project heavy hauler
 07-27-2008, 06:22 PM
#16
Registered User
Thread Starter
Join Date: Apr 2008
Location: bastrop, texas
Posts: 241
Likes: 0
Received 0 Likes
on
0 Posts
I know what you mean. I didn't think it was this bad when I bought the truck. I thought it was going to be a 2 year long project and that was when I got it back in 2003. By doing it this way I can know it's done right all around. I got the rest of the roof surgery done today. Before you could poke your finger through the ceiling and out into the sunshine. Now it's solid and nearly rust free in that area.
 07-30-2008, 02:38 PM
#17
Registered User
Thread Starter
Join Date: Apr 2008
Location: bastrop, texas
Posts: 241
Likes: 0
Received 0 Likes
on
0 Posts
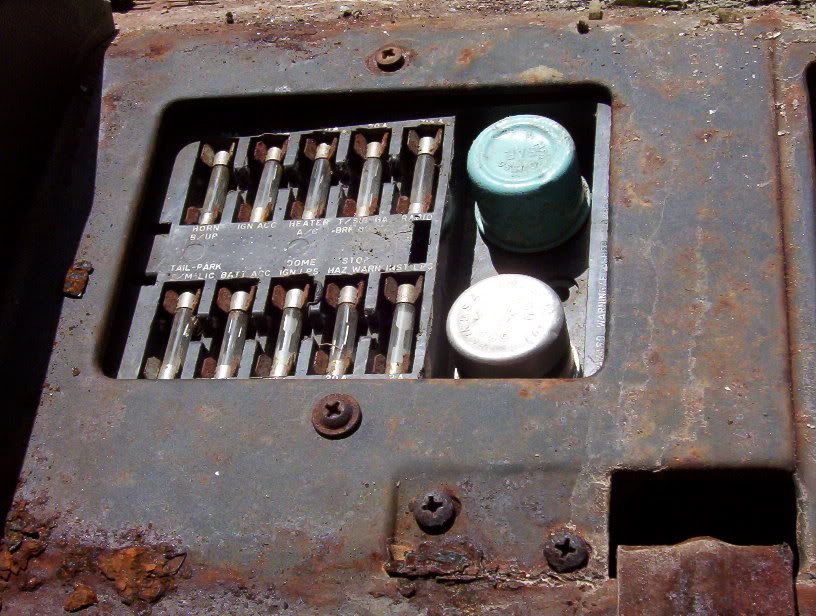
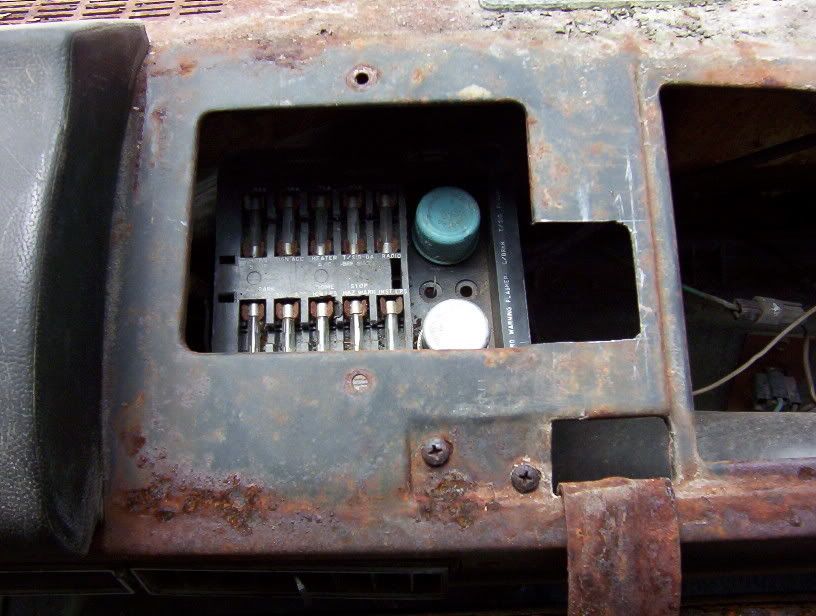
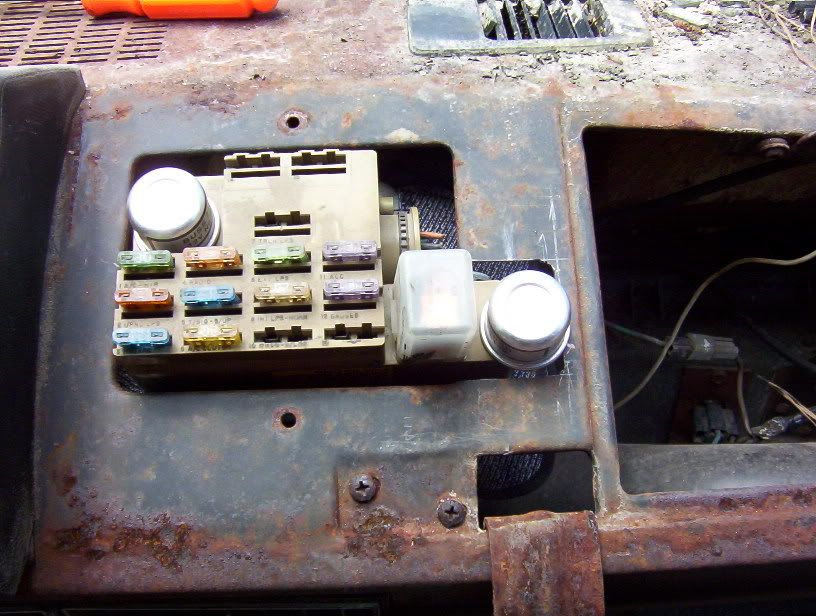
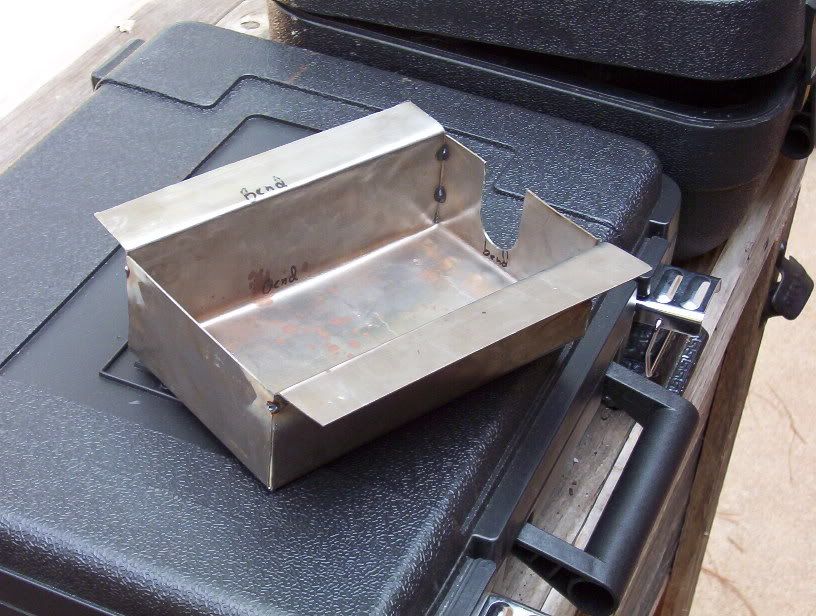
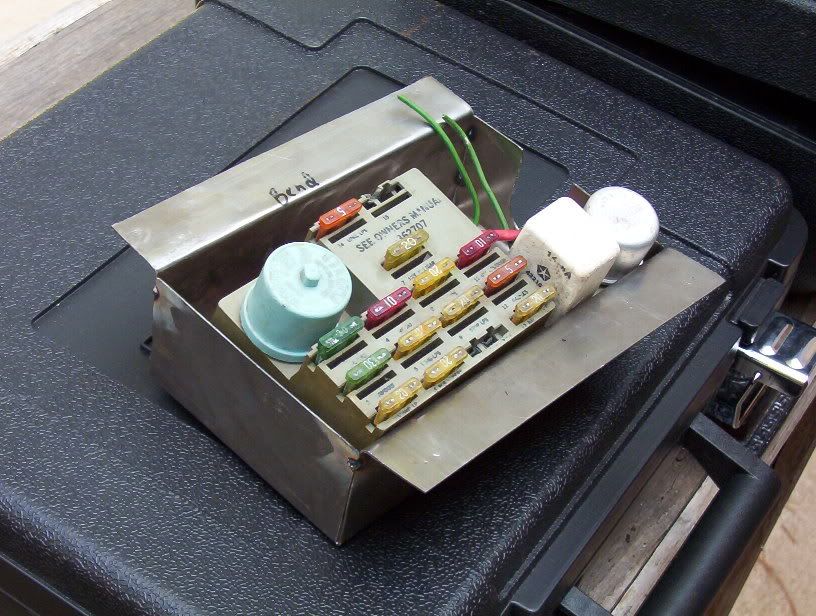
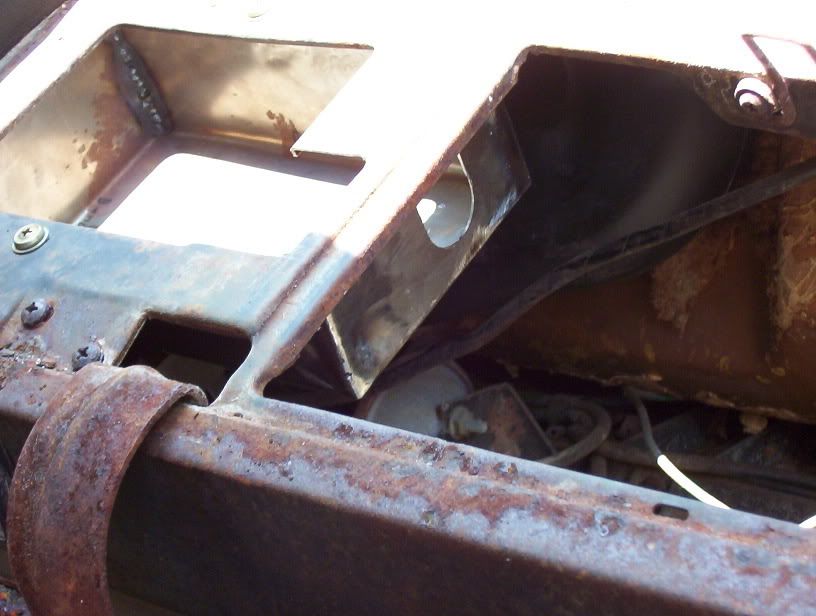
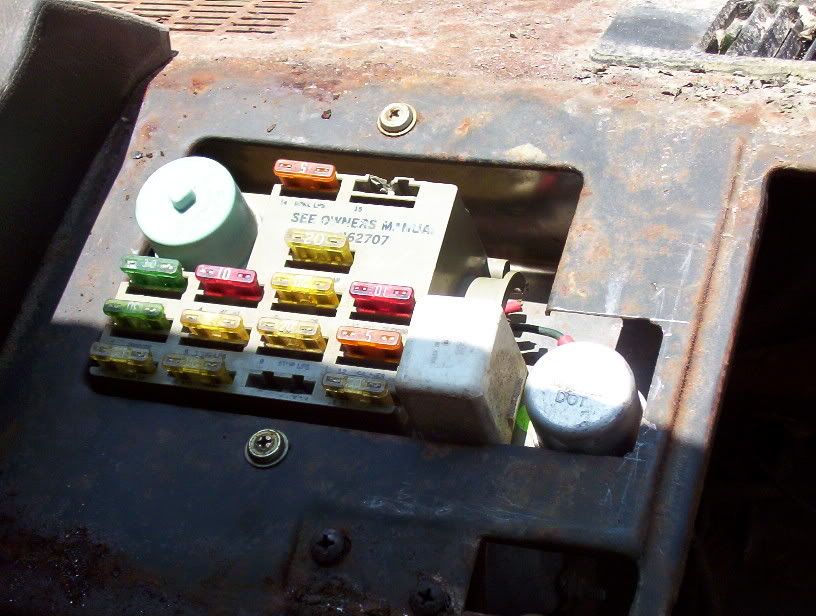
I didn't have much time today so I only had time to knock out the front windshield and modify the dash to accept my "new" fuse block. I'm eliminating the glass fuses by replacing it with a blade type fuse block from an 82.
07-30-2008, 02:55 PM
#18
Registered User
Thread Starter
Join Date: Apr 2008
Location: bastrop, texas
Posts: 241
Likes: 0
Received 0 Likes
on
0 Posts
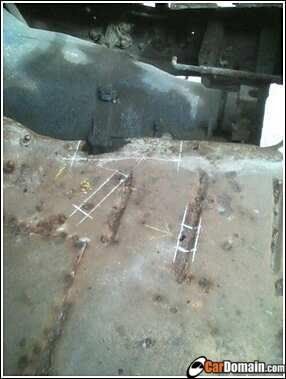
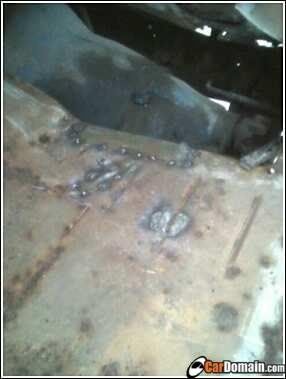
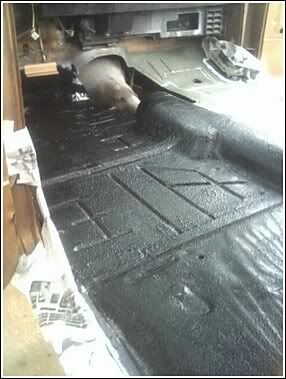
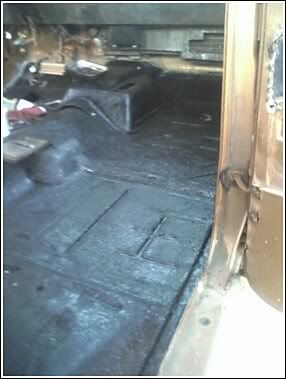
And most of ya'll probably haven't seen what my interior looked like when I bought it. There were rust holes all over the place. I had alot cutting and welding in patches to do.
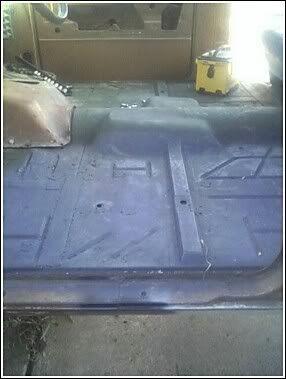
Once I had the whole floor fixed I primed it to keep it from rusting
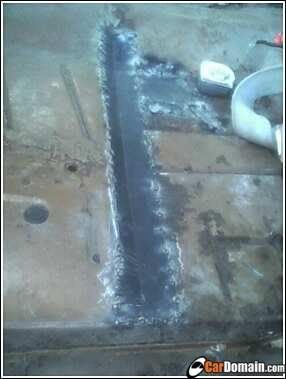
And then sealed all the welds up to prevent leaks.
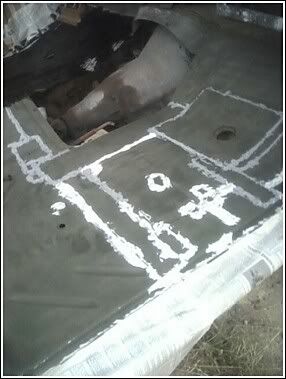
Then coated the whole floor in herculiner to prevent further problems.
Once I had the whole floor fixed I primed it to keep it from rusting
And then sealed all the welds up to prevent leaks.
Then coated the whole floor in herculiner to prevent further problems.

 08-05-2008, 08:14 PM
#20
Registered User
Thread Starter
Join Date: Apr 2008
Location: bastrop, texas
Posts: 241
Likes: 0
Received 0 Likes
on
0 Posts
Not a whole lot to report. I couldn't get any work done outside today with the tropical storm raining off and on today. I did manage to get the cowl cracks welded up yesterday. They really weren't that bad for a 35 year old truck.
I'll get back to the bulk of the work this weekend.
I'll get back to the bulk of the work this weekend.
08-05-2008, 09:47 PM
#22
Registered User
Thread Starter
Join Date: Apr 2008
Location: bastrop, texas
Posts: 241
Likes: 0
Received 0 Likes
on
0 Posts
Thanks. Little by little it'll get there. This weekend I plan on fixing the rest of the roof rust and installing some interior accessories if it doesn't rain.
08-10-2008, 02:44 PM
#23
Registered User
Thread Starter
Join Date: Apr 2008
Location: bastrop, texas
Posts: 241
Likes: 0
Received 0 Likes
on
0 Posts
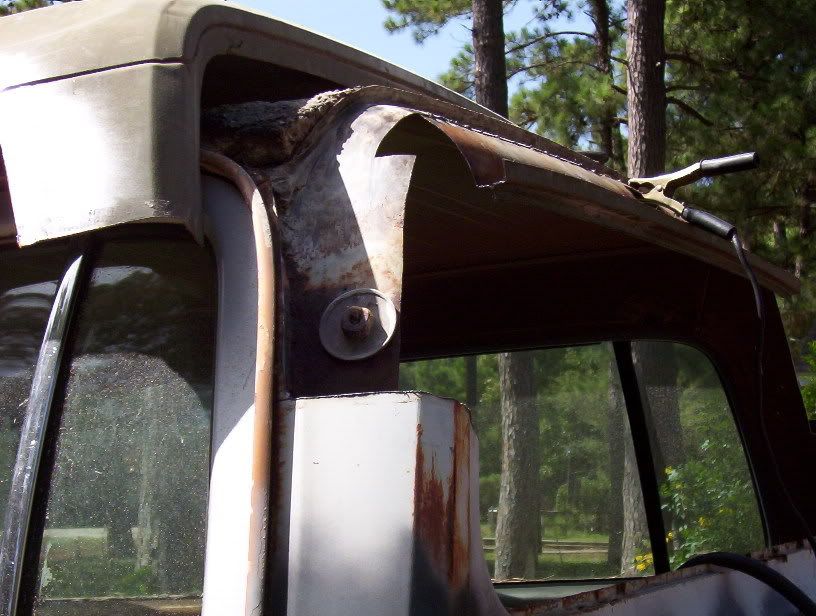
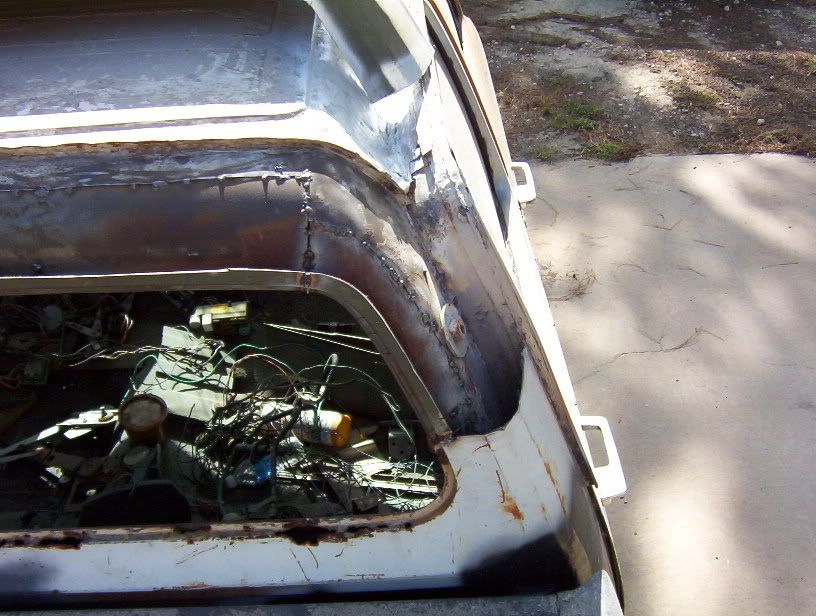
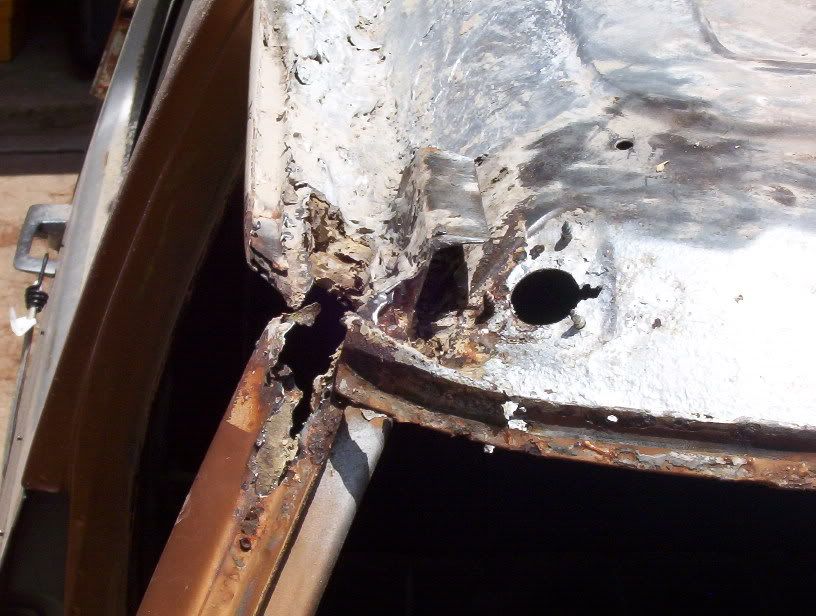
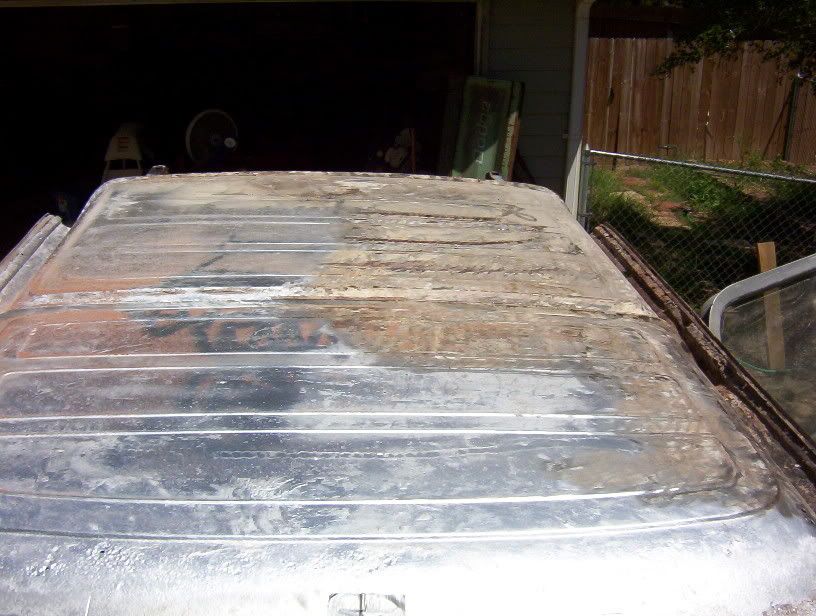
I'm taking a break now, so I'm nowhere near finished for the day. I decided to get rid of the rest of the bondo from the roofline area, will this never end? The previous owner must have been a shareholder with bondo, because there is alot of it on this truck. This is what I had to start with today.
And after 2 hours working on it this is the surprise I get.
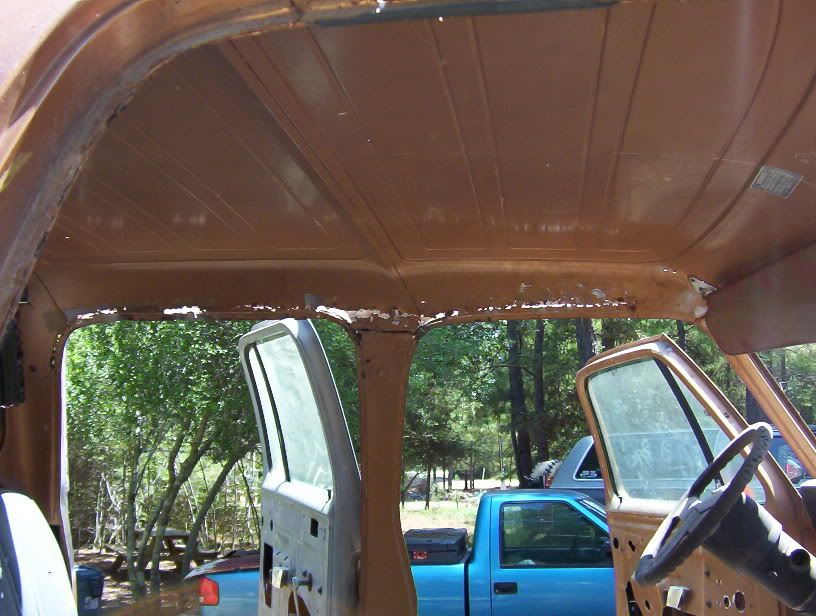
The A pillar on the passenger side is almost completely rusted through. On a positive note I can access the little brackets there that the stiffening plate mounts on to.
And after 2 hours working on it this is the surprise I get.
The A pillar on the passenger side is almost completely rusted through. On a positive note I can access the little brackets there that the stiffening plate mounts on to.
08-10-2008, 07:27 PM
#24
Registered User
Thread Starter
Join Date: Apr 2008
Location: bastrop, texas
Posts: 241
Likes: 0
Received 0 Likes
on
0 Posts
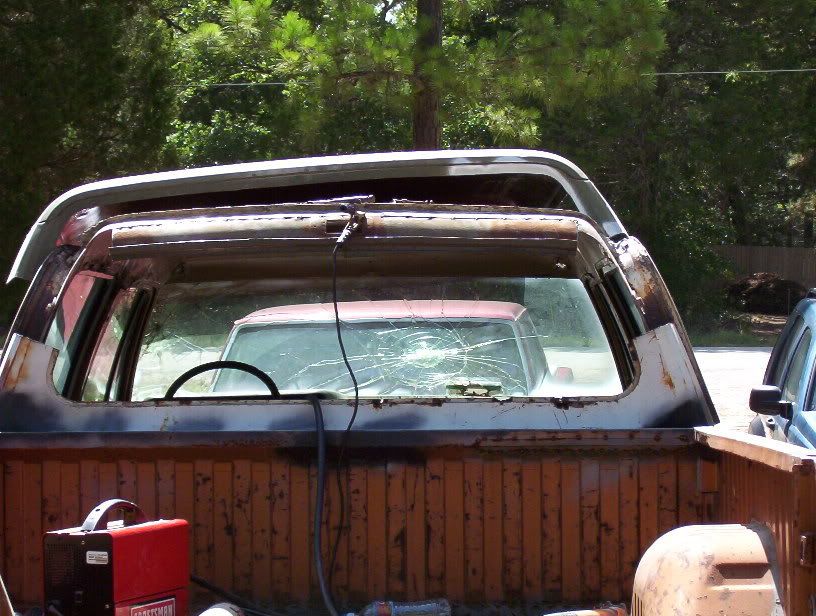
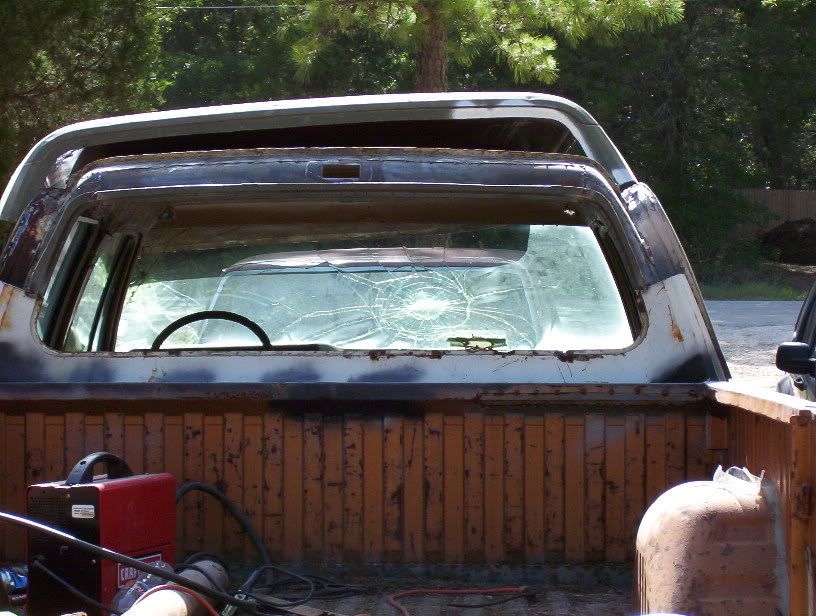
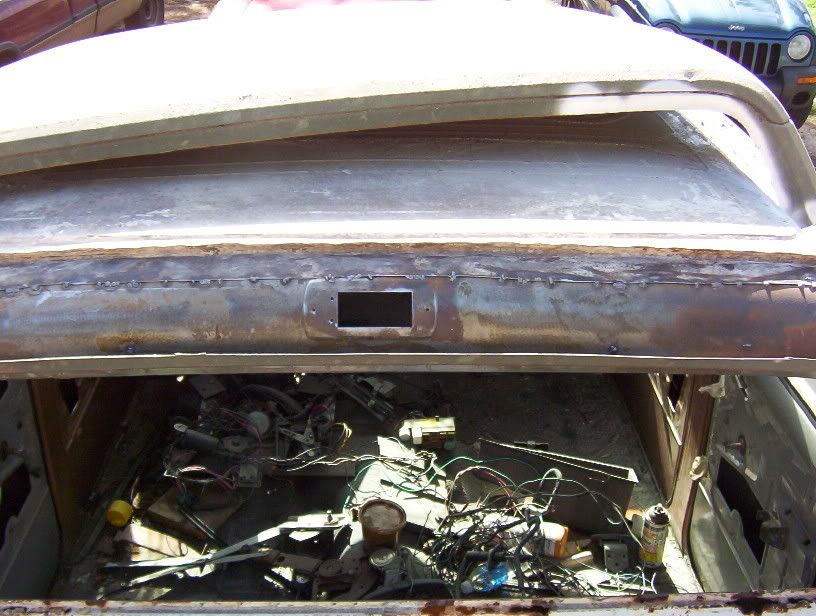
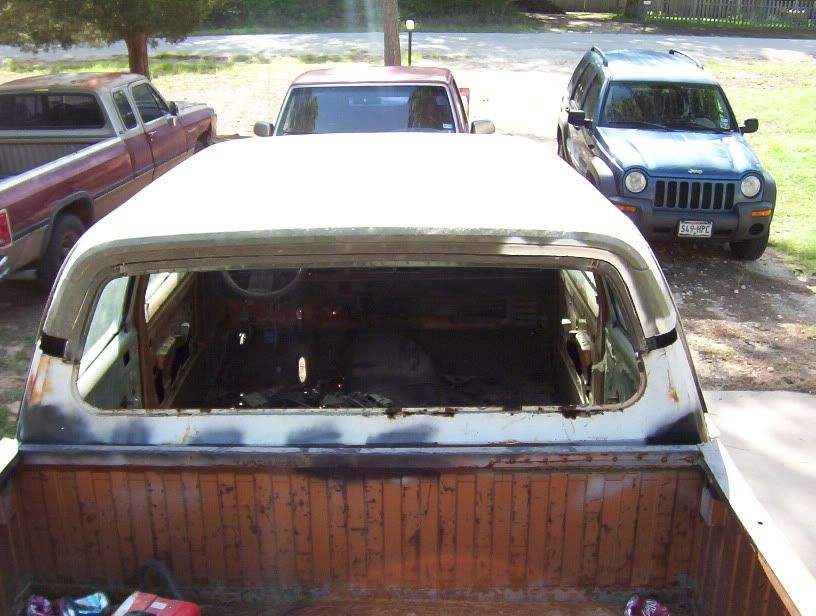
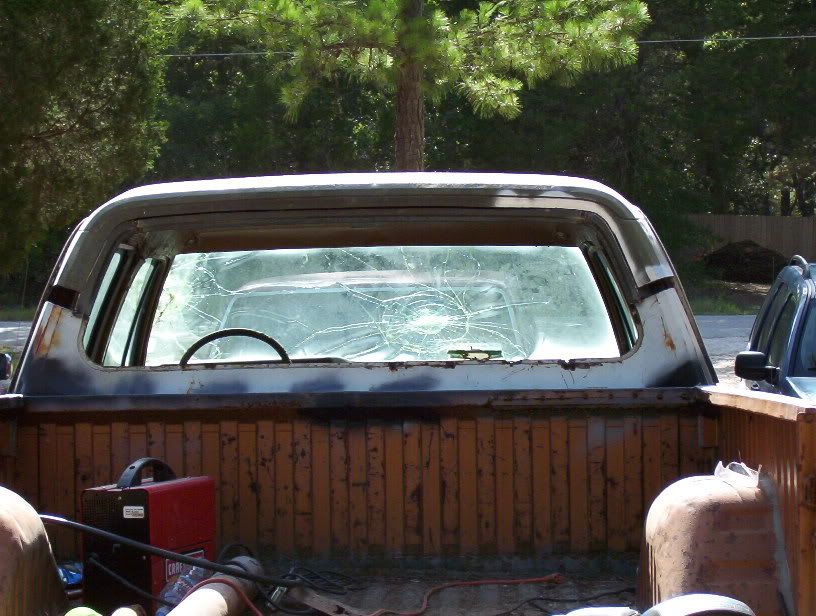
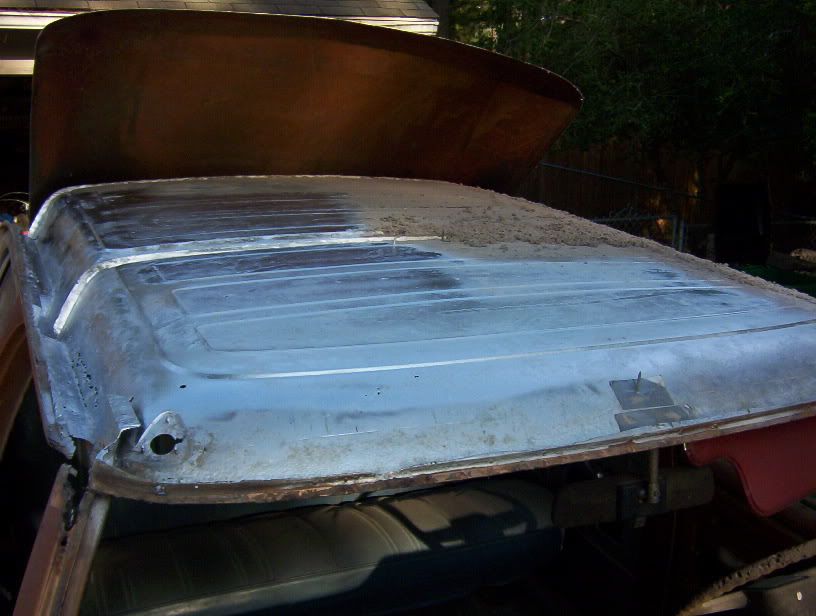
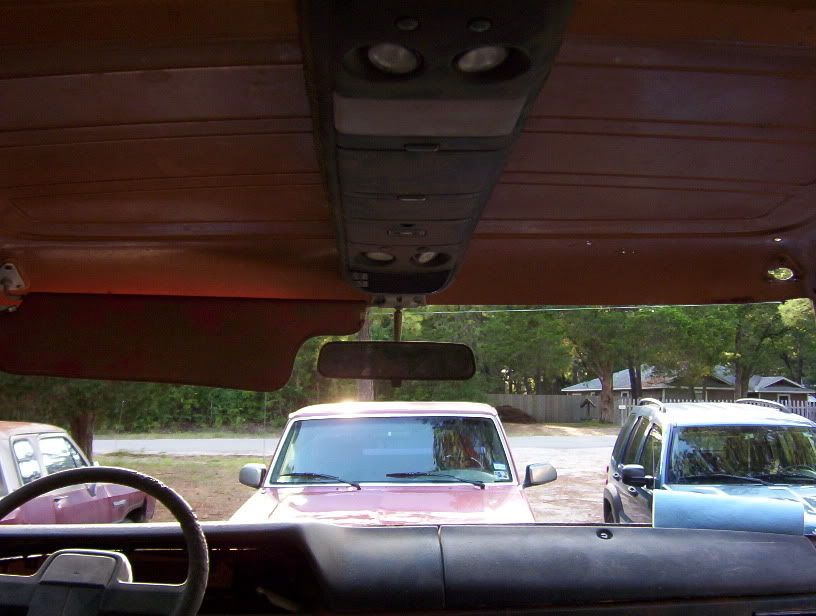
And I'm finally done for the day. All the stuff the is painted silver is stripped of bondo. So the roof is stripped about 2/3 of the way of bondo. All I have left is the driver side. And I included a view from the back seat.
08-13-2008, 01:09 PM
#25
Registered User
Thread Starter
Join Date: Apr 2008
Location: bastrop, texas
Posts: 241
Likes: 0
Received 0 Likes
on
0 Posts
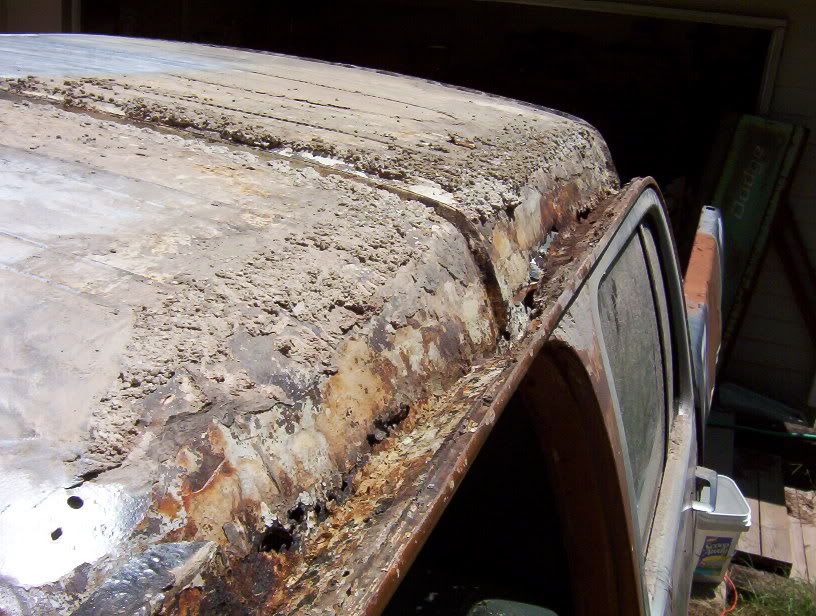
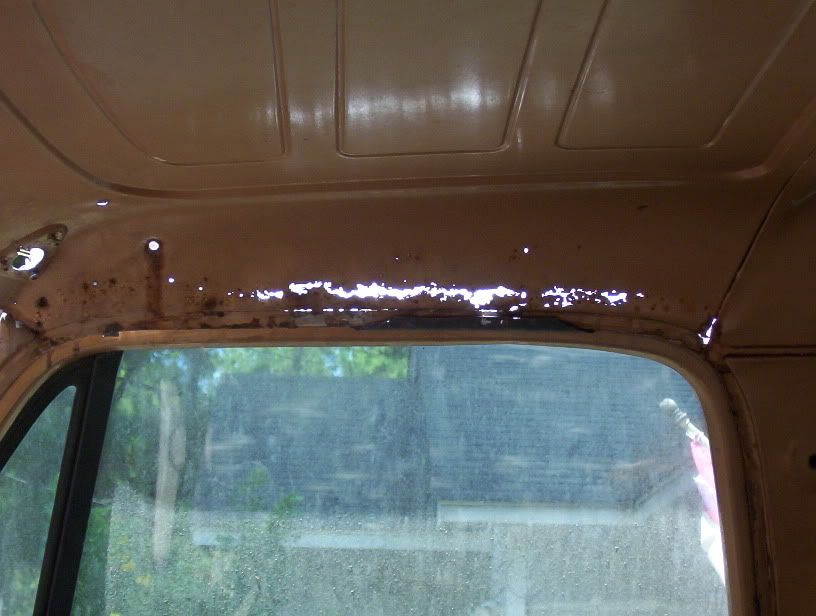
I'm just taking a short break for now. I got alot of the bondo stripped off the driver side of the roof. I'll be heading back outside in a bit to strip the last of it off with my grinder and wire wheel. It looks like I just discovered a whole lot more rust to cut out and fix.
08-13-2008, 03:04 PM
#26
Registered User
Thread Starter
Join Date: Apr 2008
Location: bastrop, texas
Posts: 241
Likes: 0
Received 0 Likes
on
0 Posts
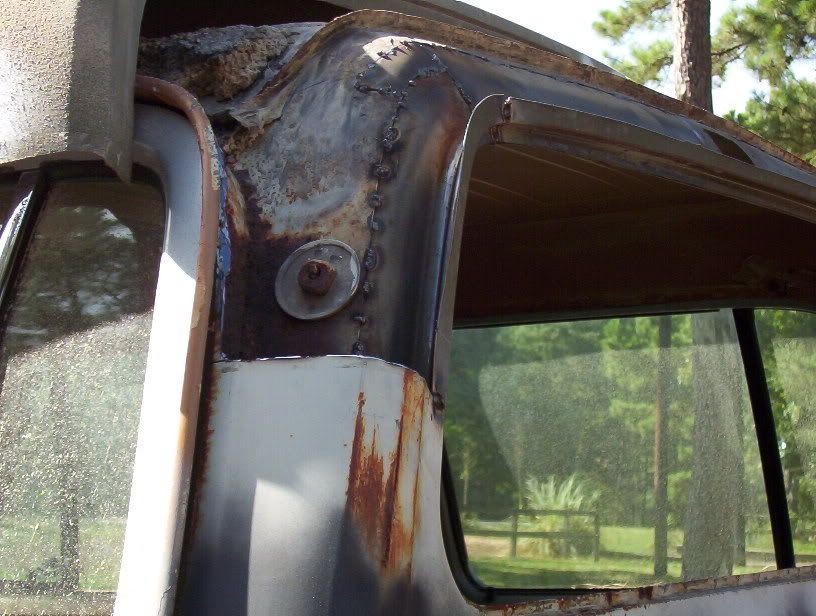
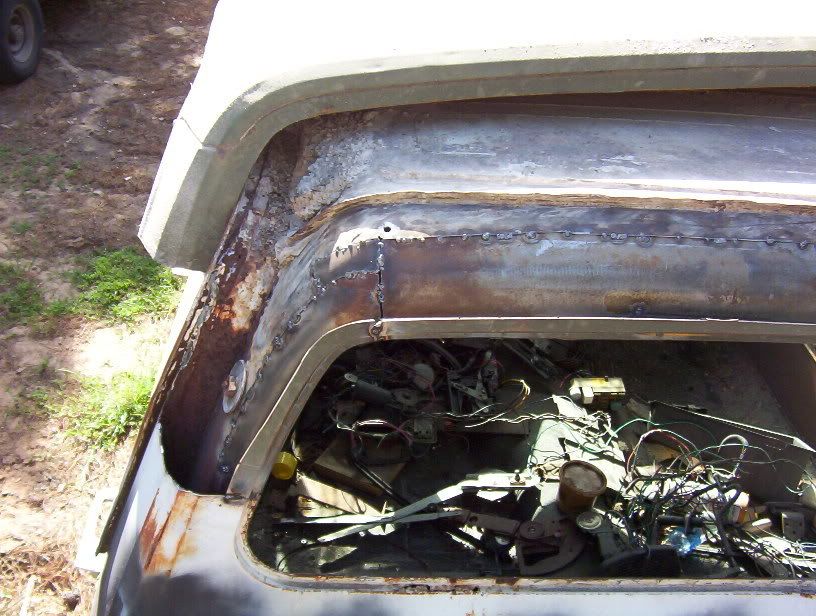
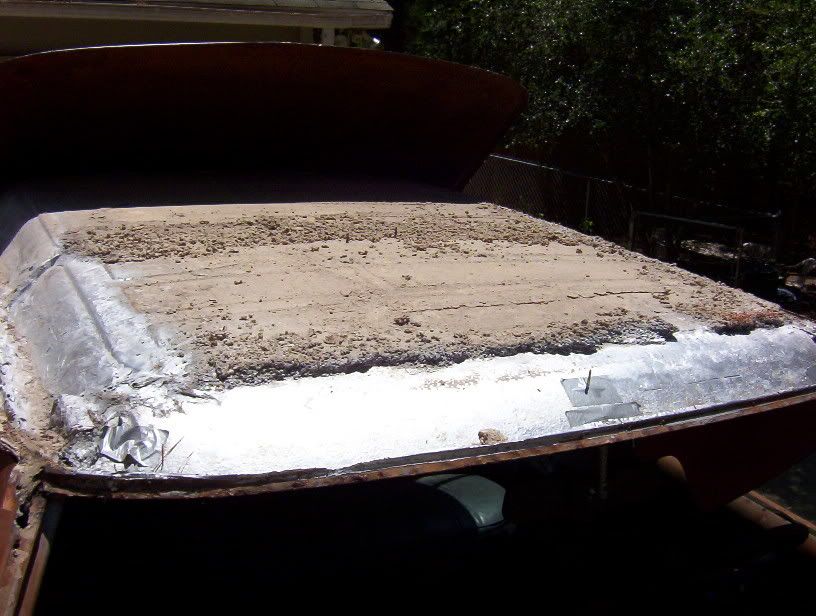
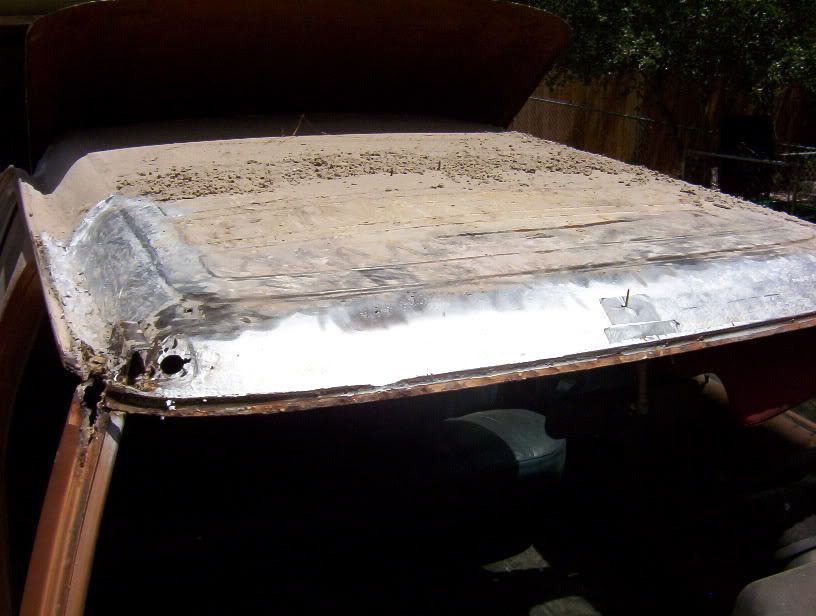
And now I'm finally done for the day. The roof is stripped 100% of all bondo work by the previous owner. There was a cardboard like substance under all the bondo that I have been trying to figure out what it was. I finally figured it out, fiberglass! It looks like the previous owner failed at doing that too. Tomorrow I should start on cutting out the rust and putting in the new panels.
And you can see the extent of the rust here.
And you can see the extent of the rust here.
 08-14-2008, 05:16 PM
#28
Registered User
Thread Starter
Join Date: Apr 2008
Location: bastrop, texas
Posts: 241
Likes: 0
Received 0 Likes
on
0 Posts
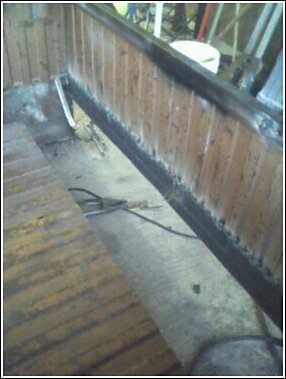
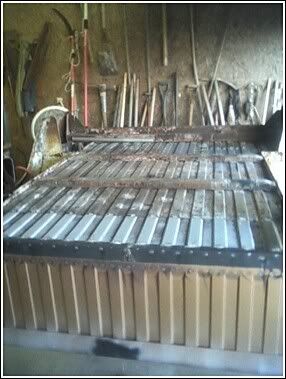
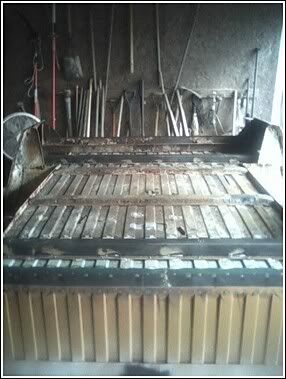
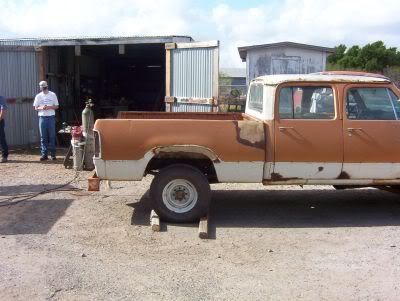
I don't think I've ever posted any pics here about all the rust I had to repair in my bed. The bed was a major tetnis shot waiting to happen.
This is how it started when I got it
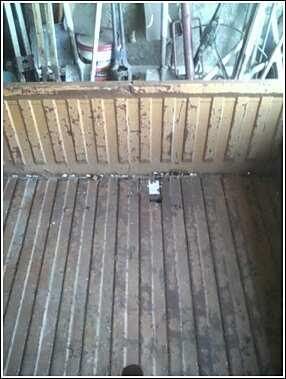
All 4 corners of the bed pretty much looked like this
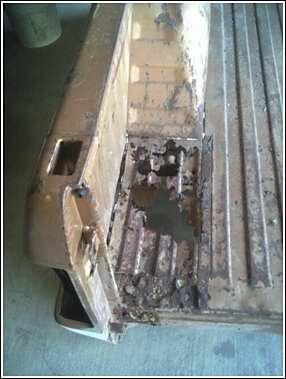
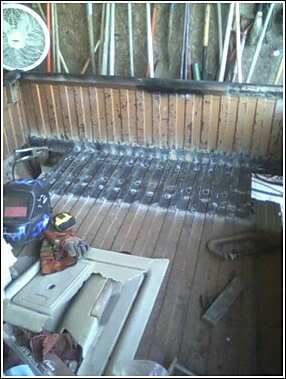
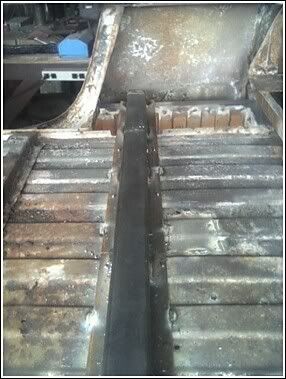
I cut out all the rusty corners
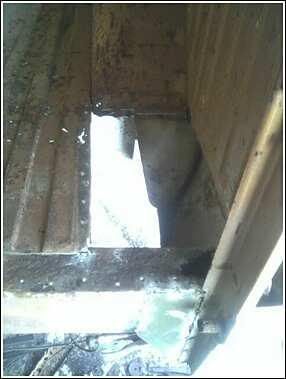
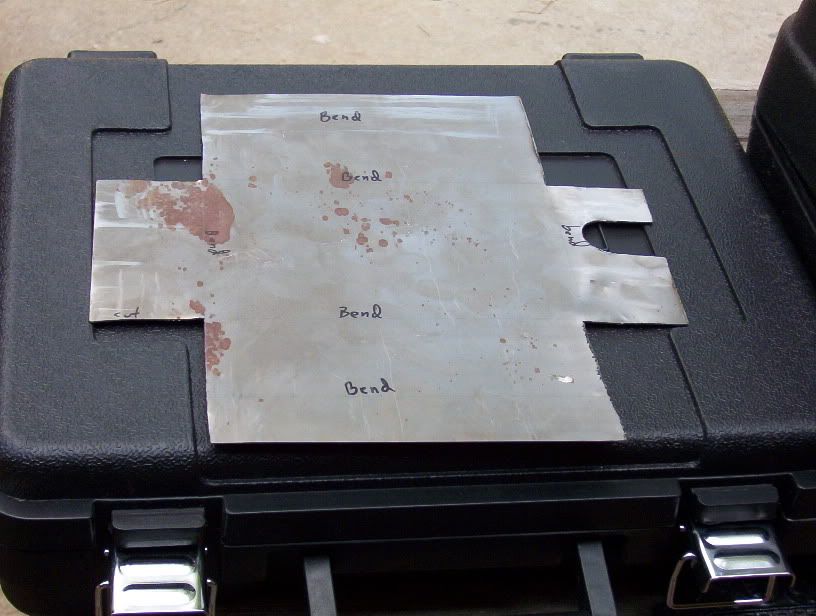
Then I built these nifty little brackets to patch up some of the rust on the side that was cut out and to have the new panel sit inside of.
I had to build these brackets to stabilize the sides of the bed. The back end wasn't even welded on anymore and you could shake both sides of the bed back and forth. Once I got these installed it was really stable.

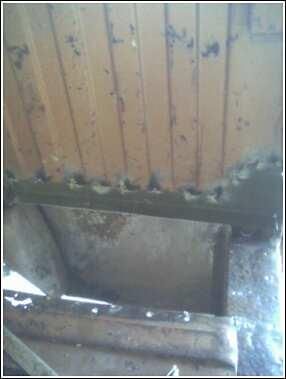
To repair the front I built this bracket similar to the one in the rear to have something for the patch panel to sit in once it was welded up.
This is how it started when I got it
All 4 corners of the bed pretty much looked like this
I cut out all the rusty corners
Then I built these nifty little brackets to patch up some of the rust on the side that was cut out and to have the new panel sit inside of.
I had to build these brackets to stabilize the sides of the bed. The back end wasn't even welded on anymore and you could shake both sides of the bed back and forth. Once I got these installed it was really stable.
To repair the front I built this bracket similar to the one in the rear to have something for the patch panel to sit in once it was welded up.
08-14-2008, 05:25 PM
#29
Registered User
Thread Starter
Join Date: Apr 2008
Location: bastrop, texas
Posts: 241
Likes: 0
Received 0 Likes
on
0 Posts
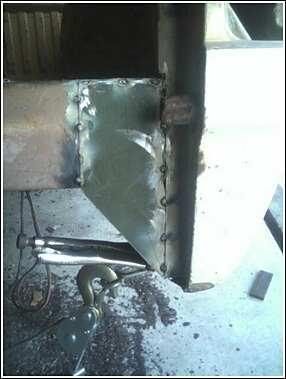
At the time I wasn't making much money so I got the remains of a floor from a ramcharger to use as my patch panels on the bed.
I used the same panel in the back corners too.
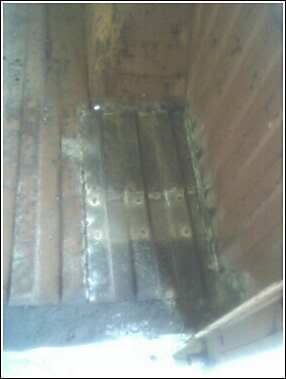
When I cut out the rust in the front the entire crossmember came out with it.
After I got all the patch panels in I flipped the bed over and welded them from the bottom too.
And since the old crossmember came out with the rusted panel and it was in pretty bad shape to begin with I just made some new ones.
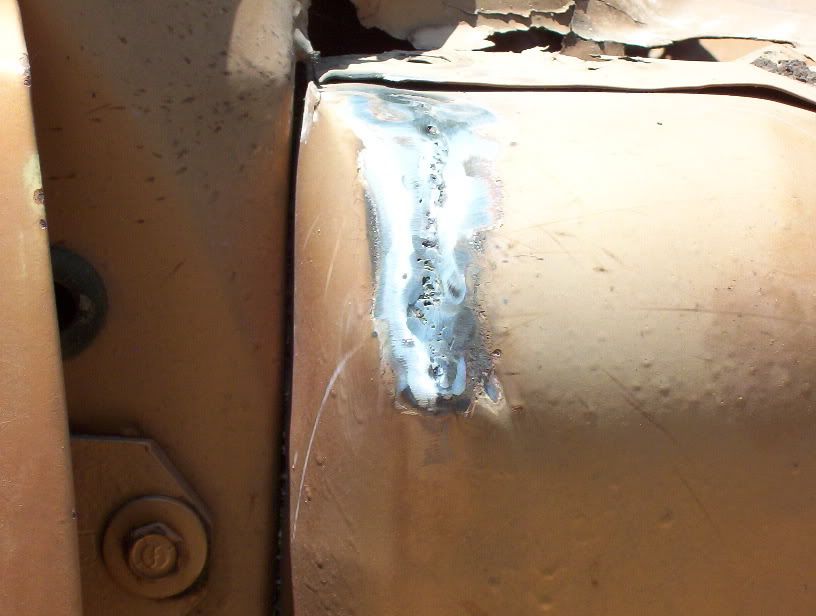
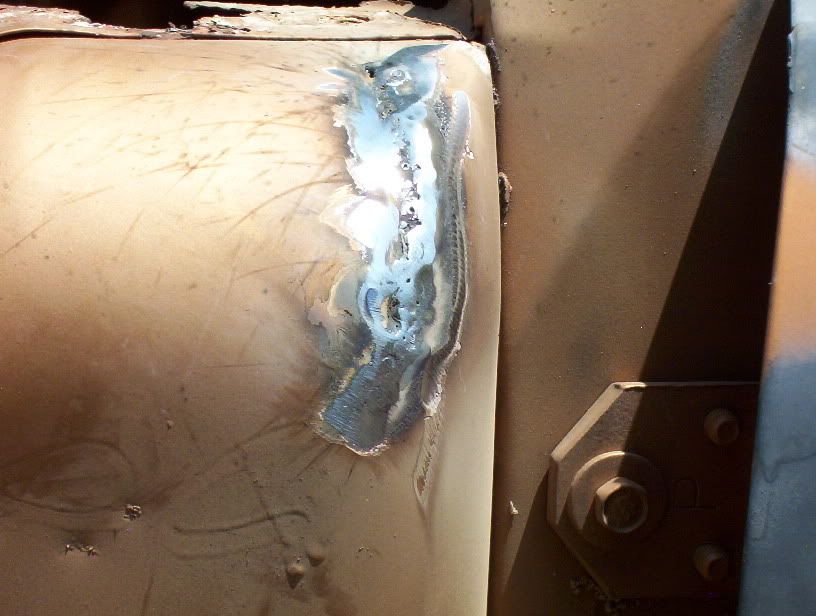
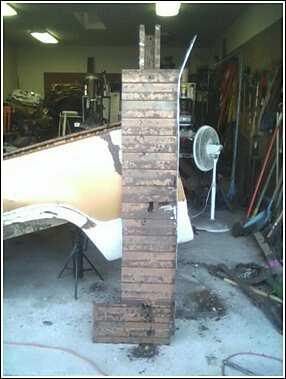
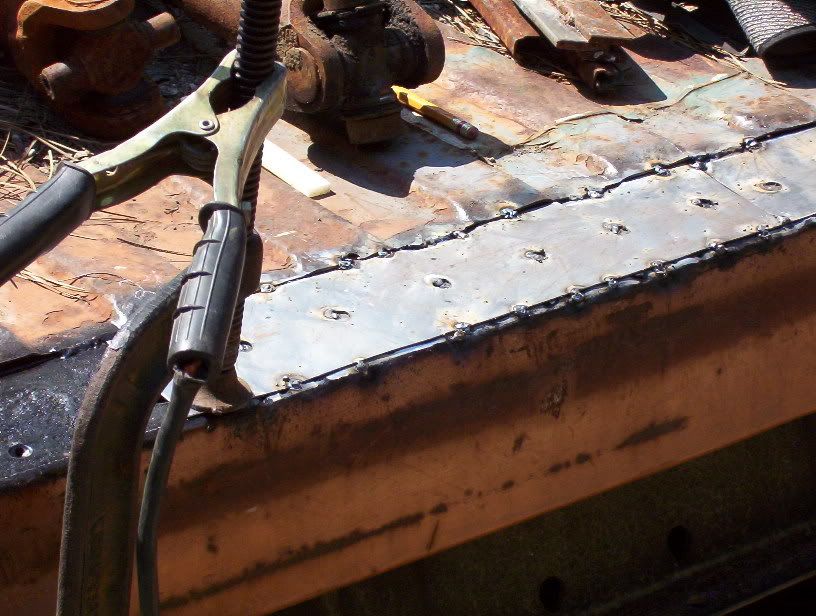
Here's todays work. I had to cut out the original panel here years ago because it was already too far gone with rust.

As you can see in the pics I was cutting out strips from some 20 gauge sheet metal and welding them in on both sides and plug welding them in the middle. I ran out of welding wire so I stopped for the day.
I used the same panel in the back corners too.
When I cut out the rust in the front the entire crossmember came out with it.
After I got all the patch panels in I flipped the bed over and welded them from the bottom too.
And since the old crossmember came out with the rusted panel and it was in pretty bad shape to begin with I just made some new ones.
Here's todays work. I had to cut out the original panel here years ago because it was already too far gone with rust.
As you can see in the pics I was cutting out strips from some 20 gauge sheet metal and welding them in on both sides and plug welding them in the middle. I ran out of welding wire so I stopped for the day.
08-14-2008, 05:28 PM
#30
Registered User
Thread Starter
Join Date: Apr 2008
Location: bastrop, texas
Posts: 241
Likes: 0
Received 0 Likes
on
0 Posts
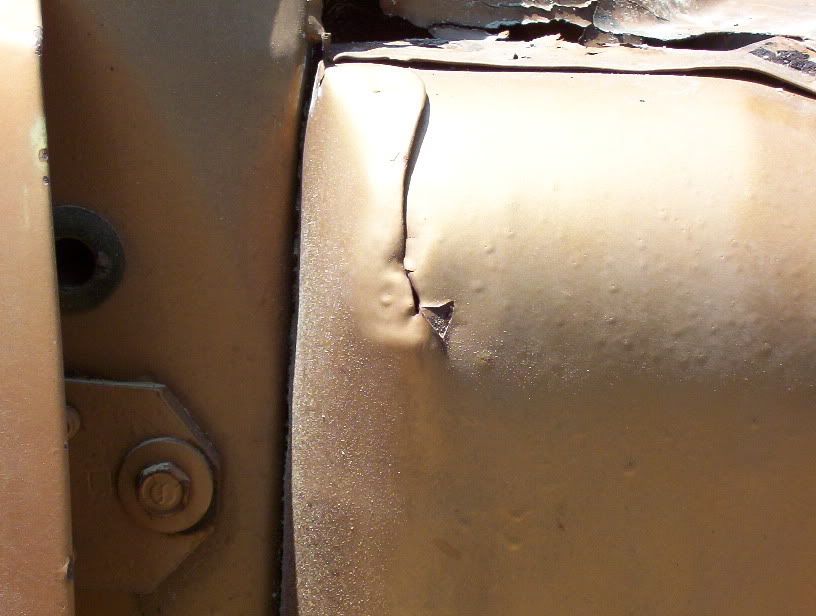
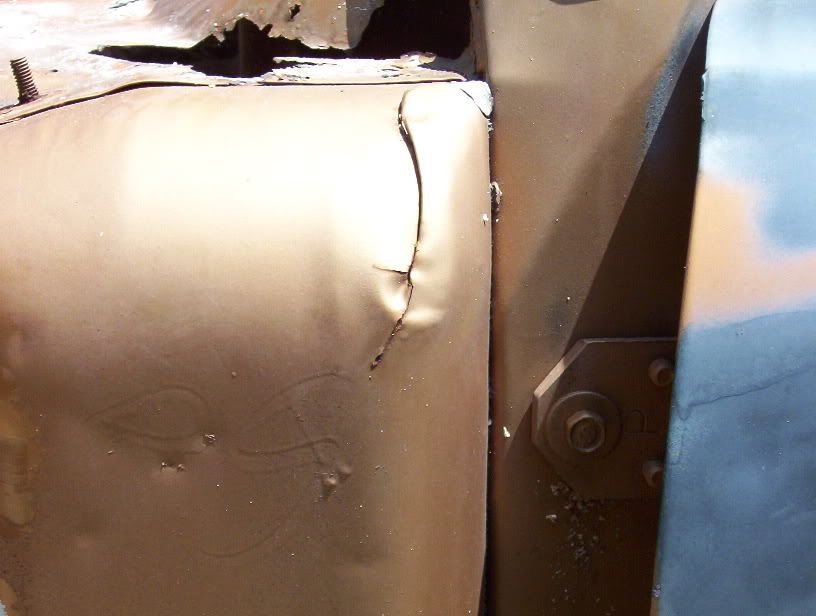
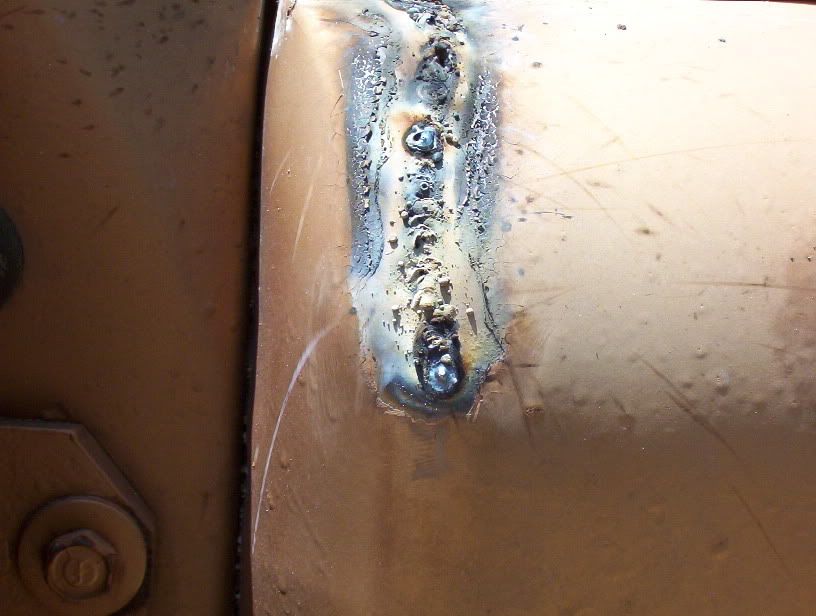
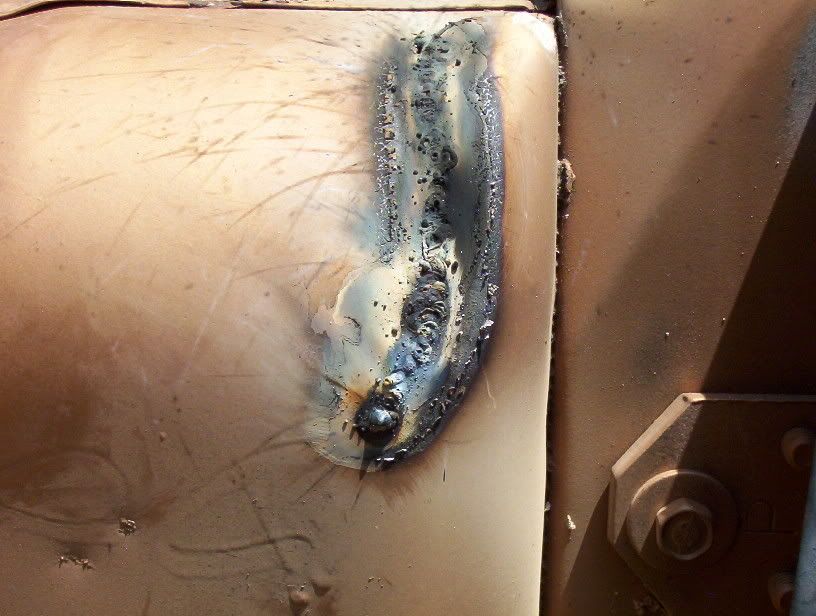
Since my stake pockets were rusted out beyond repair I just cut them out and shaved them smooth.
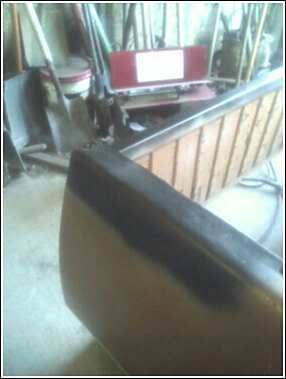
Here's one of the dents I had to fix. I was already oil canned and wouldn't pop back out when I tried so I had to weld in a patch panel and then lay on some thin coats of filler to bring it back to level.
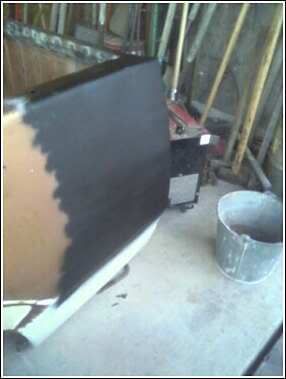
This is about the only pic I've got of what that area looked like before.
Here's one of the dents I had to fix. I was already oil canned and wouldn't pop back out when I tried so I had to weld in a patch panel and then lay on some thin coats of filler to bring it back to level.
This is about the only pic I've got of what that area looked like before.