HVAC removed and understood!
#62
Registered User
I don't recall any special tools, other than the spring lock couplers to disconnect the ac lines and some stoppers to plug them.
Drain the coolant at least below the heater connections. I just drained the whole system.
Drain the coolant at least below the heater connections. I just drained the whole system.
#63
Registered User
I replaced my blend doors back in July / August and am planning on adding more info w/ pics to this thread. Question, how important is it to put a vacuum on the lines? Is it to just make sure there is no moisture in the lines? When I did this it was very dry (no rain for several weeks) and over 100 degrees for several weeks. I think I got at least two cans in.
#65
Registered User
#69
Registered User
Join Date: Oct 2006
Location: Kennewick, WA
Posts: 503
Likes: 0
Received 0 Likes
on
0 Posts
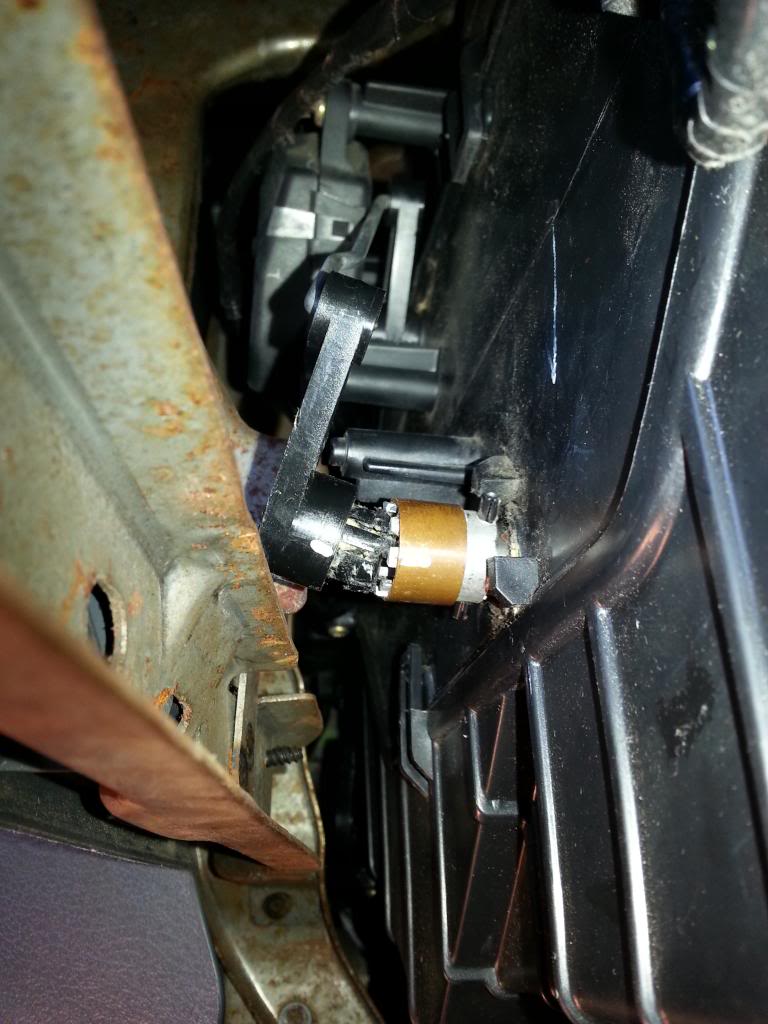
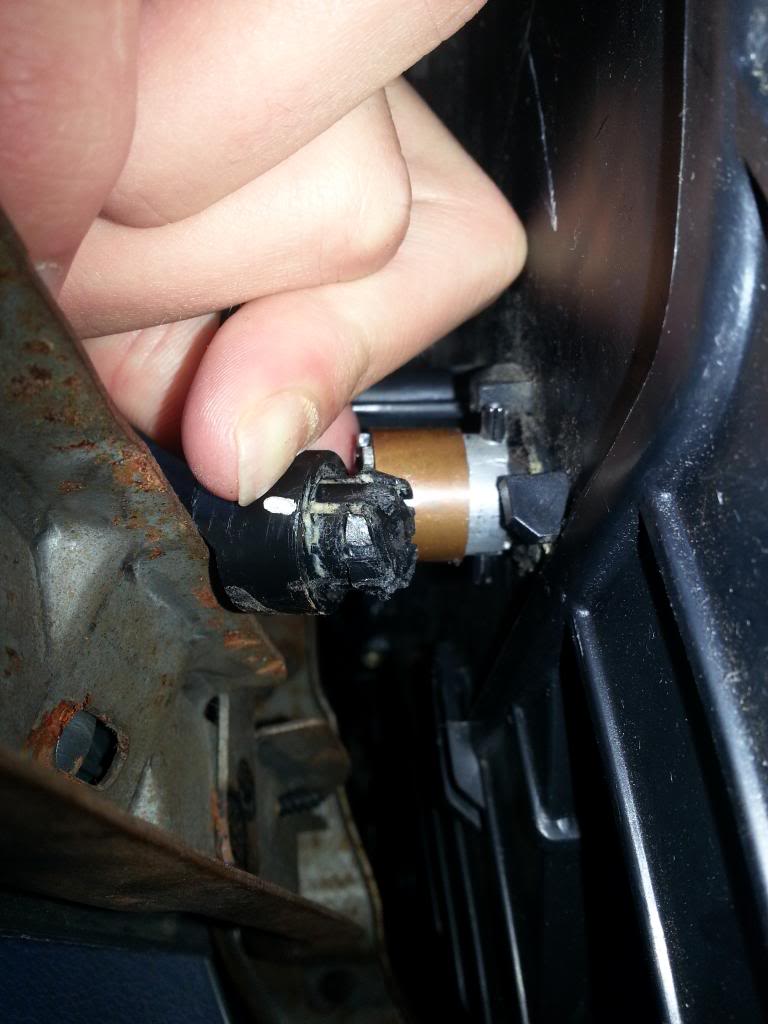
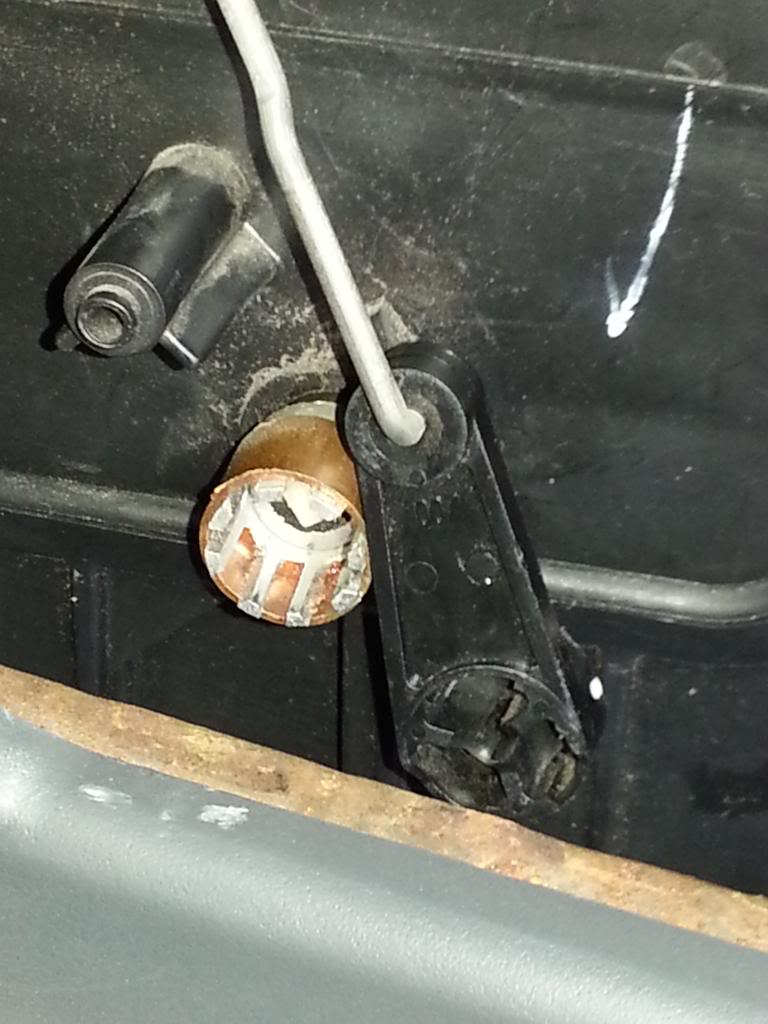
It looks like the plastic coupler is over rotating. I thought I remember reading about having to calibrate or set the movement of the doors? If that's correct was it re-set when you installed the door?
If it's just the normal range of movement I would think the plastic will almost always fail over time. But if that's the case I would think the Heater Treater guys would have come up with a fix.
The only idea I came up with would be to drill through the two parts and install a cotter pin or similar. Just a thought.
#70
Registered User
I don't know anything about resetting them or calibrating them. The tick mark is from before removing it the first time. I did that to make sure that both sides stayed lined up. I'm not sure how I'm even going to get it back into its hole.
#71
Registered User
I remember reading something about the control module learning the range of travel of the doors by running the motors until they stall, and the couplers were supposed to be stopped by little tabs moulded in the housing. If those fail, the doors get more torque than they were designed to take.
What you've got going there, I'm not sure.
What you've got going there, I'm not sure.
#72
Registered User
Join Date: Oct 2006
Location: Kennewick, WA
Posts: 503
Likes: 0
Received 0 Likes
on
0 Posts
That sounds right, and it looks like the heater treater door has a roll pin that acts as an arm and hits the tabs.
I thought the issue was that movement had stripped the plastic piece.
Have you looked into the possibility of buying a new plastic fitting and installing it, or is it more an issue of access?
I thought the issue was that movement had stripped the plastic piece.
Have you looked into the possibility of buying a new plastic fitting and installing it, or is it more an issue of access?
#73
Registered User
I hadn't thought about buying a new plastic fitting, I can try out a new Dodge dealership that just opened up about a month ago near my house. And getting direct in-line access to somehow getting to push it straight down instead of getting it in at an angle.
#74
Registered User
Join Date: Aug 2013
Location: CA Bay Area
Posts: 5
Likes: 0
Received 0 Likes
on
0 Posts
Lower Blend Door Shaft Coupler
I just replaced all my HVAC doors with Heater Treater doors. For the lower blend door that you show, they sent me a toothed coupler like yours but with a metal arm compressed onto the roll pin (same as the upper blend door coupler they sent me). The connecting rod from the upper blend door plugs into a hole in this 'arm'. Suggest you ask Heater Treater to send you their lower blend door coupler that has the arm. I used 3/32-inch E-clips and some #4 nylon washers to keep the connecting rod securely in place. Throw away those black plastic couplers/arms.
#75
Registered User
Join Date: Aug 2013
Location: CA Bay Area
Posts: 5
Likes: 0
Received 0 Likes
on
0 Posts
HVAC Door End-Of-Travel
The HVAC motor controller senses the end-of-travel by sensing an increase in motor current (of the doors against the housing or roll pins against stops). With all-metal doors and shafts I wanted it to sense the door closed, not roll pins against plastic stops, so made sure during the rebuild that the doors fully closed before the roll pins hit the stops. Dremel-tweaked the stops on two of the doors. Because this is all automatically sensed by the controller when you run HVAC you do not need to care where you engage the motor and door during re-assembly, except that the door is between fully open and fully closed. For the upper and lower blend doors, the two doors must hit their up or down end points in sync. The Heater Treater motor shaft couplers needed some minor mod of the aluminum tooth slot depth so that they fully plugged onto the motor shafts (Dremel).


