
How To: Front shock install


Thread Starter
Advocate of getting the ban button used on him...
Joined: Aug 2005
Posts: 5,082
Likes: 9
From: Live Oak Texas
How To: Front shock install
I just installed my new Bilstein shocks. Before I did it I checked here to see if there were any issues I might run into. I found several threads with questions and answers but not very detailed and some misleading. So here is my "How To" on my installation.
This is on a 2006 2500 4x4. Should apply to 2003 to 2007. (Not sure if 4x2's are different) It took about 1 hour to complete and this includes forgetting the driver side dust boot the first time
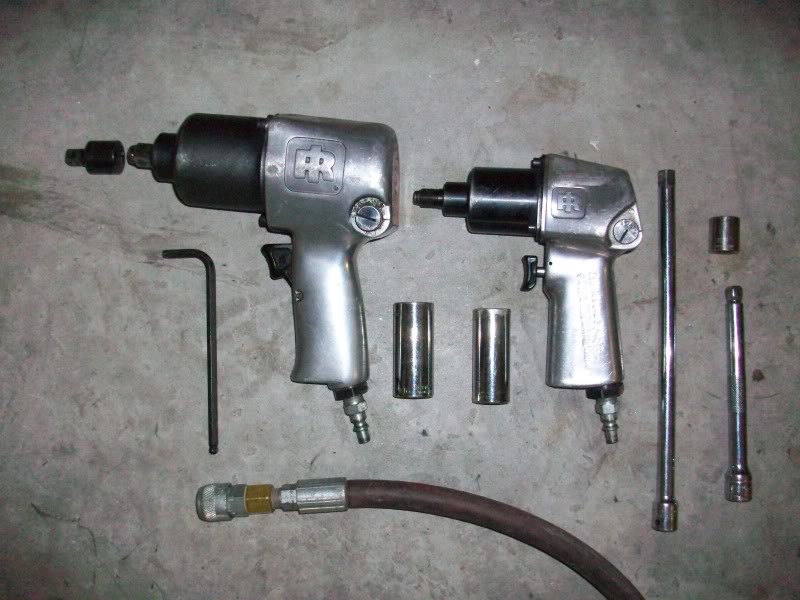
Here are some of the tools.
Sockets = 21mm, 19mm, and 15mm
Allen wrench = 6mm
Not pictured are a hammer (of course ) and a 19mm ratcheting wrench and 15mm standard wrench
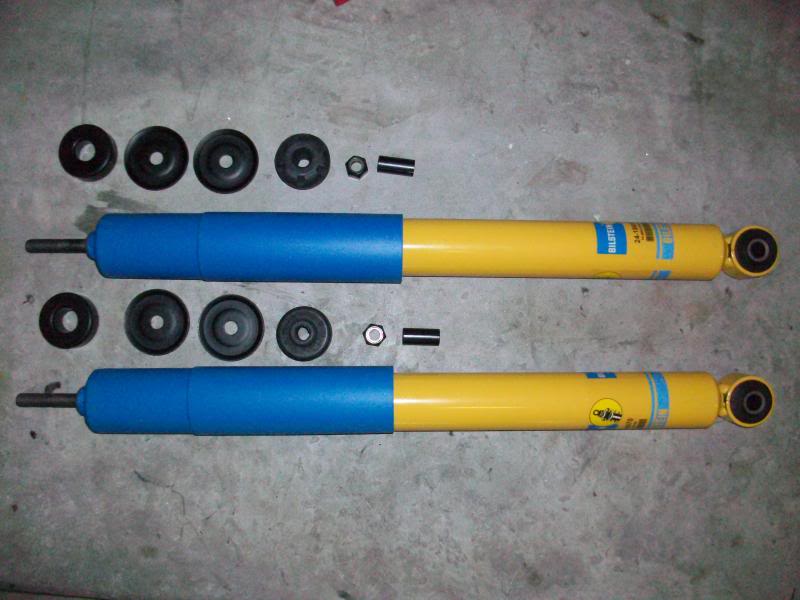
And shocks
First I removed the top nut on the shock with the 19mm socket and small impact gun. Then removed 2 of the 3 shock tower nuts with the 15mm socket and impact gun. The 3rd nut is easily accessed through the wheel well with the 15mm wrench.
I then hit the top of the shock with hammer and punch to loosen the metal washer from the shaft (driver side only) and then removed the washer and rubber bushing. I then lifted the tower up and off the shock and set it aside by the fuel filter housing. Then I undid the bottom bolt with the 21mm socket and impact. The nut is held in place so NO NEED to try to get a wrench on it. Back up top I pulled the shock out and up between the battery and brake master cylinder being careful to not touch the positive battery clamp.
Only difference on the passenger side is I removed the stock air filter top to gain better access to one of the tower nuts and I pulled the shock out with the tower and removed the tower from the shock on the bench. (The washer would not come off in the truck )
)
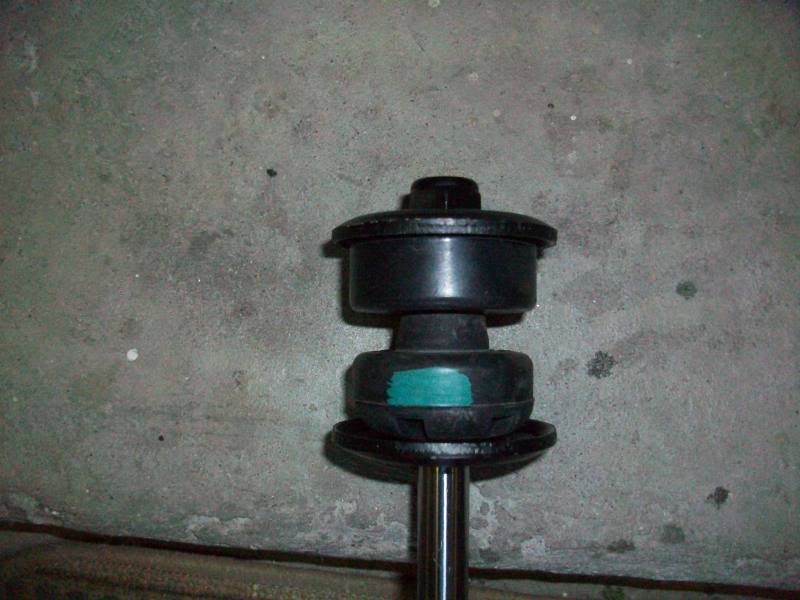
Here is how the washer and bushings go on the new shocks. The sleeve goes into the bottom bushing first and is used to keep from over tightening the top nut.
Installation is just the reverse. I made sure to tighten the bottom bolt first to make sure it was in the correct position.
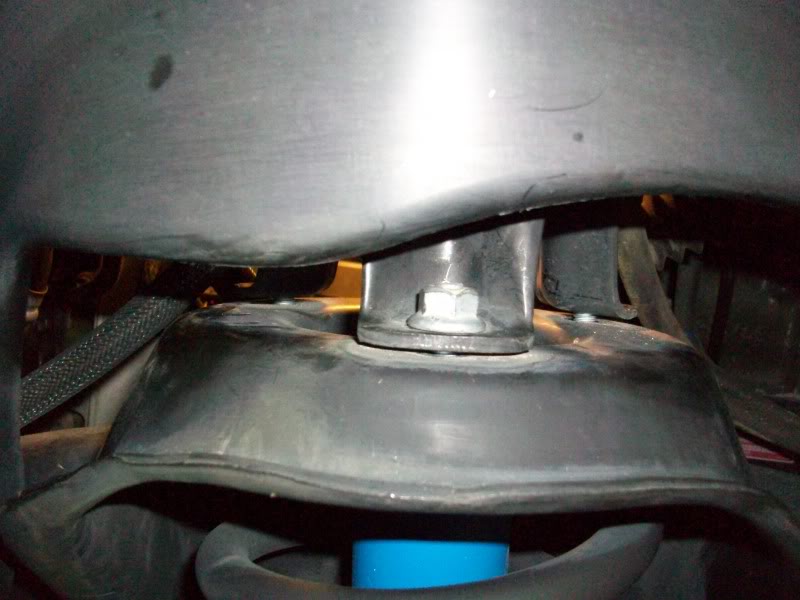
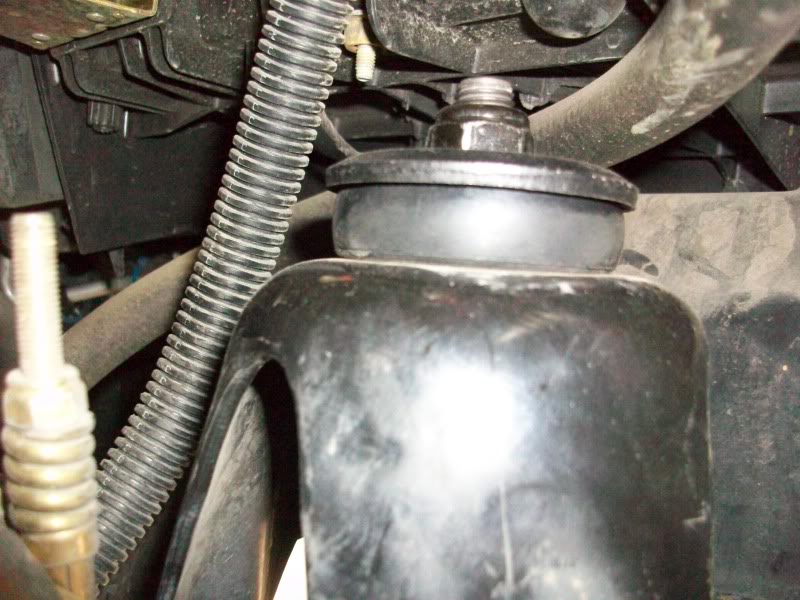
Here is how far the top nut gets tightened and how much the bushing is squeezed. Almost as big as the washer.
Hope this helps somebody!!
This is on a 2006 2500 4x4. Should apply to 2003 to 2007. (Not sure if 4x2's are different) It took about 1 hour to complete and this includes forgetting the driver side dust boot the first time
Here are some of the tools.
Sockets = 21mm, 19mm, and 15mm
Allen wrench = 6mm
Not pictured are a hammer (of course
) and a 19mm ratcheting wrench and 15mm standard wrenchAnd shocks
First I removed the top nut on the shock with the 19mm socket and small impact gun. Then removed 2 of the 3 shock tower nuts with the 15mm socket and impact gun. The 3rd nut is easily accessed through the wheel well with the 15mm wrench.
I then hit the top of the shock with hammer and punch to loosen the metal washer from the shaft (driver side only) and then removed the washer and rubber bushing. I then lifted the tower up and off the shock and set it aside by the fuel filter housing. Then I undid the bottom bolt with the 21mm socket and impact. The nut is held in place so NO NEED to try to get a wrench on it. Back up top I pulled the shock out and up between the battery and brake master cylinder being careful to not touch the positive battery clamp.
Only difference on the passenger side is I removed the stock air filter top to gain better access to one of the tower nuts and I pulled the shock out with the tower and removed the tower from the shock on the bench. (The washer would not come off in the truck
)Here is how the washer and bushings go on the new shocks. The sleeve goes into the bottom bushing first and is used to keep from over tightening the top nut.
Installation is just the reverse. I made sure to tighten the bottom bolt first to make sure it was in the correct position.
Here is how far the top nut gets tightened and how much the bushing is squeezed. Almost as big as the washer.
Hope this helps somebody!!
Thread Starter
Advocate of getting the ban button used on him...
Joined: Aug 2005
Posts: 5,082
Likes: 9
From: Live Oak Texas
I believe the lower bolt is 100 ft/lbs and the top 3 nuts are 50 ft/lbs. The top nut of the shock is just tighten until it stops and they also come with the nylon inserted nuts.
To be honest, I did the German torque...... good-n-tight method
To be honest, I did the German torque...... good-n-tight method


Trending Topics
Registered User
Joined: Apr 2008
Posts: 112
Likes: 0
From: CoCo County, CA
I need to replace mine as well. With the impact guns, I take it that you did not have to soak the bolts with WD40 (or anything like it) before removing the shocks?
Thank you for the pictures and write-up
Thank you for the pictures and write-up


Registered User
Joined: Aug 2004
Posts: 351
Likes: 1
From: Western CT
Hmmm.When I installed mine in 07 I used the new bushings and tightened them.Upon looking at them today I noticed the upper rubber bushing all dry rotted I would say.I can pick it away.Also I see how much You tightened the top nut I tightened too much I think ,as I have 6-7 threads showing You have 2-3 and my bushing is squeezed way more and is larger than the washer.Good thing I saved old mopar bushings as it looks like I will need to change them very soon.Hope the bottom bushing is ok.I saved all 4 mopars.Also i saved what look to be the sleaves that came with the Bilsteins.Maybe the mopar sleaves are shorter and thats how I over tightened them?Can I just use the mopar bushings(like new) or should I get new 1s from Bilstein?
,as I have 6-7 threads showing You have 2-3 and my bushing is squeezed way more and is larger than the washer.Good thing I saved old mopar bushings as it looks like I will need to change them very soon.Hope the bottom bushing is ok.I saved all 4 mopars.Also i saved what look to be the sleaves that came with the Bilsteins.Maybe the mopar sleaves are shorter and thats how I over tightened them?Can I just use the mopar bushings(like new) or should I get new 1s from Bilstein?
Thread Starter
Advocate of getting the ban button used on him...
Joined: Aug 2005
Posts: 5,082
Likes: 9
From: Live Oak Texas
If you can get new ones I would do it. If not you can probably use the old ones if they appear to be in good condition. I know mine looked real good even with 80k miles on them.
Registered User
Joined: Aug 2004
Posts: 351
Likes: 1
From: Western CT
When I changed them out the mopar 1s only had like 18000mi them ,bushings still look new been in the bag that the Bilstein's came in along with the sleeves.Bottom 1 will probably be a pain.I'll check bottoms if they look ok I'll change top 1s and sleeves also. Thank's
Thread Starter
Advocate of getting the ban button used on him...
Joined: Aug 2005
Posts: 5,082
Likes: 9
From: Live Oak Texas