OEM Cab light Install

 12-08-2007, 01:35 AM
#107

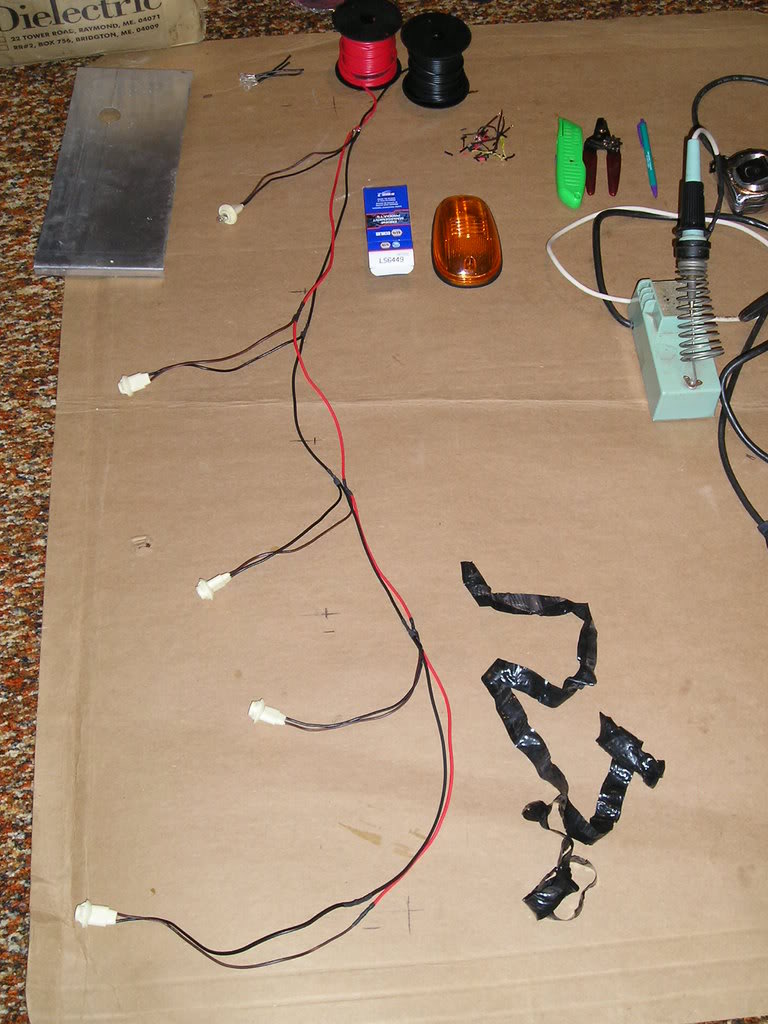
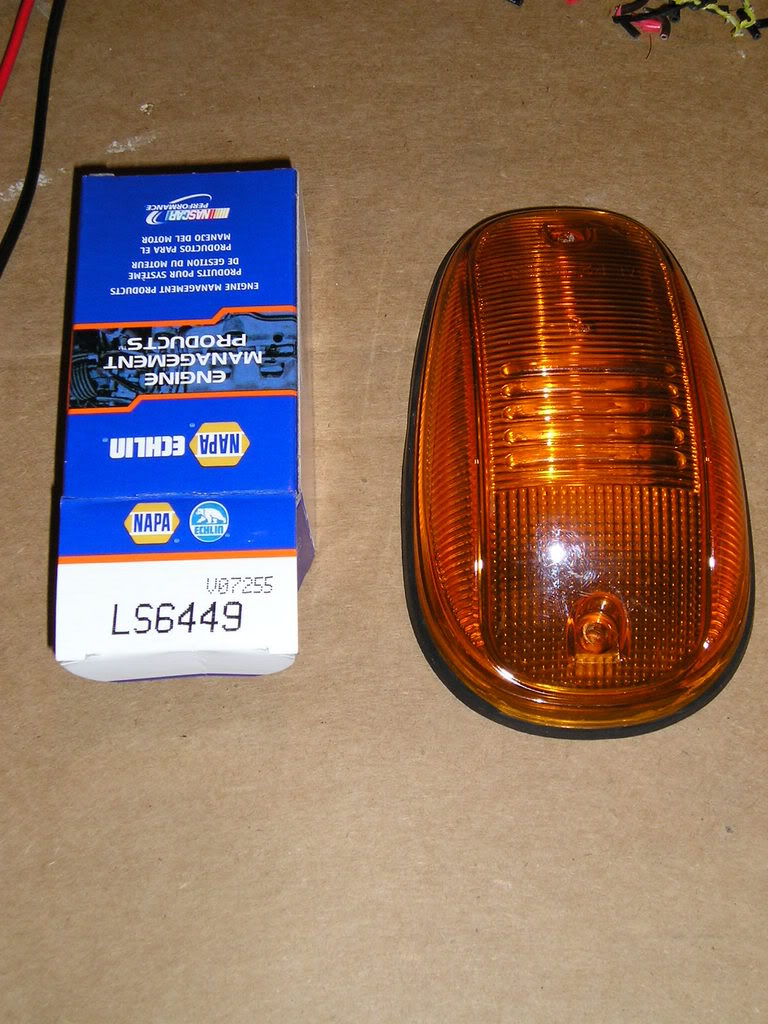
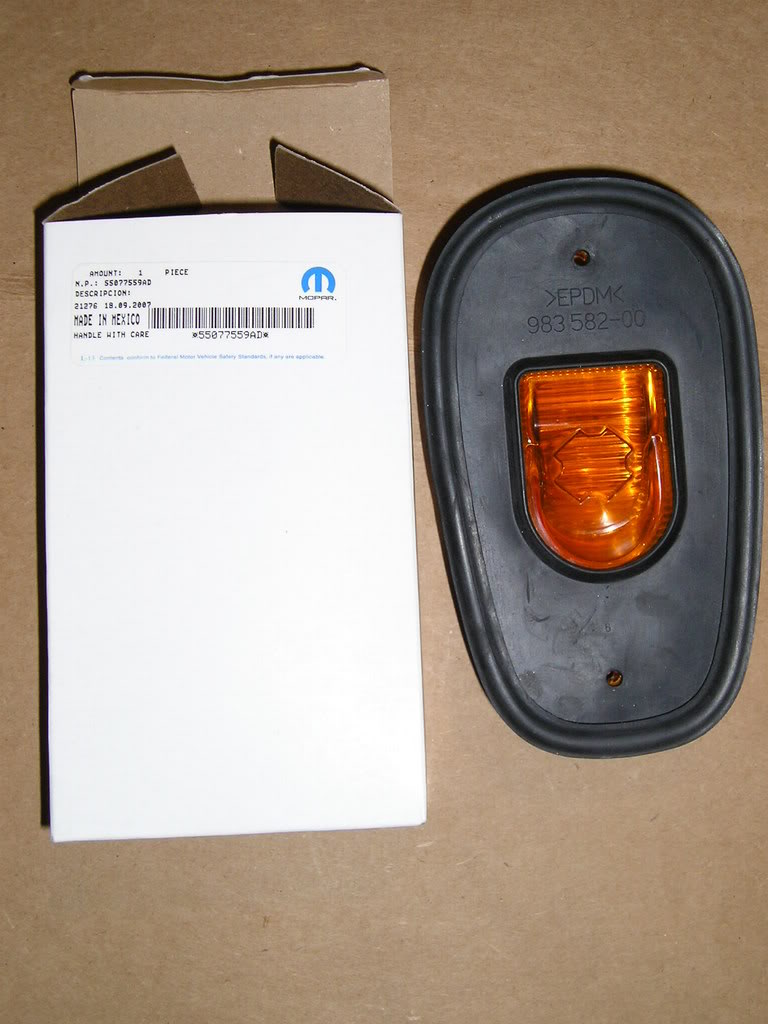
I recently finished my install as well. Thanks to this post it worked out fine. However, I do have some extra information to share. First, I was going to buy a Mopar kit, but found out that those kits still use the older lights with the two mounting holes side by side and use a foam gasket of sorts. I wanted the latest lights with the rubber gaskets and mounting holes front and back, so I simply purchased five lamp housings from the dealer for $6.35 each. Part number 55077559AD. The lamp housings came with the nice rubber gasket and special torx screws with little plastic washers. To make the harness, I purchased five 194 lamp housings, five lamps, and a package of license plate mounting buttons from NAPA for a total of $29.42 including tax. The lamp housings were part number ECH LS6449. The license plate mounting buttons were part number BK 665-1033.
I soldered and heat shrunk the five lamp housings to lengths of wire I already had to form the harness. I then wrapped the harness with harness wrap I also already had. I layed out the general lamp locations on a piece of cardboard to help locate the lamp housings along the wire. I used the dimensions in the first post of this thread and noticed a problem right away. He says the measurements are 5 3/8, 17 3/4, 26, 35, and 46 5/8. This works out to 12 3/8" between lamp one and two, and 11 5/8" between lamp four and five. It also works out to 8 1/4" between lamp two and three and 9" between lamp three and four. These are not equal spacing. So, I went down to the dealer and took my own measurements. Starting from the drivers door top edge, I got 5 7/8" to the rear most screw hole of the closest lamp. From there I got 12 1/2" on either side to the next lamp. I also got 8 5/8" between the center lamp and the lamp on either side. All these measurements are on the rear mounting screws. I measured the three center lamp housings to start 3 3/4" back from the fold in the sheet metal for the windshield. Finally, I measured 5 5/8" back for the outer lamp housings. I suggest doing your own measuring, but these are the measurements I got. I also layed out the OEM lamp housings on a piece of cardboard and marked the outer edge of the lamp and the screw centers. I believe I came up with a measurement of 25/32" from the front of the lamp to the first mounting hole and 4 1/8" between mounting holes. I believe I decided the large hole for the harness to pass through needed to be 2" behind the front mounting screw hole.
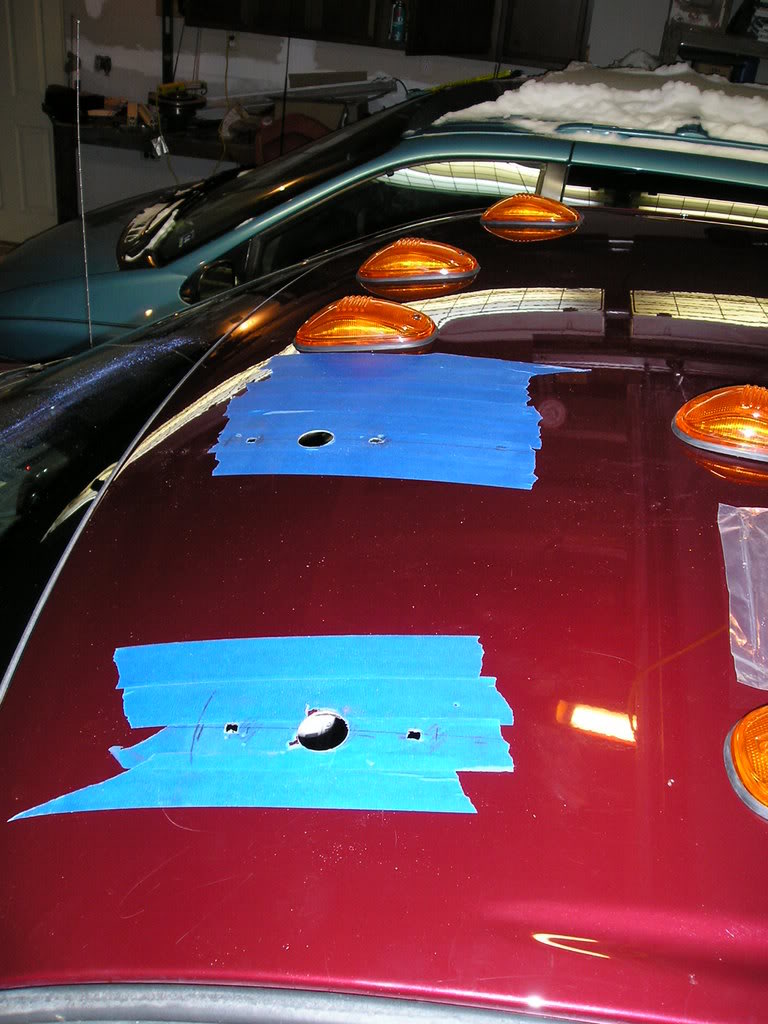
When laying out the holes on the roof of my '03 2500 quad cab truck, I first layed down masking tape where I thought I would be drilling holes. I found center in the back of cab and then center in the front of the cab, ran a straight edge between them and marked that. Then I transferred my measurements and made two more parrallel lines 8 5/8" either side of the center. Then I decided to make lines parrallel to the door edges at the 5 7/8" distance. Where the distances from the windshield edge intersected these lines I made marks. Then, I layed out the OEM lamp mounting holes back from these marks. I double and tripple checked all measurements, layed the housings out where I figured they should go and even checked out the structure underneath the headliner to make sure there would be no problems.
As for dropping the headliner, I followed the instructions in this thread although the clips for the visors confused me a bit. The two parts separate like was said, but they only pull apart about 3/4" or so and they stay attached to the headliner. Once pulled apart, they and the headliner together pull out of some rectangular holes in the roof structure with a "snap." When installing the headliner, the idea is that after the plastic parts are snapped into the roof structure, the moveable part slides up between two plastic clip type things and make it so they can't come together and fall out of the rectangular hole in the roof structure. I also removed the B pillar plastic covers and seat belt bolts to allow the headliner to pull down further.
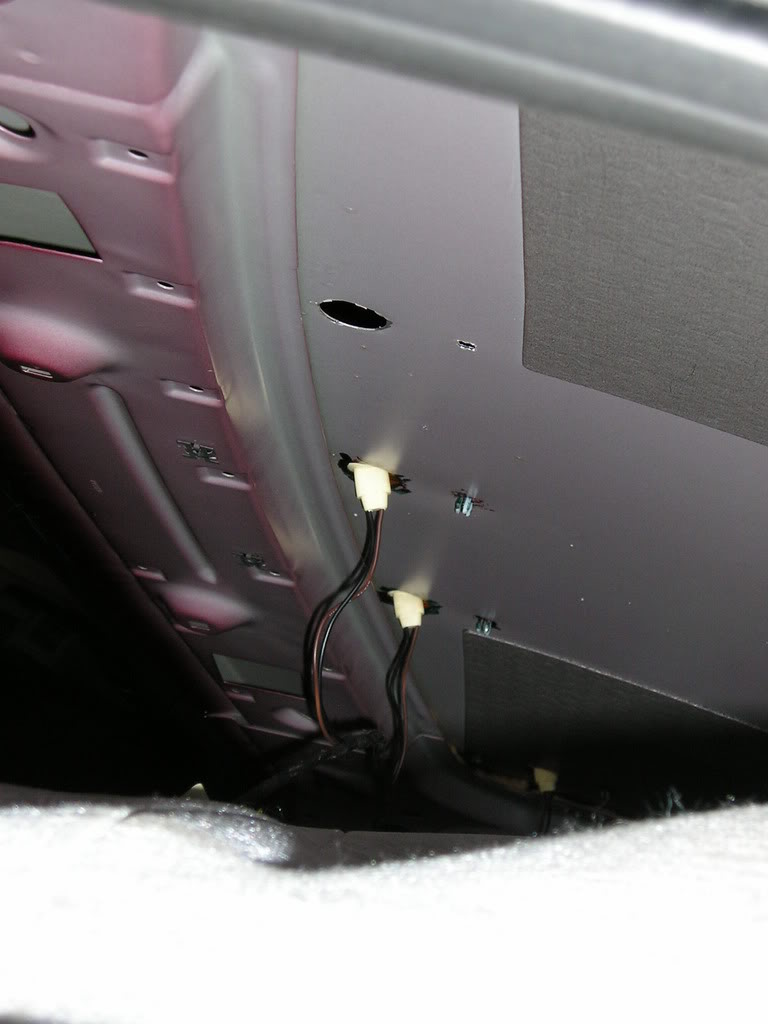
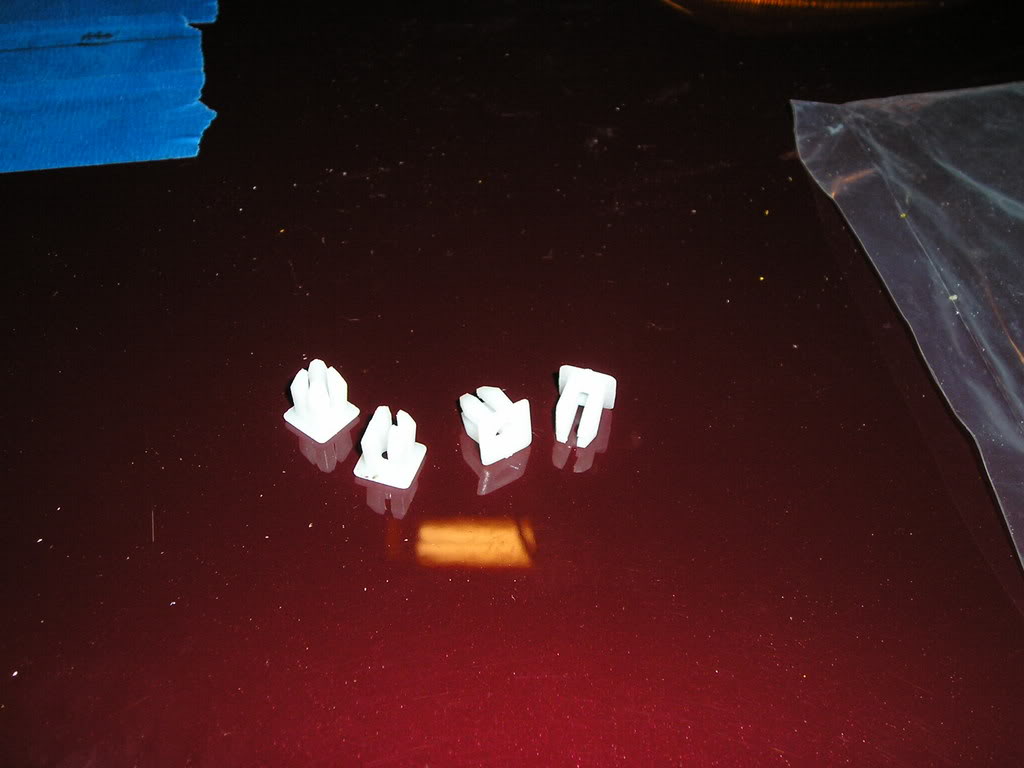
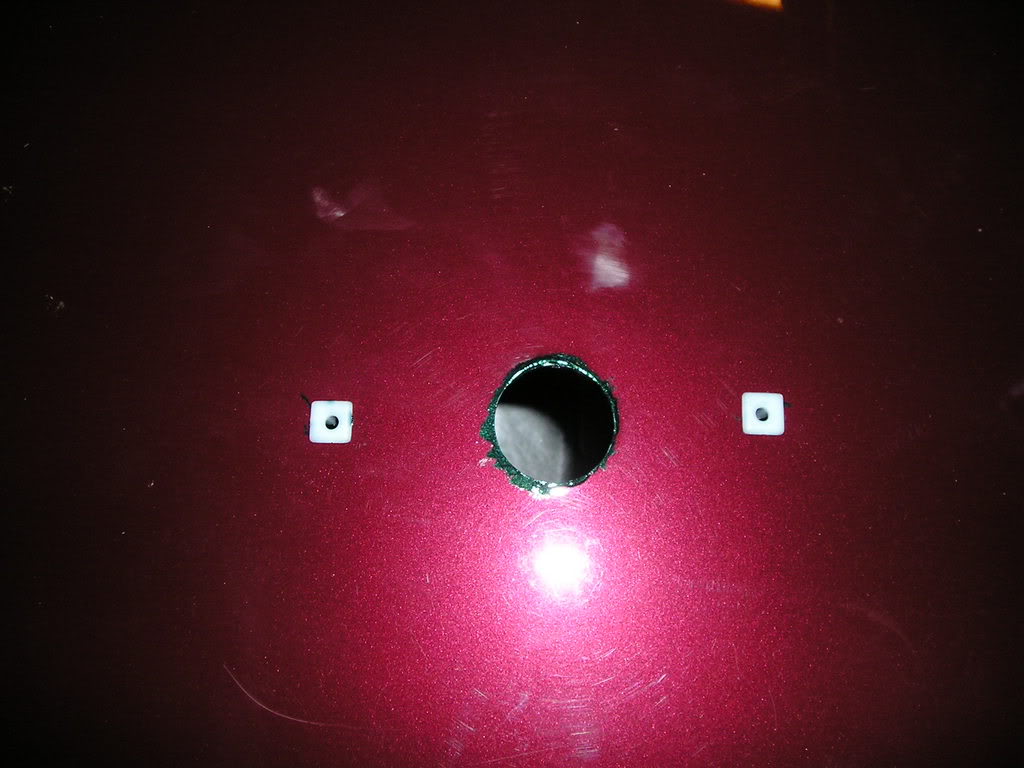
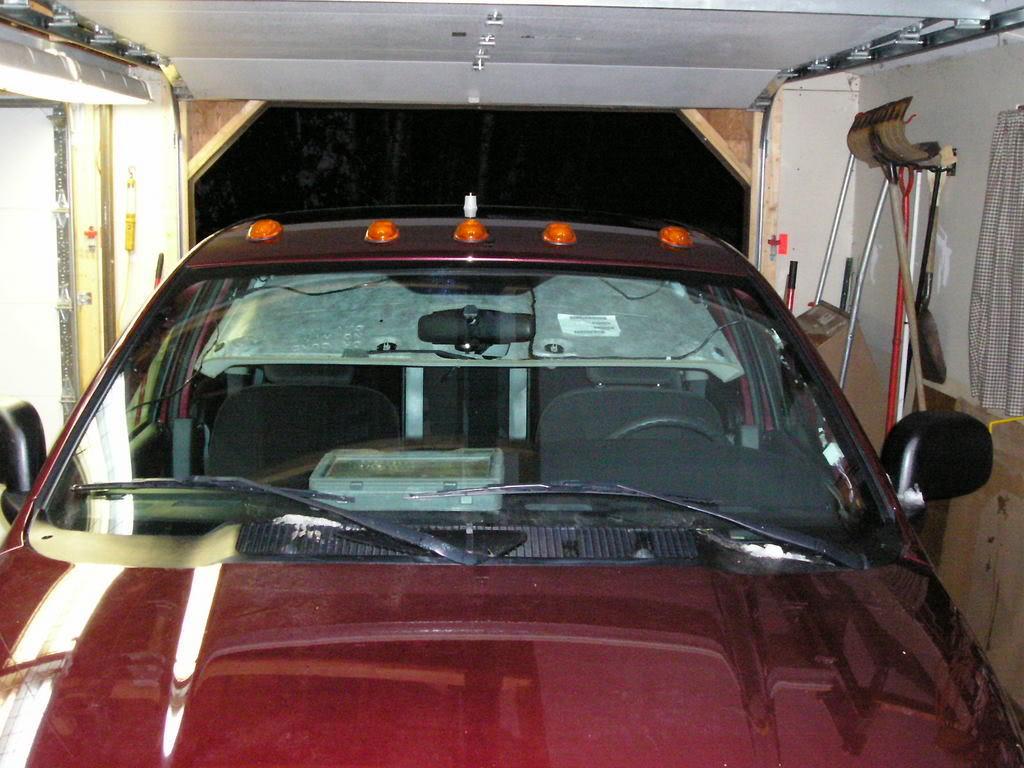
After gaining the room I needed, I drilled 15 holes in the roof as well as an additional one for an NMO antenna mount just behind the strengthening rib in the middle of the roof. I used a 3/4" hole saw for the NMO mount and followed the instuctions for mounting it. I used a hole punch for 3/4" electrical conduit to punch some nice holes for the lamp harness to pass through from underneath. I used a standard 1/4" twist drill to start the holes for the plastic screw anchors. I finished shaping the plastic screw anchor holes to a square shape using a file. I used square screw anchors to eliminate the issue of the anchor turning when installing or removing the mounting screws. When the holes were done, I deburred them and painted the edges with some touch up paint. I only had some green, so I used it. It all gets covered, so color and detail are not important. I snapped in the screw anchors, fished the harness through the holes, snapped them into the OEM housings, and screwed down the OEM housings using the screws supplied with the OEM housings. Everything fit well and looked great! In the pictures you should notice that the outer OEM housings fit quite close to some internal roof structure and that they cannot easily be moved out any further. Also, the inner three lamps actually need to be mounted pretty much right where they are since the front mounting screw falls inside some roof structure and the harness hole and rear mounting screw falls behind this structure.
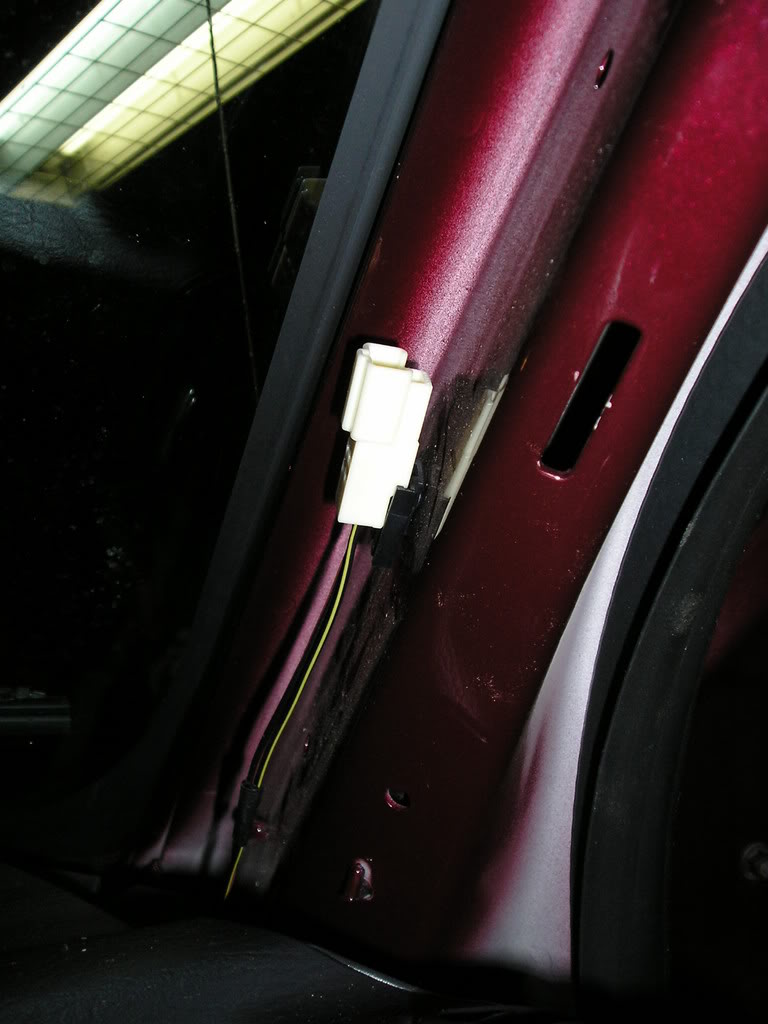
I tested the factory connector attached to the passengers side A pillar and found that it did indeed house two wires that are for supplying power to cab clearance lights. I didn't have a matching plug for the factory connector, so I cut it off and soldered and heat shrunk on a connector I did have both sides for. Here is a link to a photobucket album of my pictures:
http://s193.photobucket.com/albums/z...ght%20install/

I soldered and heat shrunk the five lamp housings to lengths of wire I already had to form the harness. I then wrapped the harness with harness wrap I also already had. I layed out the general lamp locations on a piece of cardboard to help locate the lamp housings along the wire. I used the dimensions in the first post of this thread and noticed a problem right away. He says the measurements are 5 3/8, 17 3/4, 26, 35, and 46 5/8. This works out to 12 3/8" between lamp one and two, and 11 5/8" between lamp four and five. It also works out to 8 1/4" between lamp two and three and 9" between lamp three and four. These are not equal spacing. So, I went down to the dealer and took my own measurements. Starting from the drivers door top edge, I got 5 7/8" to the rear most screw hole of the closest lamp. From there I got 12 1/2" on either side to the next lamp. I also got 8 5/8" between the center lamp and the lamp on either side. All these measurements are on the rear mounting screws. I measured the three center lamp housings to start 3 3/4" back from the fold in the sheet metal for the windshield. Finally, I measured 5 5/8" back for the outer lamp housings. I suggest doing your own measuring, but these are the measurements I got. I also layed out the OEM lamp housings on a piece of cardboard and marked the outer edge of the lamp and the screw centers. I believe I came up with a measurement of 25/32" from the front of the lamp to the first mounting hole and 4 1/8" between mounting holes. I believe I decided the large hole for the harness to pass through needed to be 2" behind the front mounting screw hole.
When laying out the holes on the roof of my '03 2500 quad cab truck, I first layed down masking tape where I thought I would be drilling holes. I found center in the back of cab and then center in the front of the cab, ran a straight edge between them and marked that. Then I transferred my measurements and made two more parrallel lines 8 5/8" either side of the center. Then I decided to make lines parrallel to the door edges at the 5 7/8" distance. Where the distances from the windshield edge intersected these lines I made marks. Then, I layed out the OEM lamp mounting holes back from these marks. I double and tripple checked all measurements, layed the housings out where I figured they should go and even checked out the structure underneath the headliner to make sure there would be no problems.
As for dropping the headliner, I followed the instructions in this thread although the clips for the visors confused me a bit. The two parts separate like was said, but they only pull apart about 3/4" or so and they stay attached to the headliner. Once pulled apart, they and the headliner together pull out of some rectangular holes in the roof structure with a "snap." When installing the headliner, the idea is that after the plastic parts are snapped into the roof structure, the moveable part slides up between two plastic clip type things and make it so they can't come together and fall out of the rectangular hole in the roof structure. I also removed the B pillar plastic covers and seat belt bolts to allow the headliner to pull down further.
After gaining the room I needed, I drilled 15 holes in the roof as well as an additional one for an NMO antenna mount just behind the strengthening rib in the middle of the roof. I used a 3/4" hole saw for the NMO mount and followed the instuctions for mounting it. I used a hole punch for 3/4" electrical conduit to punch some nice holes for the lamp harness to pass through from underneath. I used a standard 1/4" twist drill to start the holes for the plastic screw anchors. I finished shaping the plastic screw anchor holes to a square shape using a file. I used square screw anchors to eliminate the issue of the anchor turning when installing or removing the mounting screws. When the holes were done, I deburred them and painted the edges with some touch up paint. I only had some green, so I used it. It all gets covered, so color and detail are not important. I snapped in the screw anchors, fished the harness through the holes, snapped them into the OEM housings, and screwed down the OEM housings using the screws supplied with the OEM housings. Everything fit well and looked great! In the pictures you should notice that the outer OEM housings fit quite close to some internal roof structure and that they cannot easily be moved out any further. Also, the inner three lamps actually need to be mounted pretty much right where they are since the front mounting screw falls inside some roof structure and the harness hole and rear mounting screw falls behind this structure.
I tested the factory connector attached to the passengers side A pillar and found that it did indeed house two wires that are for supplying power to cab clearance lights. I didn't have a matching plug for the factory connector, so I cut it off and soldered and heat shrunk on a connector I did have both sides for. Here is a link to a photobucket album of my pictures:
http://s193.photobucket.com/albums/z...ght%20install/
01-14-2008, 11:12 PM
#108
Registered User
Join Date: Nov 2007
Location: Missouri
Posts: 197
Likes: 0
Received 0 Likes
on
0 Posts
anyone know what the part numbers are for the screws ? i need the screws and the little white clip things because i bought the recones and dont come with ANYTHING thanks
01-15-2008, 08:42 AM
#109
Registered User
Join Date: Aug 2005
Location: IL
Posts: 782
Likes: 0
Received 0 Likes
on
0 Posts
Great write up. I've got the side by side screws in mine, since I bought the dealer kit. I don't trust them, and would like to switch to the new style. The license plate inserts are a great idea. Worth the time, I imagine. I think I'm going to redo mine on of these cold weekends. Maybe Saturday . . .
01-15-2008, 09:31 AM
#110
Banned
Thread Starter
Join Date: Dec 2005
Location: Twin Falls, Idaho
Posts: 5,194
Likes: 0
Received 0 Likes
on
0 Posts
Great write up. I've got the side by side screws in mine, since I bought the dealer kit. I don't trust them, and would like to switch to the new style. The license plate inserts are a great idea. Worth the time, I imagine. I think I'm going to redo mine on of these cold weekends. Maybe Saturday . . .
 01-22-2008, 02:05 PM
#112
Registered User

Join Date: Jun 2007
Posts: 3
Likes: 0
Received 0 Likes
on
0 Posts
This a great write up guys and I just started my install this week.
#1 - the Torx bit to remove the sunvisor and light cluster is a Torx 20.
#2 - Those pesky little sunvisor clips are a pain but be patient. They seperate like everyone has said and then just pop out / straight down. I will post a picture later after removal.
#3 - I am using 16 gauge wire but you could use 18.
IMO - would it be to weird or look funny to offset the 2 inner lights(#2 & #4) farther to the outside? The templet has them just set back a little from the center one and then about 5" away. I was thinking split the difference between the center and the end ones and then set back a little further. Kind of like a "V". I am going to lay them on top of the cab first to see the look and then post pics. I hope to have some valued opinion from you guys.
thanks,
Mark
01-22-2008, 02:15 PM
#113
Registered User
Join Date: Jan 2005
Location: Nebraska
Posts: 166
Likes: 0
Received 0 Likes
on
0 Posts
You can do what you wish regarding spacing, but they are in that grouping for a reason. DOT calls them identification lights. You'll see them on everything from 1-ton to the big rigs, front and back. Three in the middle and one on each side. FWIW...
01-22-2008, 03:37 PM
#114
Registered User

go to Lowes in the Electrical department... and look at the electricians tools for this Uni-bit... They are not cheap, but unlike mentioned before... You'll be suprised how often it comes in handy!!! I have 4 of them now in various stepped sizes...
Now... I have been wanting to do this for a while... but I have a SUNROOF!!! Any insight on this application? Would the lights be in the way? Would installing them affect the sunroof in any fashion? If so, could they be moved forward and inch or so to compensate for the room required by the sunroof???
01-22-2008, 06:47 PM
#115
Banned
Thread Starter
Join Date: Dec 2005
Location: Twin Falls, Idaho
Posts: 5,194
Likes: 0
Received 0 Likes
on
0 Posts
go to Lowes in the Electrical department... and look at the electricians tools for this Uni-bit... They are not cheap, but unlike mentioned before... You'll be suprised how often it comes in handy!!! I have 4 of them now in various stepped sizes...
Now... I have been wanting to do this for a while... but I have a SUNROOF!!! Any insight on this application? Would the lights be in the way? Would installing them affect the sunroof in any fashion? If so, could they be moved forward and inch or so to compensate for the room required by the sunroof???
My 05 had a sunroof but it came with light so it's dooable will probably take a little more time to take the trim apart ...

 01-27-2008, 11:12 AM
#118
Registered User
Join Date: Dec 2005
Location: DFW, TX
Posts: 2,627
Likes: 0
Received 0 Likes
on
0 Posts
You can just order the 2nd gen lights(98-02s) from recon, they are side-side holes and are the same lights. Im still not sure why the mopar kit doesnt come with the correct lights, but I guess since they figure youre adding them, it doesnt matter if they are 98-02s or 3rd gens...