H2 Wheel Info & Pic Thread.....
 03-24-2008, 09:29 PM
#31
Registered User
Thread Starter
Join Date: Sep 2007
Location: Indiana
Posts: 2,144
Likes: 0
Received 0 Likes
on
0 Posts
I bought a carbide flush trim bit today at Sears for under $15
However, at the last minute, I found a machine shop to do it for DIRT CHEAP!!!!! Dropping them off tomorrow.......
However, at the last minute, I found a machine shop to do it for DIRT CHEAP!!!!! Dropping them off tomorrow.......
 03-24-2008, 09:30 PM
#32
Registered User
Thread Starter
Join Date: Sep 2007
Location: Indiana
Posts: 2,144
Likes: 0
Received 0 Likes
on
0 Posts
Also, for the weight rating: A Hummer dealership was selling a set of wheels on Ebay. I contacted them, stating I was interested in the wheels, but needed to know the weight rating first.
They responded with the number on the first post, on the first page.
They responded with the number on the first post, on the first page.
04-10-2008, 08:35 AM
#33
Registered User

Join Date: Aug 2005
Posts: 271
Likes: 0
Received 0 Likes
on
0 Posts
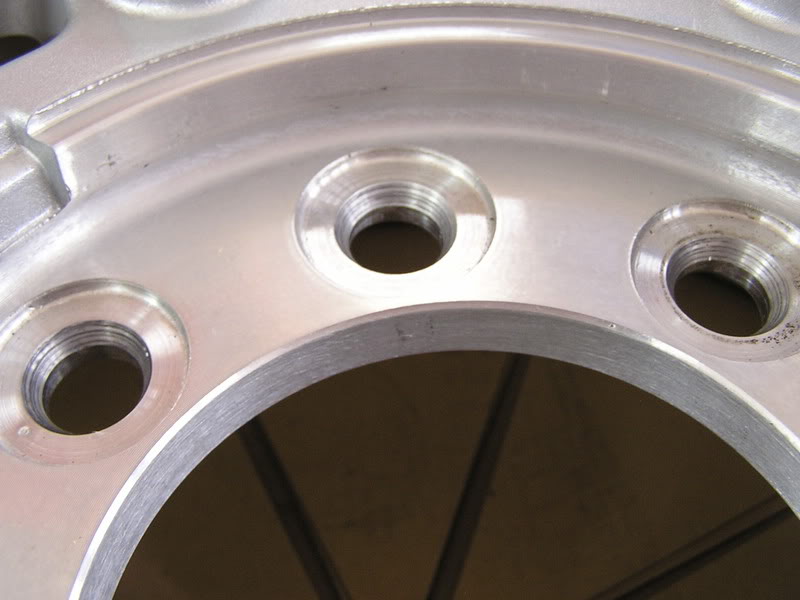
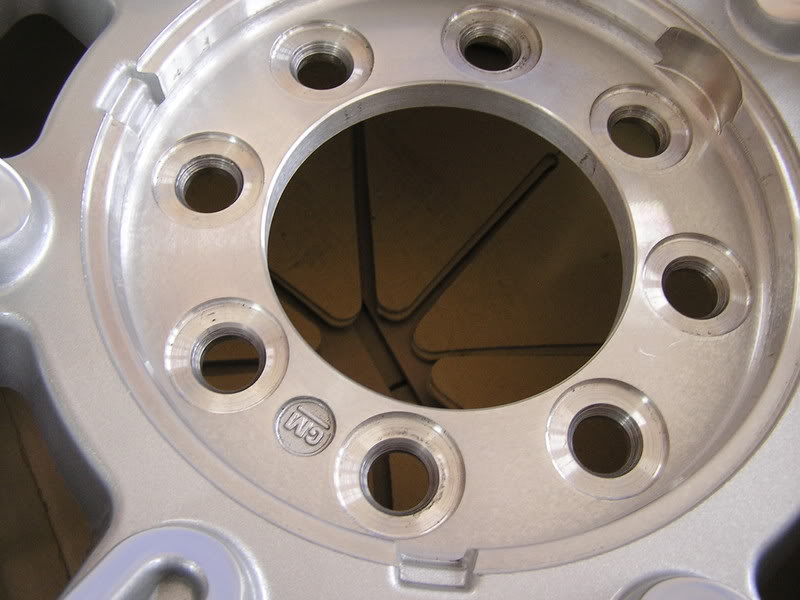
I did my first set of H2s with a 4 3/4" inch hole saw and that worked well. I posted that info back in '04 and it has worked for many of us.
I did my '08 H2s with the flush cut router bit method that someone else discovered and I like that better. It's really quick and easy. The finish size of the hole is just barely big enough and you must cut out all you can by making several passes around the hole and making sure the depth is set right. One of mine fit a little too tight and I had to go back and sand the inner surface of the hole a bit with a drum sander. Maybe the bearing was a couple thousanths under the size of the cutter. Anyway, I recommend the router method as safe, quick and easy.
John
Is this the bit? http://www.sears.com/shc/s/p_10153_1...me=Router+Bits
04-10-2008, 03:58 PM
#34
DTR's 'Wrench thrower...' And he aims for the gusto...

Join Date: Oct 2003
Location: Smith Valley, NV (sometimes Redwood City, CA)
Posts: 2,668
Likes: 0
Received 3 Likes
on
2 Posts
Shane,
That's it. The perfect bit for the job.
You may find the centers just a bit tight after routing. Make a bunch of passes to get all the metal you can. If they are tight don't force the wheels on but sand the holes a bit and on they go. I think sometimes the bearing is a couple thousandths bigger than the cutter.
John
 04-13-2008, 06:44 PM
#37
04-13-2008, 07:35 PM
#38
Registered User
Thread Starter
Join Date: Sep 2007
Location: Indiana
Posts: 2,144
Likes: 0
Received 0 Likes
on
0 Posts
I want to make sure it is warm outside so the adhesive tape can properly setup and also so the flares are more flexible for installation, in the warmer weather.
Plus, it needs to be dry for 3-4 days after installation and it has been 35-40 degrees and raining here............hopefully SOON!!!!
Plus, it needs to be dry for 3-4 days after installation and it has been 35-40 degrees and raining here............hopefully SOON!!!!
04-13-2008, 08:35 PM
#41
Registered User
Join Date: Oct 2004
Location: Williston, ND
Posts: 1,003
Likes: 0
Received 0 Likes
on
0 Posts
04-13-2008, 09:21 PM
#43
Registered User
Join Date: Oct 2004
Location: Williston, ND
Posts: 1,003
Likes: 0
Received 0 Likes
on
0 Posts
 LOL missed that one
04-13-2008, 09:33 PM
LOL missed that one
04-13-2008, 09:33 PM
#44
Registered User
Join Date: Apr 2007
Location: New Braunfels, TX
Posts: 195
Likes: 0
Received 0 Likes
on
0 Posts
Guess I should have tried the router activity! I had a friend open mine in his shop, cost me $20/rim but he did an excellent, professional job. He is also going to cut down the center caps on his lathe, said it should come out smooth and easy.
I had mine hubs coated black, so I am looking at sandblasting and painting the center caps black as well. Next modification!
Anyone got suggestions on flares? I have a blue truck with mostly black accessories (rims, tool box, Vortex lining, and nerf bars). Someday the bumpers will be cahnged over to black as well, but are chrome for the moment (as is the grille). What type of flares and a source would be great.
04-13-2008, 09:55 PM
#45
DTR's 'Wrench thrower...' And he aims for the gusto...
Join Date: Oct 2003
Location: Smith Valley, NV (sometimes Redwood City, CA)
Posts: 2,668
Likes: 0
Received 3 Likes
on
2 Posts
I put a set of Dodge Power Wagon flares on mine. Nice. They don't stick out as far as the aftermarket ones and may not protect the truck from as much spray, but they fit well and look good.
John
John

