
Another Version -- AD150 Install on a MegaCab
 07-13-2008, 12:06 PM
#1
Registered User
Thread Starter
Join Date: Jul 2003
Location: Lloydminster, Alberta, Canada
Posts: 2,066
Likes: 0
Received 0 Likes
on
0 Posts
Another Version -- AD150 Install on a MegaCab
Well, ladies and gents of the DTR, it's been a long time of gathering info. In addition, to working 10+ hour days and hospital visits with Dad having had a minor stroke last weekend, it's been a month of tinkering only during very limited spare time.
My goal was to do the AD 150 install while retaining the OE fuel system for back-up as hunting / fishing camp is 5 hours from the nearest municipality for help - certainly no internet service for DTR assistance from out there
 . Thanks to 53 *****'s, Fisherguy, Shagginwagon, along with everyone one else that have answered questions and sent pics for me to configure this set-up.
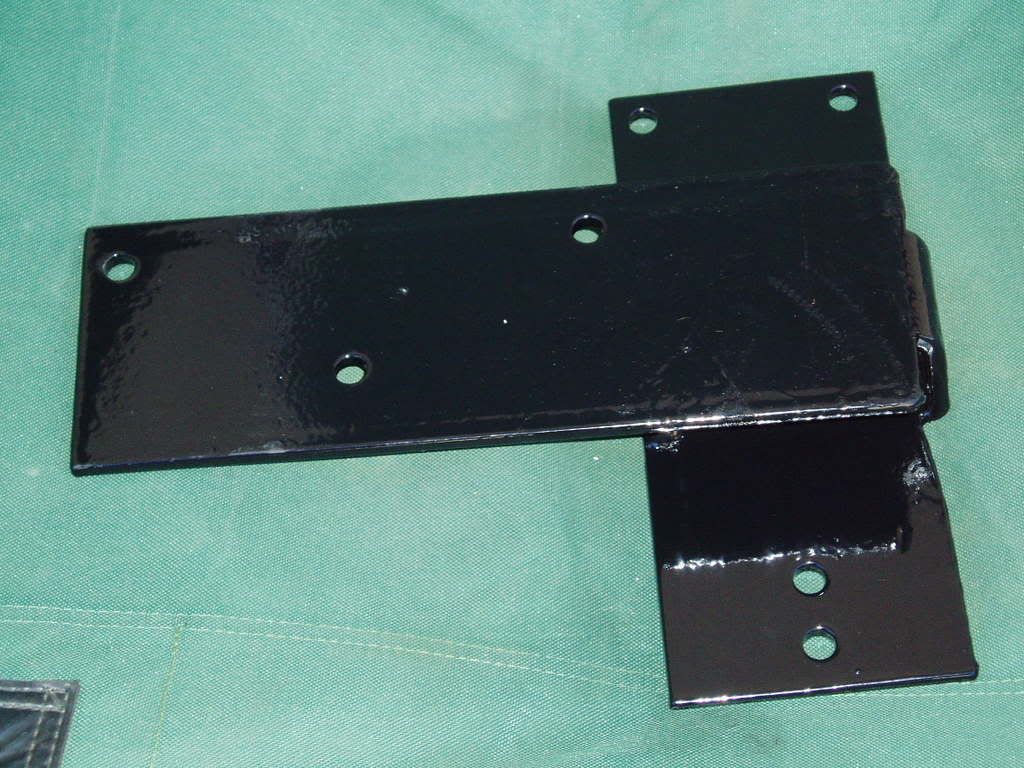
Like others, I reworked the bracket so the AD would run parallel with the frame.
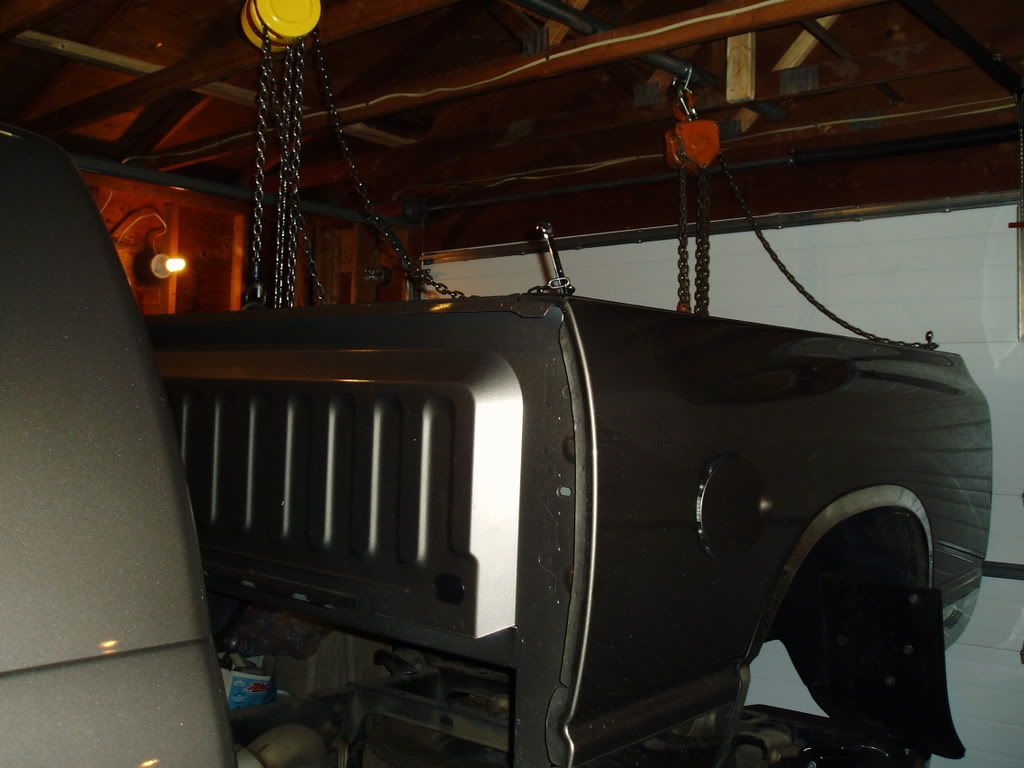
Then, I lifted the box off the frame.
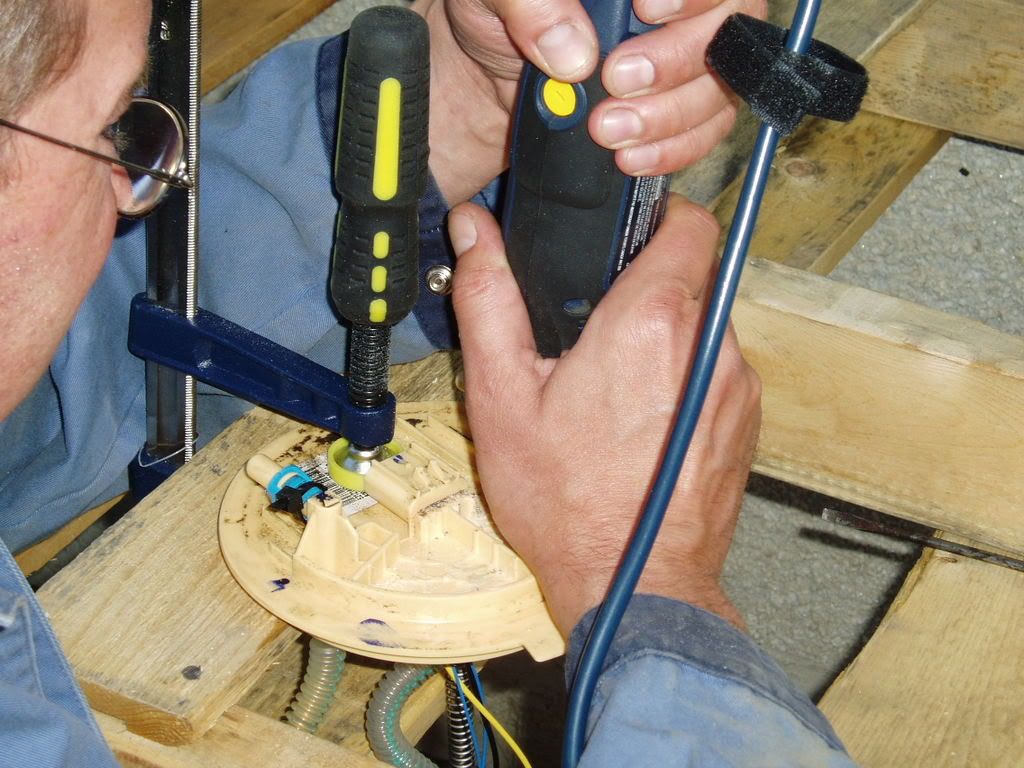
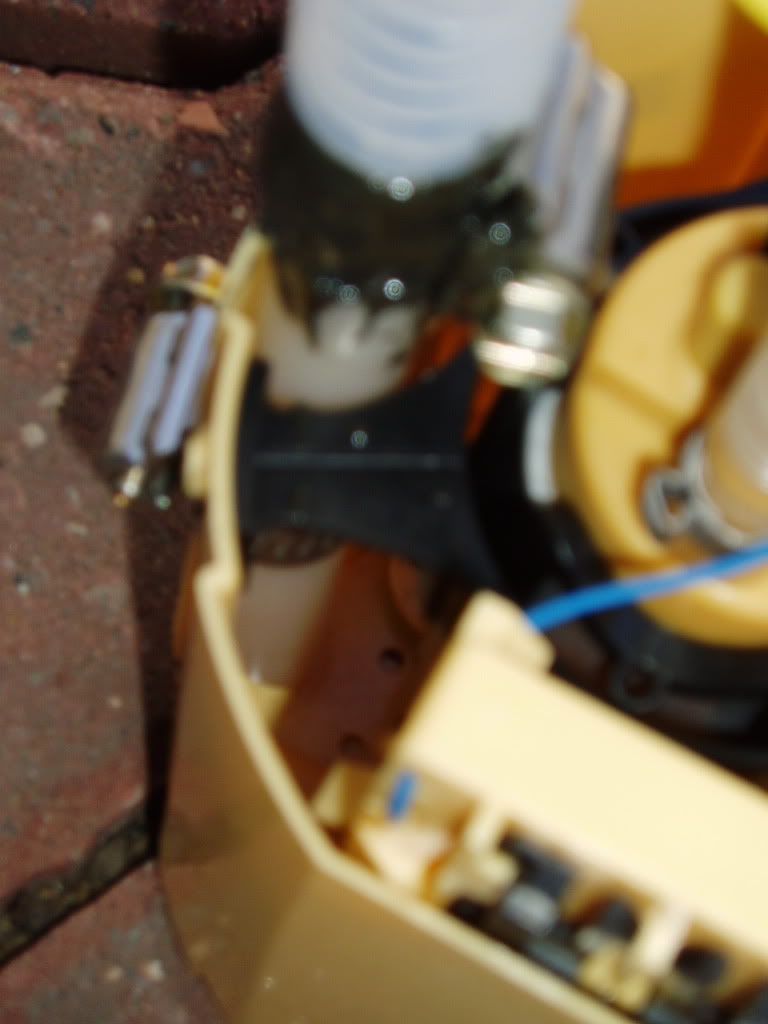
Now, to modify the canister after removal. I used some "real" bulkhead fittings from a local hydraulic shop. 1) They were smaller in diameter and I could get both on top of the canister and, 2) the supplied AD plastic one was junk (Sorry Charles, I gotta call it as I see it). My Uncle assisted in the modification (he loves this stuff too) as my fingers were beat up from the leveling kit install and other installations - I used a machine bushing that I was using for the bulkhead fitting to measure for marking which ribs on the canister that had to come out.
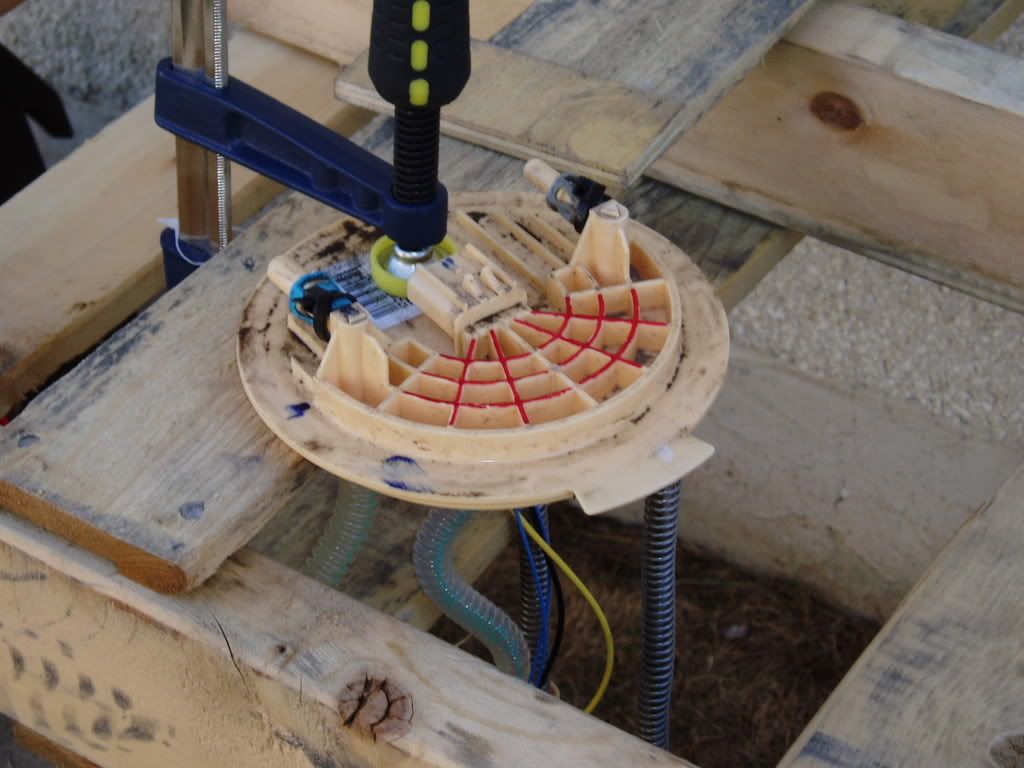
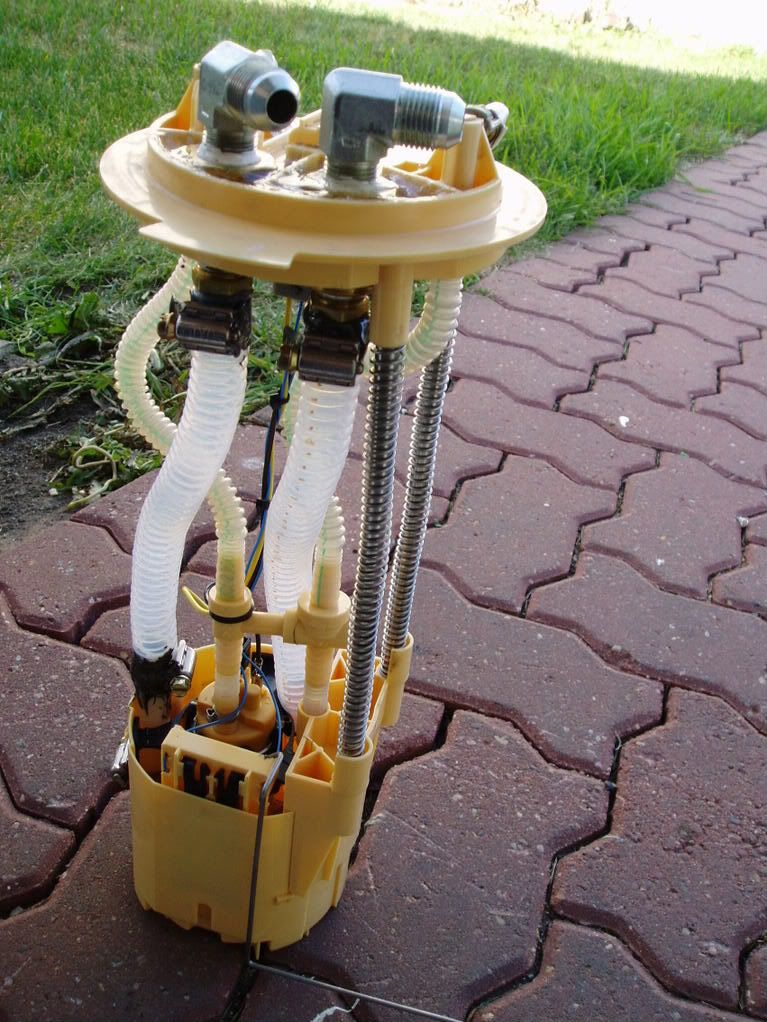
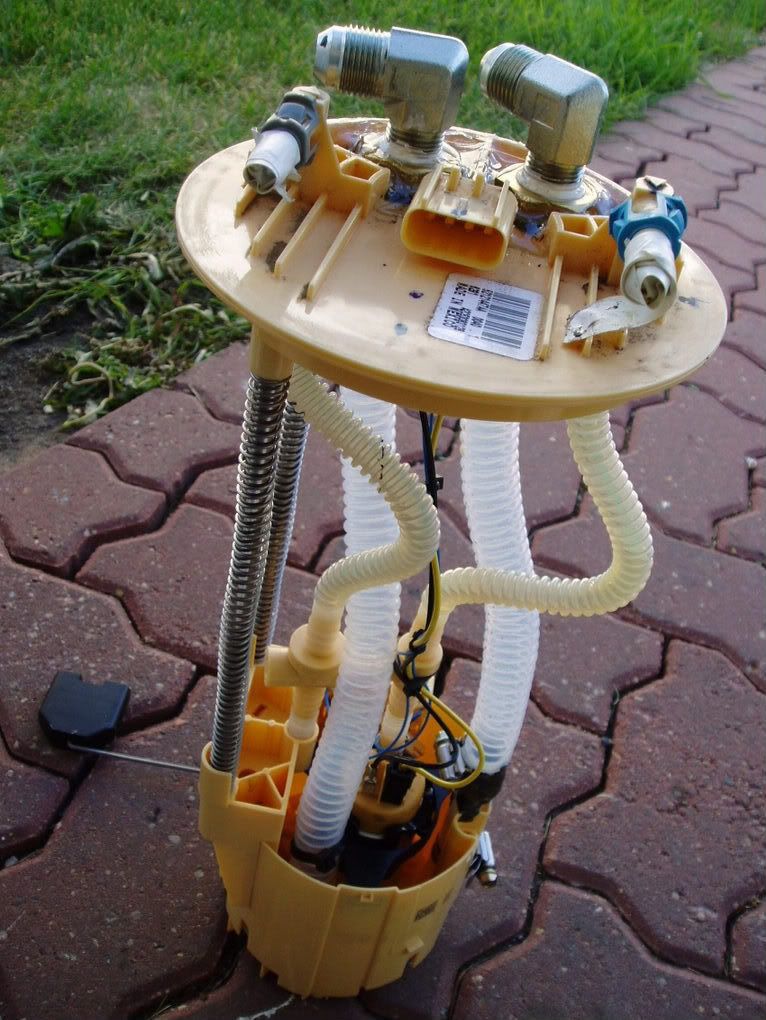
Once finished, I ended up with the draw straw and return line all encompassed in the OEM canister. The draw tube is a combination of the 1/2" supplied draw straw, cut with "feet" to sit right on the bottom of the cansister and held in place with a hose clamp, and teflon 5/8' corrugated hose up to the bottom of the bulkhead fitting. The return line is the same teflon hose routed into the canister. All fused together with epoxy and a hose clamp to ensure no air is drawn at low fuel levels. I also did drill some strategic holes in the bottom of the canister to have fuel fill it a bit quicker.
My goal was to do the AD 150 install while retaining the OE fuel system for back-up as hunting / fishing camp is 5 hours from the nearest municipality for help - certainly no internet service for DTR assistance from out there
. Thanks to 53 *****'s, Fisherguy, Shagginwagon, along with everyone one else that have answered questions and sent pics for me to configure this set-up.Like others, I reworked the bracket so the AD would run parallel with the frame.
Then, I lifted the box off the frame.
Now, to modify the canister after removal. I used some "real" bulkhead fittings from a local hydraulic shop. 1) They were smaller in diameter and I could get both on top of the canister and, 2) the supplied AD plastic one was junk (Sorry Charles, I gotta call it as I see it). My Uncle assisted in the modification (he loves this stuff too) as my fingers were beat up from the leveling kit install and other installations - I used a machine bushing that I was using for the bulkhead fitting to measure for marking which ribs on the canister that had to come out.
Once finished, I ended up with the draw straw and return line all encompassed in the OEM canister. The draw tube is a combination of the 1/2" supplied draw straw, cut with "feet" to sit right on the bottom of the cansister and held in place with a hose clamp, and teflon 5/8' corrugated hose up to the bottom of the bulkhead fitting. The return line is the same teflon hose routed into the canister. All fused together with epoxy and a hose clamp to ensure no air is drawn at low fuel levels. I also did drill some strategic holes in the bottom of the canister to have fuel fill it a bit quicker.
 07-13-2008, 12:07 PM
#2
Registered User
Thread Starter
Join Date: Jul 2003
Location: Lloydminster, Alberta, Canada
Posts: 2,066
Likes: 0
Received 0 Likes
on
0 Posts
That was getting long, so the site made me make another post:
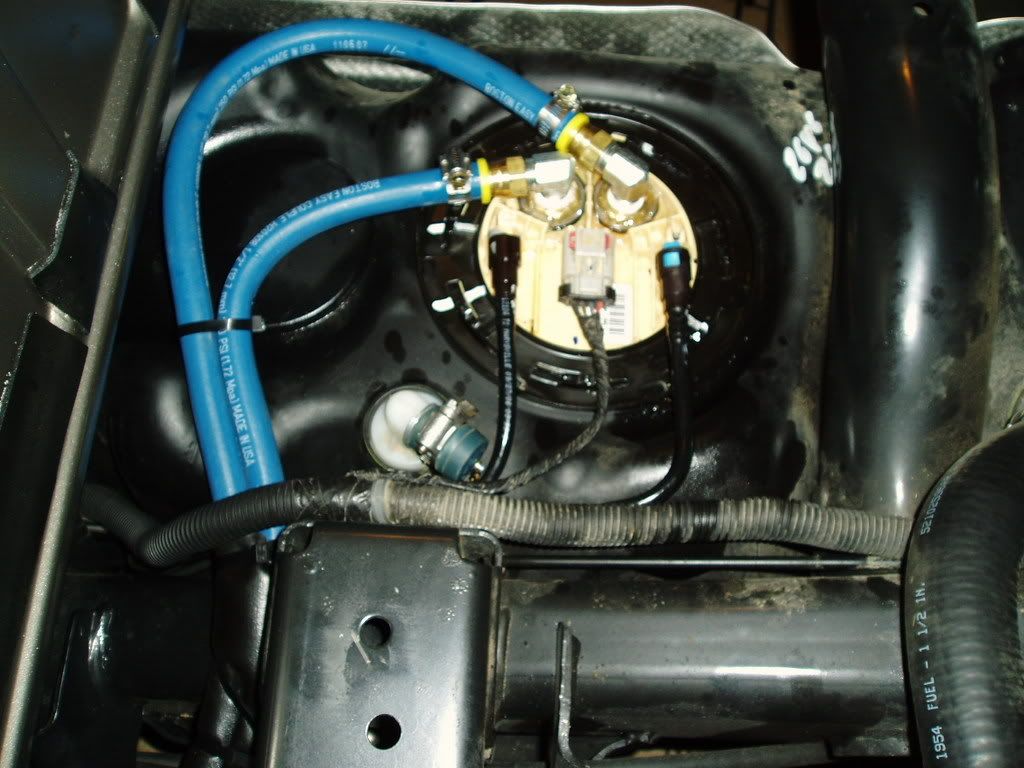
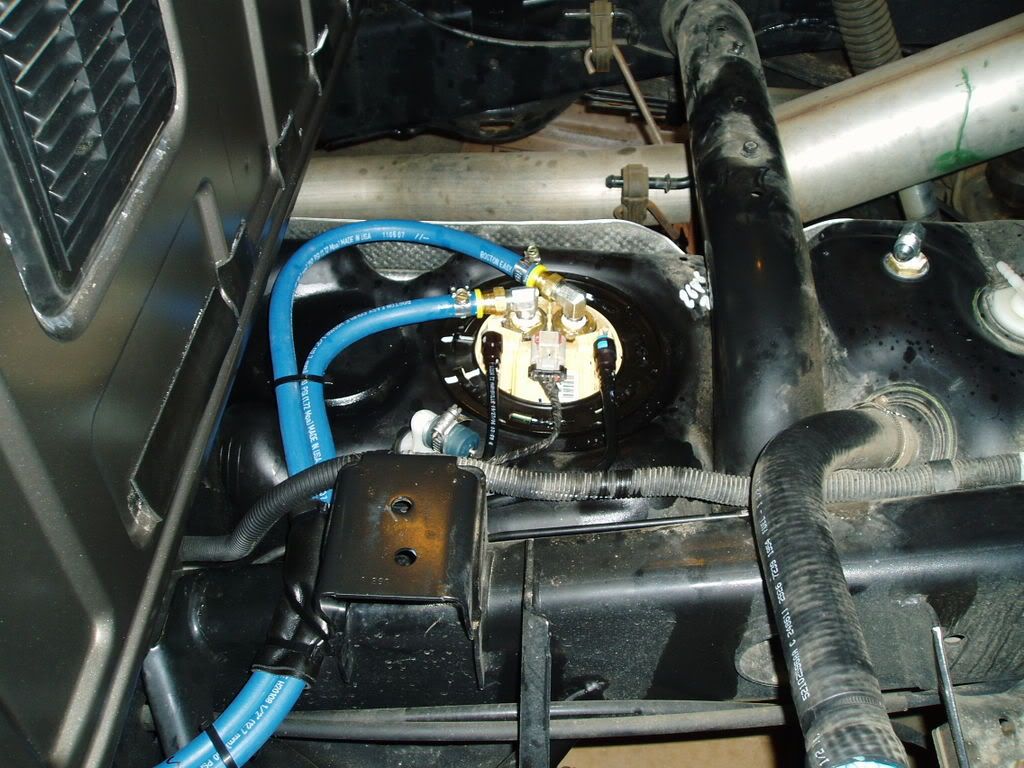
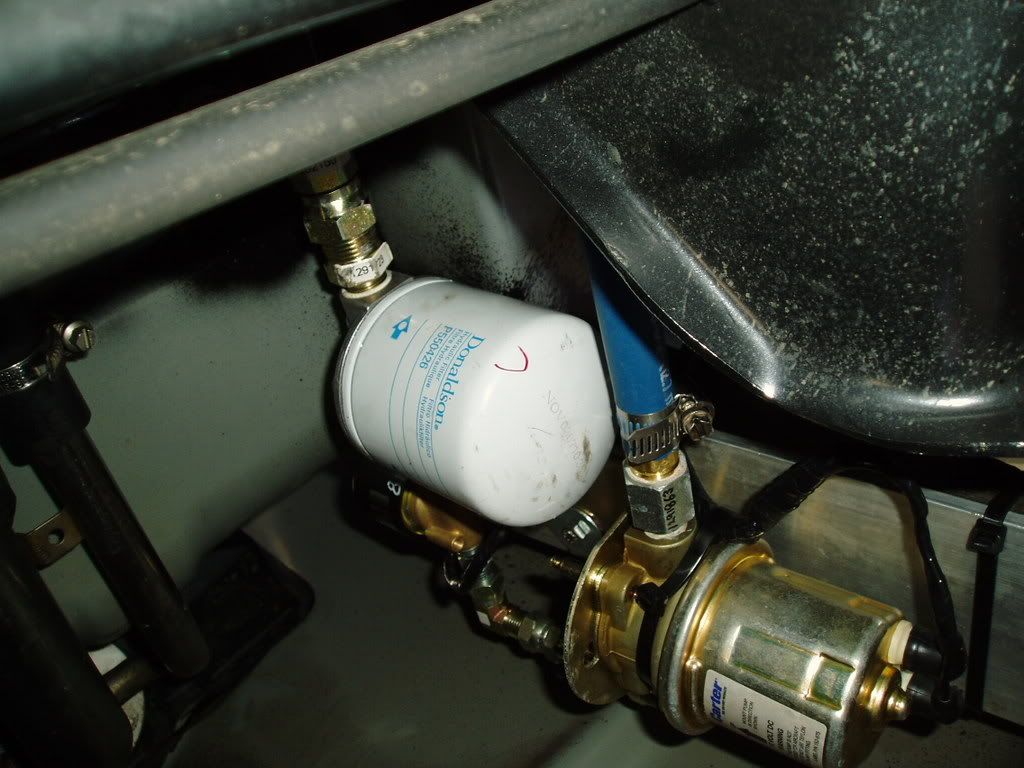
Once I was done all that business, I used a hair drier to warm up all the corrugated hoses so they'd compress smoothly and easily as the canister compressed back into the tank. At the same time, I capped the OE vent line, and put in a new one higher in the tank (fitting top right in 2nd pic). This would also serve as a way to transfer fuel from my aux. tank into the main tank as I put a "T" in the new vent line.
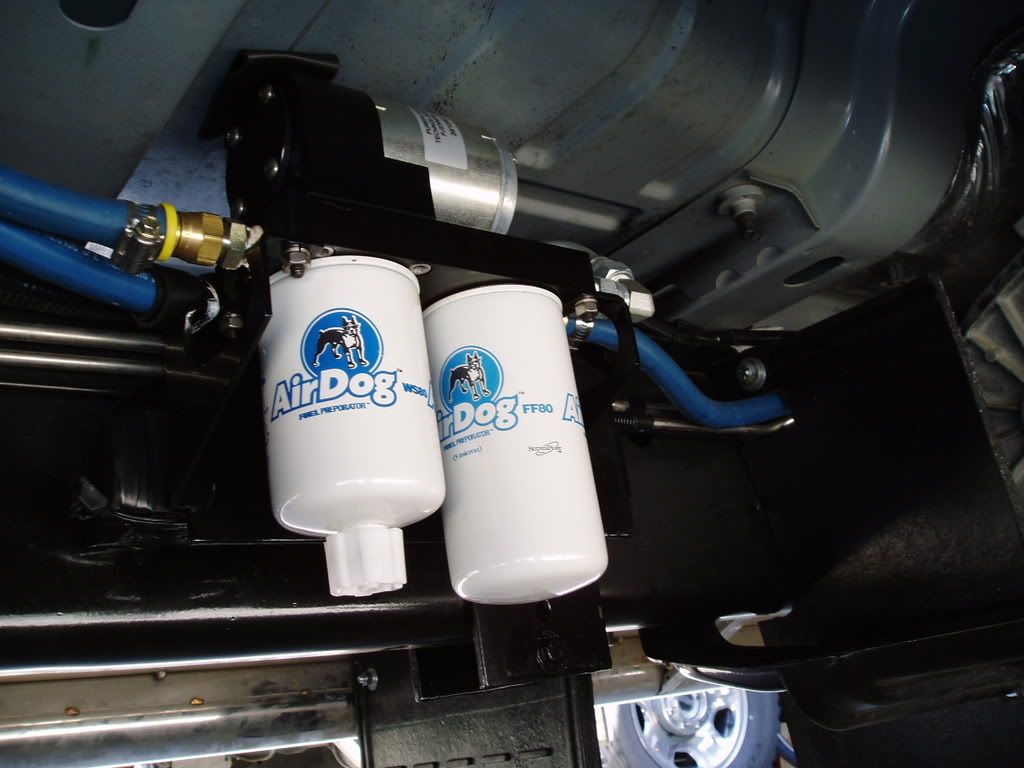
This is how the AD ended up along the frame. Kinda hard to see in the pics, but I mounted an old mud flap in front of the unit so gravel shooting from the front tire would not take out the filter. Also, the relay trigger is from the orange / red trace wire inside the loom above and front of the AD unit. If I have to, it's already set up inside that loom that all I have to do is plug the OE wire back in after unplugging the AD.
Apparently, I neglected to get a pic from under the hood, but I used a 90* fitting from Vulcan to tie into the CP3 and reuse my fuel pressure sensor. I pulled the OEM fuel line off, capped, and tie wrapped to the side ready to put back on if I ever run into a bind.
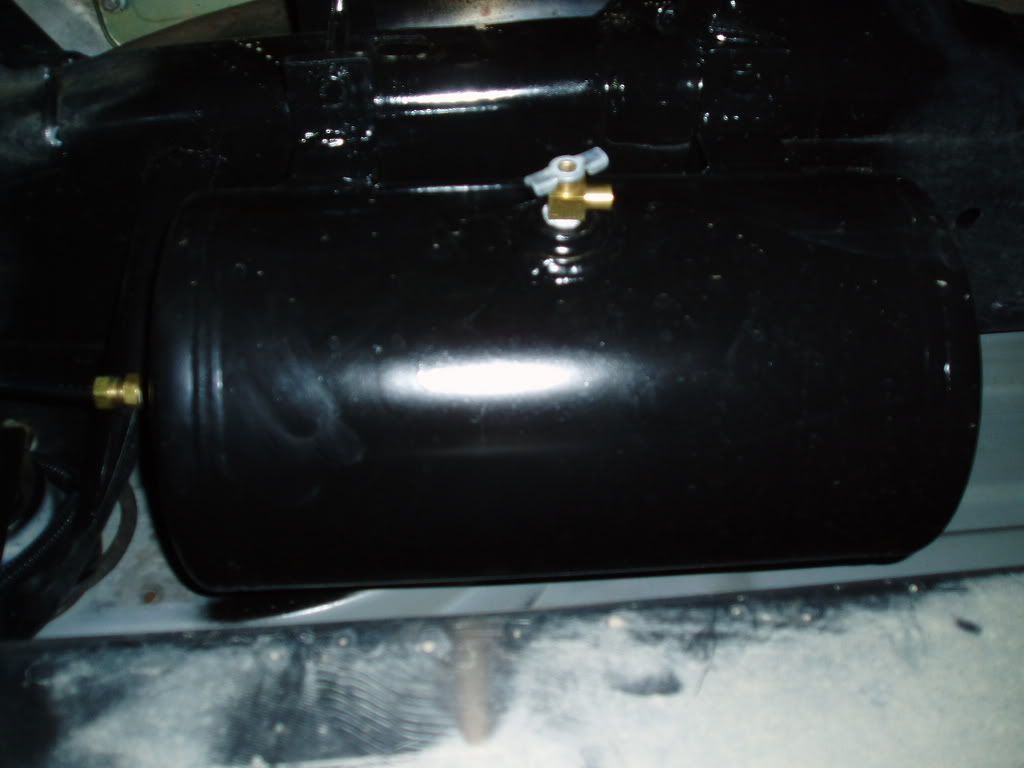
While I was at it, I put in a 2 gal. air tank on the passenger side frame rail to replace the 1/2 gal. tank for my PacBrake. I relocated the pressure sensor from the tank to above the engine on the compressor as it was freezing up in the winter. Also, I had to get a bung welded on the bottom of the air tank for a drain - it didn't come with one.
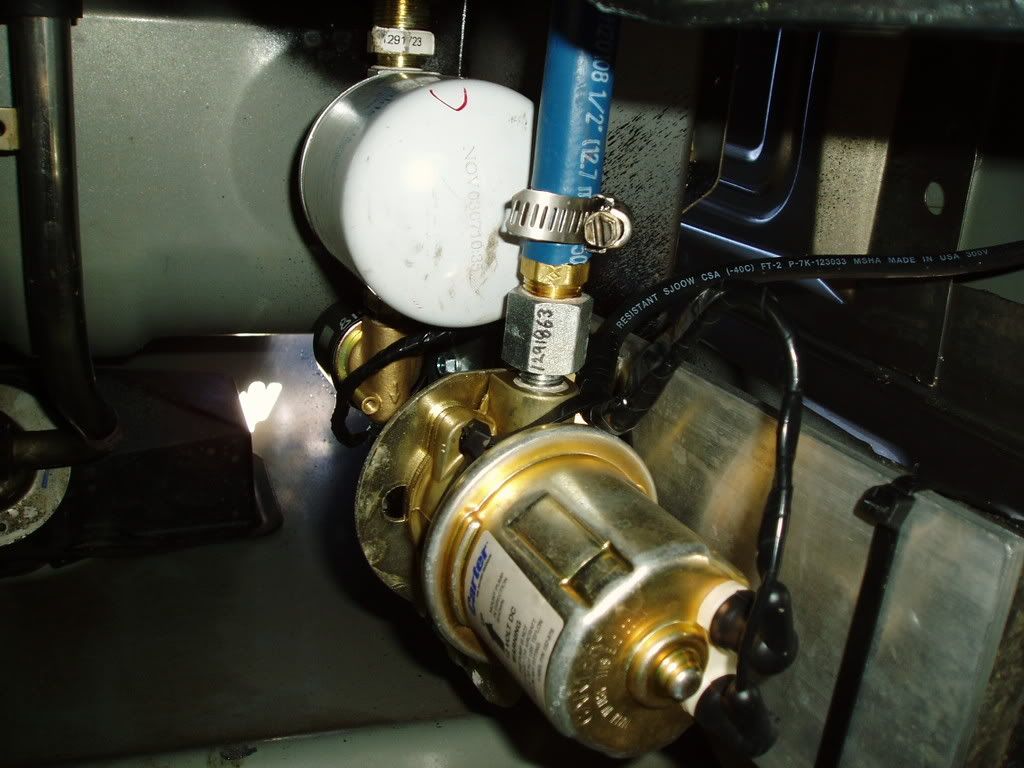
And, since I made provisions to tie in my aux. tank to the vent line, I had to mount an inline filter, solenoid valve, and fuel pump under the front, driver's side corner of the box. Anyone with a MegaCab will know how much room is in there just to even get your hand in (PIA), never mind fitting everything. This in itself, with measuring, mounting my aux tank in the box, custom making and mounting a bracket, drilling, mounting, pipe fitting, and wiring, took ~8 hours.
All in all, well worth leaving some blood from my knuckles under the truck.
It was a steady 18 psi when I was finished and tested. There was only 3/4" of fuel on the bottom of the tank at that time, plus I had to back down my steep driveway to go get fuel once I was done. Pressure never moved even with the fuel level below 1/32nd of a tank.
After fueling up, I am currently getting a pressure fluctuation between 18 and 22 psi. I believe this to be happening as the return line is 1/2 way to the bottom of the canister and the AD has to pump return fuel against the head pressure of a full tank.
However, I never even get close to 0 psi at WOT as was on the OEM fuel pump.
Any questions, I'll answer as best as possible.
Once I was done all that business, I used a hair drier to warm up all the corrugated hoses so they'd compress smoothly and easily as the canister compressed back into the tank. At the same time, I capped the OE vent line, and put in a new one higher in the tank (fitting top right in 2nd pic). This would also serve as a way to transfer fuel from my aux. tank into the main tank as I put a "T" in the new vent line.
This is how the AD ended up along the frame. Kinda hard to see in the pics, but I mounted an old mud flap in front of the unit so gravel shooting from the front tire would not take out the filter. Also, the relay trigger is from the orange / red trace wire inside the loom above and front of the AD unit. If I have to, it's already set up inside that loom that all I have to do is plug the OE wire back in after unplugging the AD.
Apparently, I neglected to get a pic from under the hood, but I used a 90* fitting from Vulcan to tie into the CP3 and reuse my fuel pressure sensor. I pulled the OEM fuel line off, capped, and tie wrapped to the side ready to put back on if I ever run into a bind.
While I was at it, I put in a 2 gal. air tank on the passenger side frame rail to replace the 1/2 gal. tank for my PacBrake. I relocated the pressure sensor from the tank to above the engine on the compressor as it was freezing up in the winter. Also, I had to get a bung welded on the bottom of the air tank for a drain - it didn't come with one.
And, since I made provisions to tie in my aux. tank to the vent line, I had to mount an inline filter, solenoid valve, and fuel pump under the front, driver's side corner of the box. Anyone with a MegaCab will know how much room is in there just to even get your hand in (PIA), never mind fitting everything. This in itself, with measuring, mounting my aux tank in the box, custom making and mounting a bracket, drilling, mounting, pipe fitting, and wiring, took ~8 hours.
All in all, well worth leaving some blood from my knuckles under the truck.
It was a steady 18 psi when I was finished and tested. There was only 3/4" of fuel on the bottom of the tank at that time, plus I had to back down my steep driveway to go get fuel once I was done. Pressure never moved even with the fuel level below 1/32nd of a tank.
After fueling up, I am currently getting a pressure fluctuation between 18 and 22 psi. I believe this to be happening as the return line is 1/2 way to the bottom of the canister and the AD has to pump return fuel against the head pressure of a full tank.
However, I never even get close to 0 psi at WOT as was on the OEM fuel pump.
Any questions, I'll answer as best as possible.
07-13-2008, 02:19 PM
#3
NICE JOB BUDDY!!!!
I like the 5/8" tubing you used...thats pretty good looking tubing.
I love seeing all these different versions of the canister mod.
the only thing that caught my eye was that you used hose clamps on the push-loc fittings!!! thats a pretty big no, no, the hose clamps can/will cut into the hose and cause leaks or air to be sucked it! you can use clamps on a barb fitting but not push-locs. keep an eye on those fittings.
sorry not trying to be rude..just pointing out something that "may" cause you issues later down the road.
07-13-2008, 02:30 PM
#4
Registered User
Thread Starter
Join Date: Jul 2003
Location: Lloydminster, Alberta, Canada
Posts: 2,066
Likes: 0
Received 0 Likes
on
0 Posts
NICE JOB BUDDY!!!!
I like the 5/8" tubing you used...thats pretty good looking tubing.
I love seeing all these different versions of the canister mod.
the only thing that caught my eye was that you used hose clamps on the push-loc fittings!!! thats a pretty big no, no, the hose clamps can/will cut into the hose and cause leaks or air to be sucked it! you can use clamps on a barb fitting but not push-locs. keep an eye on those fittings.
sorry not trying to be rude..just pointing out something that "may" cause you issues later down the road.
I like the 5/8" tubing you used...thats pretty good looking tubing.
I love seeing all these different versions of the canister mod.
the only thing that caught my eye was that you used hose clamps on the push-loc fittings!!! thats a pretty big no, no, the hose clamps can/will cut into the hose and cause leaks or air to be sucked it! you can use clamps on a barb fitting but not push-locs. keep an eye on those fittings.
sorry not trying to be rude..just pointing out something that "may" cause you issues later down the road.
Thanks, and thanks for the heads up on that Mark.
In most cases, I just could not get the hose all the way on those push locks - heat, lube, pushing like a bugger = no go. So, as an extra measure, I put the clamps on to make darn well sure there'd be no leaks. They are only snug as the pics show and I used a large number of tie wraps to ensure no vibration whatsoever in the lines. Hopefully, it won't cut through.
 07-25-2008, 07:59 PM
#5
Registered User
Thread Starter
Join Date: Jul 2003
Location: Lloydminster, Alberta, Canada
Posts: 2,066
Likes: 0
Received 0 Likes
on
0 Posts
Fuel Canister Mods
I see some posts asking about fuel canister mods in other threads so I'll bump this tread.
Update: I'm getting weird FP readings intermittently even on a fuel tank. I caught the wire with a wrench during the installation. I'm going to start there.
Update: I'm getting weird FP readings intermittently even on a fuel tank. I caught the wire with a wrench during the installation. I'm going to start there.
08-10-2008, 10:07 AM
#6
Registered User
Thread Starter
Join Date: Jul 2003
Location: Lloydminster, Alberta, Canada
Posts: 2,066
Likes: 0
Received 0 Likes
on
0 Posts
Update on fuel pressure issue: The light duty fuel sender that came with my Commander was not up to the task - it is a common issue. I talked to Justin at Quadzilla, he sent me up a heavy duty sender - workin' like a hot darn now.
-------------------------------------------------------------------------
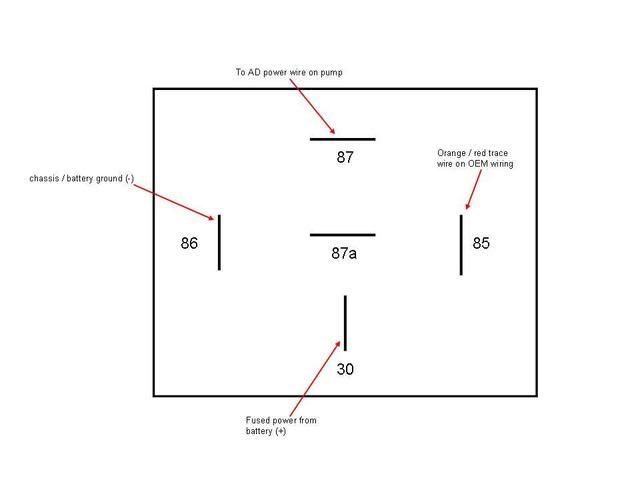
Here's a simple relay wiring diagram for AD pumps. It doesn't matter whether it's an AD100 or AD150, or raptors, as long as you have an OEM in tank pump. Relay terminal 87a stays open (no wire connected). It is easiest just to ditch all that mess that AD supplies in the wiring harness and run your own wires like this - much cleaner install too:
-------------------------------------------------------------------------
Here's a simple relay wiring diagram for AD pumps. It doesn't matter whether it's an AD100 or AD150, or raptors, as long as you have an OEM in tank pump. Relay terminal 87a stays open (no wire connected). It is easiest just to ditch all that mess that AD supplies in the wiring harness and run your own wires like this - much cleaner install too:
08-10-2008, 12:30 PM
#7
Registered User
Join Date: Dec 2005
Location: Draper, UT
Posts: 465
Likes: 0
Received 0 Likes
on
0 Posts
So, you're fuel pressure readings are steady now? I've got the DiProcol gauge and mine fluctuates between 12-15psi. Whereas before, with the Walbro, it would hold a steady 15 with little to no fluctuation.
So yours was cured with the heavy duty sender?
So yours was cured with the heavy duty sender?
Trending Topics
08-10-2008, 02:24 PM
#8
Registered User
Thread Starter
Join Date: Jul 2003
Location: Lloydminster, Alberta, Canada
Posts: 2,066
Likes: 0
Received 0 Likes
on
0 Posts
My pressure readings are actually between 17 & 21 psi while varying accelerator position with in town driving / shifting gears. With the cruise on the highway, it usually stays put at 18 psi. I am confidently going to submit the variation in fuel pressure for the shifting, and in town driving is a direct result between two functions. These are the changes in fuel requirements because my truck is a manual, along with how far into the canister my return line is as there is alot of head pressure of a full tank that the return line has to work against to dump the extra fuel, so my pressure relief valve is constantly opening and closing depending on requirements.
This is nothing scientific, just my twisted logical thinking.
The heavy duty sender cured the pressure fluctuation of 0-51 psi for sure - the light duty sender was done.
Also, I believe the fluctuation is more pronounced because it is a digital guage. I am led to believe this pressure variation occurs in everyones' systems to a certain degree, but I think that on a mechanical guage it is just not as noticeable as the needle doesn't adjust as fast.
01-10-2009, 11:13 AM
#10
Registered User
Thread Starter
Join Date: Jul 2003
Location: Lloydminster, Alberta, Canada
Posts: 2,066
Likes: 0
Received 0 Likes
on
0 Posts
01-10-2009, 11:19 AM
#12
Registered User
Thread Starter
Join Date: Jul 2003
Location: Lloydminster, Alberta, Canada
Posts: 2,066
Likes: 0
Received 0 Likes
on
0 Posts
It's teflon - will never degrade submerged in diesel for as long as the truck is in my possession. I had to order it through a hose shop - Norwesco Industries Ltd here in Edmonton. Unfortunately, not cheap, up here anyway.
01-10-2009, 11:23 AM
#13
Old Mopar Aficionado Extraordinaire

Join Date: Oct 2008
Location: North West Jorsey
Posts: 730
Likes: 0
Received 0 Likes
on
0 Posts
What size was the tube ID and what size fittings did you use in the bulkhead on the sending unit. I'll have to dig for the tubing
01-10-2009, 11:29 AM
#14
Registered User
Thread Starter
Join Date: Jul 2003
Location: Lloydminster, Alberta, Canada
Posts: 2,066
Likes: 0
Received 0 Likes
on
0 Posts
Tube is 5/8" ID. fittings for the bulkhead fittings were obtained from a hydraulic shop - 1/2" ID & 5/8" OD so 1/2" ID is maintained throughout the suction line.
01-10-2009, 01:21 PM
#15
Registered User
Thread Starter
Join Date: Jul 2003
Location: Lloydminster, Alberta, Canada
Posts: 2,066
Likes: 0
Received 0 Likes
on
0 Posts
I guess I should update this now too. I further had issue with the heavy duty sender about 2 months down the road. After replacing the sender and adding a snubber from Autometer inline, my pressure is now at 17/18 psi steady. If -30* outside, then 14 psi until the fuel warms up a bit.