
What did you do to your Gen 1 today?


Registered User
Joined: Dec 2011
Posts: 299
Likes: 5
From: Montucky
Installed the steering box frame brace early this morning - bottom most bolt wouldn't budge till coffee made me realize I had forgotten it was a splined bolt like a wheel stud. Gorilla torqued the bolts, sorry no pics, laying on my back under a greasy b$tch is what I do without a camera.
Then I installed some DRW tailgate running lamps, hoping to better my lowly SRW truck.
Used thrashingcows spacing photograph...
Fished a single 16ga wire, and spliced the bulb leads into 5 individual loops, soldered, taped, etc. etc.

Ran the now loomed wire with an inline weatherproof quick disconnect under & into the tail lamp housing, and done.

Then, since I was still not in the same category as a blue blooded LE truck, I decided to add a cargo lamp to my poor cousin wannabe SE.
A few minutes with a cutting wheel...

Even SE trucks came with the cargo lamp switch & wires in the harness; imagine that!


j.fonder doesn't even realize I stole his freshly painted steering brace & an LE cargo lamp from his workbench
Finally -

Then I installed some DRW tailgate running lamps, hoping to better my lowly SRW truck.
Used thrashingcows spacing photograph...
Fished a single 16ga wire, and spliced the bulb leads into 5 individual loops, soldered, taped, etc. etc.
Ran the now loomed wire with an inline weatherproof quick disconnect under & into the tail lamp housing, and done.
Then, since I was still not in the same category as a blue blooded LE truck, I decided to add a cargo lamp to my poor cousin wannabe SE.
A few minutes with a cutting wheel...
Even SE trucks came with the cargo lamp switch & wires in the harness; imagine that!
j.fonder doesn't even realize I stole his freshly painted steering brace & an LE cargo lamp from his workbench
Finally -
Registered User
Joined: Jan 2015
Posts: 541
Likes: 86
From: Outdoors
Thx; yes, stripped an inch of the black/yellow wire and spliced/soldered/taped in the wire from the QD.
Don't own/use scotch locks :-)
I put the QD weather pack just inside the housing so I don't have to unscrew the lens when I remove the tailgate.
Don't own/use scotch locks :-)
I put the QD weather pack just inside the housing so I don't have to unscrew the lens when I remove the tailgate.


Registered User
Joined: Sep 2015
Posts: 31
Likes: 13
From: North Dallas, TX
Today, I replaced all of the wiper bushings. Installed, and then went to put the wipers on..... put the driver post on passenger side, passenger post on driver side.
Currently, no wipers on the blue truck. Will have to take apart, and reinstall tomorrow.
Wipers look good though, put a nice coat of flat black on the wiper arms.
Currently, no wipers on the blue truck. Will have to take apart, and reinstall tomorrow.
Wipers look good though, put a nice coat of flat black on the wiper arms.

Administrator


Joined: Nov 2004
Posts: 4,084
Likes: 235
From: Southern California
Today, I replaced all of the wiper bushings. Installed, and then went to put the wipers on..... put the driver post on passenger side, passenger post on driver side.
Currently, no wipers on the blue truck. Will have to take apart, and reinstall tomorrow.
Wipers look good though, put a nice coat of flat black on the wiper arms.
Currently, no wipers on the blue truck. Will have to take apart, and reinstall tomorrow.
Wipers look good though, put a nice coat of flat black on the wiper arms.
I did that, could not figure out why I was wiping my drivers side window.
Registered User


Joined: Dec 2010
Posts: 6,838
Likes: 1,683
From: Land of the Toxic Avenger

Registered User
Joined: Aug 2013
Posts: 4,918
Likes: 603
From: Tulsa, OK
Registered User
Joined: Sep 2015
Posts: 31
Likes: 13
From: North Dallas, TX
Wiper bushings replaced, posts the right spot, and new bosch wipers sitting about an inch off the seal.
Helpful hints:
When you go to remove the mechanism, just pop of the bushing connected to the motor.
Undo the bolts for the posts and push the posts thru.
Slide everything to the passenger side, and pull out from passenger side. There is more room.
Note the direction of the bushings to put them back in the same way.
Used a C-clamp and large socket as a press to put in bushings.
Used C-clamp to press bushings onto posts. Except motor bushing, channel locks.
Sorry no pics, was to focused on getting it right this time.
Registered User
Joined: May 2005
Posts: 2,867
Likes: 536
Spent all of today attempting to install new drums and shoes, both raybestos. Swap out of old shoes to new went well, hub to drums and re set the wheel studs went well, seal installs, etc., etc, till it came time to slip the drums onto the shoes. Both sides a very snug fit, and both sides had the stars wheel adjusters pulled all the way in as far as it could go, and still a snug fit. Once I got them on, trying to spin the drums was doable, but labor intensive. By advice of T man, I withdrew the e- brake cable, which helped some. So it felt like it helped, so I thought I'd go for a 5 mile jaunt round the neighborhood, and ease these brakes in, but still gave it a couple of hard and quick stops. When I get home, the drums are at 200 degrees!!! Guess I'm gonna have to tear into them again and see where I went wrong
Registered User
Joined: Aug 2013
Posts: 4,918
Likes: 603
From: Tulsa, OK
Spent all of today attempting to install new drums and shoes, both raybestos. Swap out of old shoes to new went well, hub to drums and re set the wheel studs went well, seal installs, etc., etc, till it came time to slip the drums onto the shoes. Both sides a very snug fit, and both sides had the stars wheel adjusters pulled all the way in as far as it could go, and still a snug fit. Once I got them on, trying to spin the drums was doable, but labor intensive. By advice of T man, I withdrew the e- brake cable, which helped some. So it felt like it helped, so I thought I'd go for a 5 mile jaunt round the neighborhood, and ease these brakes in, but still gave it a couple of hard and quick stops. When I get home, the drums are at 200 degrees!!! Guess I'm gonna have to tear into them again and see where I went wrong

Banned
Joined: Aug 2015
Posts: 884
Likes: 93
From: Jacksonville, FL
put one of these in the corner of my windshield. my grandfather owned a mechanic shop and wrecking yard. I have a stack of these things that my dad found and mailed to me. I used to love walking through the yard when I was a kid, more 60s impalas than you could count! his wrecker was a 1948 dodge with a homemade hoist setup on the back for towing cars. dad still has the truck, he wants to do a very rough "restore" on it with a 6bt. my grandpa didn't have "nice" things, so we kind of decided a full on restoration just wouldn't be right.
these are ~30 years old
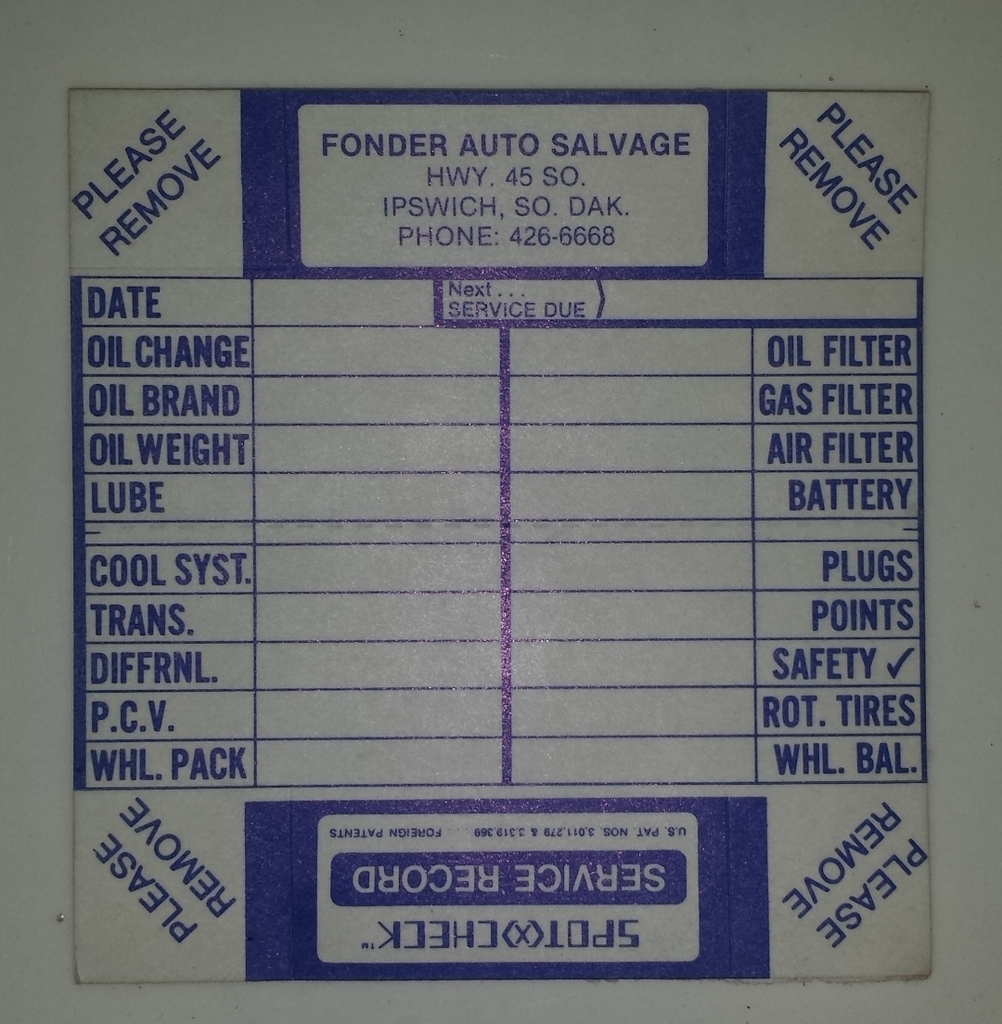
these are ~30 years old
