1st Gen. Ram - All Topics Discussion for all Dodge Rams prior to 1994. This includes engine, drivetrain and non-drivetrain discussions. Anything prior to 1994 should go in here.

No Reverse after rebuild

Thread Tools
 
Search this Thread
 
Old 05-19-2023, 11:13 PM
  #1  
Registered User
Thread Starter
 
ScubaSteveCA's Avatar
 
Join Date: Apr 2018
Location: Orange County, CA
Posts: 163
Received 72 Likes on 45 Posts
No Reverse after rebuild

Rebuilt my 46rh. I thought I double triple checked everything during assembly, but I got it all back together and I have no Reverse. It made a little screech sound on the first attempt, now just no rearward progress. I do have drive gears and park and neutral seem fine.

Checked that I start in park and neutral, so thinking linkage adjustment is fine.

Checked fluid level after some time idling in N to make sure TC was full.

Next step would be to drop the pan and verify band adjustment on the rear band?

Anyone been through this process?
Old 05-20-2023, 12:55 PM
  #2  
Registered User
 
Sheep Herder's Avatar
 
Join Date: Oct 2019
Location: East Central MO
Posts: 114
Received 69 Likes on 50 Posts
I would guess it's the wave snap ring in overdrive clutch pack. It must be replaced with a new every rebuild.

You can just drop overdrive section to get to it, without taking out whole tranny.
The following users liked this post:
ScubaSteveCA (05-20-2023)
Old 05-20-2023, 01:22 PM
  #3  
Registered User
Thread Starter
 
ScubaSteveCA's Avatar
 
Join Date: Apr 2018
Location: Orange County, CA
Posts: 163
Received 72 Likes on 45 Posts
Originally Posted by Sheep Herder
I would guess it's the wave snap ring in overdrive clutch pack. It must be replaced with a new every rebuild.

You can just drop overdrive section to get to it, without taking out whole tranny.
Thanks for the idea. I replaced it with new. Just checked my kit. I don't remember installing the OD shaft spacer in this picture. Maybe I did it was 3 months ago and just part matched it and thought it was a seal. How would OD issue affect R operation?

Old 05-20-2023, 02:16 PM
  #4  
Registered User
 
Sheep Herder's Avatar
 
Join Date: Oct 2019
Location: East Central MO
Posts: 114
Received 69 Likes on 50 Posts
You wouldn't change the spacer unless you checked clearances in OD section, and it called for a different thickness of spacer.

Also might want to check clearance for correct OD piston spacer..


Last edited by Sheep Herder; 05-20-2023 at 02:48 PM. Reason: Spelling
Old 05-20-2023, 02:46 PM
  #5  
Registered User
 
Sheep Herder's Avatar
 
Join Date: Oct 2019
Location: East Central MO
Posts: 114
Received 69 Likes on 50 Posts
The direct clutch in OD section is always applied in 1st, 2nd, 3rd, and reverse gears by way of big spring.

OD piston over comes spring tension to release direct clutch, to allow overdrive.

There are 2 snap rings, one wavy, one flat. I would check that wavy one.

You could pressure test rear servo port, before any disassembly.

The following users liked this post:
ScubaSteveCA (05-20-2023)
Old 05-20-2023, 04:16 PM
  #6  
Registered User
Thread Starter
 
ScubaSteveCA's Avatar
 
Join Date: Apr 2018
Location: Orange County, CA
Posts: 163
Received 72 Likes on 45 Posts
I pulled the pan and there was a bit of glitter.
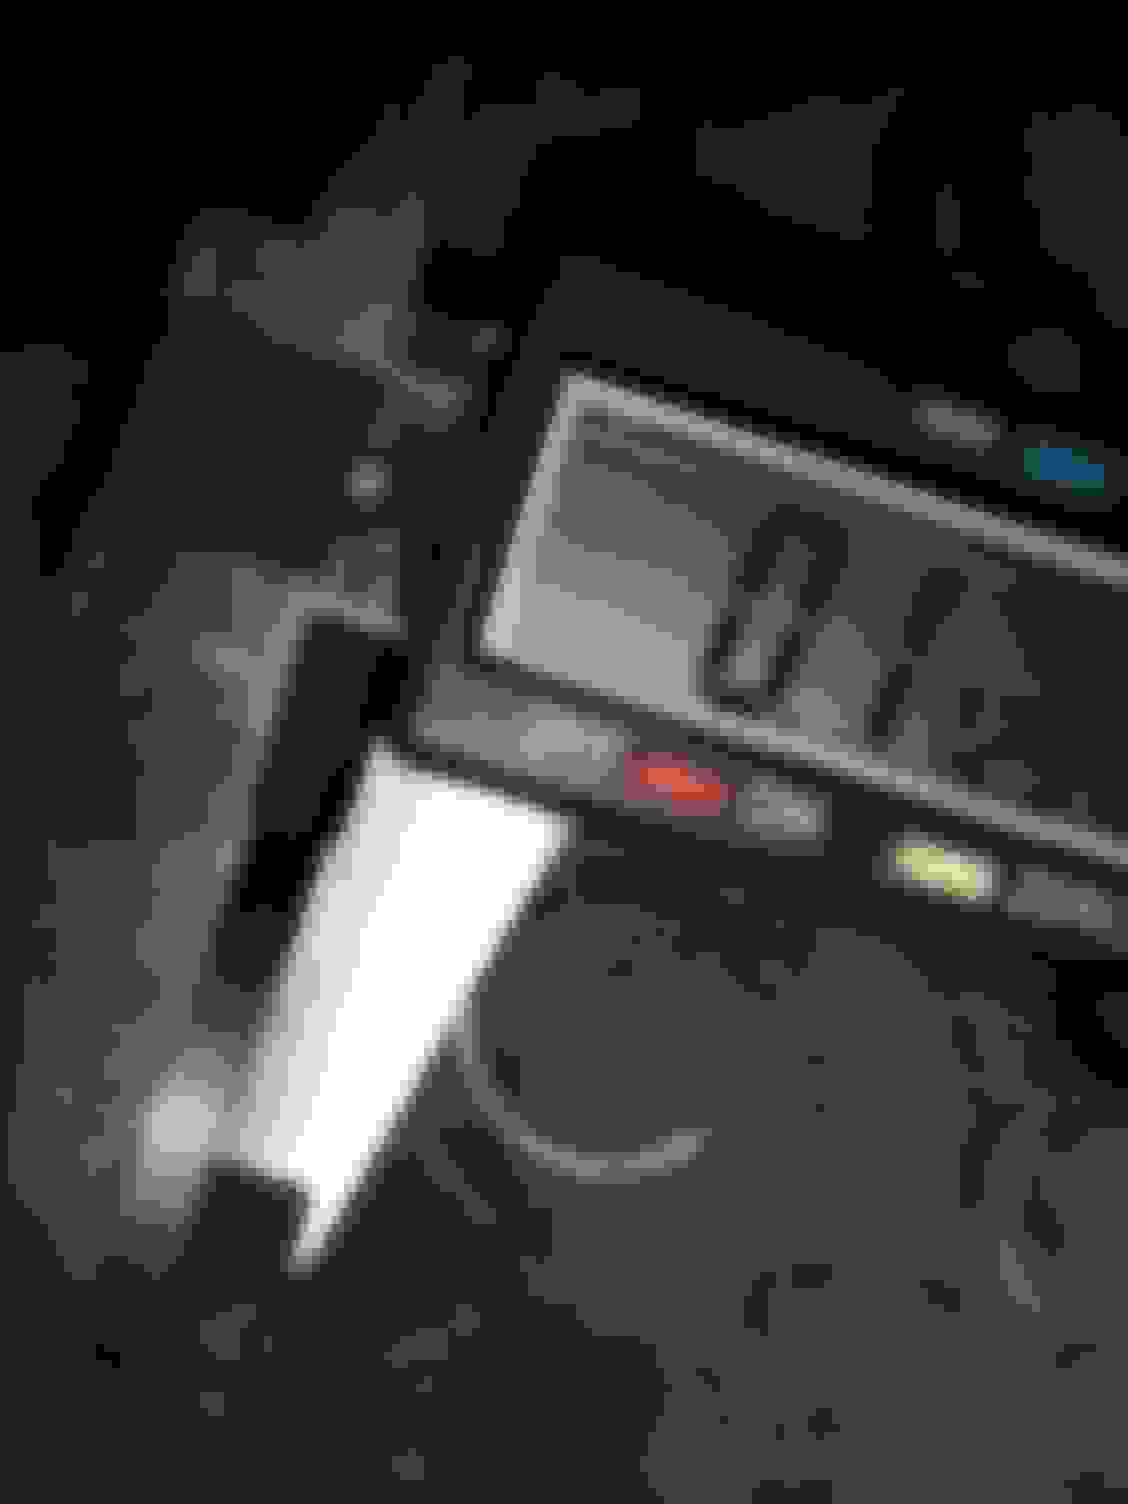
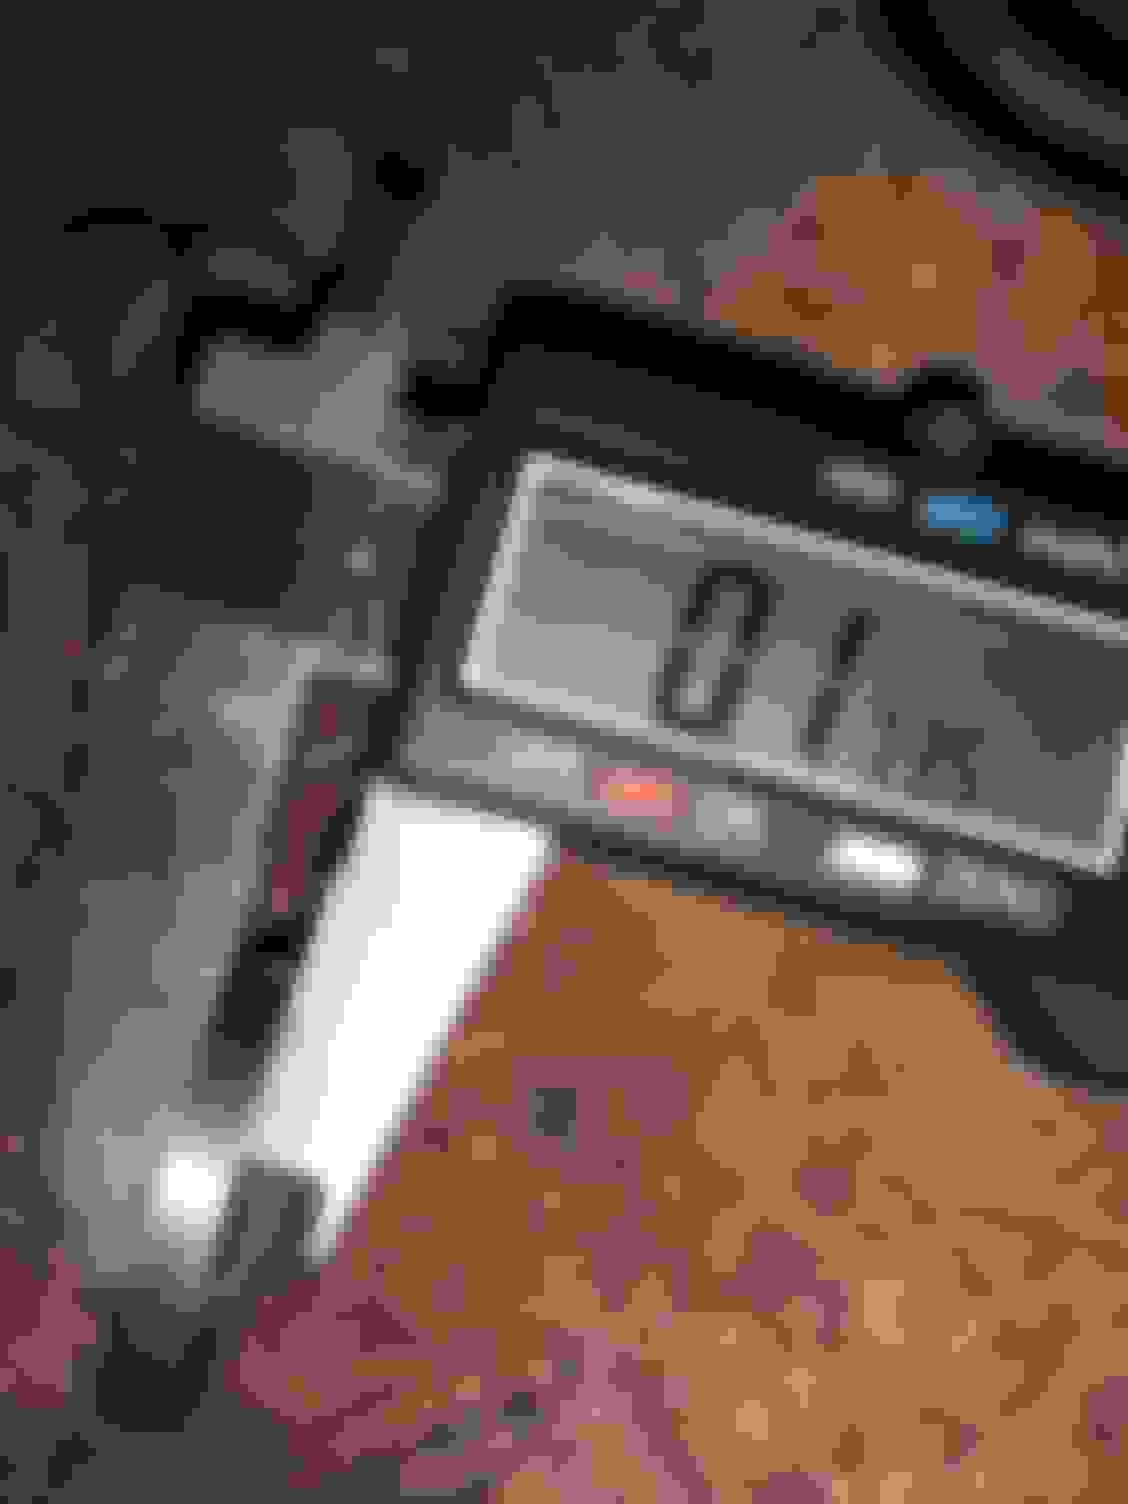
Checked my rear band adjustment, it was a little sloppy, but nothing that should've prevented movement. Maybe 1/8 of a turn difference when I reset it. The rear band piston looked fine too, so I'm thinking the OD section may be the issue based on that info. I didn't see the OD endplay measurement in my notes, I did have a total with and without OD installed (dial indicator)

I'm gonna have to set up a test rig for that pressure port. I don't have a 500psi guage sitting around.

4wd is a pain when it comes to servicing the trans. At least everything is already clean.
Old 05-20-2023, 06:21 PM
  #7  
Registered User
 
Sheep Herder's Avatar
 
Join Date: Oct 2019
Location: East Central MO
Posts: 114
Received 69 Likes on 50 Posts
Clearances for this tranny are pretty important. Really helps if you have the special tools.
Old 05-22-2023, 06:13 PM
  #8  
Registered User
Thread Starter
 
ScubaSteveCA's Avatar
 
Join Date: Apr 2018
Location: Orange County, CA
Posts: 163
Received 72 Likes on 45 Posts
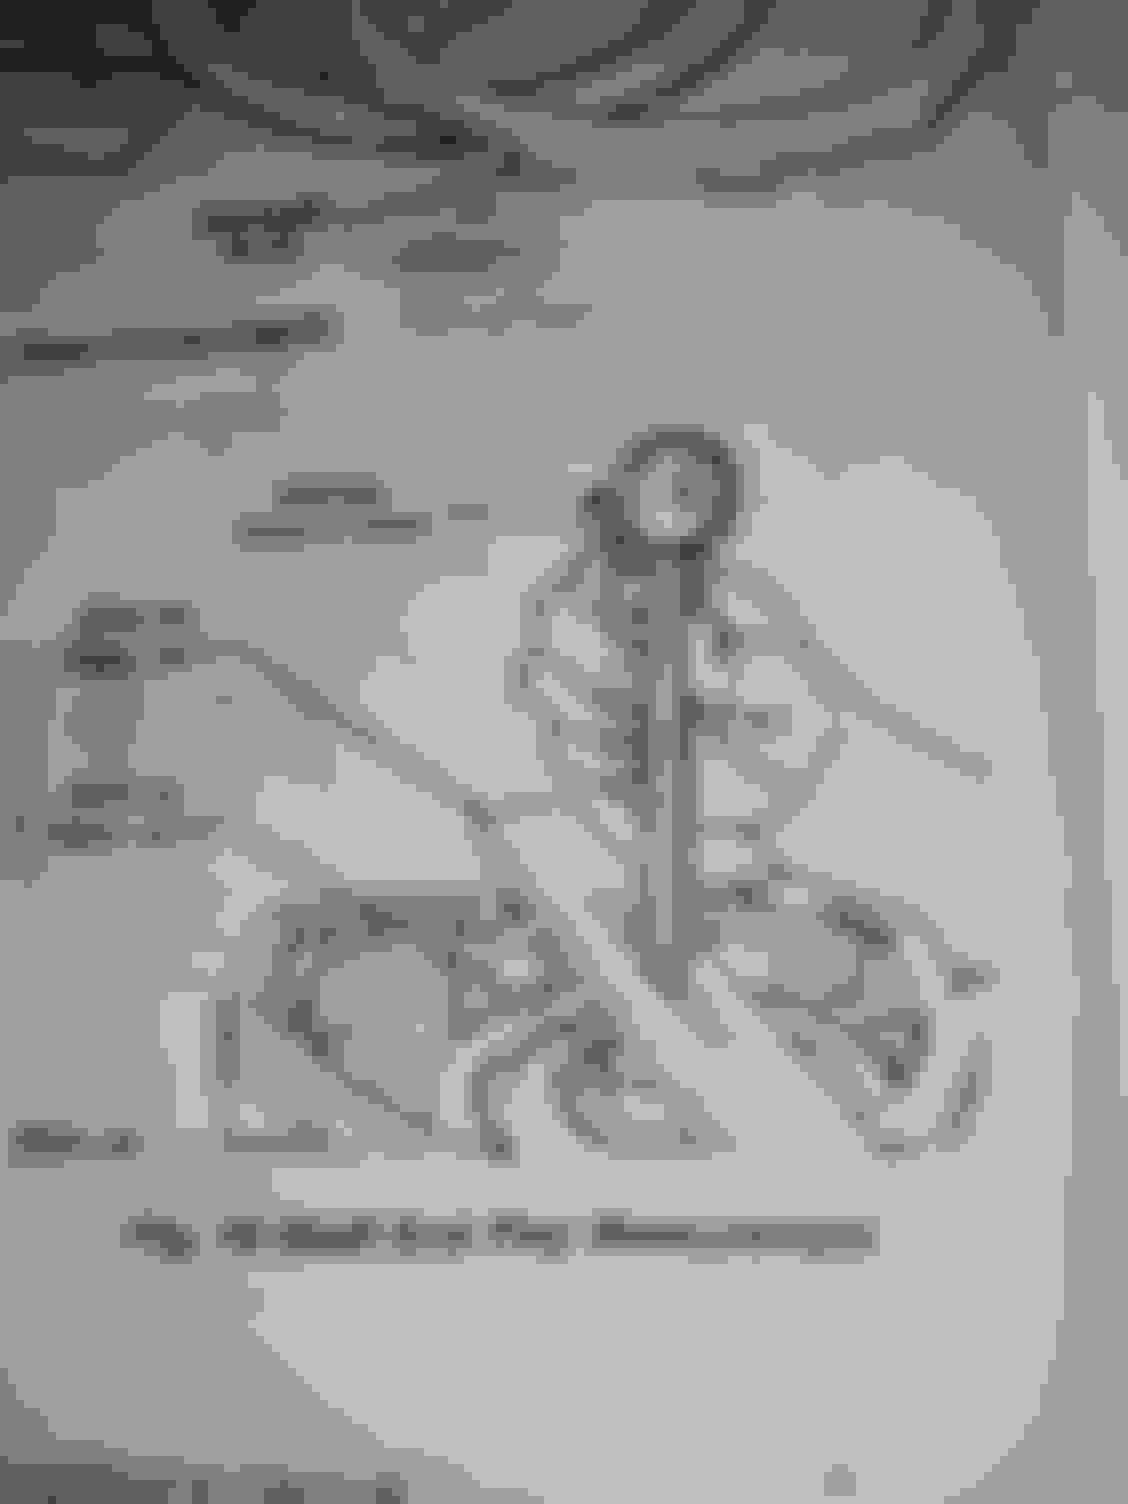
Pulled the OD. Found a problem. See where the gear sits in the teardown picture?


See where it sits now?


I double checked everything is in there per the manual, and that thrust bearings are all facing the right way. Kinda stumped because the internal assembly doesn't call for any additional spacers.
Old 05-22-2023, 07:11 PM
  #9  
Registered User
 
Sheep Herder's Avatar
 
Join Date: Oct 2019
Location: East Central MO
Posts: 114
Received 69 Likes on 50 Posts
Good job!

No selective spacers in the actual OD unit.
The spacer on the intermediate shaft.


This is the selective spacer that sits on top of that thrust bearing, in the overdrive apply piston.


Some shims to make correction if need be.

The following 2 users liked this post by Sheep Herder:
ScubaSteveCA (05-22-2023), thrashingcows (05-23-2023)
Old 05-22-2023, 08:34 PM
  #10  
Registered User
Thread Starter
 
ScubaSteveCA's Avatar
 
Join Date: Apr 2018
Location: Orange County, CA
Posts: 163
Received 72 Likes on 45 Posts
So I've got the measuring jig on order. I'm failing to wrap my head around the discrepancy of where that gear sits. There's all hard parts behind that wire snap ring, why would it sit so much differently?
Old 05-22-2023, 08:46 PM
  #11  
Registered User
 
Sheep Herder's Avatar
 
Join Date: Oct 2019
Location: East Central MO
Posts: 114
Received 69 Likes on 50 Posts
Good question, but something wasn't right before.

Do have a way to make sure all the splines are lined when you compressed the big spring?

An old intermediate shaft or tool 6227-2?
Old 05-22-2023, 09:20 PM
  #12  
Registered User
Thread Starter
 
ScubaSteveCA's Avatar
 
Join Date: Apr 2018
Location: Orange County, CA
Posts: 163
Received 72 Likes on 45 Posts
Originally Posted by Sheep Herder
Good question, but something wasn't right before.

Do have a way to make sure all the splines are lined when you compressed the big spring?

An old intermediate shaft or tool 6227-2?
I cut a piece of shimstock that fits snuggly to make sure the splines stay aligned. Visually after my teardown and reassembly they look aligned and my shimstock slid out with no binding.

The following users liked this post:
Sheep Herder (05-22-2023)
Old 05-22-2023, 10:04 PM
  #13  
Registered User
Thread Starter
 
ScubaSteveCA's Avatar
 
Join Date: Apr 2018
Location: Orange County, CA
Posts: 163
Received 72 Likes on 45 Posts
Originally Posted by Sheep Herder
Good question, but something wasn't right before.
Just to be clear, the original as found photo was from when I originally toredown the trans prior to the rebuild.

I suppose the difference could be the fresh thrust bearings and spring backing plate. But it Looks considerable.
I've got a .198 piston spacer in there now. I'll have to wait for my tool 6311 to arrive
Old 05-22-2023, 10:29 PM
  #14  
Registered User
 
Sheep Herder's Avatar
 
Join Date: Oct 2019
Location: East Central MO
Posts: 114
Received 69 Likes on 50 Posts
And you got both snap rings in when you compressed the big spring?
The little wire one and and a bigger one the goes on top of the clutches
and steels?
The following users liked this post:
ScubaSteveCA (05-23-2023)
Old 05-23-2023, 10:37 AM
  #15  
Registered User
Thread Starter
 
ScubaSteveCA's Avatar
 
Join Date: Apr 2018
Location: Orange County, CA
Posts: 163
Received 72 Likes on 45 Posts
Yes. Got it back in the case and seated the snap ring.(potentially the omitted step last go around) Took some measurements with depth mic. and some 1/2" plate. My numbers were avged to 1.780 so I need a .140 spacer not the .198 that is in there. Hopefully that .060 was what was hanging up my direct clutch engagement.
The following 2 users liked this post by ScubaSteveCA:
Sheep Herder (05-23-2023), thrashingcows (05-23-2023)


Quick Reply: No Reverse after rebuild


All times are GMT -5. The time now is 08:53 AM.