My 47rh swap (bunch of pics and a Vid)
 03-19-2009, 11:29 PM
#1
Chapter President
Thread Starter
My 47rh swap (bunch of pics and a Vid)
Well, i finally finished up my 47rh swap from a A518 and would like to help out anyone else that wishes to do the swap. I would like to start off by saying thanks to Mike (JD730) and Derek (DNRCustoms) if was not for their wealth of knowledge i would have been lost.
I know there is already a write up by Mike in the sticky and i don't want to take any credit away from him. i just thought i would add some more comments and pictures to what he has already stated.
Here it is Mikes original post (the red is my comments):
I know there is already a write up by Mike in the sticky and i don't want to take any credit away from him. i just thought i would add some more comments and pictures to what he has already stated.
Here it is Mikes original post (the red is my comments):
You will need,
1.) The 94-02 bellhousing adaptor which is about 1" thicker than your current one.
here is a comparison
All bolted up
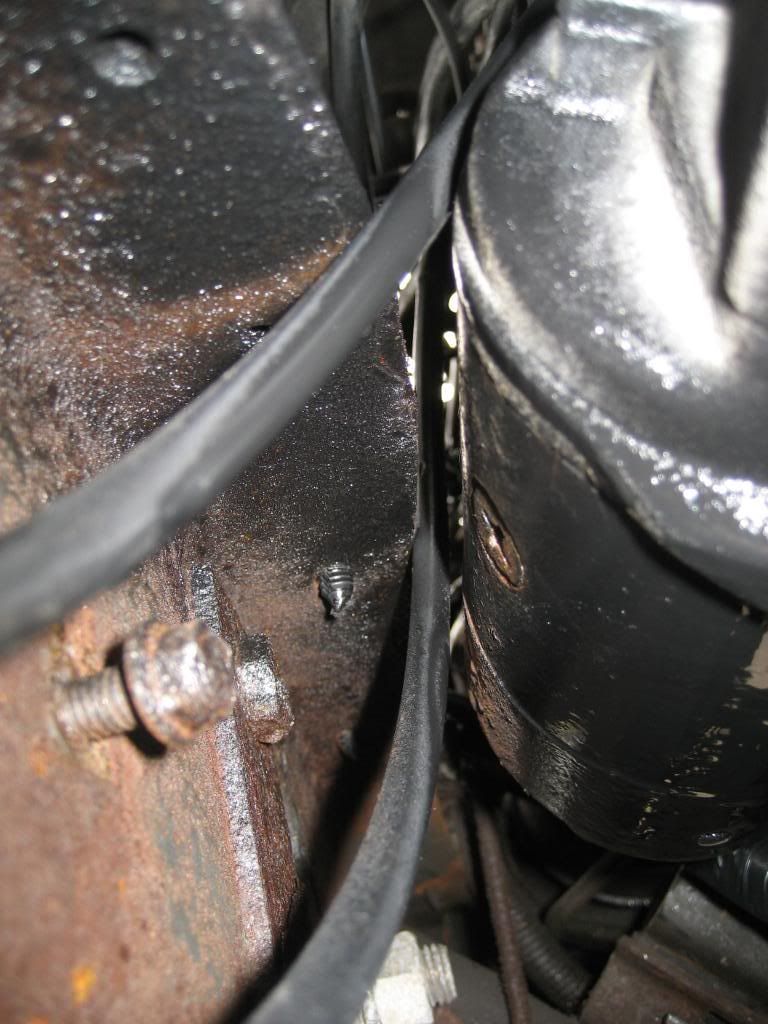
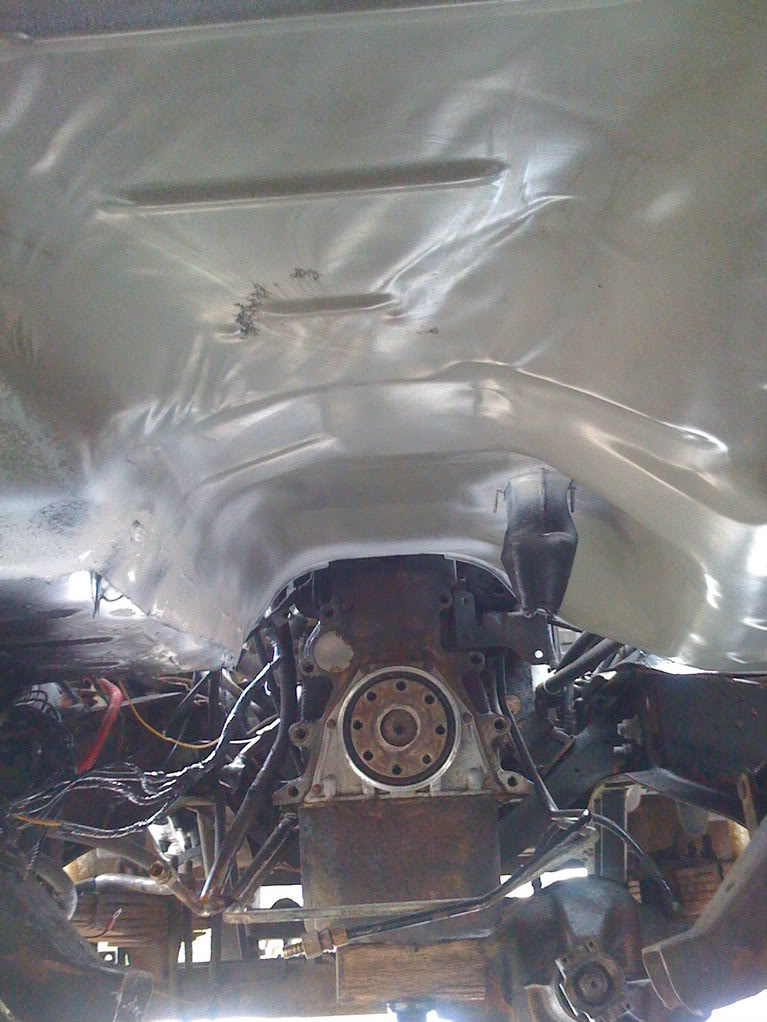
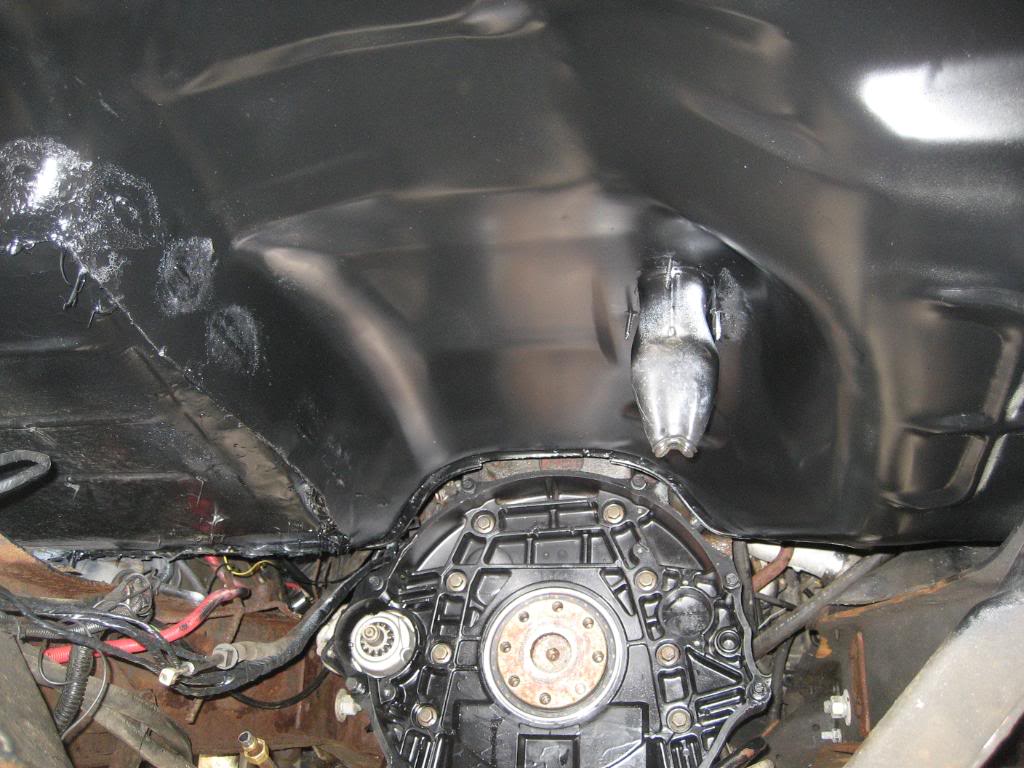
2.) Get the starter that goes with adapter and your going to want to bend (trust me your going to want to after the starter hitting the frame drives you nuts) the frame up slightly where the starter is.
lacking the ability to heat the frame i chose to take my angle grinder and and shave down the frame where the starter is located. There is a bend in the frame that sticks out right where the starter goes.
Here is the clearance afterward
3.) Transmission 47RH from a 94 or 95 truck, diesel prefered, but a V10 unit can be made to work by changing the governer weights in the OD unit if you can't find a diesel setup unit. Not going into that here.
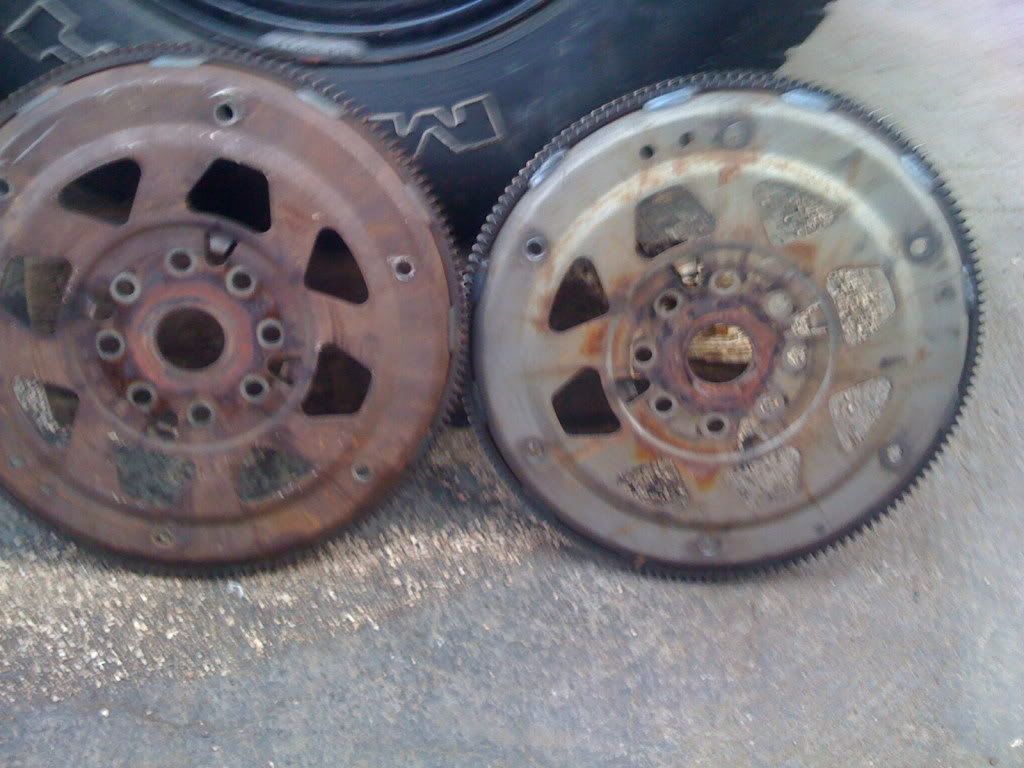
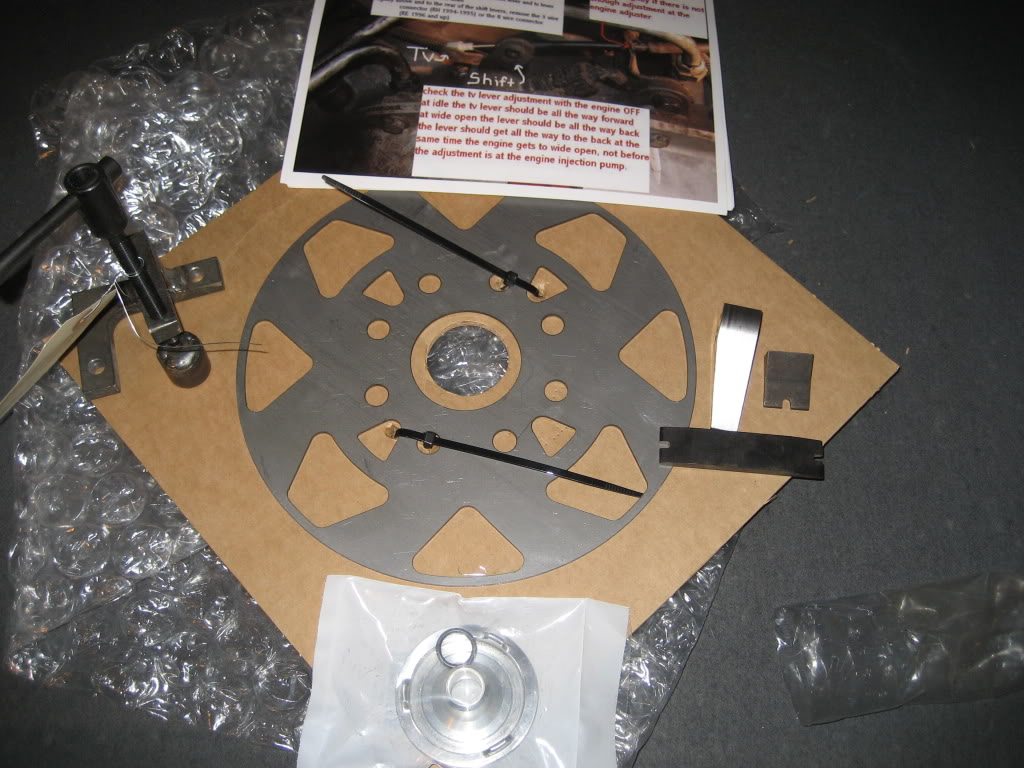
4.) Get the 2nd gen flexplate, either when you get all the other parts or ge a new one.
My two compared, i think the previous owner already had a 2nd gen flexplate so i really did not need it.
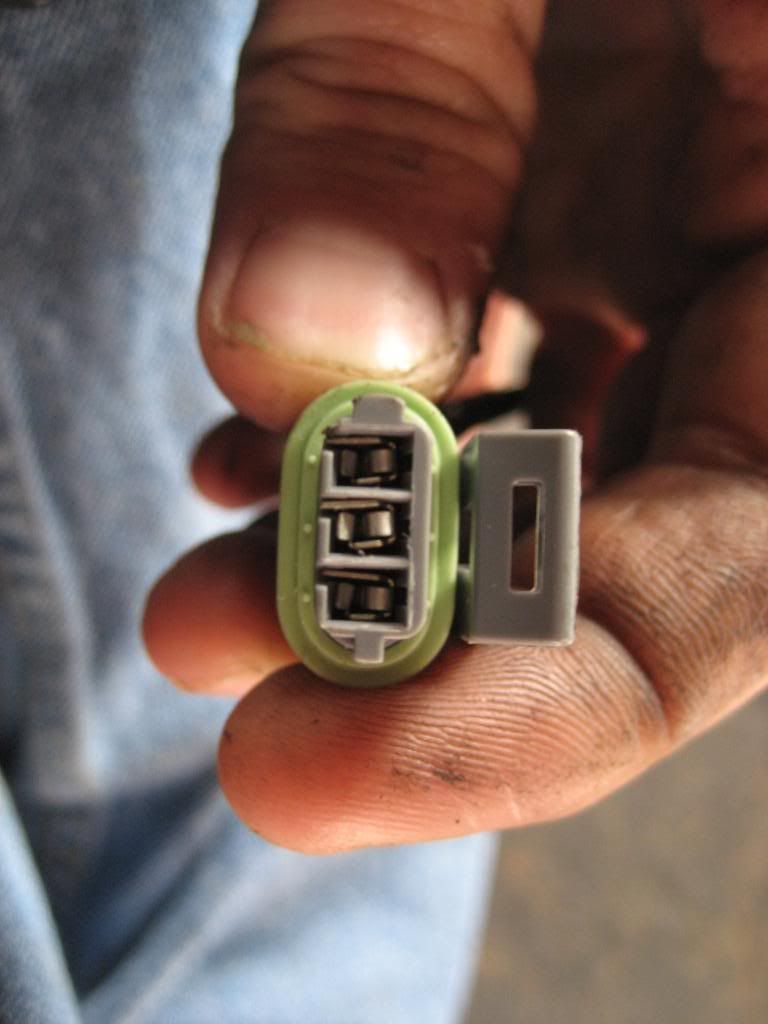
5.) 3 pin connector for lockup/OD functions, get from the junkyard or from these guys if you really can't find one http://www.transmissionsone.com/, just a friendly warning, the page is huge and the connector is at the bottom. At $39 I consider this a last resort, junk yard ones are alot cheaper.
The connector from transmissionone.com
6.) You need to decide at this point what kind of $$$ you can spend on this, can you afford some aftermarket stuff, throw a master rebuild kit at it, a good torque converter and a full valve body and a billet front lever (one that lets you lockup in any forward gear)
1.) The 94-02 bellhousing adaptor which is about 1" thicker than your current one.
here is a comparison
All bolted up
2.) Get the starter that goes with adapter and your going to want to bend (trust me your going to want to after the starter hitting the frame drives you nuts) the frame up slightly where the starter is.
lacking the ability to heat the frame i chose to take my angle grinder and and shave down the frame where the starter is located. There is a bend in the frame that sticks out right where the starter goes.
Here is the clearance afterward
3.) Transmission 47RH from a 94 or 95 truck, diesel prefered, but a V10 unit can be made to work by changing the governer weights in the OD unit if you can't find a diesel setup unit. Not going into that here.
4.) Get the 2nd gen flexplate, either when you get all the other parts or ge a new one.
My two compared, i think the previous owner already had a 2nd gen flexplate so i really did not need it.
5.) 3 pin connector for lockup/OD functions, get from the junkyard or from these guys if you really can't find one http://www.transmissionsone.com/, just a friendly warning, the page is huge and the connector is at the bottom. At $39 I consider this a last resort, junk yard ones are alot cheaper.
The connector from transmissionone.com
6.) You need to decide at this point what kind of $$$ you can spend on this, can you afford some aftermarket stuff, throw a master rebuild kit at it, a good torque converter and a full valve body and a billet front lever (one that lets you lockup in any forward gear)
 03-19-2009, 11:32 PM
#2
Chapter President
Thread Starter
Continued...
(need more words to continue)
(need more words to continue)
I prefer the simple way of hooking it up, get yourself some wire, shrink tubing, soldering equipment, and a switch (you can use 2 as an option). I mounted mine on the dash with a little homemade aluminum bracket. I did 1 switch for lockup intially, but I'm going to 2 so I can control both OD and lockup manually just incase the PCM decides not to shift it into OD when I want it to.
I decided to use a floor mounted dimmer switch to control my lockup. I wired in a led light that illuminates when i am locked up. I really wanted to be able to control the lock up without using my hands. The light is not necessary buy my old lady drives the truck once and awhile and i wanted her to be able to know for sure when it is locked.
Don't mind my floor i am still in the proccess of redoing the interior
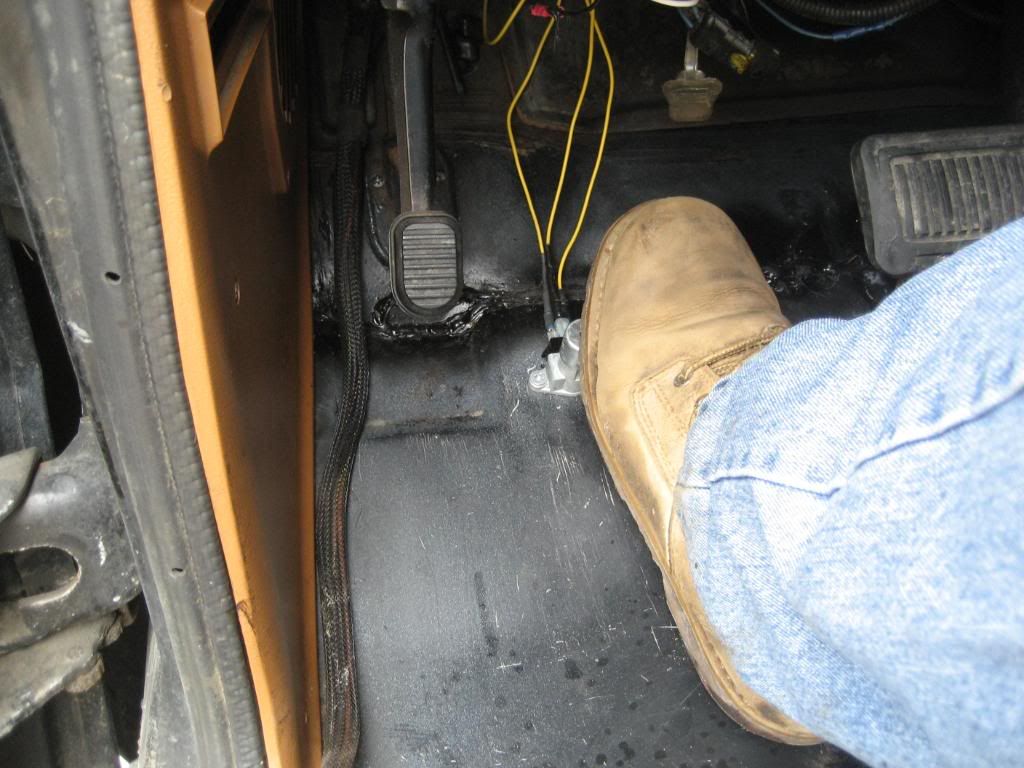
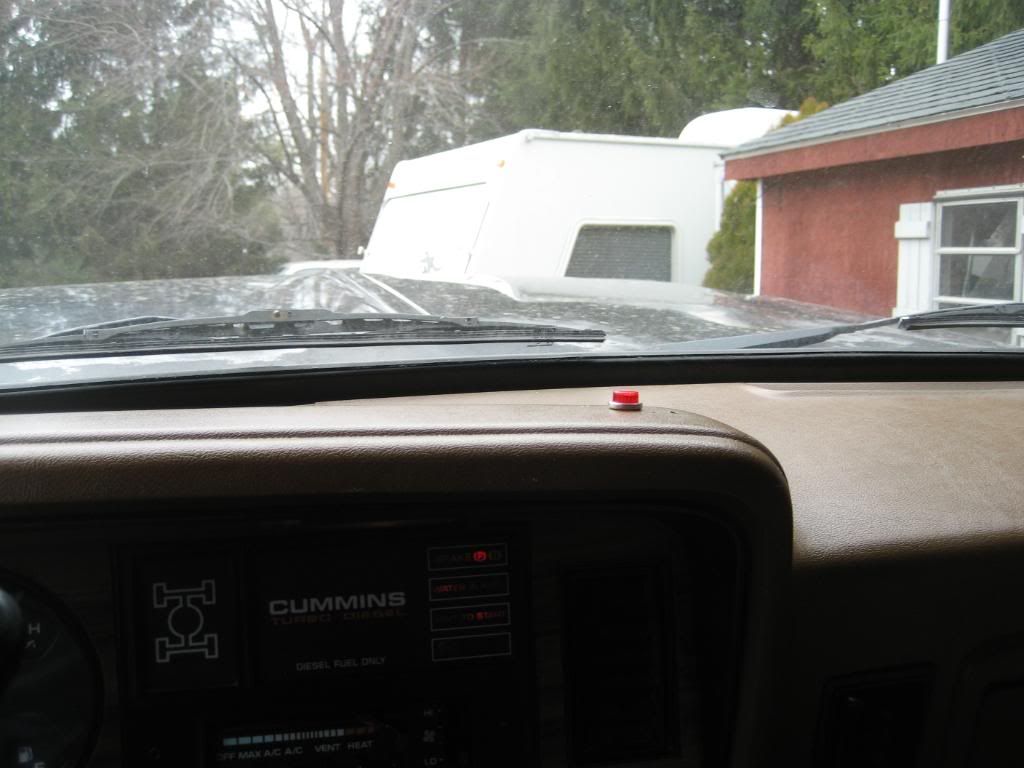
I have to move the location of the light. It is hard to see during the day light. there was already a hole there the exact size that the light needed so i figure i would give it a try
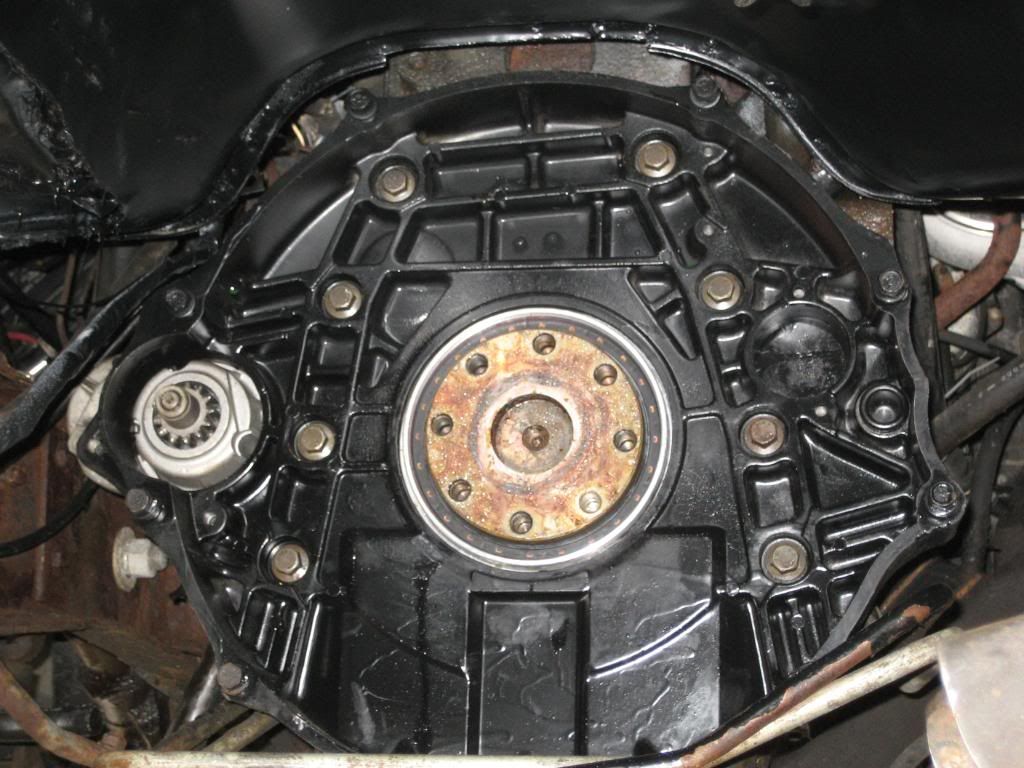
Installation:
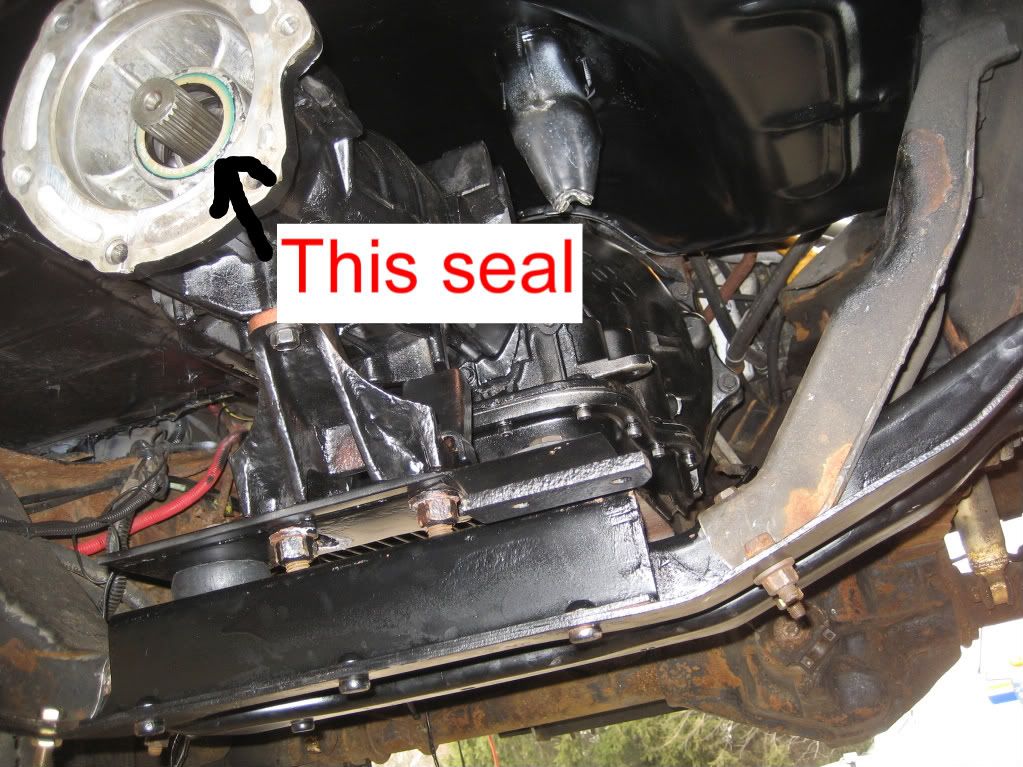
Is it 4 wheel drive or 2 wheel? 2 wheel drive is simpler, no transfer case. On the 4 wheel drive transmissions the T-case from a 94-95 seals with a seal on the T-case input shaft. NP205's have a coupler between the trans and itself and it seals on the flange. I find the easiest thing to do is to pull the seal out and use RTV to seal the flange up. Be aware that there is a drain of sorts on the OD unit that is why you should use RTV a gasket won't seal it.
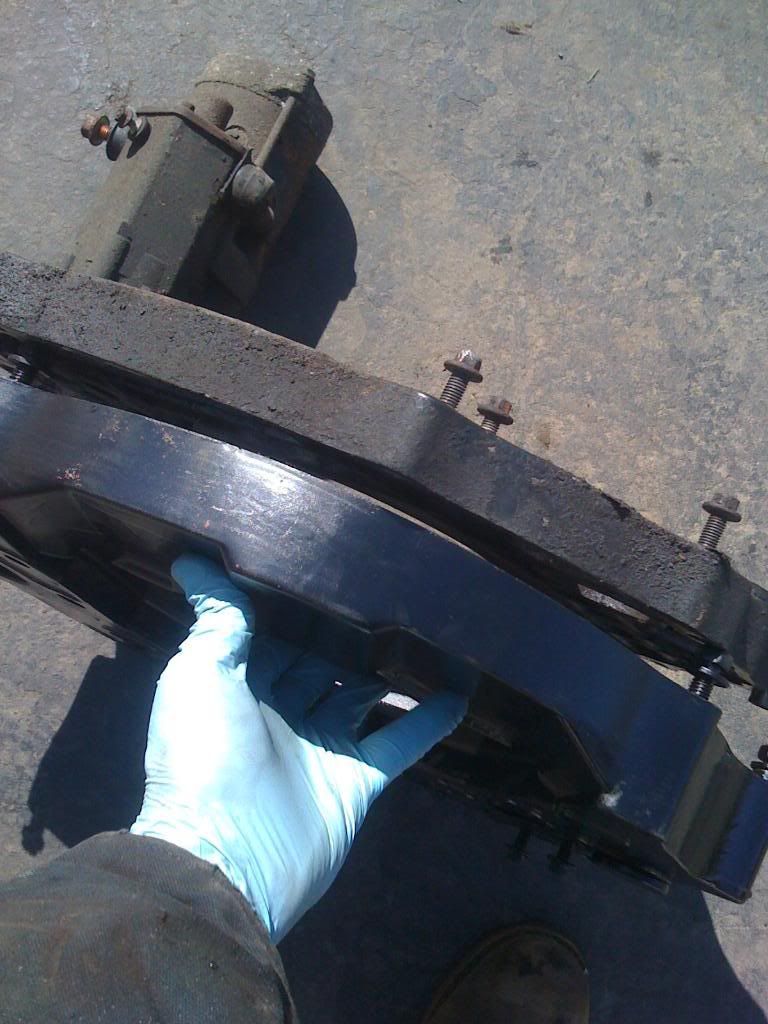
Trans mount:
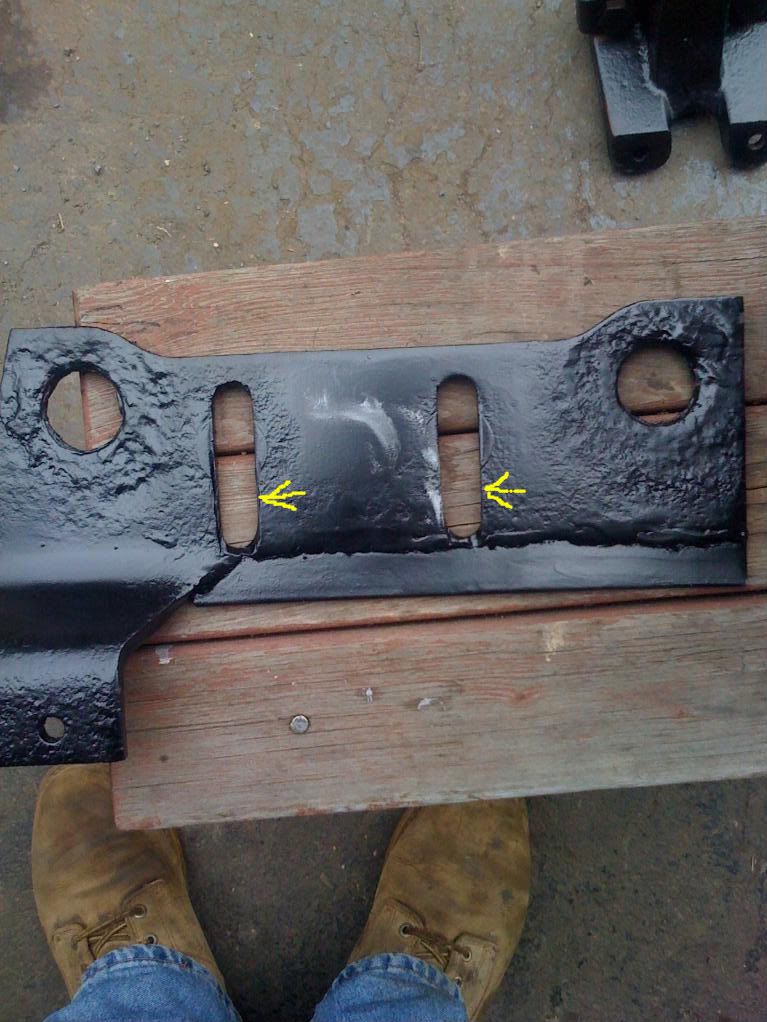
It's going to have to modified slightly, if you or a buddy has a milling machine then its a piece of cake and it will turn out looking pretty decent. If you don't you can use a cutting torch to do it also, won't look as nice, but then again who's going to see it. The slots in trans mount plate need to be lengthed the amount the trans moved back which is about an 1".
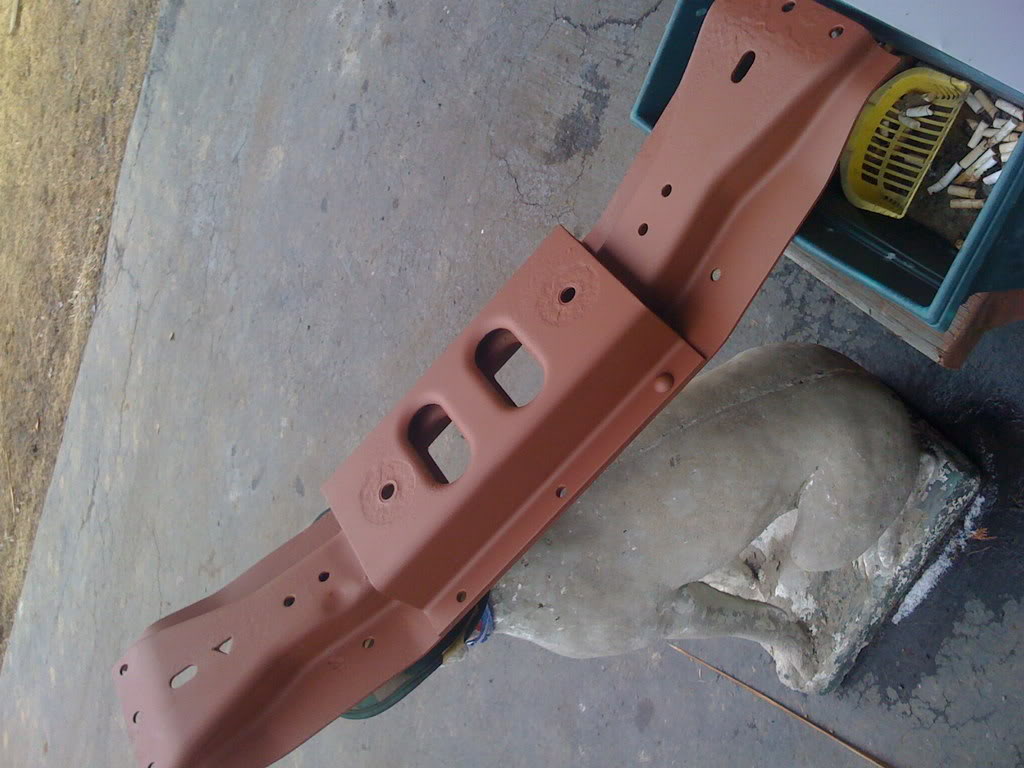
i lacked both a milling machine and a torch so again i used my angle grinder with a cut off wheel. I drilled a hole the same diameter as the slots at the end mount then cut out the gap with the cut off wheel. I also welded a piece of 1" stock to support the mount (probably was not necessary but o well)
Here is mine, the original holes ended at the yellow lines
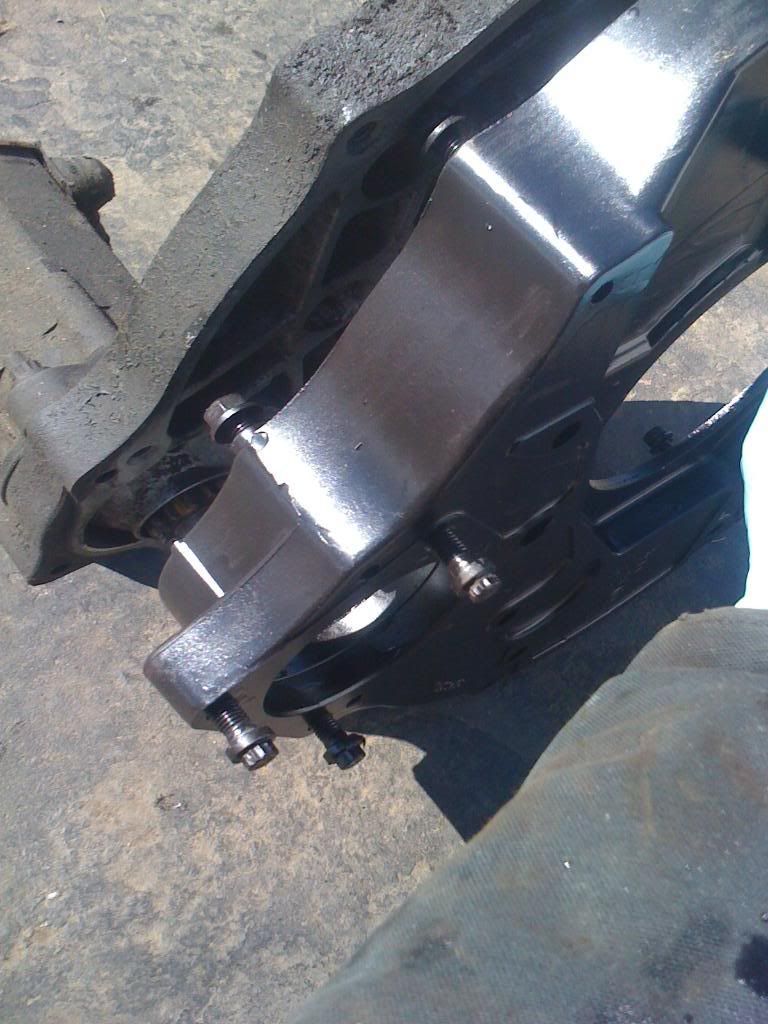
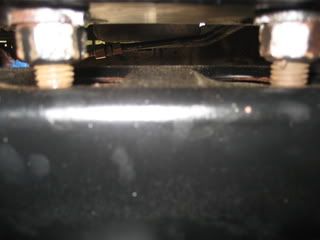
one other thing i noticed was after the trans was mounted is how close the bolts that go though the mount are to the cross member. i think i would consider notching this a little just to be safe
Here is what i mean
Drive shafts:
Depending on the wheel base, you may or may not have to shorten/lengthen the drive shafts, I didn't have to on a club cab. I did have to move the carrier bearing mount rearward an 1" with 1/4" x 2" flat stock.
My rear drive shaft fit fine on my regular cab. I have not hooked the front up yet.
TV bellcrank lever:
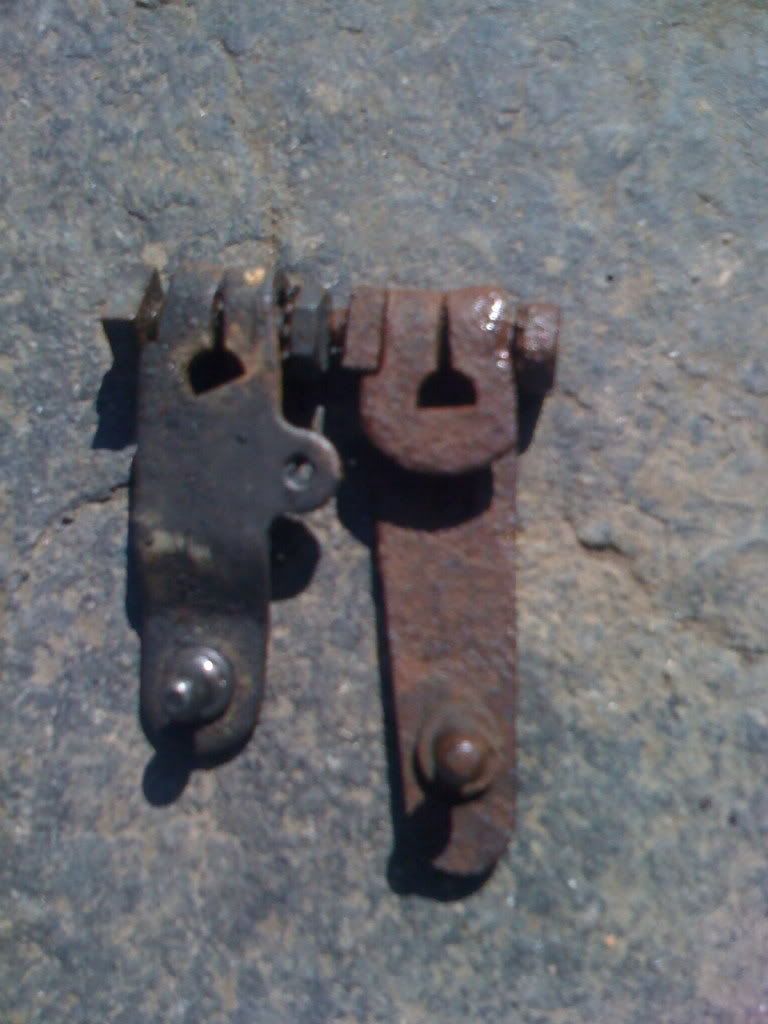
This is VERY important, the 94-95 lever is incorrect for the 1st gen application, won't travel correctly and the trans won't shift right. You will need to take the one off of your current A518 or 727 and put it on the trans going in the truck.
The 1st gen bellcrack lever is clocked different from the 2nd gen. Also the 1st gen T.V. cable uses a push action for T.V. travel vs. the 2nd gen uses a pull action.
Here is a comparison with the 2nd gen on the left (notice the clocking)
Things I didn't do:
I did not move the shifter linkage pivot point on the frame, don't know if there are any issues, but it works fine for me the way it is.
i rotated the pivot point on the frame because the linkage coming from the shifter was rusted not allowing move the pivot point down the linkage. it works but still needs to be tweeked
I haven't reinstalled the skid plate, lack of time and ambition to fab something up to make it fit back in there Me to .
.
Wipe the smile off my face after the first test drive with it.
Wanna, do you think we could get this setup as a sticky for all those who are thinking about doing a swap like this?
Did I forget anything? I hope not.
I decided to use a floor mounted dimmer switch to control my lockup. I wired in a led light that illuminates when i am locked up. I really wanted to be able to control the lock up without using my hands. The light is not necessary buy my old lady drives the truck once and awhile and i wanted her to be able to know for sure when it is locked.
Don't mind my floor i am still in the proccess of redoing the interior
I have to move the location of the light. It is hard to see during the day light. there was already a hole there the exact size that the light needed so i figure i would give it a try
Installation:
Is it 4 wheel drive or 2 wheel? 2 wheel drive is simpler, no transfer case. On the 4 wheel drive transmissions the T-case from a 94-95 seals with a seal on the T-case input shaft. NP205's have a coupler between the trans and itself and it seals on the flange. I find the easiest thing to do is to pull the seal out and use RTV to seal the flange up. Be aware that there is a drain of sorts on the OD unit that is why you should use RTV a gasket won't seal it.
Trans mount:
It's going to have to modified slightly, if you or a buddy has a milling machine then its a piece of cake and it will turn out looking pretty decent. If you don't you can use a cutting torch to do it also, won't look as nice, but then again who's going to see it. The slots in trans mount plate need to be lengthed the amount the trans moved back which is about an 1".
i lacked both a milling machine and a torch so again i used my angle grinder with a cut off wheel. I drilled a hole the same diameter as the slots at the end mount then cut out the gap with the cut off wheel. I also welded a piece of 1" stock to support the mount (probably was not necessary but o well)
Here is mine, the original holes ended at the yellow lines
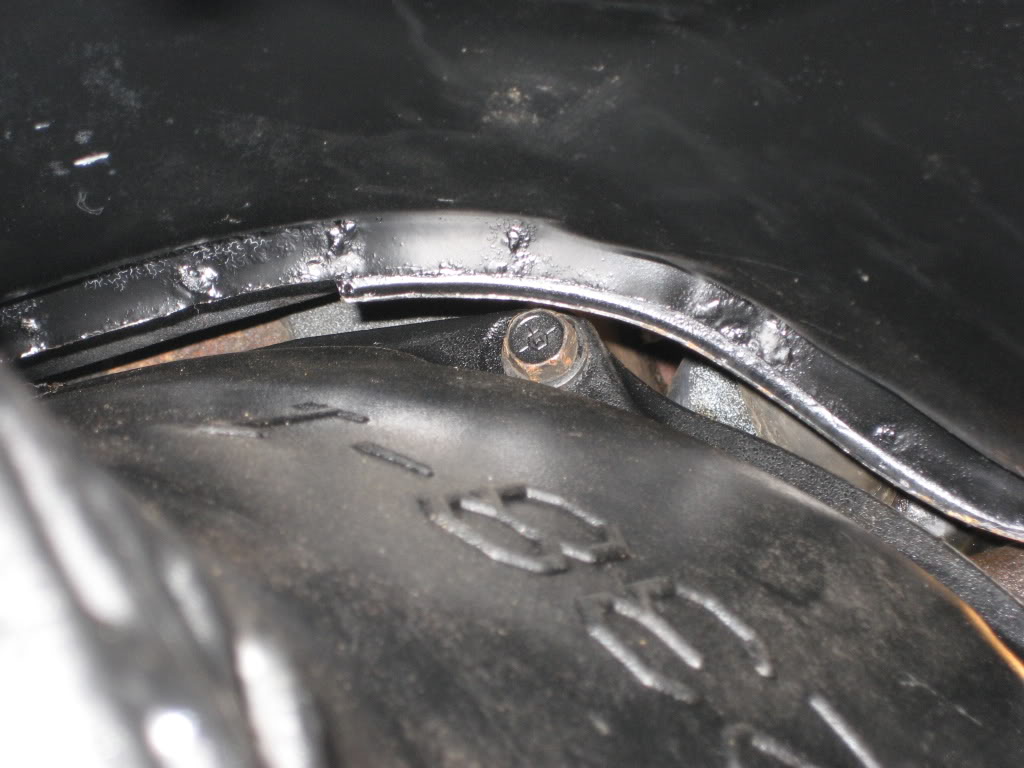
one other thing i noticed was after the trans was mounted is how close the bolts that go though the mount are to the cross member. i think i would consider notching this a little just to be safe
Here is what i mean
Drive shafts:
Depending on the wheel base, you may or may not have to shorten/lengthen the drive shafts, I didn't have to on a club cab. I did have to move the carrier bearing mount rearward an 1" with 1/4" x 2" flat stock.
My rear drive shaft fit fine on my regular cab. I have not hooked the front up yet.
TV bellcrank lever:
This is VERY important, the 94-95 lever is incorrect for the 1st gen application, won't travel correctly and the trans won't shift right. You will need to take the one off of your current A518 or 727 and put it on the trans going in the truck.
The 1st gen bellcrack lever is clocked different from the 2nd gen. Also the 1st gen T.V. cable uses a push action for T.V. travel vs. the 2nd gen uses a pull action.
Here is a comparison with the 2nd gen on the left (notice the clocking)
Things I didn't do:
I did not move the shifter linkage pivot point on the frame, don't know if there are any issues, but it works fine for me the way it is.
i rotated the pivot point on the frame because the linkage coming from the shifter was rusted not allowing move the pivot point down the linkage. it works but still needs to be tweeked
I haven't reinstalled the skid plate, lack of time and ambition to fab something up to make it fit back in there Me to
.Wipe the smile off my face after the first test drive with it.
Wanna, do you think we could get this setup as a sticky for all those who are thinking about doing a swap like this?
Did I forget anything? I hope not.
03-19-2009, 11:34 PM
#3
Chapter President
Thread Starter
A few picture and comments of my own.
As far as upgrades to my 47rh i went with Goerend parts. Got their triple disk converter, valve body and strap & anchor & lever and flex plate insert.
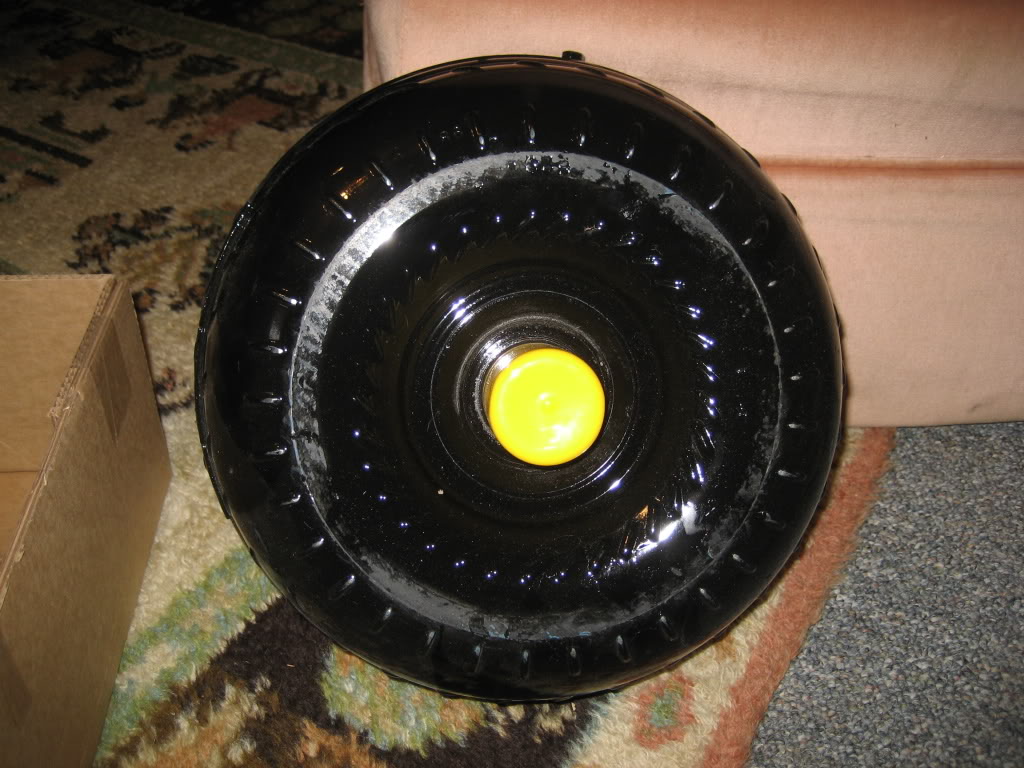
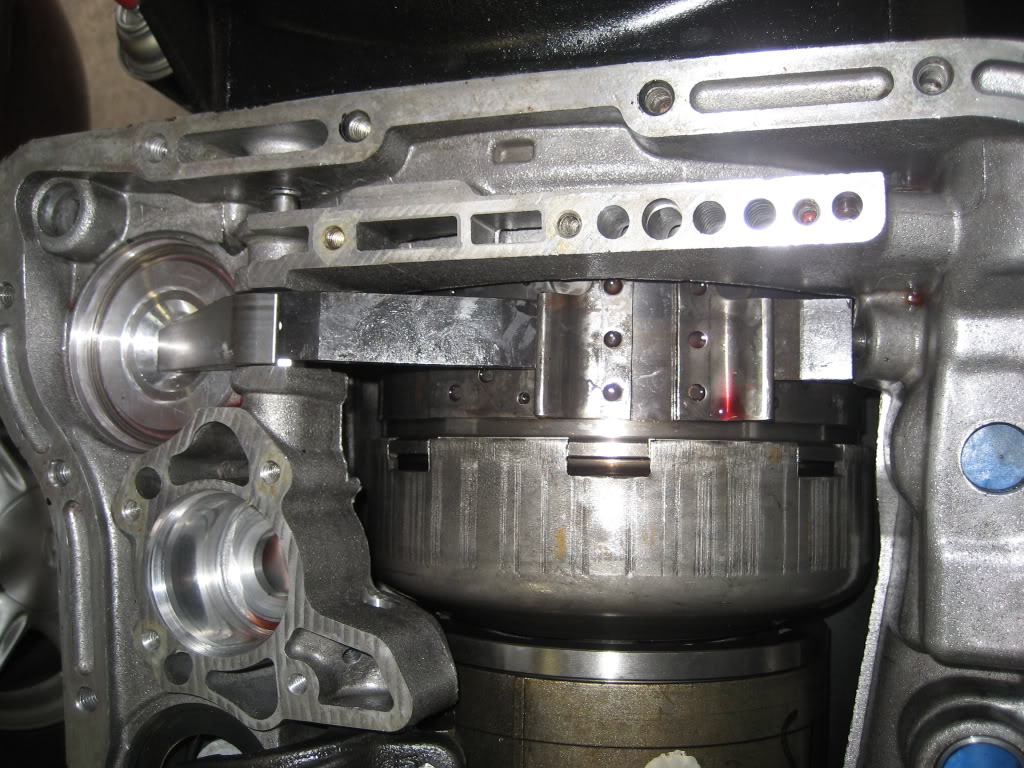
Valve body installed
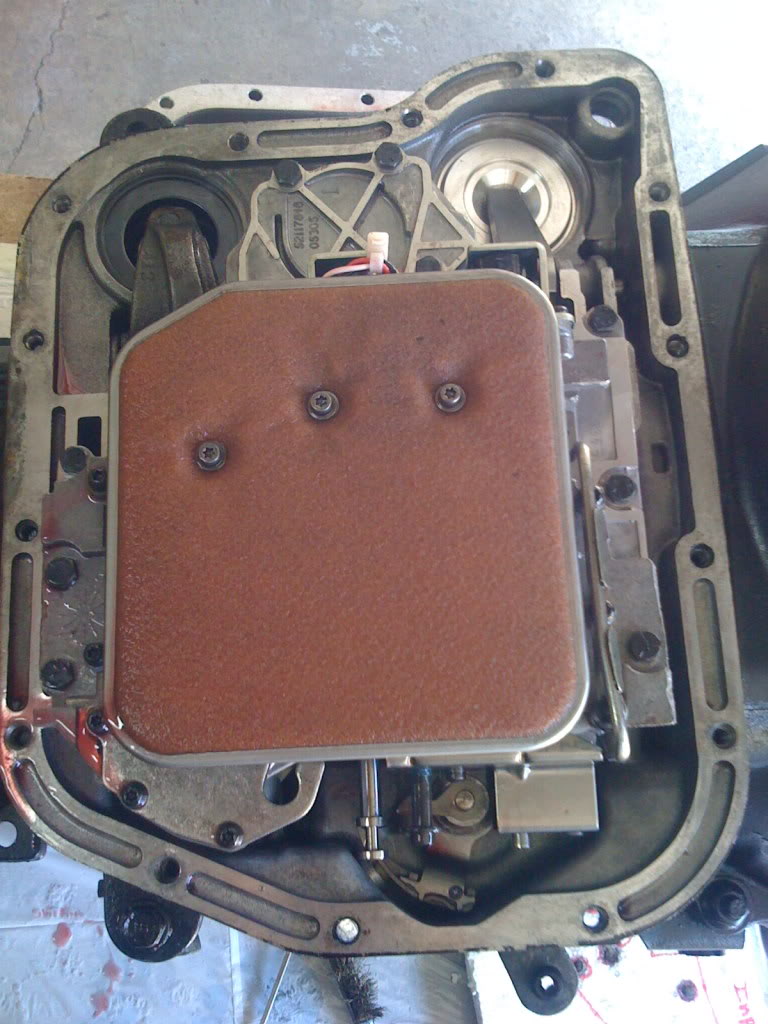
Comparison of the stock strap vs. the Goerend strap (this is a must when running an upgraded valve body)
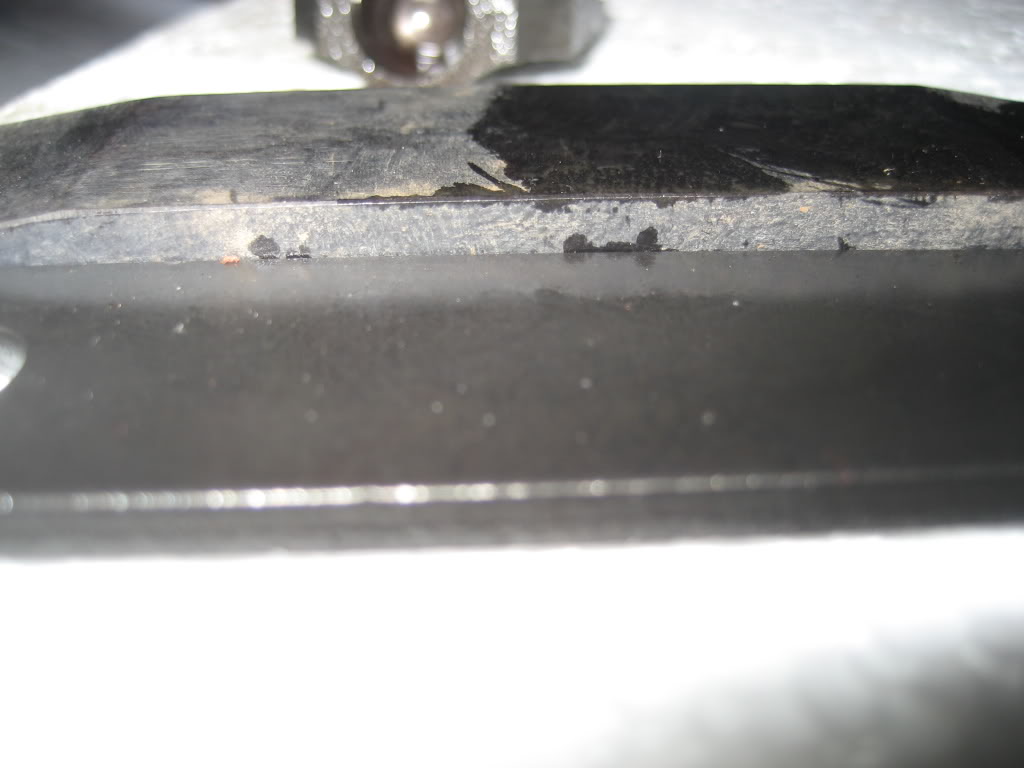
Strap, anchor and strap installed on the band
As far as the installation and removal goes here are a few more points:
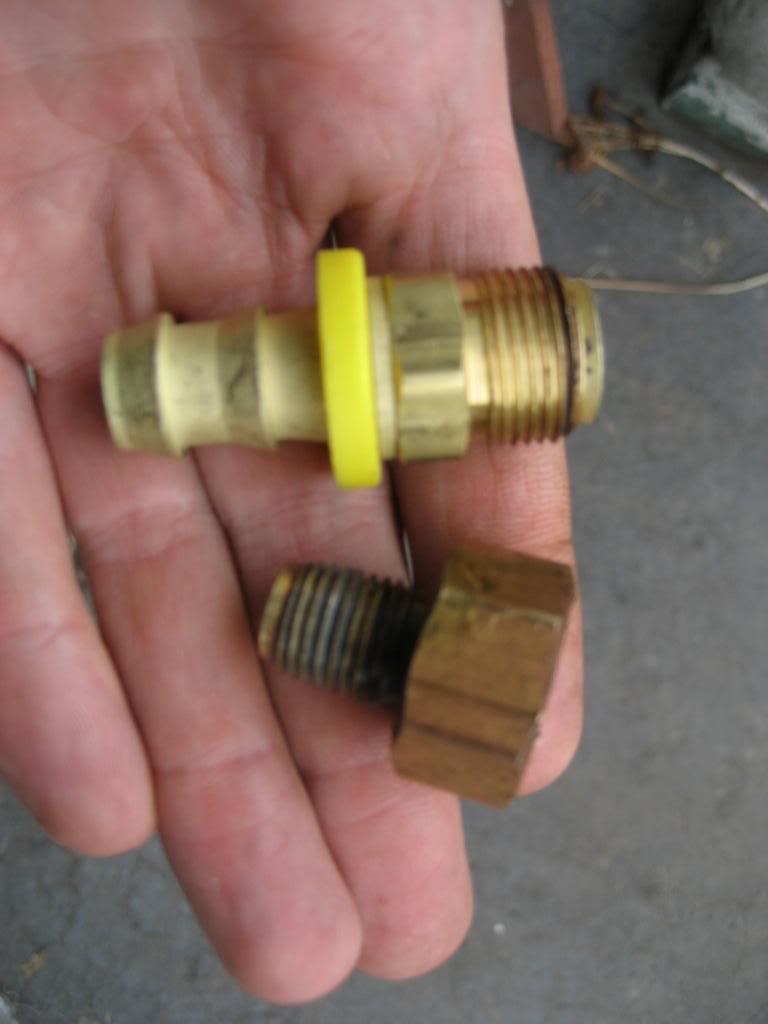
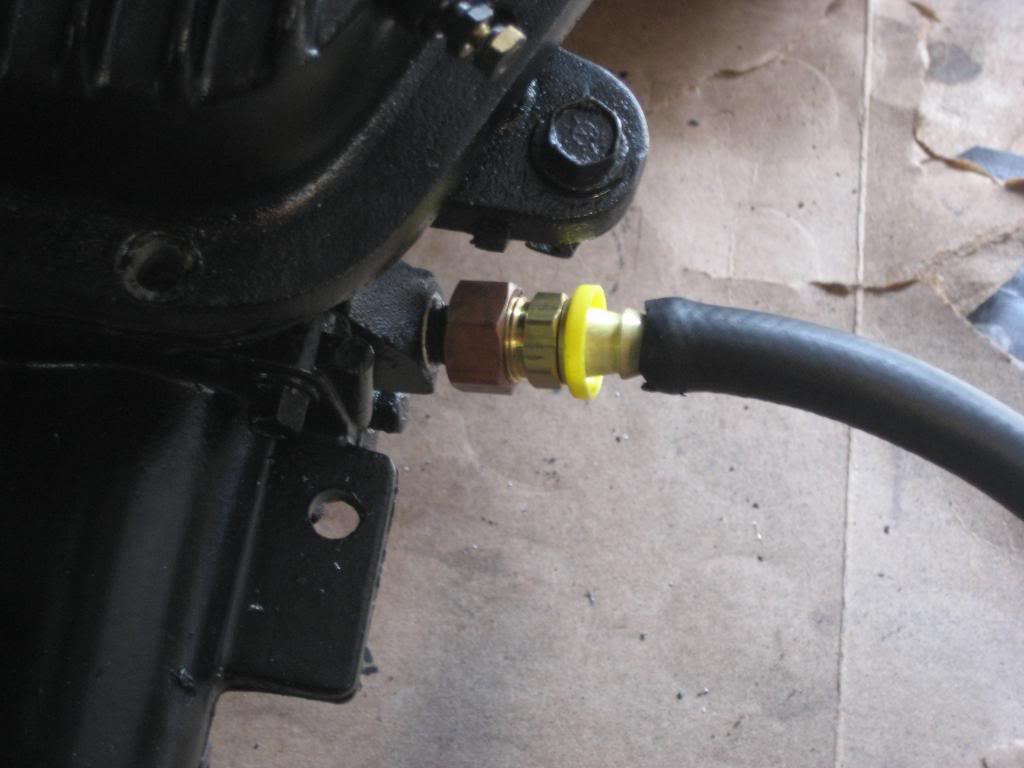
Because of the extra length of the bell housing adapter my factory transmission cooler lines would not reach. The fittings going into the trans are 1/4ntp and that goes to 1/2 inverter flare. I used an inverted flare to pushlock hose and just connected it where it needed to go.
Also because of the bell housing adapter the two top bolts that mounts the trans to bell housing are very hard to get to. I had to bend a 9/16 wrench to get on the passenger side bolt. the driver side has more room but still alot tough than the original removal
very tight
one last point. don't know if this is normal or not but after the truck sat for 3 weeks without the crossmember in place the frame bowed in about 1/2 inch. I used a 4"x4" and a bottle jack to spread the frame apart to make the holes line up.
As far as upgrades to my 47rh i went with Goerend parts. Got their triple disk converter, valve body and strap & anchor & lever and flex plate insert.
Valve body installed
Comparison of the stock strap vs. the Goerend strap (this is a must when running an upgraded valve body)
Strap, anchor and strap installed on the band
As far as the installation and removal goes here are a few more points:
Because of the extra length of the bell housing adapter my factory transmission cooler lines would not reach. The fittings going into the trans are 1/4ntp and that goes to 1/2 inverter flare. I used an inverted flare to pushlock hose and just connected it where it needed to go.
Also because of the bell housing adapter the two top bolts that mounts the trans to bell housing are very hard to get to. I had to bend a 9/16 wrench to get on the passenger side bolt. the driver side has more room but still alot tough than the original removal
very tight
one last point. don't know if this is normal or not but after the truck sat for 3 weeks without the crossmember in place the frame bowed in about 1/2 inch. I used a 4"x4" and a bottle jack to spread the frame apart to make the holes line up.
03-19-2009, 11:35 PM
#4
Chapter President
Thread Starter
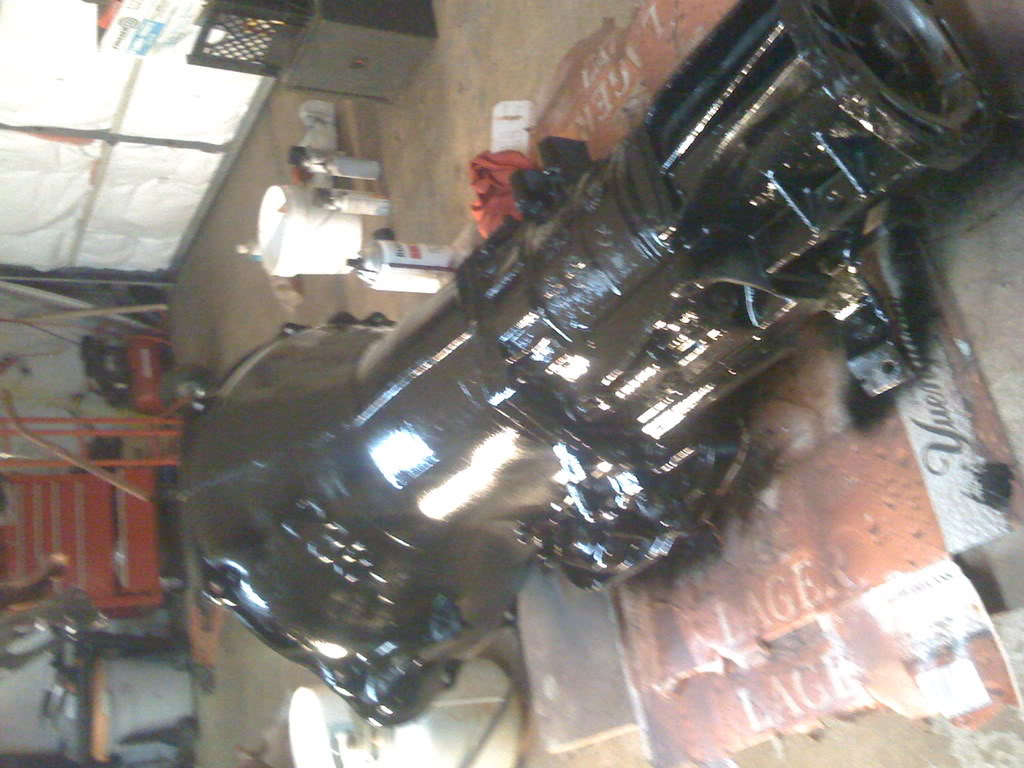
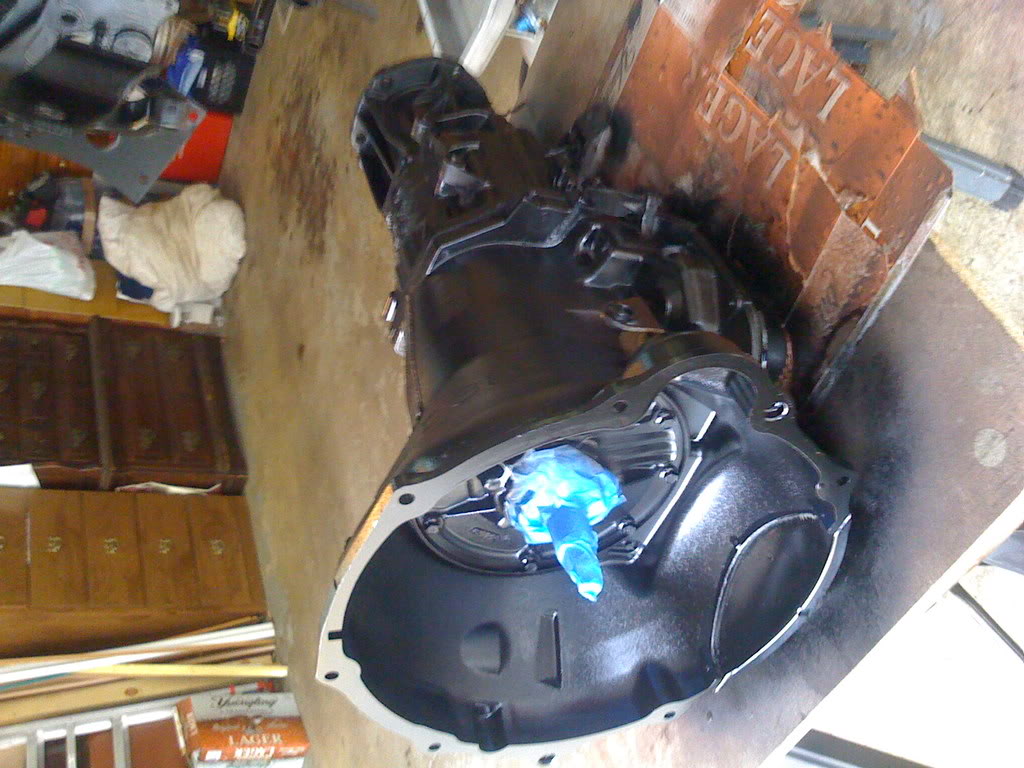
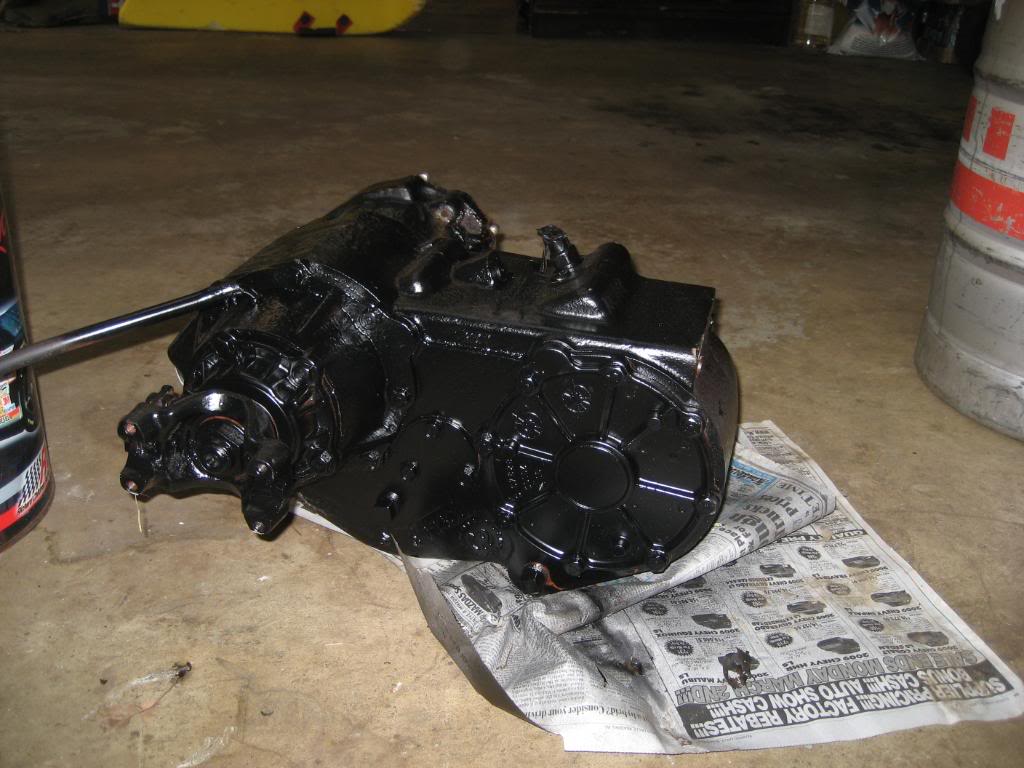
Here are just some pictures i took during the process
All clean
Cross member primed
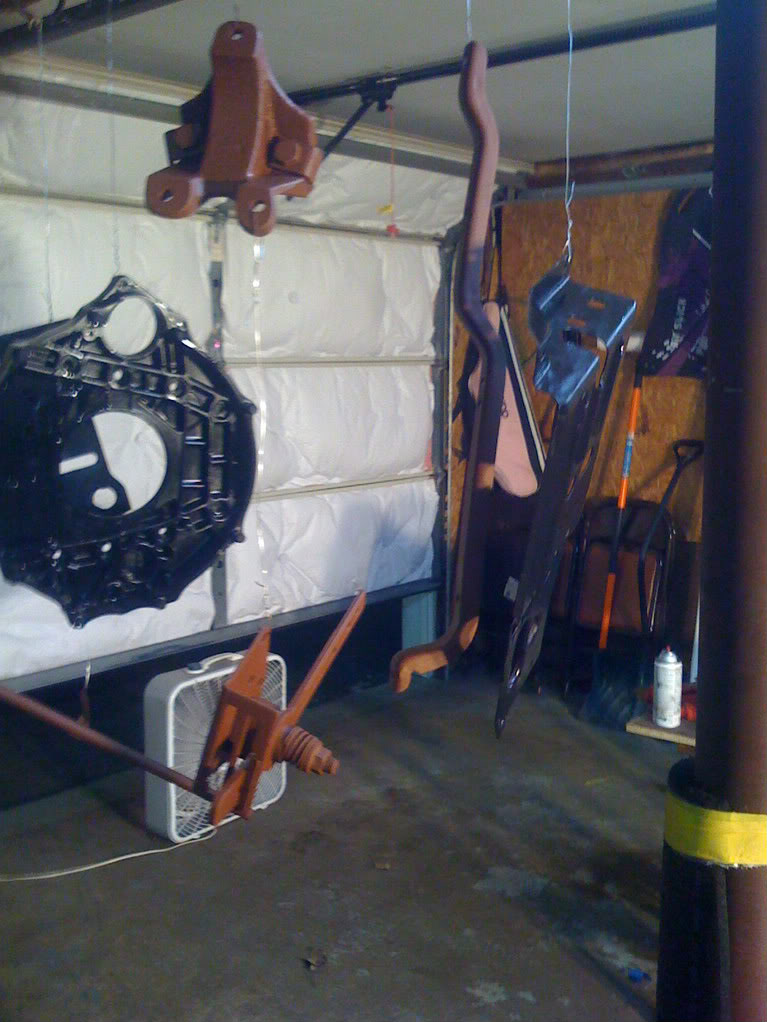
My paint shop haha
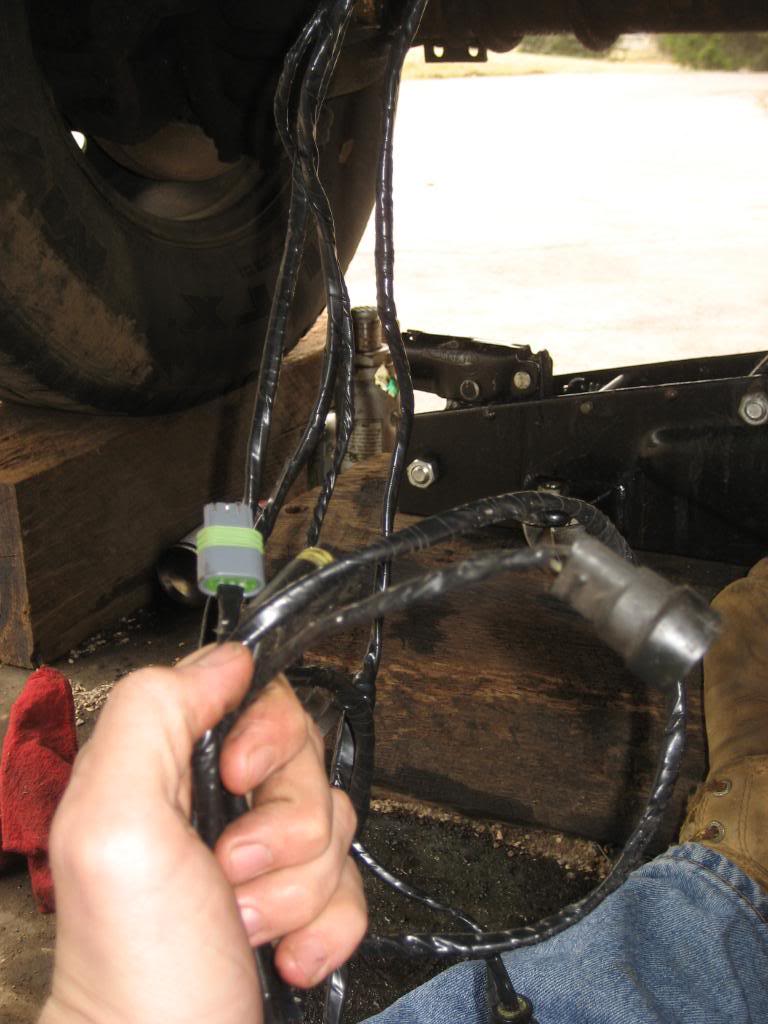
The wires all taped and cleaned up
Well i think that is it for the pictures. If anyone has questions feel free to ask while it's still fresh in my mind.
So how do i like it....
There is NO comparison. My 518's converter was very bad so it was like night and day for me. I can now cruise down the highway and not have the motor scream. The lockup converter along with the valve body is amazing. being able to lock the tranny and go is amazing. the power gets to the ground instead of losing though the converter.
Short video:

All clean
Cross member primed
My paint shop haha
The wires all taped and cleaned up
Well i think that is it for the pictures. If anyone has questions feel free to ask while it's still fresh in my mind.
So how do i like it....
There is NO comparison. My 518's converter was very bad so it was like night and day for me. I can now cruise down the highway and not have the motor scream. The lockup converter along with the valve body is amazing. being able to lock the tranny and go is amazing. the power gets to the ground instead of losing though the converter.
Short video:
 please excuse my ignorance, but what is valet mode? lockup off?
03-20-2009, 06:26 AM
please excuse my ignorance, but what is valet mode? lockup off?
03-20-2009, 06:26 AM
#6
Registered User

Join Date: Apr 2008
Posts: 476
Likes: 0
Received 0 Likes
on
0 Posts
very nice!! i wanted to do the swap just didnt have the cash to do it right. im putting in a converter in my 518. was your tranny stock befor the swap?
how does the old girl feel at 95? my is scary at 70!
how does the old girl feel at 95? my is scary at 70!
03-20-2009, 06:49 AM
#7
Chapter President
Thread Starter
the valet switch limits the fuel pin travel. When on (less power) the pin sits at its widest part not give the truck as much fuel. what i mean by lockup off is that i don't have the converter locked. i should of worded it better.
Trending Topics
03-20-2009, 06:50 AM
#8
Chapter President
Thread Starter
yea it was stock before. she feels pretty scary, it won't be going that fast aging for a long while.
03-20-2009, 07:25 AM
#9
Registered User

Excellent addition to Mikes write-up, I'm going to be doing this shortly so this helps but I'm sure I'll have some questions though.
I couldn't get the transmissionone.com to work. Is that where you got the 3 pin connector? I could only find one at PATC.
Love the Yuengling floor mat, mine is Black&Tan.
I couldn't get the transmissionone.com to work. Is that where you got the 3 pin connector? I could only find one at PATC.
Love the Yuengling floor mat, mine is Black&Tan.

 03-20-2009, 08:17 AM
#11
Registered User
Sweet deal, yours definatly locks hard and goes... I can tell by the sound yours locks and goes.. Mine locks and I can raise the rpm's a tad when I'm on it hard... That is from my slippin converter..lol Nice write up!!
Only thing I could add is on those top bolts on the bellhousing, After you get a few bolts snugged up on the both sides.. I just lowered the the floor jack that was supporting the trans and it tilted the motor back allowing easy access to those top bolts.. And I love the floor lock up switch... Like I might be switching mine..lol
Only thing I could add is on those top bolts on the bellhousing, After you get a few bolts snugged up on the both sides.. I just lowered the the floor jack that was supporting the trans and it tilted the motor back allowing easy access to those top bolts.. And I love the floor lock up switch... Like I might be switching mine..lol
03-20-2009, 09:59 AM
#12
Registered User

Join Date: Oct 2005
Location: socal
Posts: 453
Likes: 0
Received 0 Likes
on
0 Posts
okay now i'm really confused! i understand the lockup converter part, but the valet switch limits movement in the injection pump? is this part of the 47rh swap, or something you had before?
03-20-2009, 02:37 PM
#14
Chapter President
Thread Starter
Excellent addition to Mikes write-up, I'm going to be doing this shortly so this helps but I'm sure I'll have some questions though.
I couldn't get the transmissionone.com to work. Is that where you got the 3 pin connector? I could only find one at PATC.
Love the Yuengling floor mat, mine is Black&Tan.
I couldn't get the transmissionone.com to work. Is that where you got the 3 pin connector? I could only find one at PATC.
Love the Yuengling floor mat, mine is Black&Tan.
Sweet deal, yours definatly locks hard and goes... I can tell by the sound yours locks and goes.. Mine locks and I can raise the rpm's a tad when I'm on it hard... That is from my slippin converter..lol Nice write up!!
Only thing I could add is on those top bolts on the bellhousing, After you get a few bolts snugged up on the both sides.. I just lowered the the floor jack that was supporting the trans and it tilted the motor back allowing easy access to those top bolts.. And I love the floor lock up switch... Like I might be switching mine..lol
Only thing I could add is on those top bolts on the bellhousing, After you get a few bolts snugged up on the both sides.. I just lowered the the floor jack that was supporting the trans and it tilted the motor back allowing easy access to those top bolts.. And I love the floor lock up switch... Like I might be switching mine..lol
) but i am guessing around 3k with all the miscellaneous stuff.