
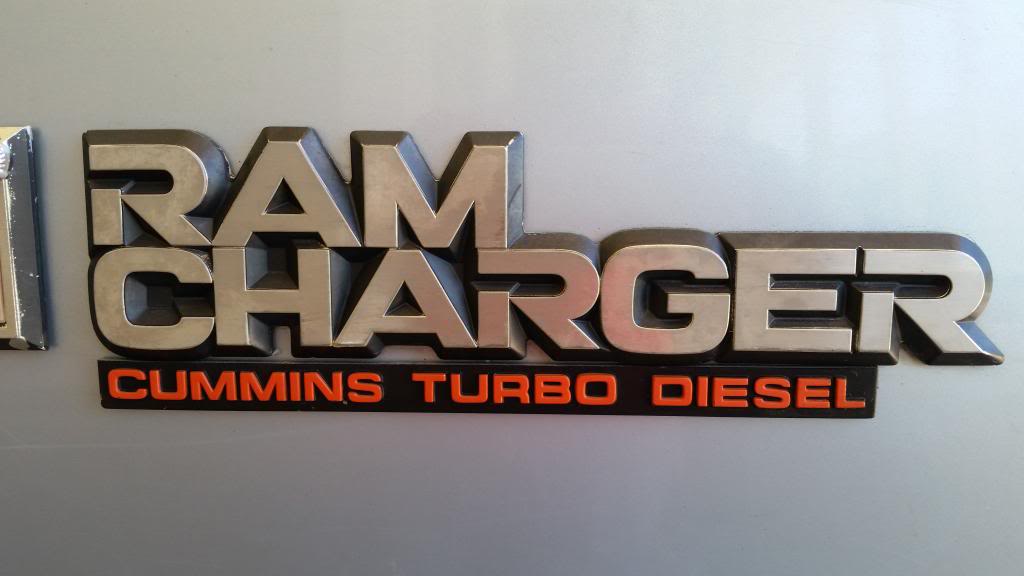
Cummins Ramcharger Build Thread


Thread Starter
Registered User
Joined: Jun 2014
Posts: 68
Likes: 2
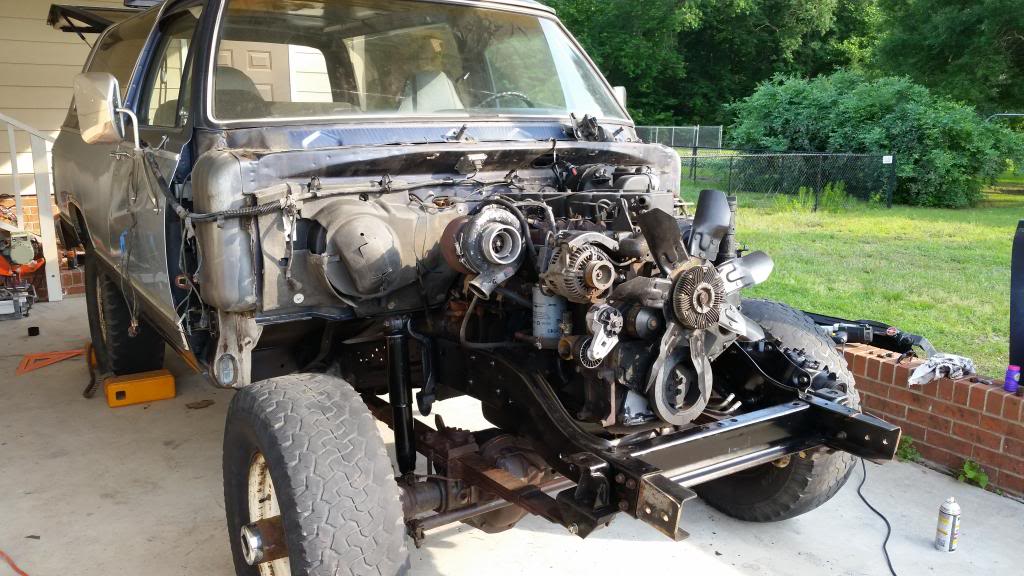
Even with all the fluids drained, this power plant is incredibly heavy. Since my driveway has a slight grade and the metal casters kept getting stuck in the expansion joints, it took me and my wife a little while to get it pushed up to the carport, 6 inches at a time. When we finally got it into position, I had to remove the wheels and lower the front end until the rotors nearly touched the ground. With the nose end of the truck down that far, I had the clearance I needed to pass the oil pan over the crossmember and set everything down on the mounts. I used the mounts that came in the Ramcharger since the W250 mounts were trashed. With a little adjusting, they were in the perfect position to hold the Cummins without and binding or twisting. TIP: it really helps to remove the wiper motor before installing the engine since the #6 valve cover wants to bump into it before everything is lowered into position.
I also used the crossmember from the Ramcharger to support the transmission and transfer case. It doesn't have the provisions for the skid plate and is shaped a bit differently, but after drilling 4 holes so I could move it towards the rear a few inches, everything lined up and bolted in without a fuss. Here it is mounted with the wheels back in:
I also used the crossmember from the Ramcharger to support the transmission and transfer case. It doesn't have the provisions for the skid plate and is shaped a bit differently, but after drilling 4 holes so I could move it towards the rear a few inches, everything lined up and bolted in without a fuss. Here it is mounted with the wheels back in:


Thread Starter
Registered User
Joined: Jun 2014
Posts: 68
Likes: 2
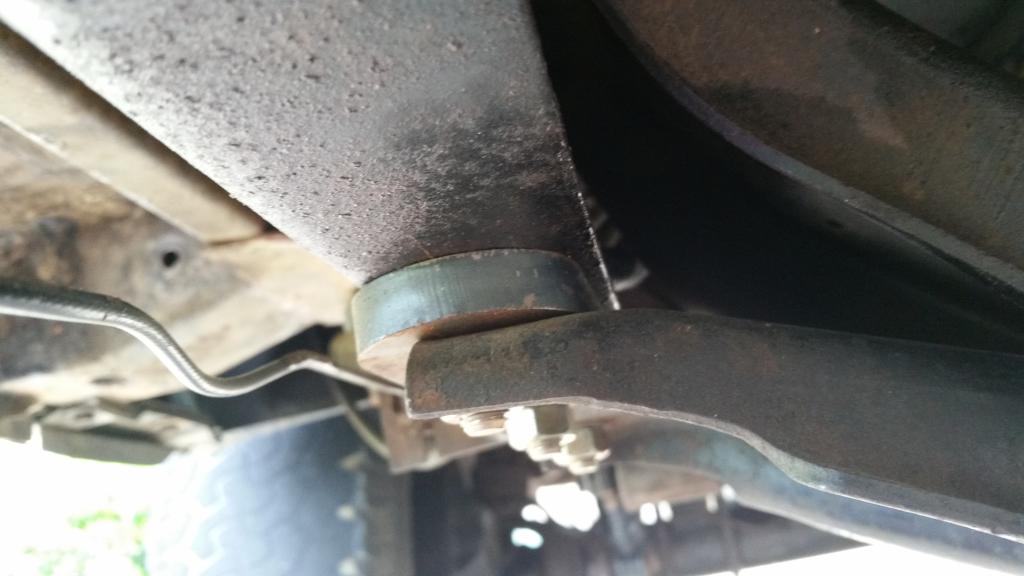
After reinstalling the transfer case and measuring the distance between the output yoke and the rear end (a very short 31"), I decided that spacers between the frame and the crossmember to reduce the pinion angle might be a good idea. I haven't seen anybody else do this, so I know it's not necessary, but it gives me a warm fuzzy feeling, especially since I'll be pulling a little more height on it in the future.

Thread Starter
Registered User
Joined: Jun 2014
Posts: 68
Likes: 2
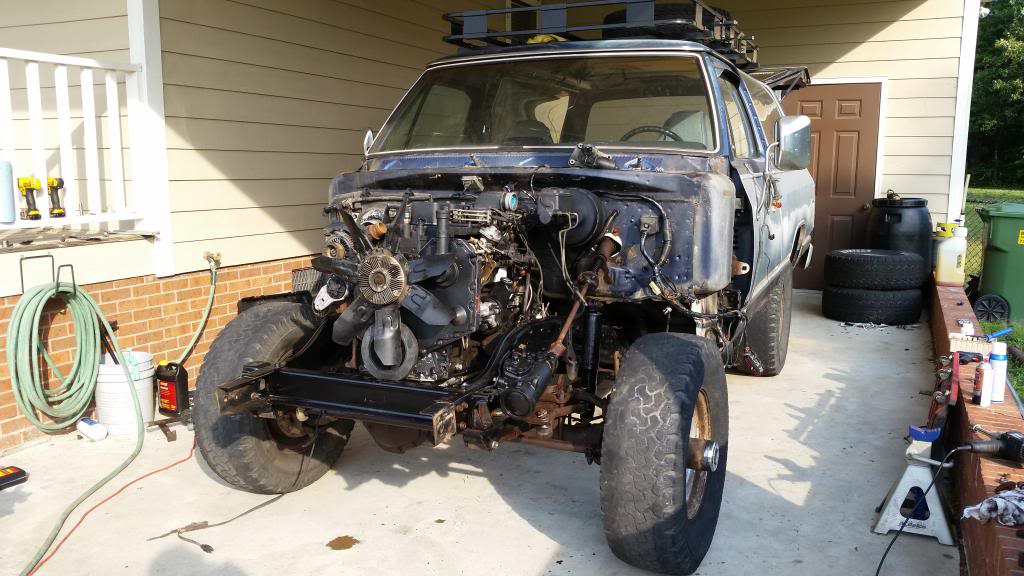
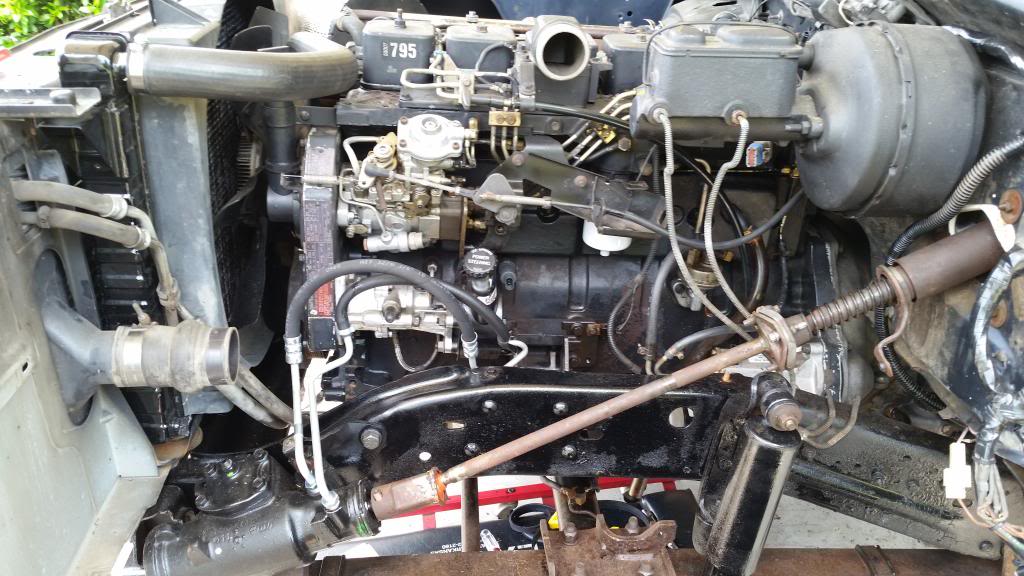
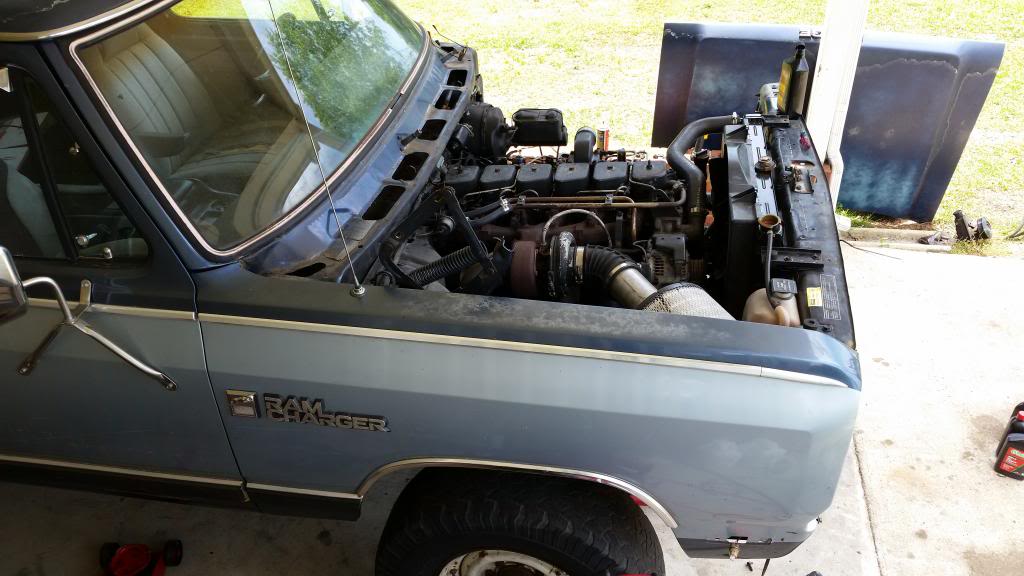
With the drivetrain completely installed, I just needed to clean up the engine wiring harness, which included cutting the loom, deleting the grid heater relays and wires and taping it all back up. Here's a shot with the new PS lines, core support, radiator, intercooler, etc. installed and the transmission cooler lines hooked back up:

Thread Starter
Registered User
Joined: Jun 2014
Posts: 68
Likes: 2
...and the intercooler tubing, new Diamond Eye 4" turbo-back exhaust (ordered this from Tony and Crystal at Mighty Diesel Performance for $280, shipped, and it was on my front steps in under 72 hours!) installed:

The exhaust is, of course, made for a first gen pickup, so I needed to trim a few inches off of a couple of pieces and completely omit the intermediate (muffler delete) pipe, but it fit perfectly, clearing everything without any rattling or knocking. I was back and forth between Diamond Eye and MBRP (the only exhaust for diesels I have any experience with) but decided to go with the former and couldn't be pleased more with the quality and fitment. It's superb. Buy with confidence.

The exhaust is, of course, made for a first gen pickup, so I needed to trim a few inches off of a couple of pieces and completely omit the intermediate (muffler delete) pipe, but it fit perfectly, clearing everything without any rattling or knocking. I was back and forth between Diamond Eye and MBRP (the only exhaust for diesels I have any experience with) but decided to go with the former and couldn't be pleased more with the quality and fitment. It's superb. Buy with confidence.
Thread Starter
Registered User
Joined: Jun 2014
Posts: 68
Likes: 2
The fuel sending unit was an interesting problem to solve. The '91-'93 unit is held in by a collar where the smaller, pre-'91 gas unit is much smaller and is held in with machine screws.
I had a few options: First, I could find a '91-'93 Ramcharger tank with the later model collar setup and just use the diesel cup-style sending unit. Second, I could cut the gas tank and fab a collar to use the diesel sending unit. I opted to use the gas pickup since it already fit the tank I have and the inner diameter of the tube is the same as my existing fuel lines (5/16"). The only problem was that the early gasoline fuel lever sender ohms differently than my '91.5 fuel gauge. I decided to remove the float, arm and sender from the gas pickup and install the diesel one to it. It wires right up, even the wire colors are the same, just with different connectors. I had to use a tiny bit of aluminum sheet metal, but it was fast and easy and, more importantly, was a direct drop-in.
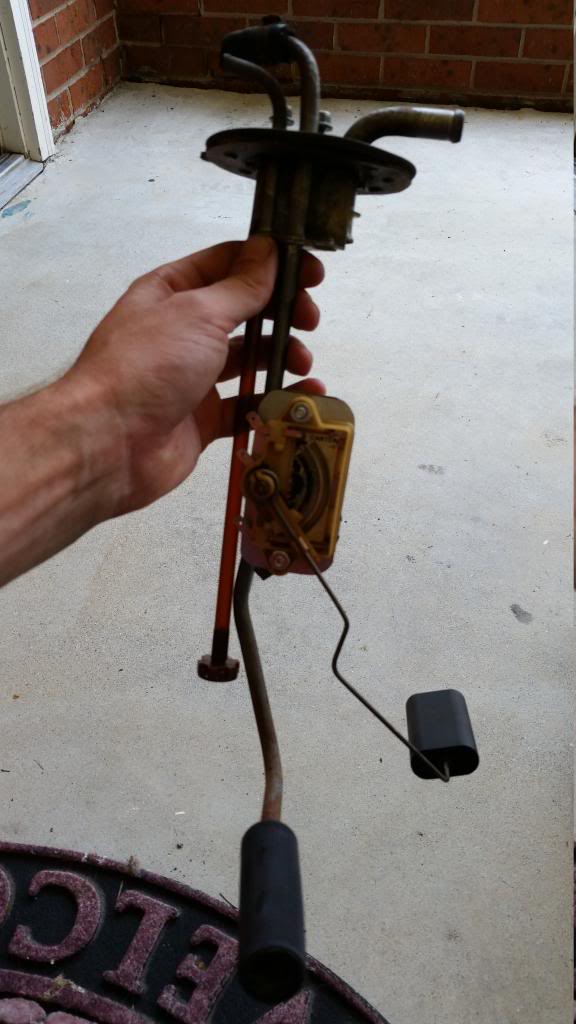
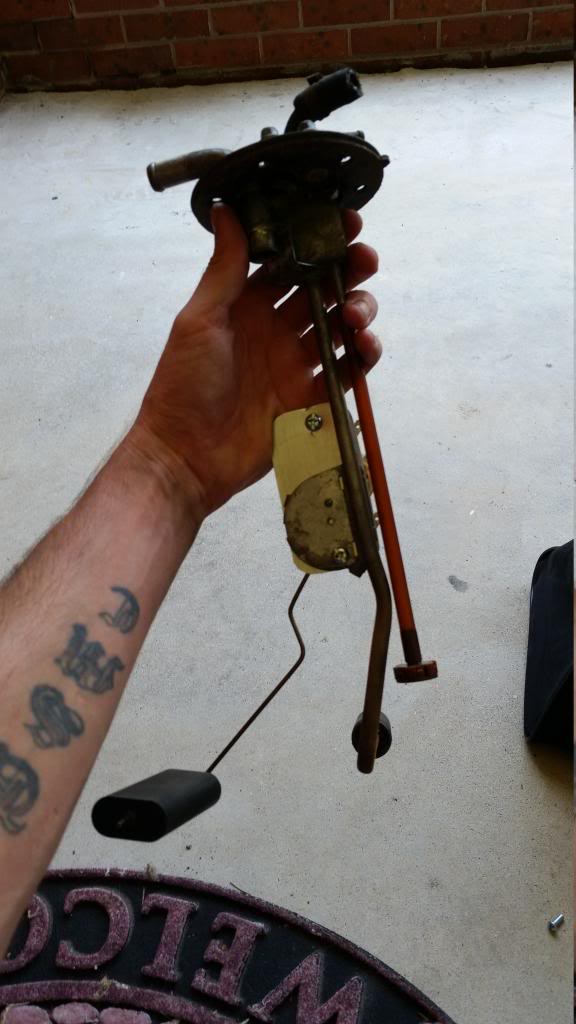
I had a few options: First, I could find a '91-'93 Ramcharger tank with the later model collar setup and just use the diesel cup-style sending unit. Second, I could cut the gas tank and fab a collar to use the diesel sending unit. I opted to use the gas pickup since it already fit the tank I have and the inner diameter of the tube is the same as my existing fuel lines (5/16"). The only problem was that the early gasoline fuel lever sender ohms differently than my '91.5 fuel gauge. I decided to remove the float, arm and sender from the gas pickup and install the diesel one to it. It wires right up, even the wire colors are the same, just with different connectors. I had to use a tiny bit of aluminum sheet metal, but it was fast and easy and, more importantly, was a direct drop-in.


Thread Starter
Registered User
Joined: Jun 2014
Posts: 68
Likes: 2
All that was left was to do a function check of lights, horns, install filters, fill fliuds, double check clamps, clips, plugs, etc. and bolt the sheet metal back up...
Starting to look like a truck again:
Once the exhaust was all buttoned up, and the brakes checked and bled (I deleted the ABS by simply not swapping over the rear metering block. The brake hose from the D70 went right into the Ramcharger's hard line right at the bracket), the fuel system primed and the battery charged and hooked up, I turned the key and it fired up instanly. I let it idle, checked for leaks, gave it a bit of throttle once it was warm and went through the gears/4wd to make sure everything engaged. Good to go! Now it's official:
Starting to look like a truck again:

Once the exhaust was all buttoned up, and the brakes checked and bled (I deleted the ABS by simply not swapping over the rear metering block. The brake hose from the D70 went right into the Ramcharger's hard line right at the bracket), the fuel system primed and the battery charged and hooked up, I turned the key and it fired up instanly. I let it idle, checked for leaks, gave it a bit of throttle once it was warm and went through the gears/4wd to make sure everything engaged. Good to go! Now it's official:


Thread Starter
Registered User
Joined: Jun 2014
Posts: 68
Likes: 2
It was fun. It's better now... I'll explain in the next post.
Thanks. it's definitely one of those things that never gets finished.
Thread Starter
Registered User
Joined: Jun 2014
Posts: 68
Likes: 2
Right off the bat it ran like a skunk ape from a camera flash just from the new exhaust, BHAF and a minimal amount of pump tuning. At least it felt that way compared to the stock setup in the pickup truck.
I need to focus on suspension, wheels, tires, interior pieces, proper fuel tank straps and a new windshield, but I just can't help digging into a Cummins sometimes. I have a 180hp p-pump, lines, 2nd gen injectors, timing cover, pump gear and intake/piping, so I figured I'd get it all together and cleaned up and throw it on the Ramcharger. First, I had to get rid of the H1C. Pitiful.
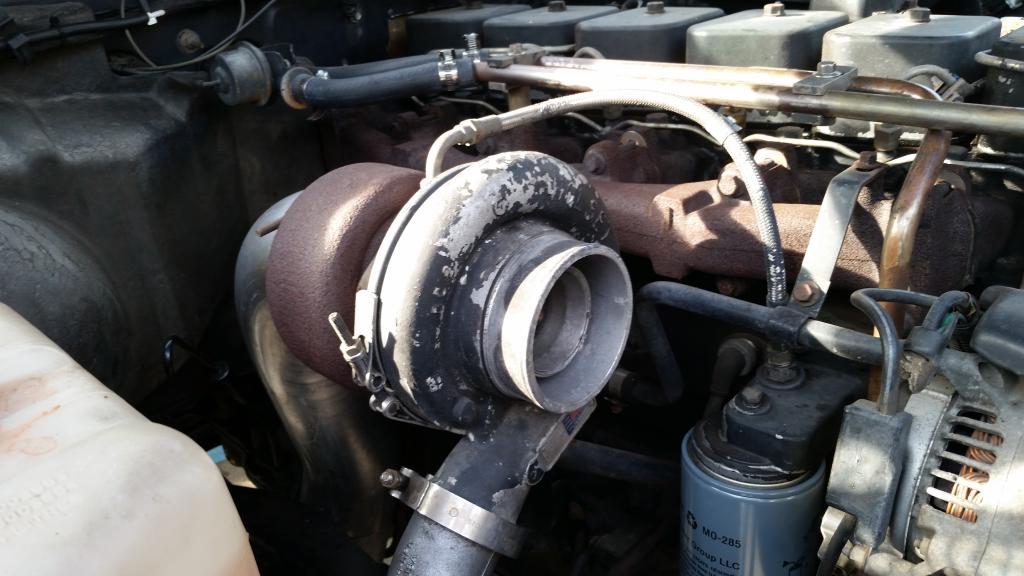
So, I went ahead and threw an HX35 in there. I figure I can turn the fuel up more and bump the timing, this way it'll have a little more go between now and the p-pump swap.
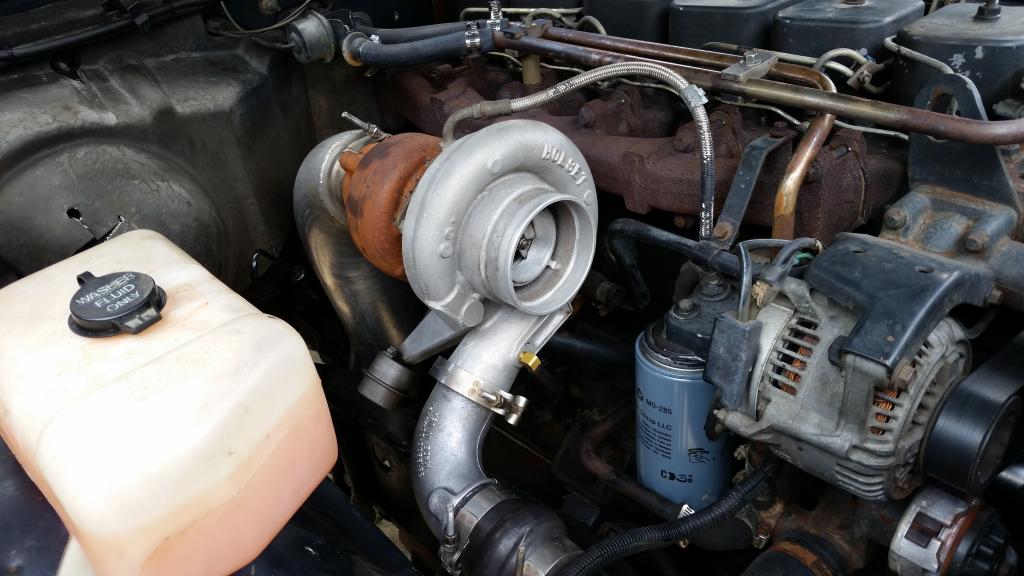
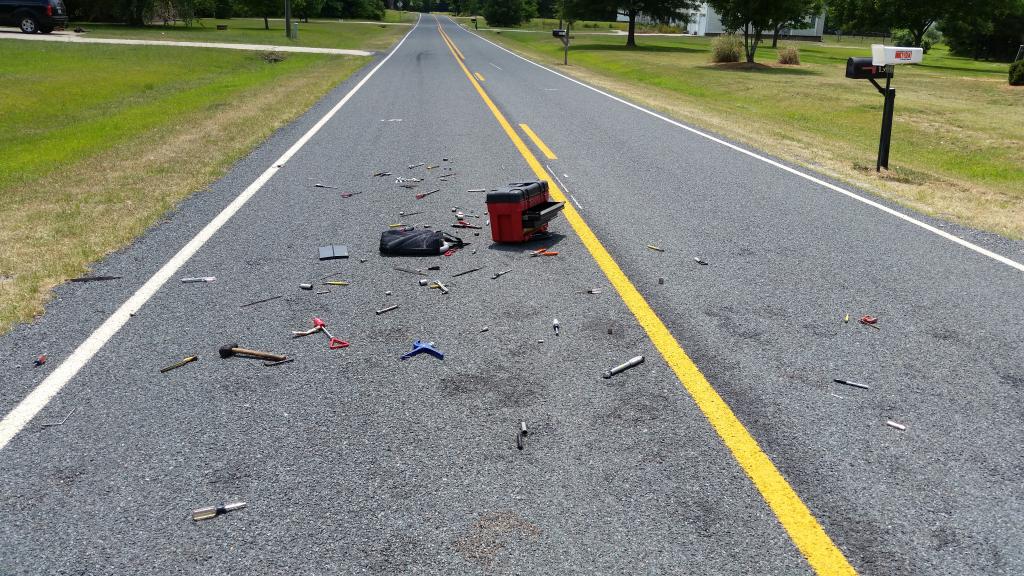
I don't think it flows much more than the H1C did, but its whistle is much louder and lights much faster. It lights so much sooner that I didn't anticipate it while my foot was in the pedal hard, waiting for it to spool, and it threw my toolbox right through the lift gate and onto the street because I didn't let out in time.
I need to focus on suspension, wheels, tires, interior pieces, proper fuel tank straps and a new windshield, but I just can't help digging into a Cummins sometimes. I have a 180hp p-pump, lines, 2nd gen injectors, timing cover, pump gear and intake/piping, so I figured I'd get it all together and cleaned up and throw it on the Ramcharger. First, I had to get rid of the H1C. Pitiful.

So, I went ahead and threw an HX35 in there. I figure I can turn the fuel up more and bump the timing, this way it'll have a little more go between now and the p-pump swap.

I don't think it flows much more than the H1C did, but its whistle is much louder and lights much faster. It lights so much sooner that I didn't anticipate it while my foot was in the pedal hard, waiting for it to spool, and it threw my toolbox right through the lift gate and onto the street because I didn't let out in time.

Thread Starter
Registered User
Joined: Jun 2014
Posts: 68
Likes: 2
Just a little update. Scored some 16x10 wheels and a set of 285s that are in better shape than mine (not a high bar to clear, I admit) on CL for a cool hundo. Even with the used tires, they all balanced out with under 3 ounces of weight, so I threw 'em on there, checked my steering range... no rubbing or hitting the springs or fenders! WOOT! They ride nice and smooth and look way better than the old steelies, imo.
Before:
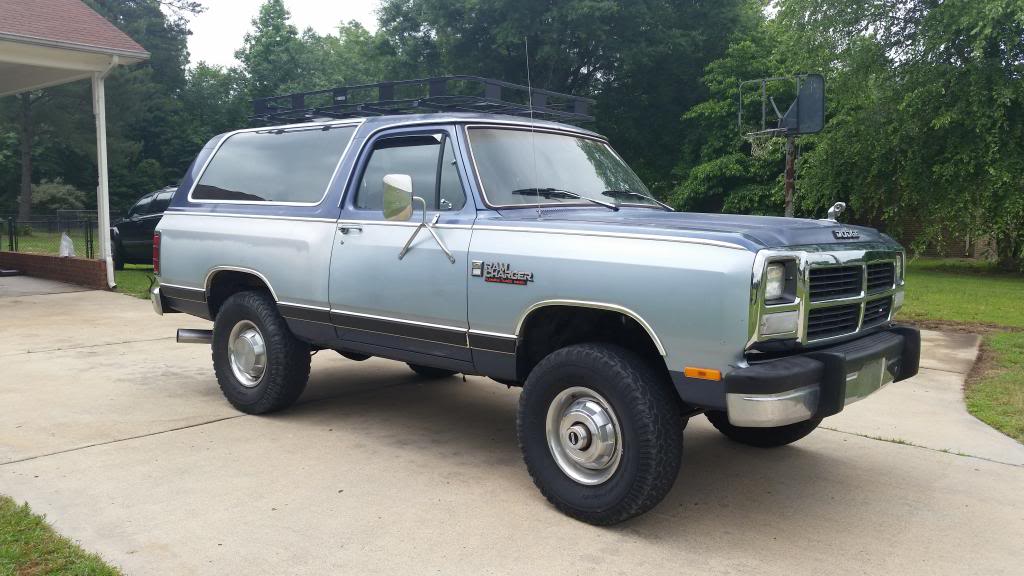
After:
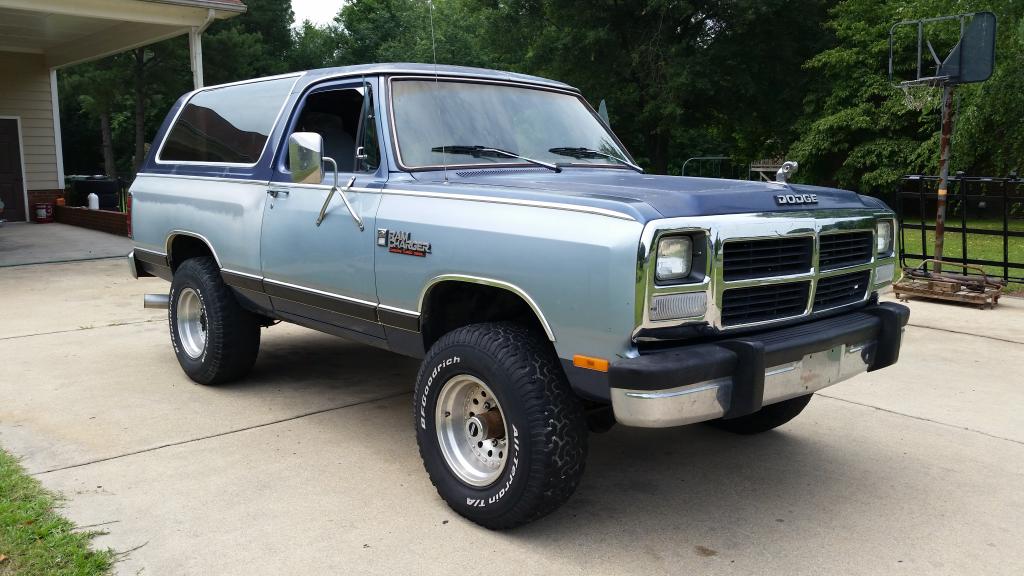
You'll notice I also pulled the safari rack. The wind noise was ridiculous and I never used it. I think it even looks better without it.
Before:

After:

You'll notice I also pulled the safari rack. The wind noise was ridiculous and I never used it. I think it even looks better without it.

