
Alternator Ground


Thread Starter
Administrator


Joined: Nov 2004
Posts: 4,084
Likes: 233
From: Southern California
The importance of a good Ground.
It has been getting colder here in Southern California the last week or so, and this has been of the few times that I have had my Grid Heaters cycle when I first started the truck.
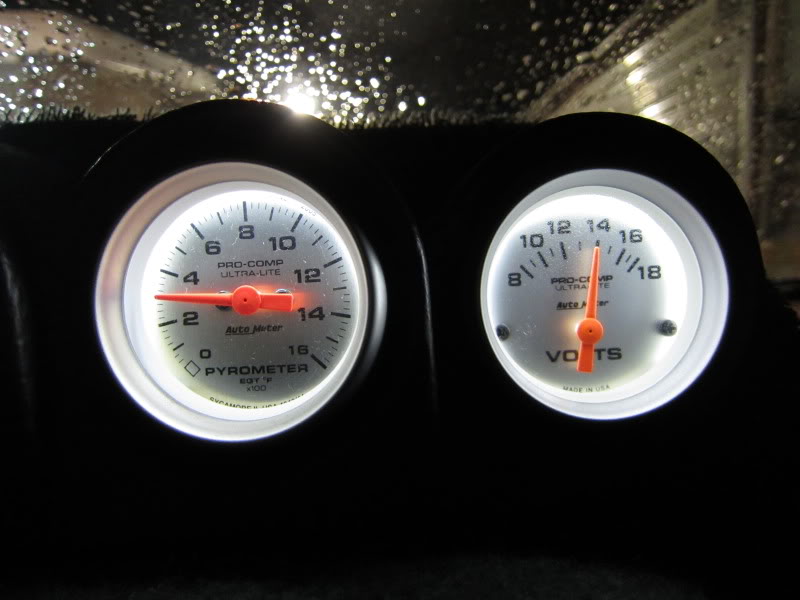
The first shown my battery voltage with the Grid heaters OFF @ 14 volts.
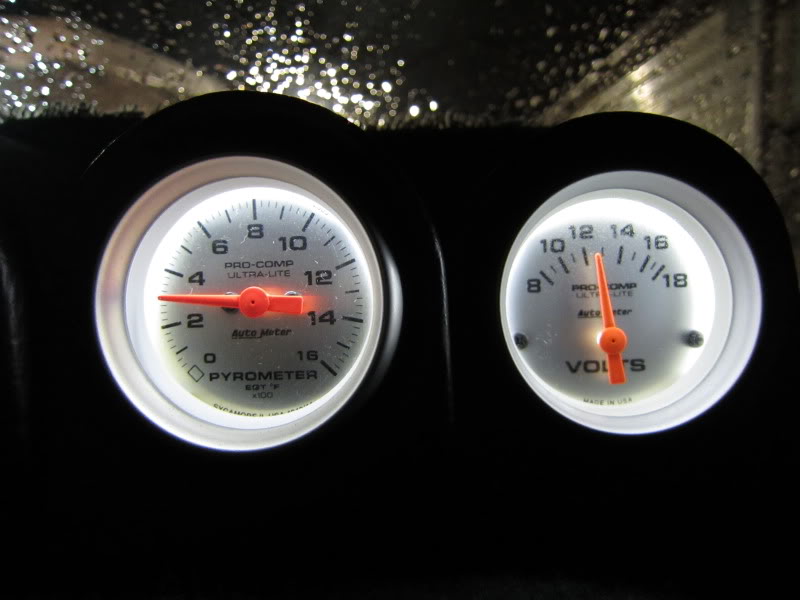
And this is with the Grid heaters ON @ 12.5 volts.
At this time, the headlights are ON and the truck is IDLING. (This the time when your lights would be dimming and your volt meter would be pegging discharge)
How do I do this you are asking yourself...
Remembering that my heaters are drawing 204.7-Amps

The first answer is my 160-amp Leece Neville alternator that will charge 100-amps at an IDLE.
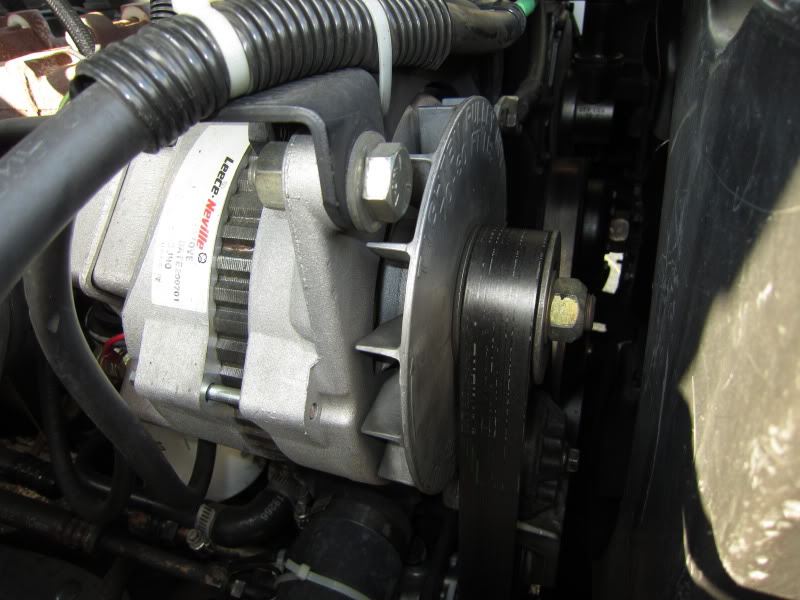
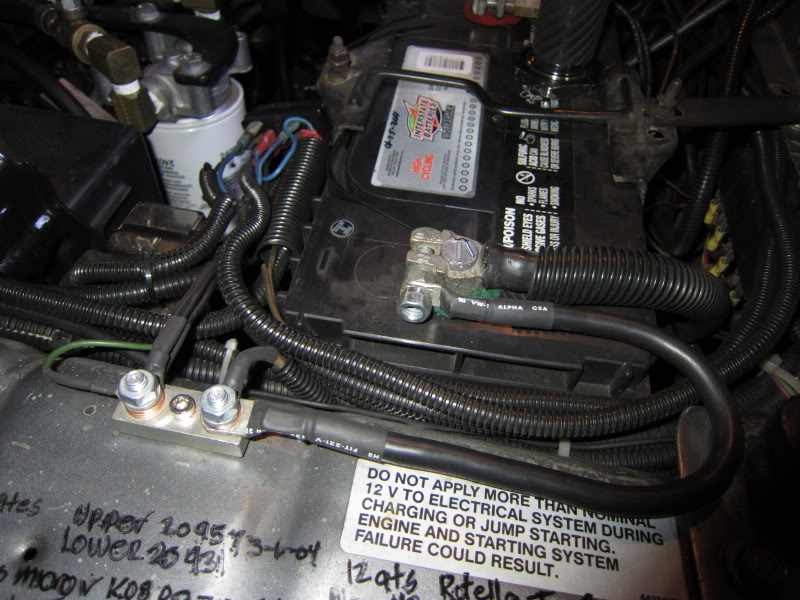
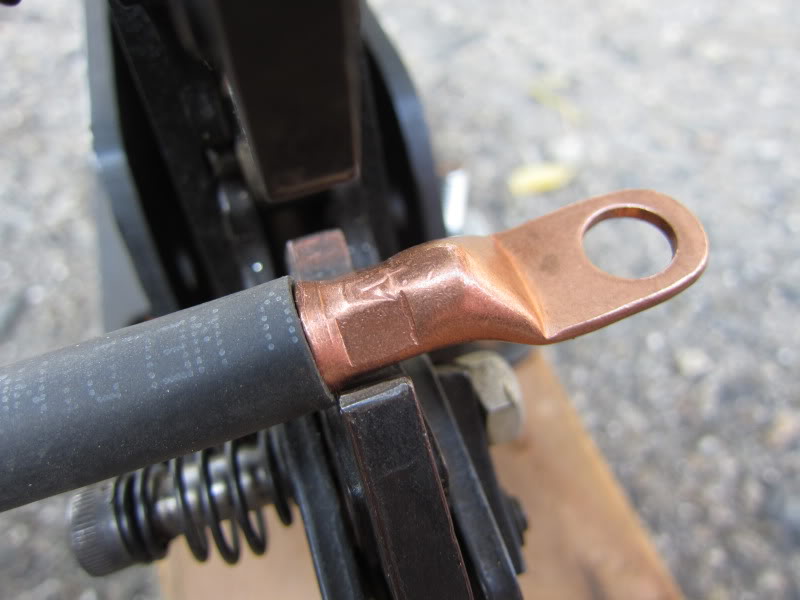
The second thing are the way I have the alternator connected, not only is the POSITIVE cable connected to my battery using #2 welding cable, so in the NEGATIVE or GROUND cable, (both names are interchangeable) I have it connected to the alternator using #2 welding cable. (Yes I will replace the shrink tubing on the lug)
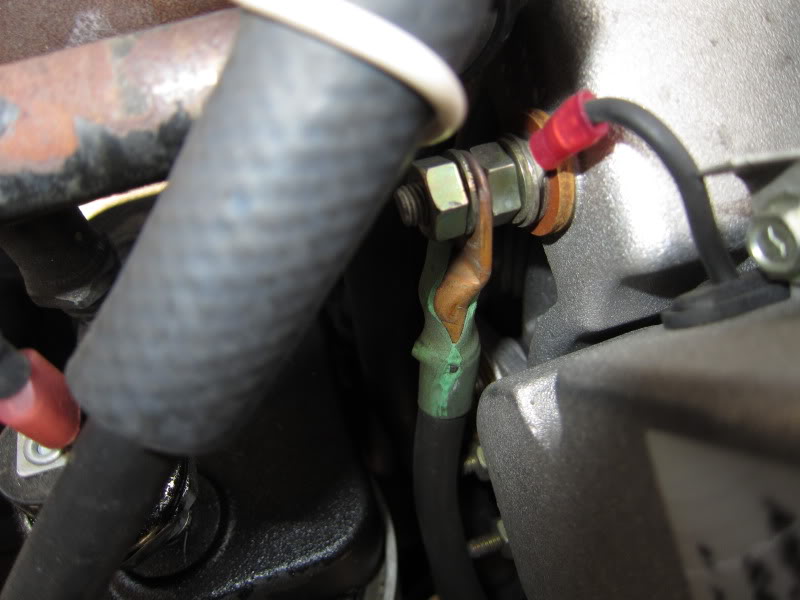
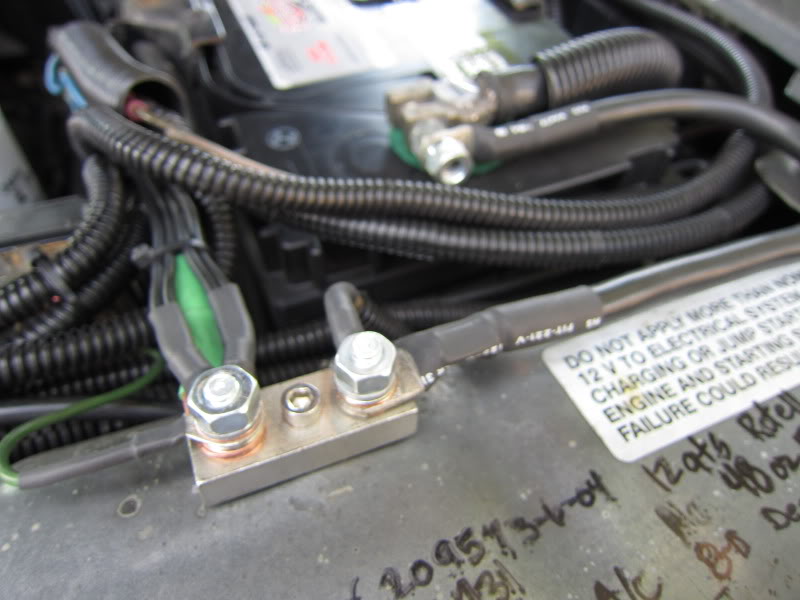
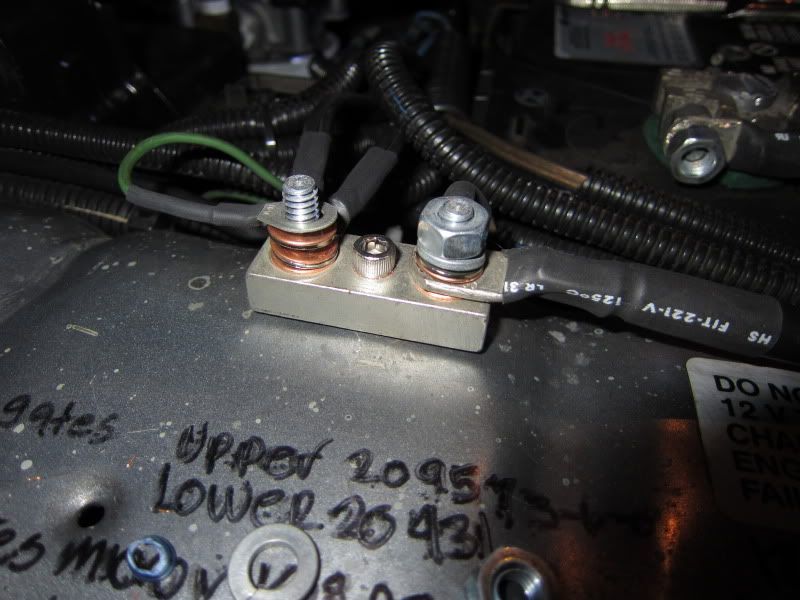
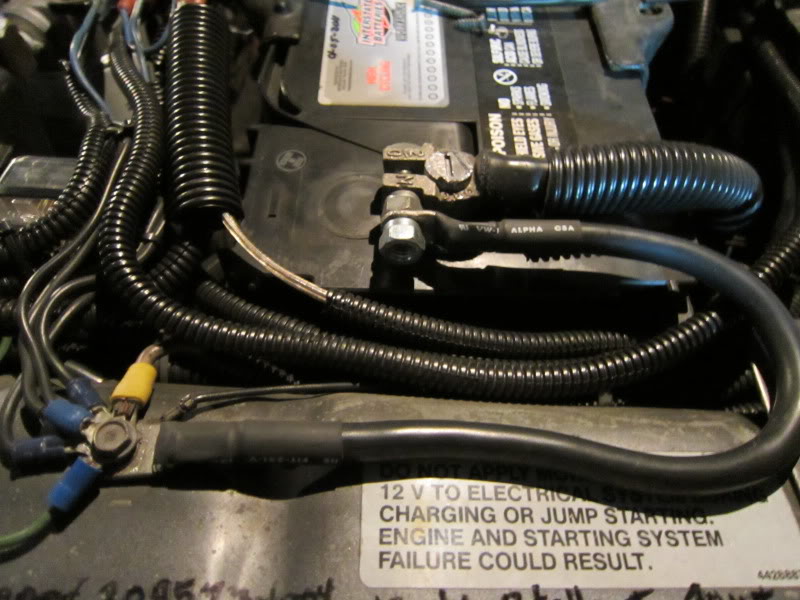
Looking at my NEG-GROUND connections:
Top left backside with green shrink tubing is from the alternator (-) #2-gauge.
Top front heavy cable is NEG-GROUND for Aux #1 battery 2/0-gauge.
Top right with green shrink tubing is to a grounding block at the Main battery #2-gauge.
Bottom with the heavy cable grounds the engine block to the chassis at the left front frame rail 2/0-gauge.
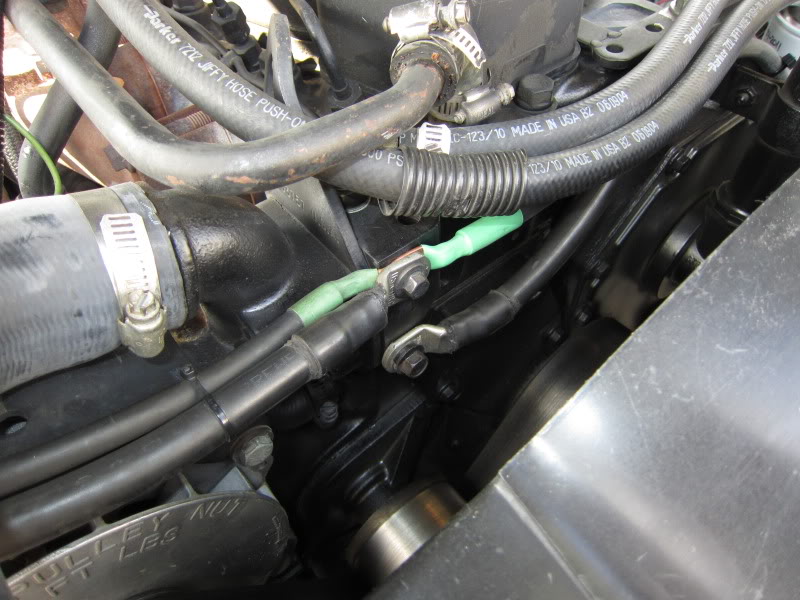
The grounding lead from the front of the block connects to this solid copper terminal block where I use as a fixing point for some of the systems requiring a ground connection including headlights, blower motors and control relay circuits.
I have several of these ground terminals strategically located under the hood for various connections.
To supplement its path to the battery I have also installed a jumper I made of #2- gauge welding cable from the terminal block directly to the NEG terminal on the main battery.
So in essence my alternator is connected directly to my battery through about 4 feet of #2 welding cable, there is very little resistance or voltage drop in this connection as compared to factory 6-gauge alternator charge wire and 10-gauge fuse link.
Notice I already have battery cables made from 3/0 welding cable with crimped on copper ends.
The factory battery cables are only 2/0 cable
Here is more detail how I mounted the terminal block to the body, there is a star washer between the block and the core support and it is secured using a 3/16� stainless steel bolt, washer and nylock nut underneath.
This is what the new grounding terminal had replaced.
Everything I have showed you here YOU can benefit from to enhance your charging system and allow it to operate at its maximum output.
What I am trying to say is your NEG-Ground connections are as important and necessary as the POSITIVE connection.
Way back when,
The first thing I did to my factory stock tiny little 120-amp Nippon-Denso alternator was to replace the stock wiring using lengths of #2 welding cable connected from the alternator terminals directly the battery, this made a huge improvement in the overall charge rate.
I would also strongly recommend installing a 150-amp power fuse (I have a 200-amp fuse protecting my alternator) between the cable and the battery to protect the battery in the event of a catastrophic short.
Any questions?
It has been getting colder here in Southern California the last week or so, and this has been of the few times that I have had my Grid Heaters cycle when I first started the truck.
The first shown my battery voltage with the Grid heaters OFF @ 14 volts.
And this is with the Grid heaters ON @ 12.5 volts.
At this time, the headlights are ON and the truck is IDLING. (This the time when your lights would be dimming and your volt meter would be pegging discharge)
How do I do this you are asking yourself...
Remembering that my heaters are drawing 204.7-Amps
The first answer is my 160-amp Leece Neville alternator that will charge 100-amps at an IDLE.
The second thing are the way I have the alternator connected, not only is the POSITIVE cable connected to my battery using #2 welding cable, so in the NEGATIVE or GROUND cable, (both names are interchangeable) I have it connected to the alternator using #2 welding cable. (Yes I will replace the shrink tubing on the lug)
Looking at my NEG-GROUND connections:
Top left backside with green shrink tubing is from the alternator (-) #2-gauge.
Top front heavy cable is NEG-GROUND for Aux #1 battery 2/0-gauge.
Top right with green shrink tubing is to a grounding block at the Main battery #2-gauge.
Bottom with the heavy cable grounds the engine block to the chassis at the left front frame rail 2/0-gauge.
The grounding lead from the front of the block connects to this solid copper terminal block where I use as a fixing point for some of the systems requiring a ground connection including headlights, blower motors and control relay circuits.
I have several of these ground terminals strategically located under the hood for various connections.
To supplement its path to the battery I have also installed a jumper I made of #2- gauge welding cable from the terminal block directly to the NEG terminal on the main battery.
So in essence my alternator is connected directly to my battery through about 4 feet of #2 welding cable, there is very little resistance or voltage drop in this connection as compared to factory 6-gauge alternator charge wire and 10-gauge fuse link.
Notice I already have battery cables made from 3/0 welding cable with crimped on copper ends.
The factory battery cables are only 2/0 cable
Here is more detail how I mounted the terminal block to the body, there is a star washer between the block and the core support and it is secured using a 3/16� stainless steel bolt, washer and nylock nut underneath.
This is what the new grounding terminal had replaced.
Everything I have showed you here YOU can benefit from to enhance your charging system and allow it to operate at its maximum output.
What I am trying to say is your NEG-Ground connections are as important and necessary as the POSITIVE connection.
Way back when,
The first thing I did to my factory stock tiny little 120-amp Nippon-Denso alternator was to replace the stock wiring using lengths of #2 welding cable connected from the alternator terminals directly the battery, this made a huge improvement in the overall charge rate.
I would also strongly recommend installing a 150-amp power fuse (I have a 200-amp fuse protecting my alternator) between the cable and the battery to protect the battery in the event of a catastrophic short.
Any questions?
Thread Starter
Administrator
Joined: Nov 2004
Posts: 4,084
Likes: 233
From: Southern California
How I make my cables.
First I will trim the end of the cable that I am going to use, in this instance this is a jumper using #2 gauge welding cable.
It cuts with ease using my pair of $300.00 Klein Ratcheting Cable Cutter, they operate using very little effort.
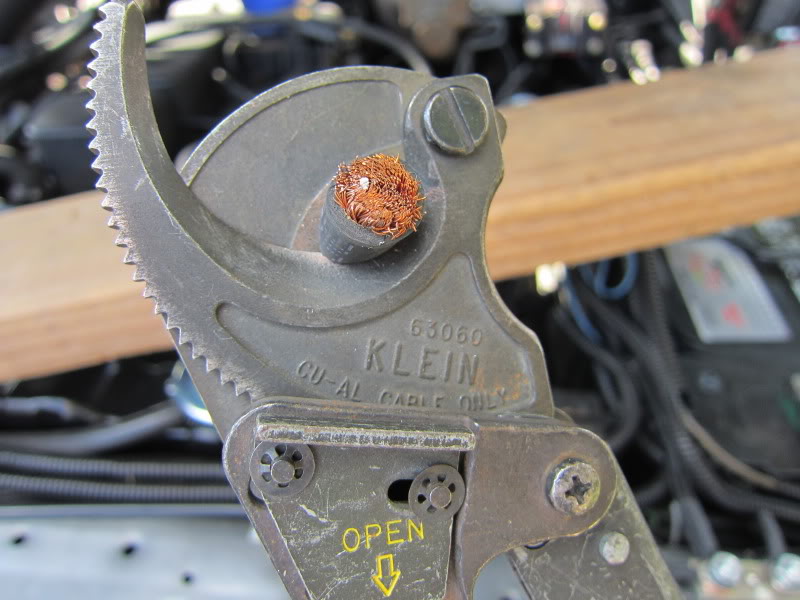
Then I trim back the insulation to expose the 636 strands of copper wire.
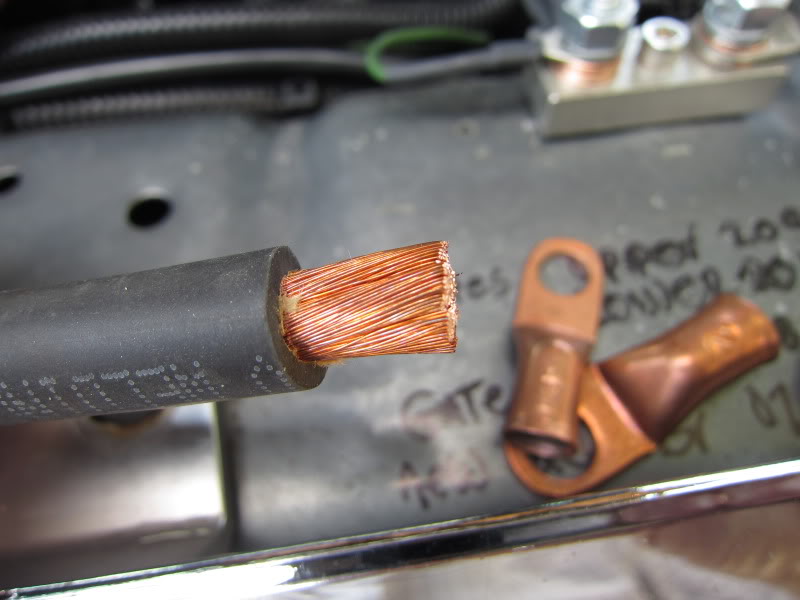
After inserting the bare strands into the new clean copper lug, it is inserted into the crimper after selecting the correct set of dies.
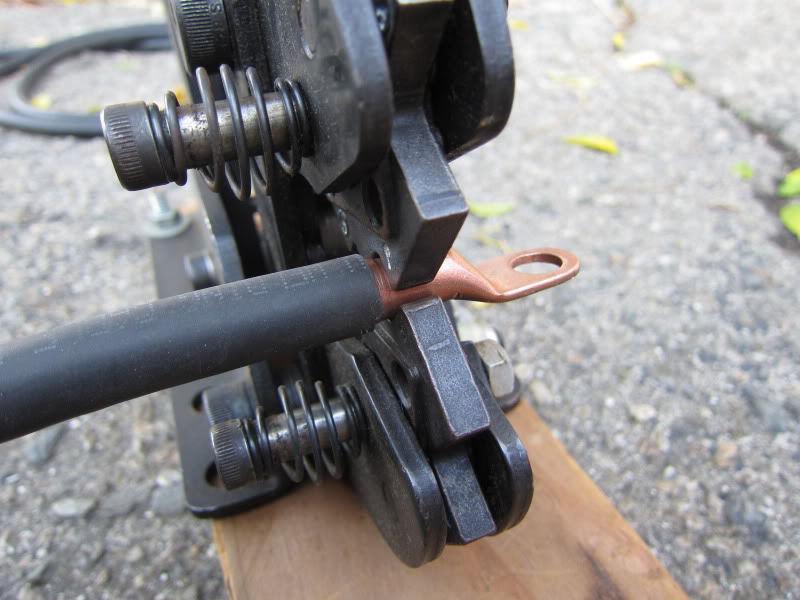
Pull down on the handle until it bottoms (this does requires some force) then retract the handle opening the dies and you have a finished crimp.
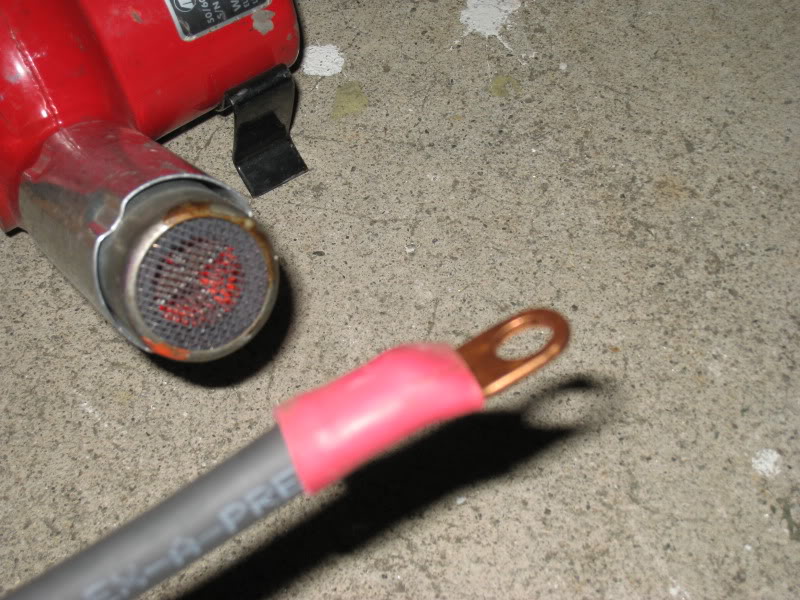
All that is left is to cut a section of heavy wall adhesive lined heat shrink tubing slipping it into place over the terminal and then using my Master Heat Gun shrink it into place.
I know some people are thinking that a crimp is not a good connection and corrosion might get inside the wire.
Not possible, using the correct set of dies for the proper lug or terminal ensures the correct force is used to crimp the junction so tight the strands actually become one piece of copper.
I have cut open an old terminal end I made using 3/0 or 000-gauge and the 1586 strands of 30-gauge wire were crushed so tightly together they could not be separated.
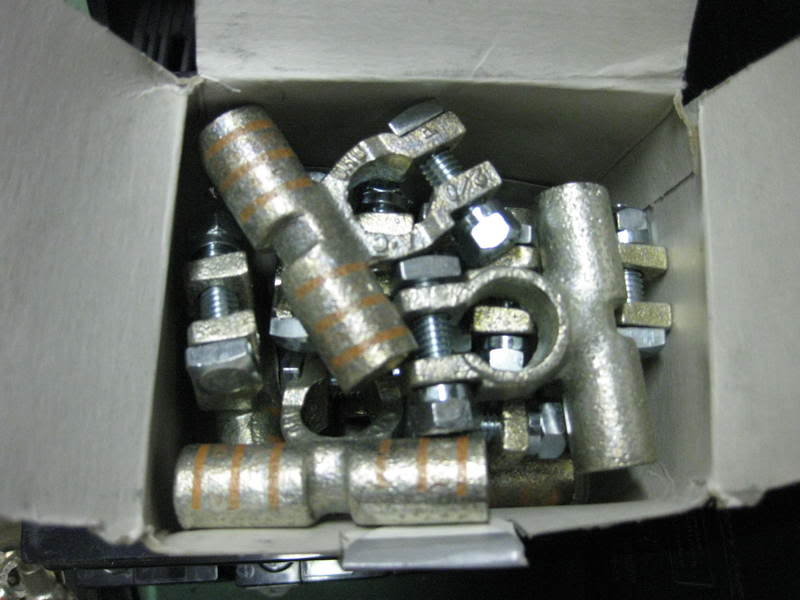
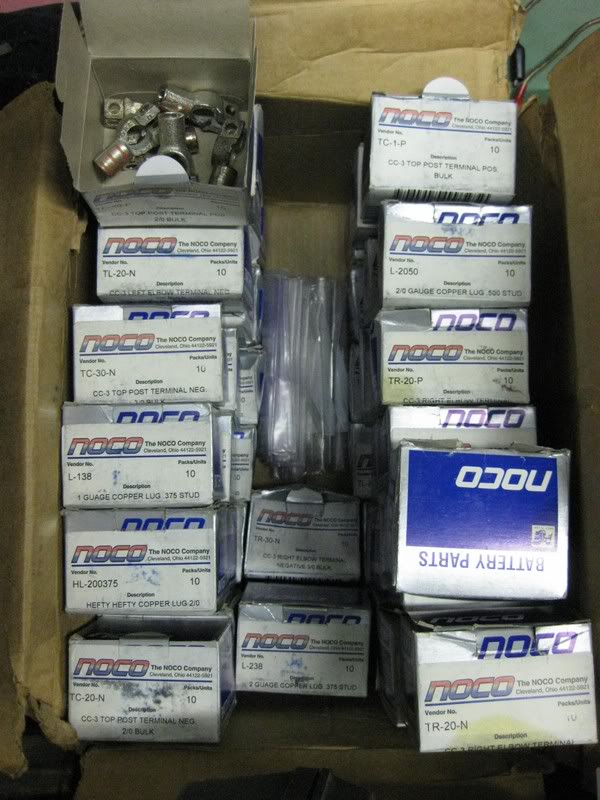
Here are some of the types of terminal I work with.
I have a couple of them.
One of my specialty when I worked for Los Angeles County was a coach/ truck electrician in addition to being a Diesel Mechanic.
Jim
First I will trim the end of the cable that I am going to use, in this instance this is a jumper using #2 gauge welding cable.
It cuts with ease using my pair of $300.00 Klein Ratcheting Cable Cutter, they operate using very little effort.
Then I trim back the insulation to expose the 636 strands of copper wire.
After inserting the bare strands into the new clean copper lug, it is inserted into the crimper after selecting the correct set of dies.
Pull down on the handle until it bottoms (this does requires some force) then retract the handle opening the dies and you have a finished crimp.
All that is left is to cut a section of heavy wall adhesive lined heat shrink tubing slipping it into place over the terminal and then using my Master Heat Gun shrink it into place.
I know some people are thinking that a crimp is not a good connection and corrosion might get inside the wire.
Not possible, using the correct set of dies for the proper lug or terminal ensures the correct force is used to crimp the junction so tight the strands actually become one piece of copper.
I have cut open an old terminal end I made using 3/0 or 000-gauge and the 1586 strands of 30-gauge wire were crushed so tightly together they could not be separated.
Here are some of the types of terminal I work with.
I have a couple of them.
One of my specialty when I worked for Los Angeles County was a coach/ truck electrician in addition to being a Diesel Mechanic.
Jim
Registered User

Joined: Nov 2006
Posts: 3,184
Likes: 564
From: Central KY
Excellent, I do admire your work. I've solved several of my electrical issuses by cleaning/adding welding cable grounds.
Will this work/help on the stock alternator too?
Thanks for documenting.
Will this work/help on the stock alternator too?
Thanks for documenting.
Thread Starter
Administrator
Joined: Nov 2004
Posts: 4,084
Likes: 233
From: Southern California
Registered User
Joined: Apr 2007
Posts: 1,260
Likes: 25
From: hesperia ca.
those heat elements are the next thing to a dead short, up here on top of the cajon pass, weve been scratching the 20's, early for the colder season, my truck sits in a insulated garage, and still cycles the heaters, i like your klein kollection.
Registered User
Joined: Nov 2007
Posts: 1,816
Likes: 0
From: Maine
Yes it DOES! I added a 6awg wire since it's what I had in bulk at the shop. Ran it through a 160a ANL fuse to my distribution block I made so I don't have so much connected to the battery. I added several 6 awg grounds to the engine, frame, and body. It VASTLY improved my electrical issues!


Trending Topics
DTR's "Cooler than ice cubes 14 miles North of North Pole" member
Joined: Oct 2006
Posts: 1,797
Likes: 9
From: 14mi North of North Pole
Back to your normal program......

Nice thread Jim. as always.

DTR's "Cooler than ice cubes 14 miles North of North Pole" member
Joined: Oct 2006
Posts: 1,797
Likes: 9
From: 14mi North of North Pole
https://www.dieseltruckresource.com/...s-t247286.html
IIRC he lists the PN at the end.
Thread Starter
Administrator
Joined: Nov 2004
Posts: 4,084
Likes: 233
From: Southern California
8LHA2070VF 110-555JHO
http://www.prestolite.com/pgs_produc...esh=1322425227
You can get these at almost any Truck Parts Store or Truck Stop in the nation.
Jim


Registered User
Joined: Nov 2009
Posts: 1,955
Likes: 2
From: McCook, Nebraska
8LHA2070VF 110-555JHO
http://www.prestolite.com/pgs_produc...esh=1322425227
You can get these at almost any Truck Parts Store or Truck Stop in the nation.
Jim
http://www.prestolite.com/pgs_produc...esh=1322425227
You can get these at almost any Truck Parts Store or Truck Stop in the nation.
Jim