73 Crew Cab 2nd Gen
 09-30-2016, 06:25 PM
#61
Registered User
Thread Starter

I'll have to check the brand and part number when I get home. It's a universal hotrod type harness, made in USA with 20 or 21 circuits. It was fairly decent on price at $160 from the classic car swap meet, here in California.
 10-01-2016, 12:45 AM
#62
Registered User
Thread Starter
Here's the harness that I bought...it looks pretty decent in the box, but I won't know for sure, until I go to install it.
EZ Wiring E-Store - EZ Wiring Harness Kits
I'm thinking about running this for the connection at the firewall, or I may just do a big grommet and run the wires through, not quite sure yet. I do know that the original bulkhead connectors are mostly junk nowadays, unless you invest a lot of time cleaning, rebuilding and sealing them. There are other places online selling it for 1/2 the price with the pin connector tools included, but not having another wiring connection eliminates another place for a circuit to fail. Hmmmmm
https://m.summitracing.com/parts/prf-40130
10-01-2016, 07:05 AM
#63
Registered User
Join Date: Dec 2010
Location: Land of the Toxic Avenger
Posts: 6,769
Received 1,637 Likes
on
1,112 Posts

How in the world have i missed this thread...???

Oh well, freaking awesome work, man.....
 I can only imagine what you could do if you were set up in a big shop with unlimited tools and machinery access....
10-01-2016, 12:02 PM
I can only imagine what you could do if you were set up in a big shop with unlimited tools and machinery access....
10-01-2016, 12:02 PM
#64
Registered User
Thread Starter
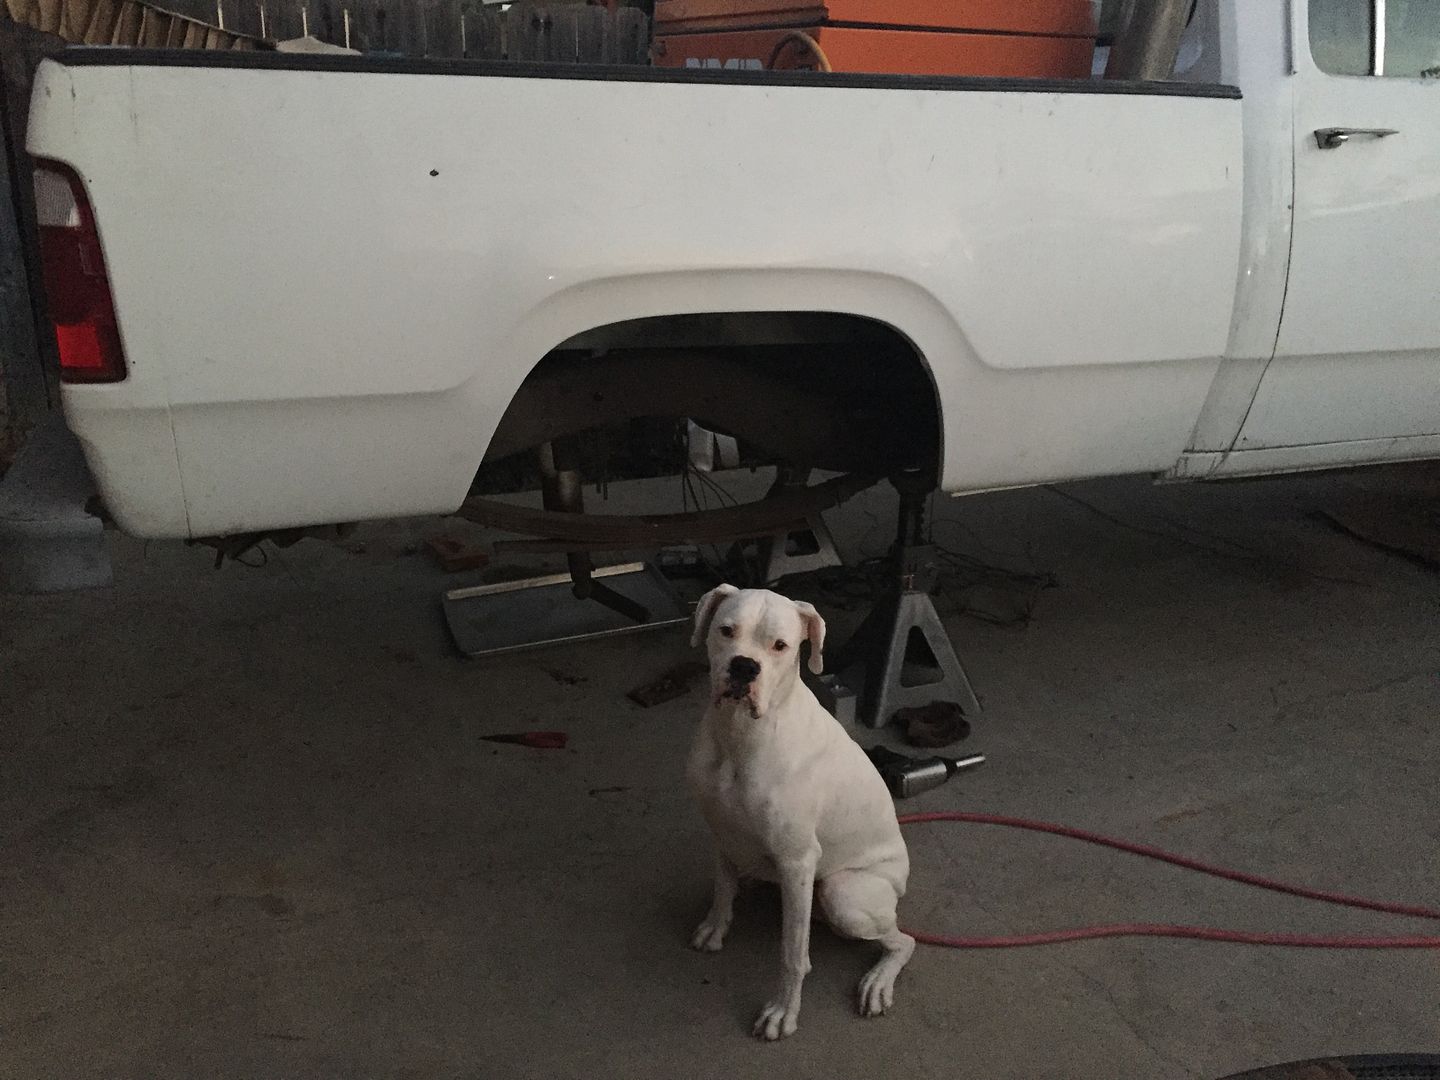
Your wife is very well behaved, sitting there for you to photograph her next to your truck. Very well behaved, indeed !
How in the world have i missed this thread...???
Oh well, freaking awesome work, man..... I can only imagine what you could do if you were set up in a big shop with unlimited tools and machinery access....
How in the world have i missed this thread...???
Oh well, freaking awesome work, man.....
I can only imagine what you could do if you were set up in a big shop with unlimited tools and machinery access....
Thank you, I try. We're planning on buying our first home in 2-3 years. I have visions of a 1500+ sq. ft. garage, a lift, big compressor and all of my tools having a home so that I can find them. Not working outside when it's over 100* would have been so much better.

 10-03-2016, 09:33 PM
#68
Registered User
Thread Starter
Then slipped the 2nd Gen radiator in and hung it from the top 2 bolts. I still have to mock up the 2nd Gen intercooler, cut off the excess tubing, and finalize the lower section, which will be a removable piece, for easy access during future radiator replacement.
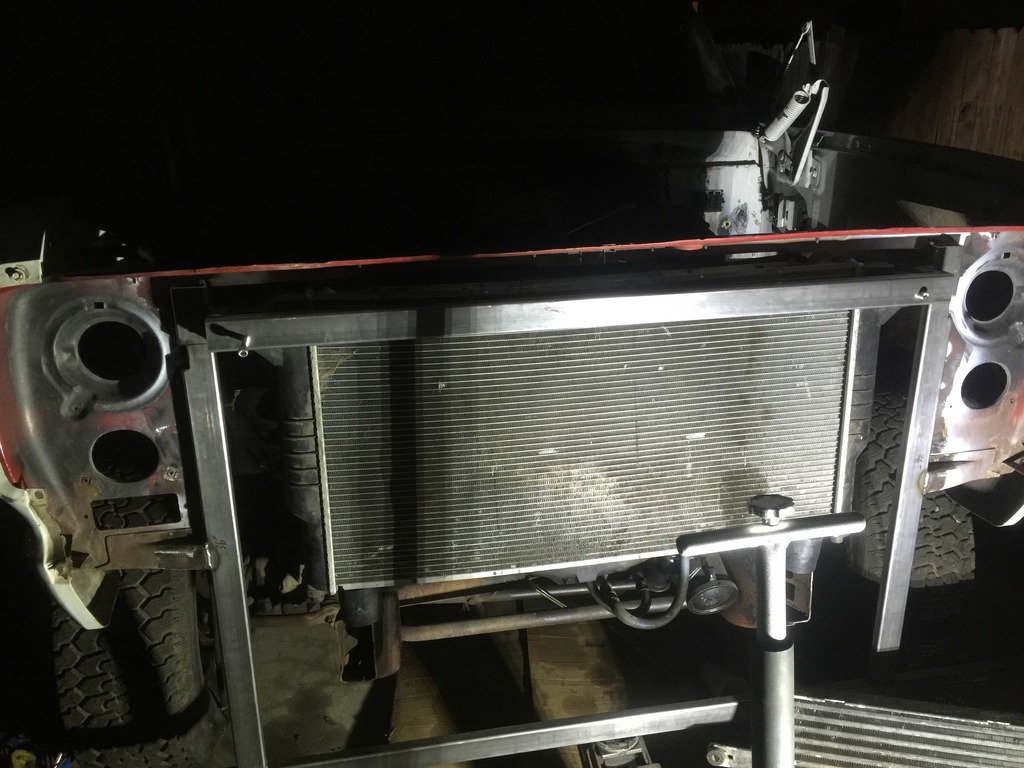 This radiator is HUGE!
This radiator is HUGE!
10-04-2016, 09:25 PM
#69
Registered User
Thread Starter
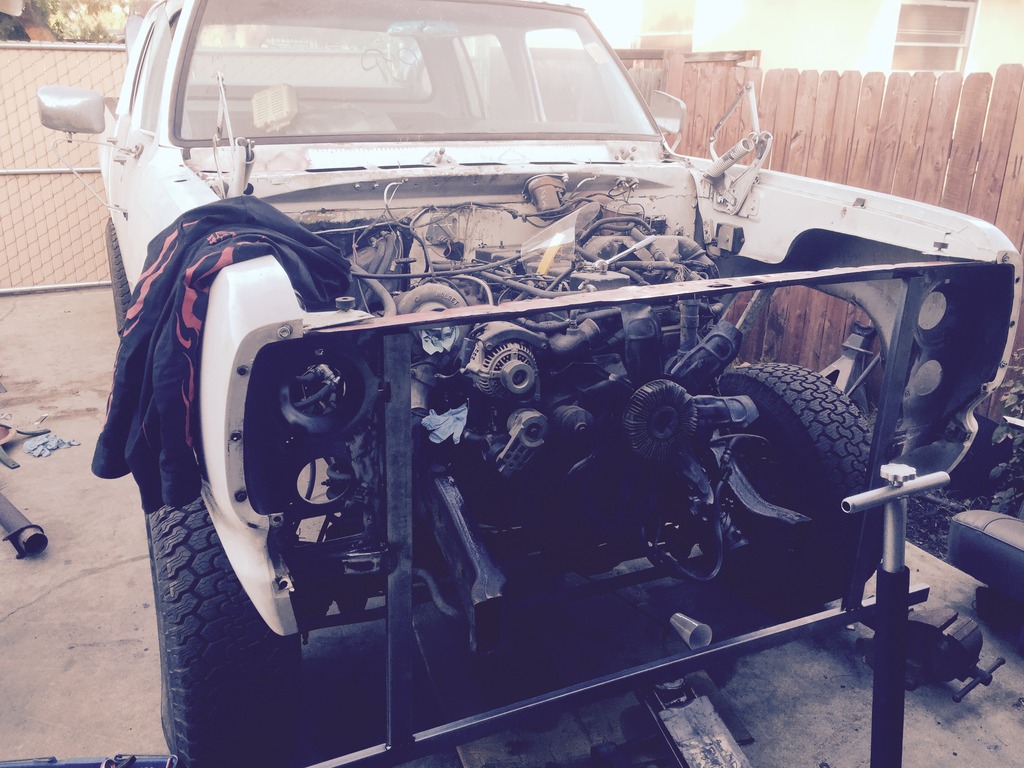
And here's what a 2nd Gen radiator and intercooler looks like behind an early 70's grill. It's a REALLY tight fit. I see why so many guys switch to the 91-93 front end. Without the 3" body lift, there's no way that this could have worked with the early bird bath hood latch mechanism. I did not want to get rid of what I think is the best looking grill and hood combo Dodge made in these years, and I'm glad I was able to keep it. 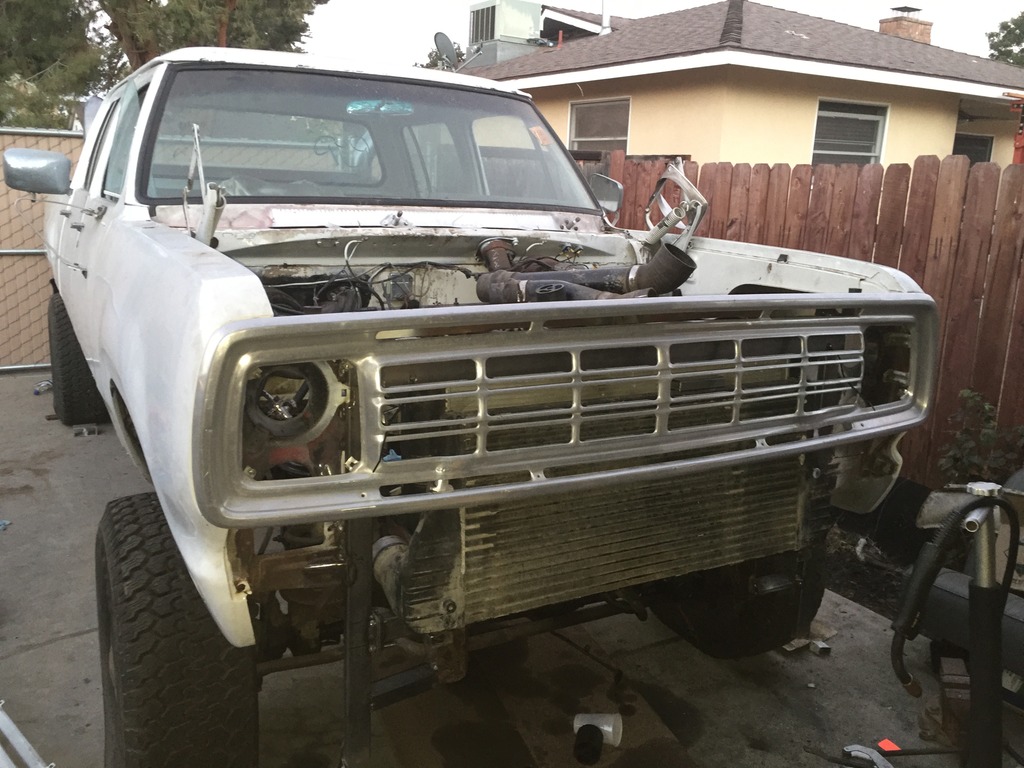
10-04-2016, 09:27 PM
#70
Registered User
Thread Starter
Tomorrow, I'm having 2 upper mounting tabs welded to the intercooler, so I can finish the upper mounts and paint everything. I still need to find my frame to core support bushings and weld the lower core support mounts on. Hopefully, that will be done by Thursday and I can move on to fuel lines.
10-06-2016, 03:14 PM
#71
Registered User
Thread Starter
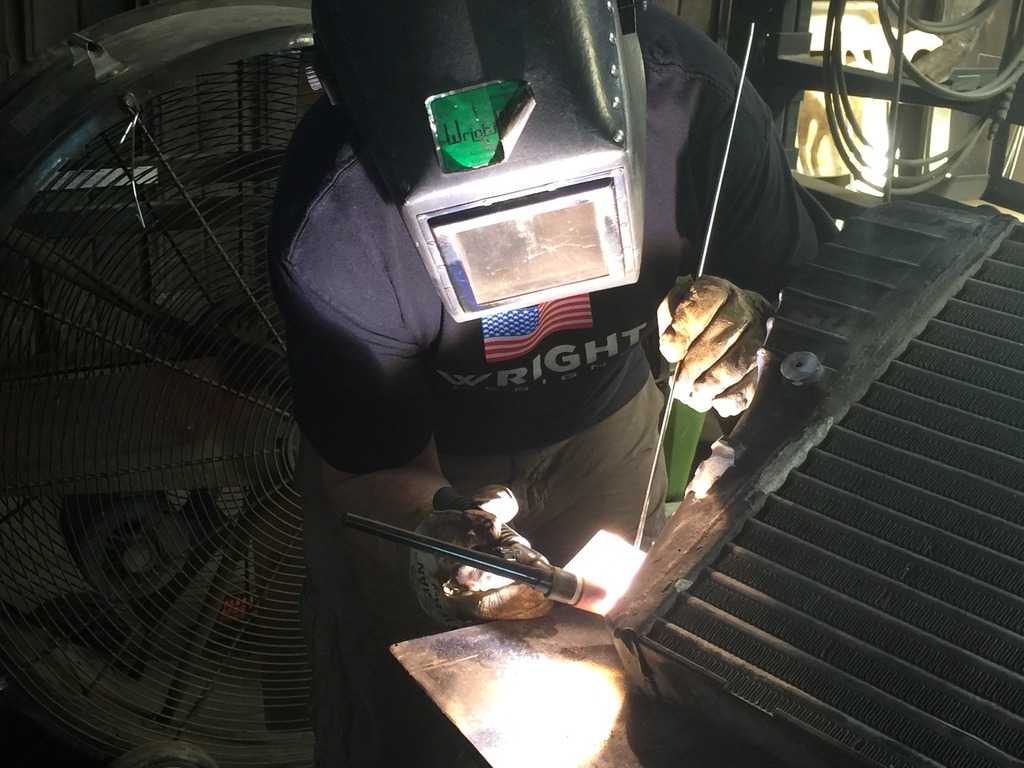
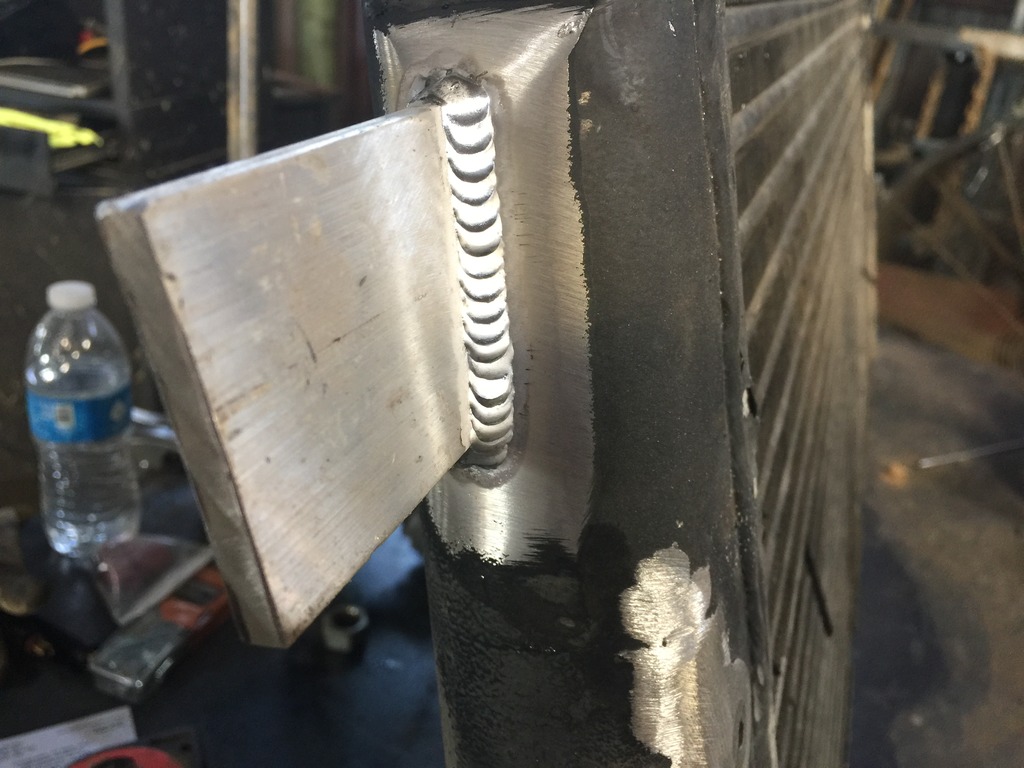
I had a friend weld some mounting tabs onto the 2nd Gen intercooler for me. The stock ones caused major interference with the early grill.
The following users liked this post:
NJTman (10-06-2016)
10-06-2016, 03:21 PM
#73
Registered User
Thread Starter
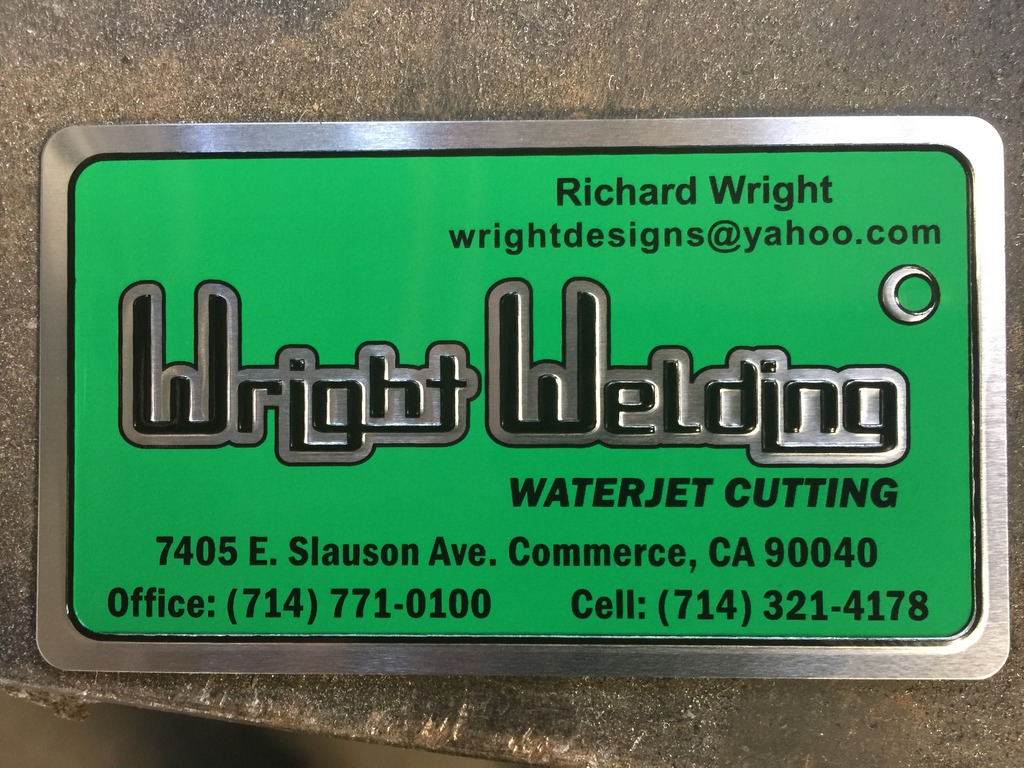
If you guys need any fab work, waterjet cutting, etc, call my buddy Rick. He's awesome with stainless, aluminum and pretty much anything metal. Just tell him that Shaggy sent ya! Oh yeah, he drives a Cummins too!
10-06-2016, 04:42 PM
#74
Registered User
Progress looks good! I can't wait until I can get the motor in and start wiring. Not that I really enjoy that stuff but it beats grinding and sandblasting 25 years of Pennsylvania off my parts.