What did you do to your Gen 1 today?
 01-22-2015, 06:00 PM
#781
Registered User
I measured from the ground to the top of the wheel well arch before I started, and after I was done, lost exactly 1.5" on each side. And I can say the ride is like night and day!! I used to cringe every time I ran over a manhole cover in the road....now it just absorbs the bump and you barely feel it.
I couldn't be happier with the ride so far. Although I've only put a couple miles on it, but so far so good!
I couldn't be happier with the ride so far. Although I've only put a couple miles on it, but so far so good!
 01-24-2015, 08:13 PM
#782
Registered User
Well today I decided to see where my "bang/Clunk" was coming from in the front end. I was pretty sure it was the steering box, but had my neighbour crank the wheels back and forth while I watched and listened.
Sure enough the box torqued in one direction, then when direction and torque was applied in the opposite direction I got a bang. And you could see that the steering box had a lot of movement.
Pulled the battery, and IC tube on the DS and lifted up the splash guard. Found one bolt half out and loose. One other was just starting to loosen up. So I removed the two I could remove, cleaned them up and blue loctited them in place. The other two I backed out as for as I could, more blue loctite, and then tightened back up.
Cycled the steering again once everything was back together and all seems well.
02-01-2015, 04:49 PM
#783
Registered User

I worked on making a metal turn signal stalk. I have two plastic ones one broken the other cracked. So far I am in the design stage but I have most of the parts I need.
02-02-2015, 10:55 AM
#784
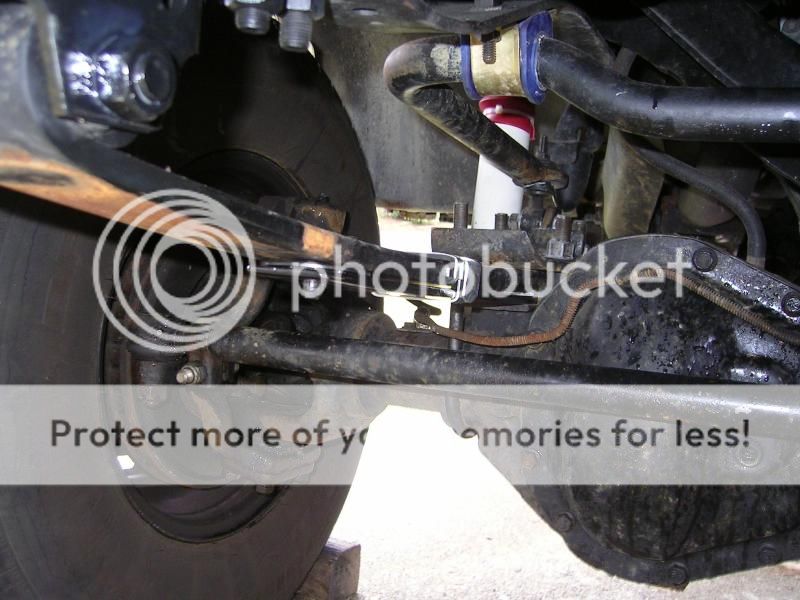
Transferred the two plates from the original pack to the new spring and installed. Required a couple clamps to compress the spring so I could get the threads started on the center bolt. Then it was just snug everything up and make sure all the plates and springs stayed in alignment.
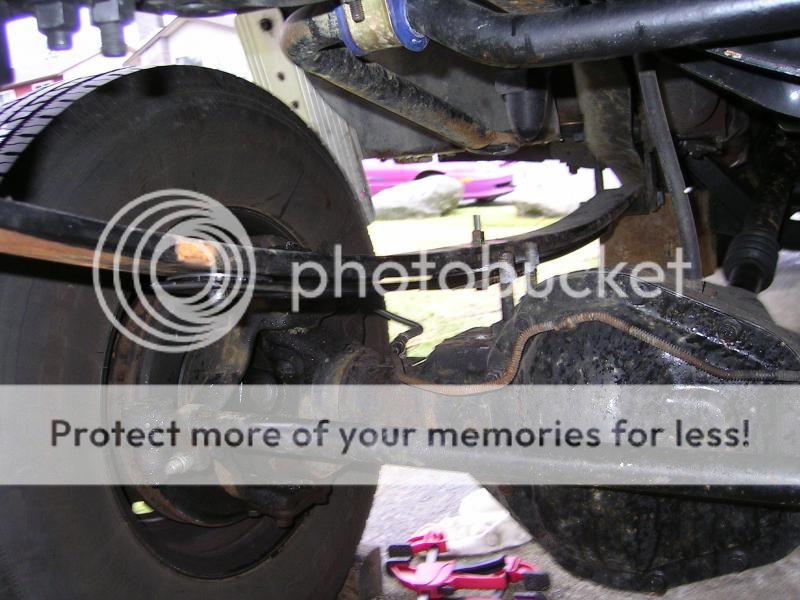
Then once both side were done I had to lower the truck back down and get everything to line up. Had to go back and forth taking a few inches out of each side to slowly lower it back down. Once the weight was on the springs I installed the spring clamps. Then finished re-installing everything. Only had to cut about 3/4" to 1" off the U-bolts to make up for the difference in spring pack thickness.
All done and ready to go.
 02-02-2015, 10:11 PM
#785
Registered User
I think the frame mount bushings, the blue ones, were from Moog. The end link bushings were just some spare poly bushings I had laying around, on the original links.
02-03-2015, 02:07 AM
#786
I stripped the block down, pulled the VE and resealed the fuel pin, shutoff lever, both sides of the KSB valve, top cover, RPM lever, and power screw. I think those were all the orings I could find easily. I didn't mess with the bottom end of the pump any further, the pump looked to be in good shape. Oh, and I had already replaced the two on the weird fuel line up front, and the input shaft seal.
I'll be replacing the oil pan gasket, front crank seal, tappet and timing cover gaskets tomorrow prior to paint.
I'm painting the block , pan and front cover/accy's apex red, with gloss black valve covers and IP.
Or maybe the IP should be red as well? Fuel lines will be black. bought 8 cans of brake cleaner.
Prepped for a fuel heater delete as well.'
Did 60lb valve springs yesterday. will be running an HE300VG turbo with a Steed Banshee II stand alone VGT controller / Exhaust brake.
Low pressure LP installed.
Thinking of leaving the tappet cover "sound insulation" off. It is crusty.
02-03-2015, 06:45 AM
#787
Registered User

will be running an HE300VG turbo with a Steed Banshee II stand alone VGT controller
Thanks
02-03-2015, 08:52 AM
#788
Registered User
I stripped the block down, pulled the VE and resealed the fuel pin, shutoff lever, both sides of the KSB valve, top cover, RPM lever, and power screw. I think those were all the orings I could find easily. I didn't mess with the bottom end of the pump any further, the pump looked to be in good shape. Oh, and I had already replaced the two on the weird fuel line up front, and the input shaft seal.
I'll be replacing the oil pan gasket, front crank seal, tappet and timing cover gaskets tomorrow prior to paint.
I'm painting the block , pan and front cover/accy's apex red, with gloss black valve covers and IP.
Or maybe the IP should be red as well? Fuel lines will be black. bought 8 cans of brake cleaner.
Prepped for a fuel heater delete as well.'
Did 60lb valve springs yesterday. will be running an HE300VG turbo with a Steed Banshee II stand alone VGT controller / Exhaust brake.
Low pressure LP installed.
Thinking of leaving the tappet cover "sound insulation" off. It is crusty.
I'll be replacing the oil pan gasket, front crank seal, tappet and timing cover gaskets tomorrow prior to paint.
I'm painting the block , pan and front cover/accy's apex red, with gloss black valve covers and IP.
Or maybe the IP should be red as well? Fuel lines will be black. bought 8 cans of brake cleaner.
Prepped for a fuel heater delete as well.'
Did 60lb valve springs yesterday. will be running an HE300VG turbo with a Steed Banshee II stand alone VGT controller / Exhaust brake.
Low pressure LP installed.
Thinking of leaving the tappet cover "sound insulation" off. It is crusty.
02-03-2015, 09:26 AM
#789
Yup, it is the motor out of the 1991.0 going in the '87 F350 Crew.
02-03-2015, 09:30 AM
#790
Registered User
 02-03-2015, 07:14 PM
#792
 02-03-2015, 10:08 PM
#794
Registered User
My son beat me in the good deal department. When his went last year, he found a new one in a retired Fummins builder's parts pile and paid $25 for it.
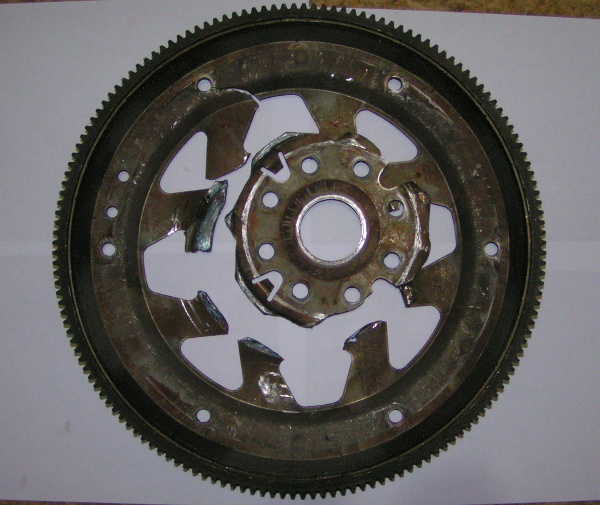
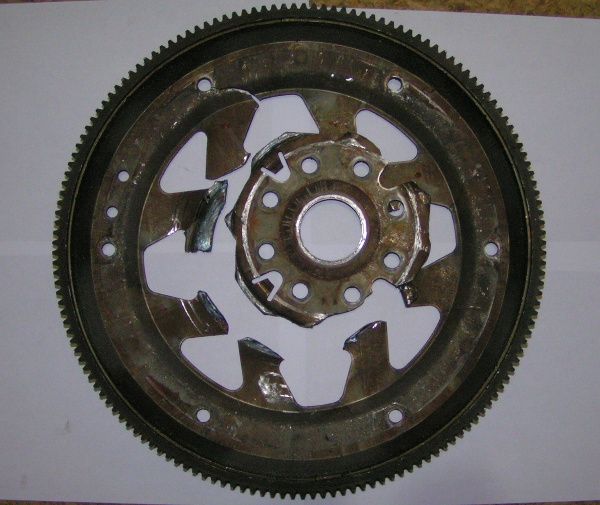
It went from inaudible to that in about a mile. DW was driving. she's a wild one, she is.
Here's the flexplate
PRW 1835910 Platinum Series SFI 29.1 Rated Steel Flexplate
02-04-2015, 12:33 AM
#795
Registered User

Join Date: Jul 2013
Location: Washington State
Posts: 389
Likes: 0
Received 0 Likes
on
0 Posts
Did the drivers side window motor. Plugged it in and the polarity was backwards... Thought that was wierd. Re pinned te two wires on the plug and good to go.

