In preparation for the fluid damper install
 08-07-2015, 08:28 PM
#1
Registered User
Thread Starter
In preparation for the fluid damper install
Haven't bought it just yet. Should have it by next weekend, though. If you all that have installed the fluid damper wouldn't mind offering some tid bit advice, here is what I need to know: 1. What size open end wrench is needed to remove the fan clutch? 2. If I remember, fan clutch nut is a left hand thread, correct? It's been awhile, but seems to remove it I had to wack the wrench clockwise to the right to unthread it. Please verify 3. Seems that the harness extension for the crank sensor that comes with the damper is not needed due to the OEM harness being long enough for the new I relocation? 4. Is it wise to replace the four bolts that retain the damper? Was thinking of getting the ARP ones that XDP offers as the replacement. 5. Lastly, and this question ties in with multiple subjects: What was the ideal thickness and hole size of the shim/washer you all used to push the stock fan forward to clear the added thickness of the fluid damper? O.D dimension? Seems to me someone found a fan clutch/fan combo off of another year cummins that clears the damper easily, and is adaptable to our rigs. I appreciate it. If you don't know/remember some of my questions, just reply back on the ones you're sure of- thanks a bunch

 08-08-2015, 01:43 AM
#3
Registered User
Thread Starter
08-08-2015, 03:32 AM
#4
Registered User
Yes the harness does not need to be added too...just run it along the outside edge of the timing case cover.
I can't recall the dimensions of the shim I used. I chose to use a big one on the outside, but others have used washers on the inside of the clutch fan hub. I made mine from a strengthening brace off a 2wd cross member.
If there is truly a set-up that clears I have not seen, heard or come across it. My fan and clutch cleared fine when I had the fluidampr on my Non-IC motor. But due to the differences in the fan hub on IC vs Non-IC motors the IC set-up just does not clear.
I just re-used the OEM bolts for the harmonic balancer.

I can't recall the dimensions of the shim I used. I chose to use a big one on the outside, but others have used washers on the inside of the clutch fan hub. I made mine from a strengthening brace off a 2wd cross member.

If there is truly a set-up that clears I have not seen, heard or come across it. My fan and clutch cleared fine when I had the fluidampr on my Non-IC motor. But due to the differences in the fan hub on IC vs Non-IC motors the IC set-up just does not clear.
I just re-used the OEM bolts for the harmonic balancer.
08-08-2015, 09:02 AM
#5
Registered User
Thread Starter
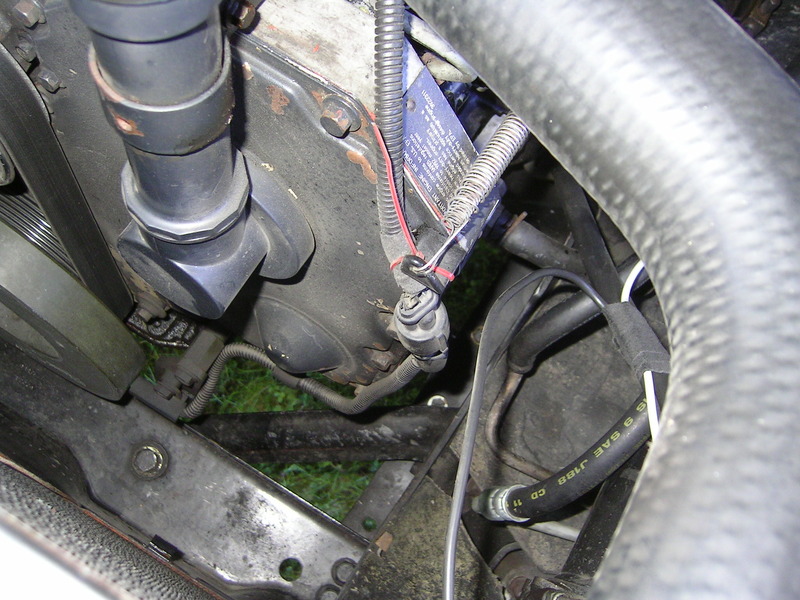
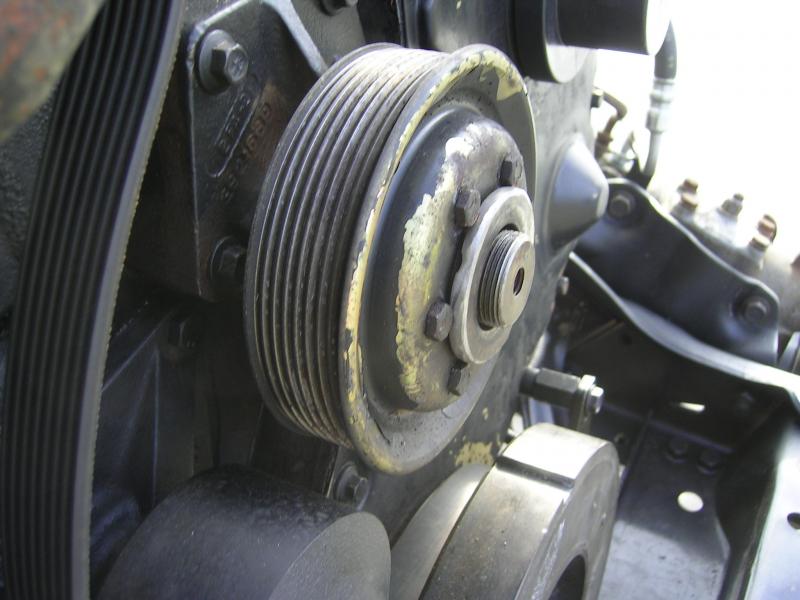
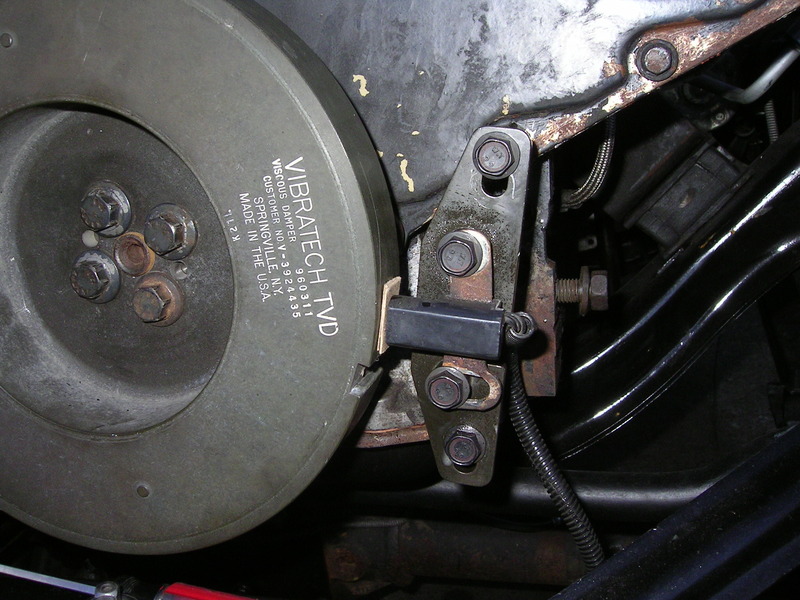
TC, thanks for your insight. Now, looking at your front pic, I see the concern of a belt swap out being what I thought originally to be very troublesome, but again, looking at your first pic it looks like all one would need to do in a belt swap would be to unbolt the top bolt of that sensor retaining bracket and pivot it towards the drivers side. Slip the new belt in, re pivot the bracket towards the passenger side, re bolt in, and I should still maintain the gap needed for the sensor to work. Am I correct in theory? As far as the shim to push the fan forward, I now see(thnx to your pic) that it goes between the fan and the pulley. All this time I thought the shim went behind the pulley. My uncle who lets me stay on his property out here in the bay is a machinist. Out of billet aluminum I will have him fab out a shim. Is it safe that I have him, say fab one out at 1/8", and one at a 1/4", so at install time I have choices, or should I have a set of shims at 3/16" and 5/16" made instead?
08-08-2015, 09:05 AM
#6
Registered User
Thread Starter
Re read your shim section and I see that the shim can also be installed behind the pulley as you stated others have done. My bad
08-08-2015, 09:14 AM
#7
Registered User
Thread Starter
Hey TC, I read BC847's install post on his FD during my search, and he said he had to bore out the fluid damper sensor bracket to allow his sensor to achieve the required gap. Now, if I remember the time lines, I believe he did that install in 2006. He commented he would notify Fluid Damper on this modification in hopes they would resolve that problem for future 1st Genners looking to do this install. I'm curious if you still had to do the same thing. Sorry to hammer you with back to back inquiry posts. Hopefully you'll be able to dissect my last 3 replies
Trending Topics
08-08-2015, 12:45 PM
#8
Registered User
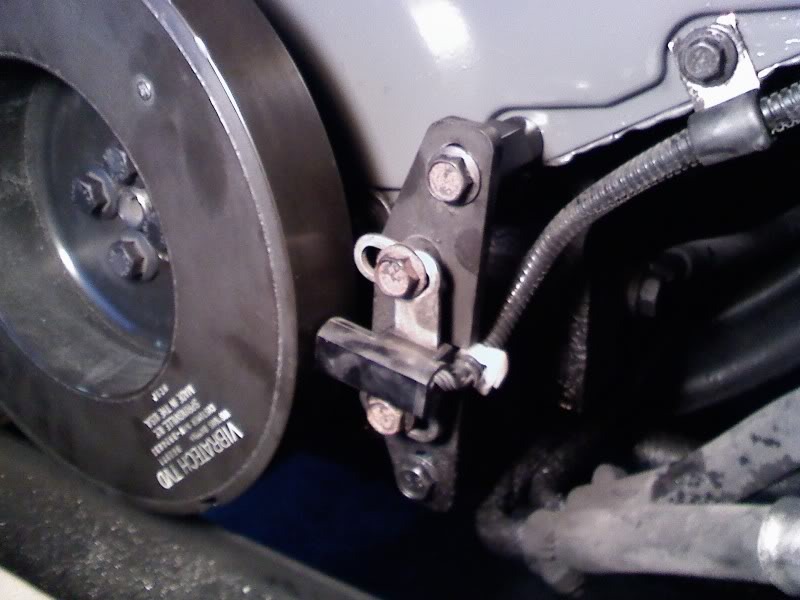
The shim kind of depends on your current clutch and fan set-up. I tried a bunch of different shims before finally coming up with this one. I found that I had to re-use the original 20+ year old clutch assembly due to it being about 1/8th longer then the new unit I had.
I also wanted to make sure I had about 3 good solid threads for the clutch to thread onto the hub....if not then I felt it was too sketchy and had the potential to come loose, or come apart at high RPM's.
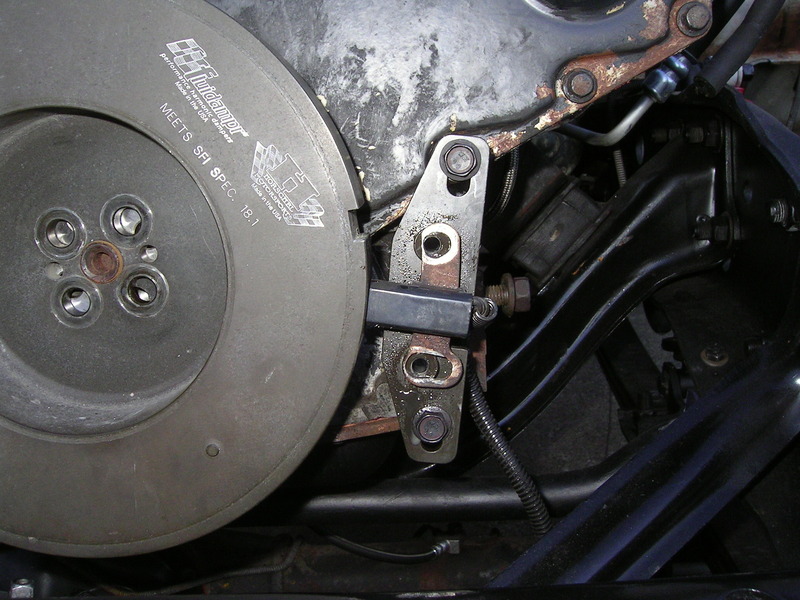
As for changing the belt. I have done it a couple times, and I just un-bolt the CPS and then re-install. There is too much adjustment in the bracket and the CPS to be able to simply swig it out of the way and then re-install. The gap would change. It's not too hard to re-set the gap.
Also check your CPS. This kit and bracket assembly is set-up to work with a 2nd Gen/aftermarket CPS. The OEM 1st Gen CPS does not have the appropriate amount of adjustment built into the bracket, where as the 2nd Gen/aftermarket unit does.
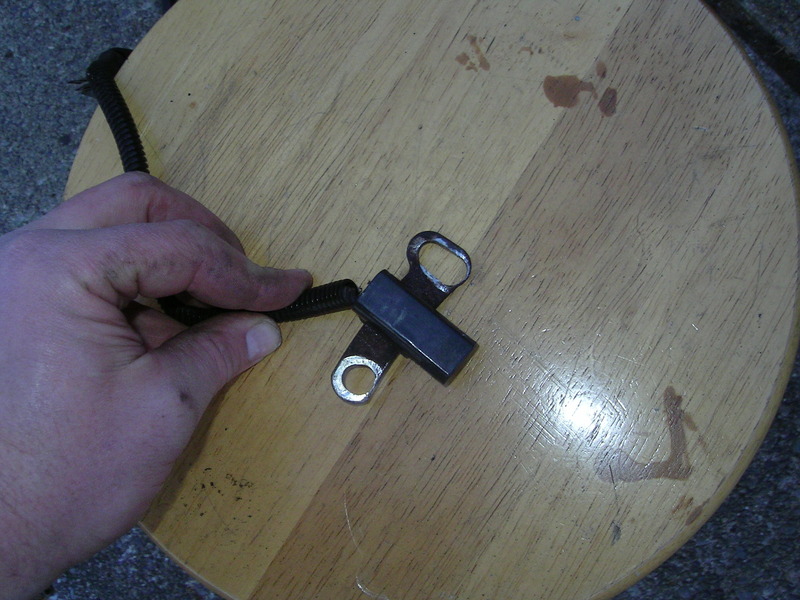
Here's what I had to do to my OEM CPS to make it work.
Here's a pic of the 2nd Gen/aftermarket unit I found on the net...
I also wanted to make sure I had about 3 good solid threads for the clutch to thread onto the hub....if not then I felt it was too sketchy and had the potential to come loose, or come apart at high RPM's.
As for changing the belt. I have done it a couple times, and I just un-bolt the CPS and then re-install. There is too much adjustment in the bracket and the CPS to be able to simply swig it out of the way and then re-install. The gap would change. It's not too hard to re-set the gap.
Also check your CPS. This kit and bracket assembly is set-up to work with a 2nd Gen/aftermarket CPS. The OEM 1st Gen CPS does not have the appropriate amount of adjustment built into the bracket, where as the 2nd Gen/aftermarket unit does.
Here's what I had to do to my OEM CPS to make it work.


Here's a pic of the 2nd Gen/aftermarket unit I found on the net...
 08-08-2015, 09:09 PM
#9
Registered User
Thread Starter
I understand now, TC, and thanks. So I need to get my files ready LOL! What did you use as your shim to gap the sensor from the balancer in the 3rd pic? I know fsm says to use a non magnetic feeler gage to achieve gap. Just trying to picture the time I have an emergency for a belt swap and I don't have my brass feeler gages on me...what are you using there? Also, looking ahead as part of preventative maintenance on a 22 year old rig- did you by chance swap out for new, the fan hub bearing? Did a search on that in the sticky. Cummins ones sure are pricey, but also there are ones to be had for anywhere from $40-$65 vs the $145. Figured while I was there with things apart, it made sense wether it needed it or not. If you did change it out, where did you source your parts from? Lastly, for now, I see on my search quest there is talk about upgrading the OEM fan for I believe a 2nd gen one, which had more blades but is plastic? It was either that or there was one made out of steel, but had more of a twist in the blades, allowing more air to be drawn/better cooling. You happen to know anything about this upgrade?
08-09-2015, 01:25 AM
#10
Registered User
The shim I used for the COS gap is just a piece of cardboard. I folded it over and measured it to make sure it was in the proper range. It is said that a match book cover, folded in half, should be close enough to get you going. 
No I did not bother with the fan bearing. I do have a new bearing in the shop just in case it ever starts to go out on me.
As for fan's themselves, the 2nd Gen unit is darn close to the 1st Gen unit...I have one and could not see the difference that is mentioned. As for the plastic bladed unit...there was a guy on e-bay selling a few a month or so ago. I was watching them on Ebay for a couple weeks, and then I Believe I mentioned it here, and on CF and they were snapped up pretty quick after that...not sure if they have anymore for sale.
I would not bother messing with your fan....just clean, inspect and re-install.
08-09-2015, 10:03 AM
#11
Registered User
Thread Starter
Right on Thrashin'! Thanks a bunch. Since my last post on this tread I've done a lot of reading, and saw your step by step on the sticky. Also saw NJT's 2012 tread on his KDP install which brought pics in close. I believe the combination of those two, along with your helpful replies back, should make this a trouble free install. Gotta do a knowledge check on this tourque to yield stuff on the damper bolts, though. Do not fully understand that concept. May do what others have done and torque to the foot lbs. called out for and just add the reliable lock tite. While I'm at it, I will re open my timing case cover and re tourque the bolt heads underneath and re do that KDP wire tab. My FD was ordered yesterday, and will be in by Wednesday. If anything else pops up during the install I may PM you, but I believe I'll be OK. Thanks again
 08-11-2015, 01:00 AM
#14
Registered User
Not really at idle, or at low RPM...but at 2000rpm and above...yes I sure could feel the difference. With the old balancer you could feel the point where the balancer really stopped doing it's job effectively, and it would start shaking the whole truck at higher RPM's. But now it's nice and smooth all the way through.
08-13-2015, 10:46 AM
#15
Registered User
Thread Starter
My Fluid Damper came in yesterday. Holy Camole! That thing is huge n heavy! I knew it was larger than stock, but this thing is big. Maybe my front end will droop down some after install LOL