Installing Headlamp Relays
 11-07-2007, 06:55 AM
#16
Registered User

Join Date: May 2006
Location: Canton, Georgia
Posts: 253
Likes: 0
Received 0 Likes
on
0 Posts
OK, I don't get this.
As quoted from Jim's post "You will see I have also included a 3rd. relay to turn on the Low beams in conjunction with the High Beams."
Jim can you explain how to wire this please and possibly show a picture?
Thanks,
Joseph
As quoted from Jim's post "You will see I have also included a 3rd. relay to turn on the Low beams in conjunction with the High Beams."
Jim can you explain how to wire this please and possibly show a picture?
Thanks,
Joseph
 11-07-2007, 02:57 PM
#17
Administrator
Thread Starter

I just checked and it looks like I lost a link to the schematic.
Sorry if I have confused you.
Give me a bit and I will fix it.
Jim
Sorry if I have confused you.
Give me a bit and I will fix it.
Jim
11-07-2007, 08:35 PM
#18
Registered User

Jim I installed my LiteForce driving lights last night. I tied into the headlight harness at the steering column in the High beam circuit. From there I used a lighted rocker switch, then I went to a Tyco 30/40 amp relay. What I have noticed is that when the headlight are off and the DRL are working that the rocker is lit very dim when in the on position and the relay is not enguaged. Just a little more insight into the DRL system.
11-07-2007, 08:55 PM
#19
Banned
Wiki'd
http://wiki.dieseltruckresource.com/...eadlamp_Relays
Hey Jim, when u get the schematic back, can u PM it to me so i can throw it in there?
Mike
http://wiki.dieseltruckresource.com/...eadlamp_Relays
Hey Jim, when u get the schematic back, can u PM it to me so i can throw it in there?
Mike
11-10-2007, 12:05 AM
#20
Administrator
Thread Starter
Ok everyone I got the link fixed and I added the install for the 3rd. relay.
Check it out and let my know what you think. And if there are any questions feel free to ask.
Dave,
Thank you for your help it looks great.
Thanks again
Jim.
Check it out and let my know what you think. And if there are any questions feel free to ask.
Dave,
Thank you for your help it looks great.
Thanks again
Jim.
11-10-2007, 10:31 AM
#21
Registered User
Join Date: Apr 2007
Location: Geary Co. Kansas
Posts: 354
Likes: 0
Received 0 Likes
on
0 Posts
A great write up jim!! I wish i had it when i did mine! haha I people can't find the heavy duty pigtails at their local auto parts store, I used one's i cut off of a old chevy pickup with round headlights i had at the farm they are 14 ga wire and work good. Ya might have to spread the teminals back out on the inside of the sockets so they fit tight and use a good amount of dielectric grease. Thanks again for the good info
ez
ez
 12-03-2007, 04:56 PM
#23
OK. Dummies standpoint here.
I attached my relays to a small panel that I then attached between the fender and the battery. This let me keep all my jumpers short and clean.
Other than that... WHOOOHOOOO Its not dark yet... but at least my high beams stay on with my low beams.
Thanks Jim for the great write-up. I could NOT have done it without the pictures (wiring diagrams confuse the heck outta me)
12-04-2007, 04:13 AM
#24
Administrator
Thread Starter
OK. Dummies standpoint here.
I attached my relays to a small panel that I then attached between the fender and the battery. This let me keep all my jumpers short and clean.
Other than that... WHOOOHOOOO Its not dark yet... but at least my high beams stay on with my low beams.
Thanks Jim for the great write-up. I could NOT have done it without the pictures (wiring diagrams confuse the heck outta me)
I attached my relays to a small panel that I then attached between the fender and the battery. This let me keep all my jumpers short and clean.
Other than that... WHOOOHOOOO Its not dark yet... but at least my high beams stay on with my low beams.
Thanks Jim for the great write-up. I could NOT have done it without the pictures (wiring diagrams confuse the heck outta me)
Hey everyone,
I am glad my write-ups are of some interest to you.
I was checking my Photobucket Account the other day that does my web hosting for the pictures I put on this site and I was like WOW.
Look how many people are accessing my pictures.
I was really surprised because it is all from this site.
Total Pictures and Videos: 406
Monthly Hits: 11770
Jim
12-04-2007, 06:14 PM
#25
Registered User

When I relayed the lights on mine and the wife's trucks, I did not do the third relay(dims on with brights).
I intend to do so soon; but, I am going to approach this from a different angle.
I am going to tap into the BRIGHT wire, in the cab, under the dash, for my relay trigger-wire (the one you show going from BRIGHT terminal 87 to third-relay terminal 86), then through an in-dash toggle-switch, before tying to third-relay 86 terminal.
This should accomplish the same job with one less wire ran through the fire-wall.
For that matter, the relay could be entirely under the dash, with the third-relay 87 wire tying into the DIM wire under the dash, and the third-relay 30 being not so big a wire, right ??
Wired as such, no wires would need be ran through the firewall.
12-05-2007, 09:39 AM
#26
DTR's Night Watchman & Poet Laureate
Hey everyone,
I am glad my write-ups are of some interest to you.
I was checking my Photobucket Account the other day that does my web hosting for the pictures I put on this site and I was like WOW.
Look how many people are accessing my pictures.
I was really surprised because it is all from this site.
Total Pictures and Videos: 406
Monthly Hits: 11770
Jim
Jim, thats because you did an excellent job making what sounds very complicated into a very easy to understand job.
Kudo's on the excellent write up and good photos!!!
12-08-2007, 02:55 AM
#27
Administrator
Thread Starter
Hey everyone,
I am glad my write-ups are of some interest to you.
I was checking my Photobucket Account the other day that does my web hosting for the pictures I put on this site and I was like WOW.
Look how many people are accessing my pictures.
I was really surprised because it is all from this site.
Total Pictures and Videos: 406
Monthly Hits: 11770
Jim
I am glad my write-ups are of some interest to you.
I was checking my Photobucket Account the other day that does my web hosting for the pictures I put on this site and I was like WOW.
Look how many people are accessing my pictures.
I was really surprised because it is all from this site.
Total Pictures and Videos: 406
Monthly Hits: 11770
Jim
Total Pictures and Videos: 406
Monthly Hits: 13580
I am impressed..
Jim
12-08-2007, 10:16 AM
#28
Registered User
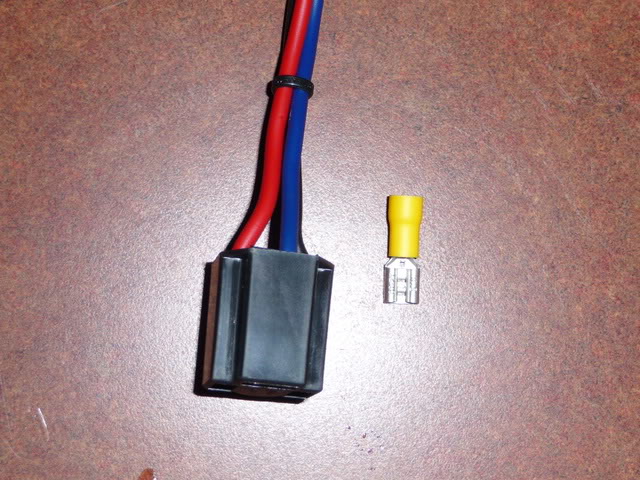
10-13-2008, 05:49 PM
#30
Registered User
Join Date: Aug 2008
Location: Murray KY
Posts: 21
Likes: 0
Received 0 Likes
on
0 Posts
I couldn't find any headlight socket that were to my liking, so I made my own 12 gauge sockets using the 2.99 cheapo sockets and yellow female spade connectors. I pulled the little 18 gauge spades out and stripped the big yellow and had to spread the terminal out a bit as well as punch it with a pick so it would stay in the terminal base. 20 minuets worth of work got me a lot better connector than I could find/buy.