Crewcab update...
 02-24-2017, 09:59 PM
#1231
Registered User
Thread Starter
I will probably try to use the original bracket system....but modified to drop the seats as low as possible....being the giant 300lb gorilla that I am I need all the room I can get. 

My 2nd Gen seats are angled back quite a bit...for added head room etc. So the height from the back of the seat to the roof will not reflect the seat height properly. I can get you height from the front and rear of the front seat cushion....that will give you a better understanding of the height of the seat.
My 2nd Gen seats are angled back quite a bit...for added head room etc. So the height from the back of the seat to the roof will not reflect the seat height properly. I can get you height from the front and rear of the front seat cushion....that will give you a better understanding of the height of the seat.

The following users liked this post:
NJTman (02-25-2017)
02-24-2017, 10:02 PM
#1232
Registered User
I will probably try to use the original bracket system....but modified to drop the seats as low as possible....being the giant 300lb gorilla that I am I need all the room I can get.
My 2nd Gen seats are angled back quite a bit...for added head room etc. So the height from the back of the seat to the roof will not reflect the seat height properly. I can get you height from the front and rear of the front seat cushion....that will give you a better understanding of the height of the seat.
My 2nd Gen seats are angled back quite a bit...for added head room etc. So the height from the back of the seat to the roof will not reflect the seat height properly. I can get you height from the front and rear of the front seat cushion....that will give you a better understanding of the height of the seat.
 02-24-2017, 10:37 PM
#1234
Registered User
Awesome, thanks.
With the original brackets my seat sits at 36 1/4 in the front and 38 3/4 in the rear. Looks like it won't be too hard for you to get your original heights using the factory brackets.
With the original brackets my seat sits at 36 1/4 in the front and 38 3/4 in the rear. Looks like it won't be too hard for you to get your original heights using the factory brackets.
The following users liked this post:
thrashingcows (02-25-2017)
02-25-2017, 08:10 AM
#1236
Registered User
Join Date: Dec 2010
Location: Land of the Toxic Avenger
Posts: 6,770
Received 1,637 Likes
on
1,112 Posts
Thanks for posting this pic of you on that other website. At least now I know what you look like.....
02-25-2017, 08:41 AM
#1237
Registered User
I could make most of them work and would just need a 90* piece bolted / welded to the front mount and bolt them all to the floor. But I'm undecided if the seats sit too high for me or not.
Your head might touching the roof if you used the original brackets
That reminds me - I was going to ask if you could get a measurement from the top of your seat to your roof to compare the height difference.
Your head might touching the roof if you used the original brackets
That reminds me - I was going to ask if you could get a measurement from the top of your seat to your roof to compare the height difference.
The following users liked this post:
thrashingcows (02-25-2017)
02-25-2017, 11:13 PM
#1238
Registered User
I put 3rd gen seats in my 74 Crew. I thought they sat too high, so I cut an inch out of the brackets, then I reinforced the floor and bolted them through. It not an easy job making seats fit our trucks, but the reward is a much more comfortable ride compared to the OE bench.
The following users liked this post:
thrashingcows (02-26-2017)
02-25-2017, 11:15 PM
#1239
Registered User

The following 4 users liked this post by dan123dbl:

The following users liked this post:
mknittle (03-05-2017)


The following 4 users liked this post by thrashingcows:
03-13-2017, 11:38 PM
#1242
Registered User
Thread Starter
I have a 1500 mile trip in the truck next week, so decided I better service my front hub bearings...been about 30K km's years since I did them last.
The last time the inner seals were toast, and it looked really bad in there.....had to put in new bearings and races too. Well this time it was only slightly better....inner seals were gone again, and water had worked into the grease.
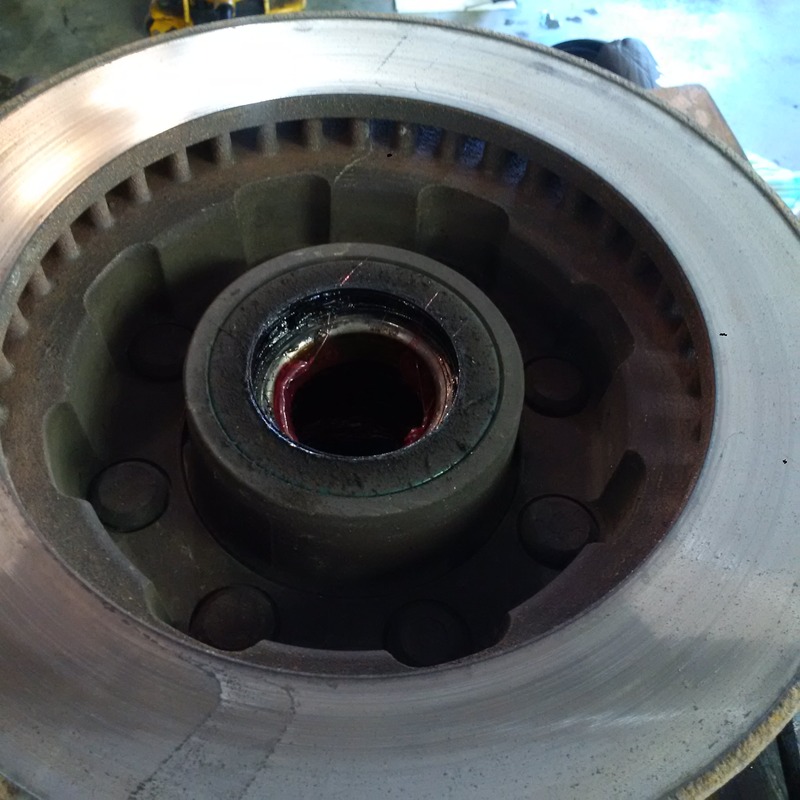
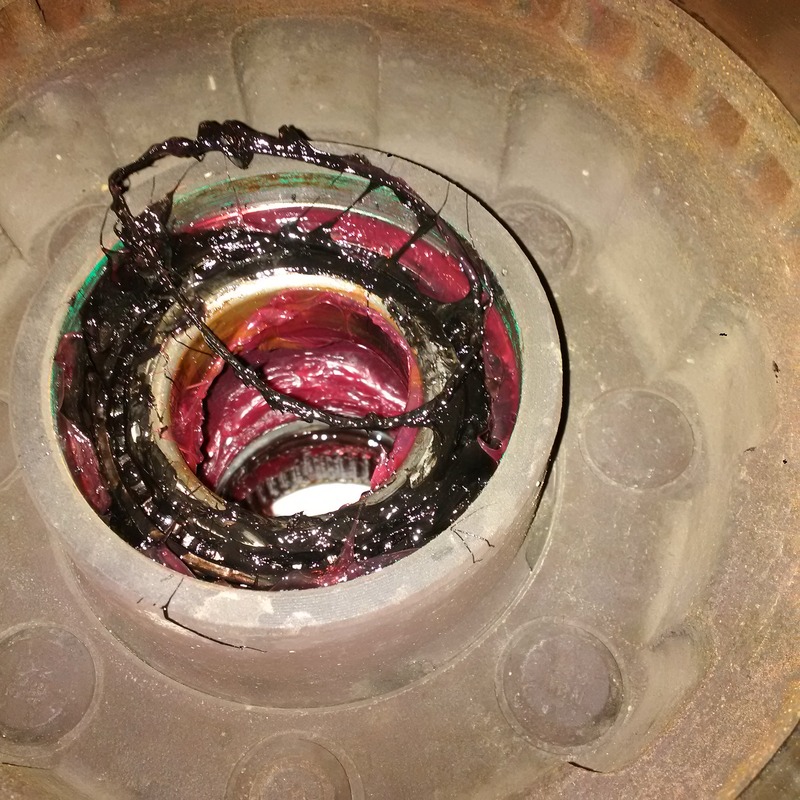
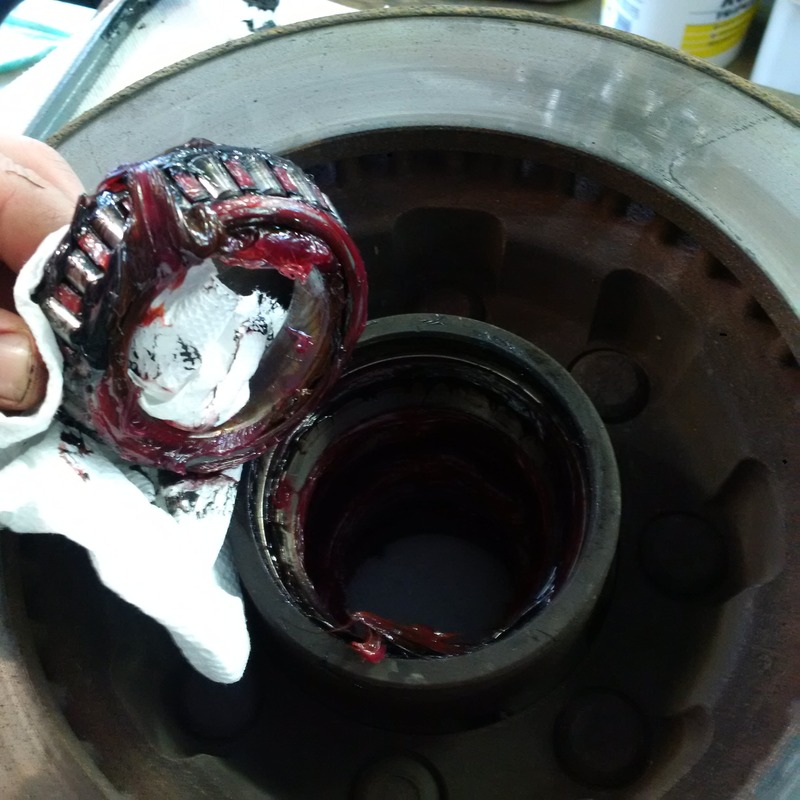
The last time the inner seals were toast, and it looked really bad in there.....had to put in new bearings and races too. Well this time it was only slightly better....inner seals were gone again, and water had worked into the grease.


 03-13-2017, 11:44 PM
#1243
Registered User
Thread Starter
Bit of water got in past the front hub selector O-ring....but not too bad.
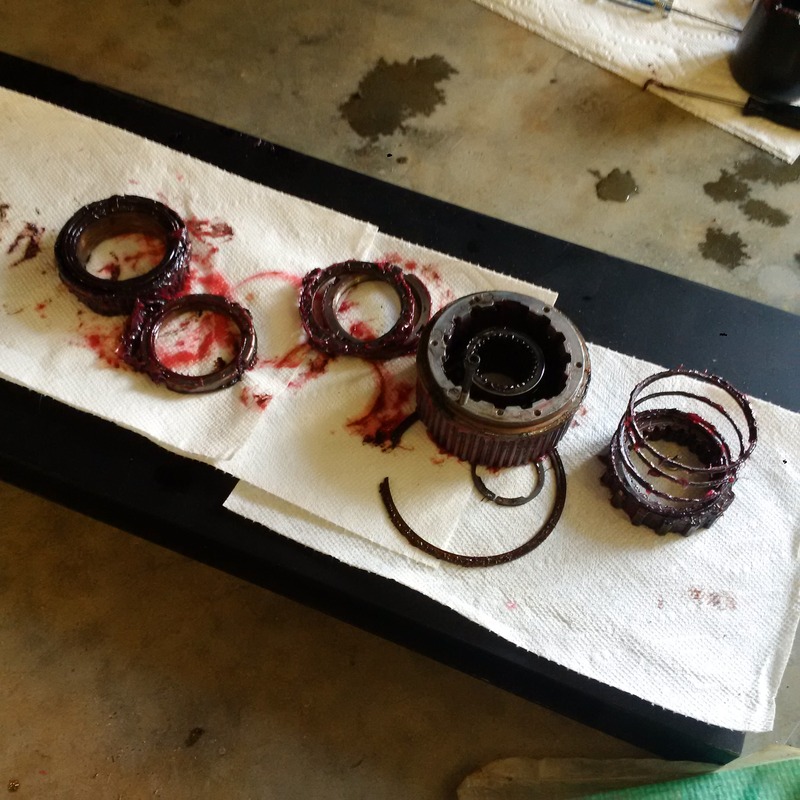
Front bearing....
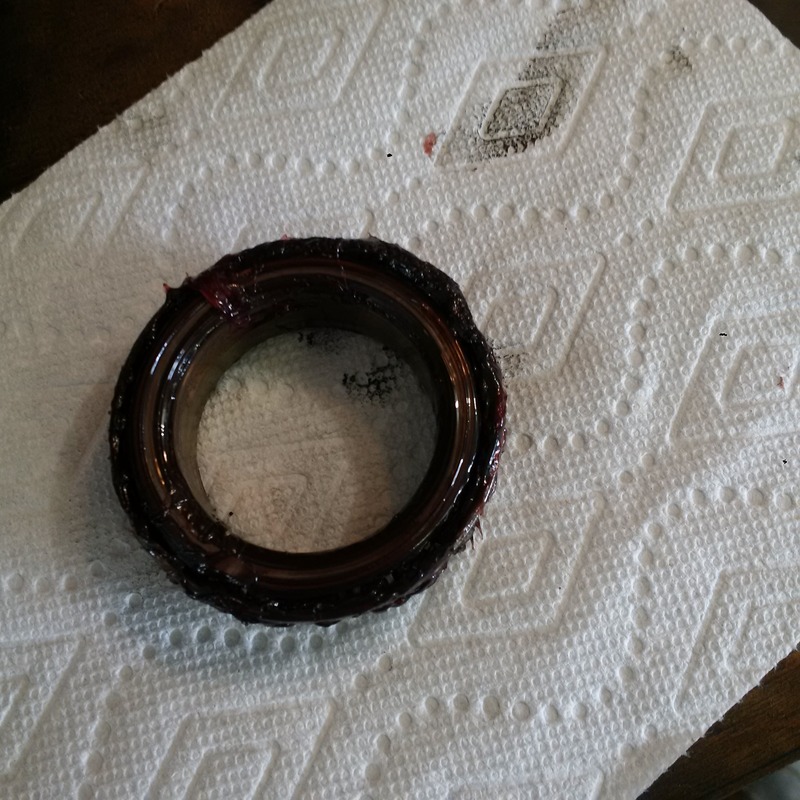
I think my spindles are just worn out....think that is why I have the inner seals cooking out on me, and the rusty surfaces between the bearings and the spindle.
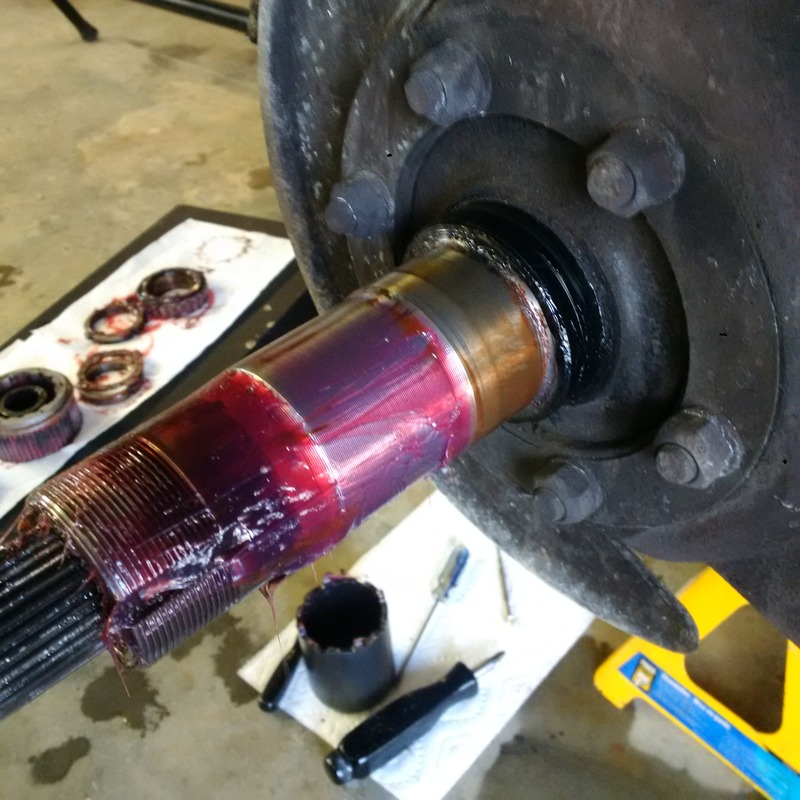
Cleaned up the caliper mounting points, scuffed the rotors and brake pads, and Also rotate my tires at this time as well. Should be good for our trip now.
The following users liked this post:
mknittle (04-16-2017)
04-16-2017, 01:51 AM
#1244
Registered User
Thread Starter
Note-been trying to upload to photobucket all day....if I didn't have 3000 pics on the site already I would use another pic provider. I eventually got the pics to work using my old PC hard drive and then copy and paste in this thread......what a gong show! 
Well yesterday I drove almost 1200km's, and 15.5hrs, round trip to Grande Prairie AB and back, to pick up a couple items I purchased at a Richie Bros Auction. Since I couldn't bid in person, I bid on-line....very handy system they have, and couldn't be happier with my purchases.
I purchased a simple backhoe attachment for my skid steer, and a 2 post hoist (9000lb rating) for the new shop when it gets built. Same hoist I had been looking at locally, but got it for $1200 cheaper! Pretty certain it's off shore built, but will inspect it carefully, and if I have to modify and strengthen it I will.
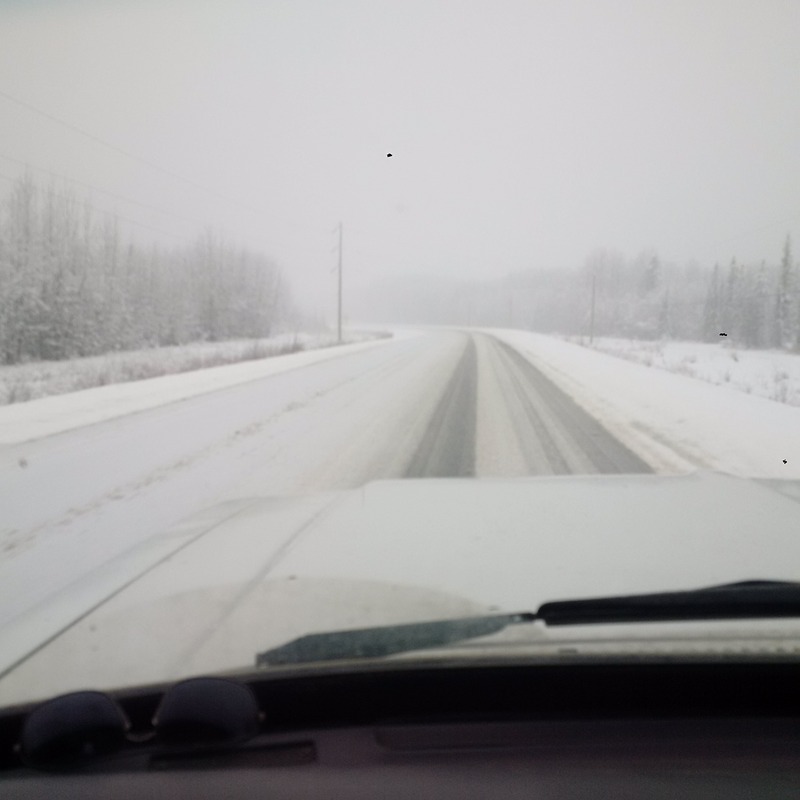
Due to the Easter weekend I was not sure if they were going to be open, so had to call early...Thankfully they were. I had got the truck and trailer ready to go the night before, so all I had to do was basically jump in and go. About an hour north of town the snow started.....and I had just put on my worn summer tires last week!
Snow got worse and worse as the trip went on, at least through BC, and evened out to a steady snow fall by the time I got into Alberta. Again thankful for the 4wd that's for sure.
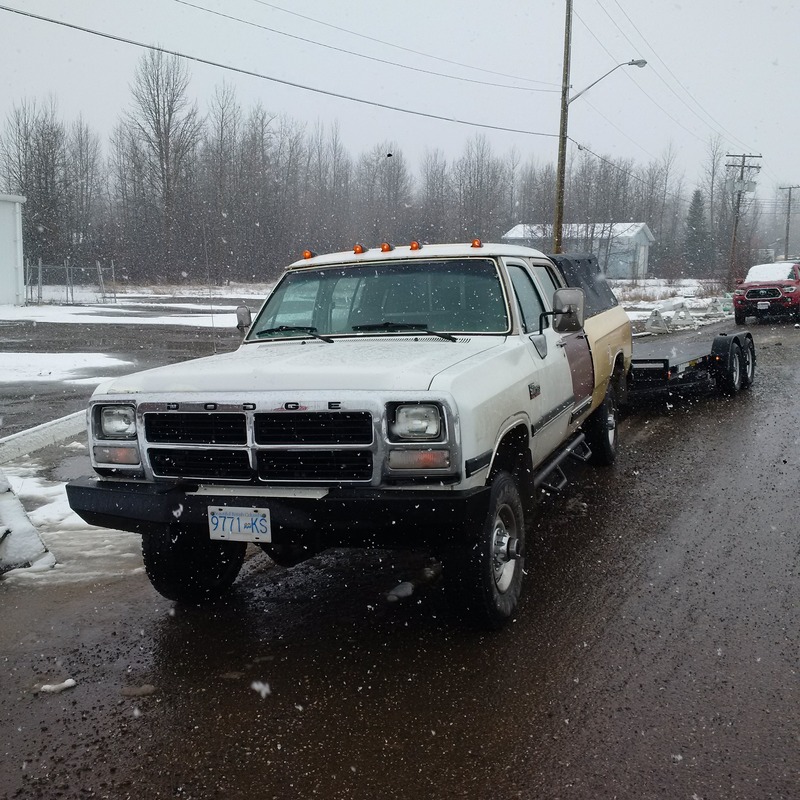
Once I arrived at the RB Auction house they got me loaded up, chained everything down really well.

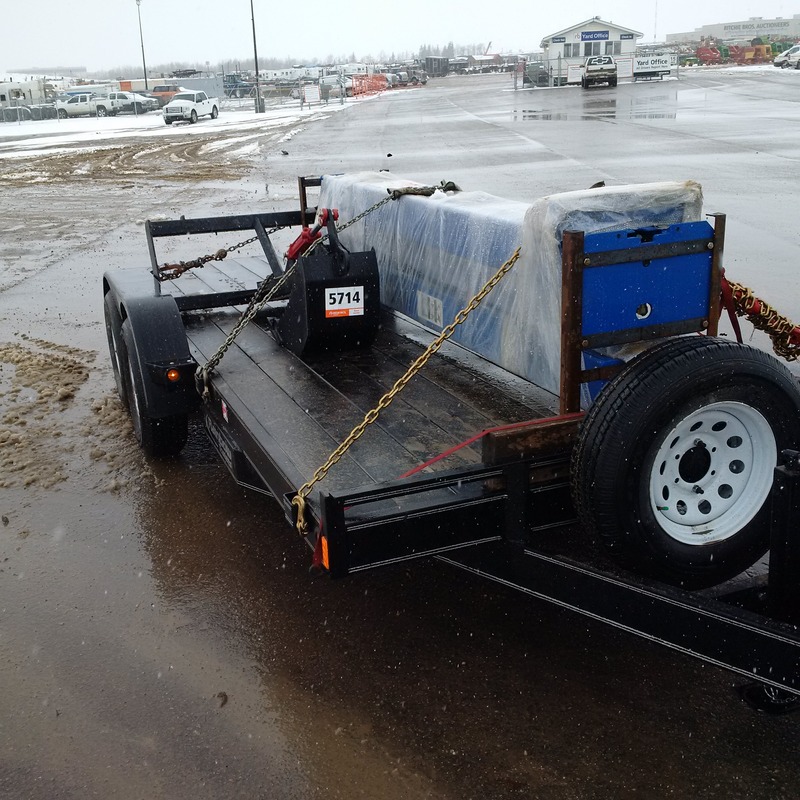
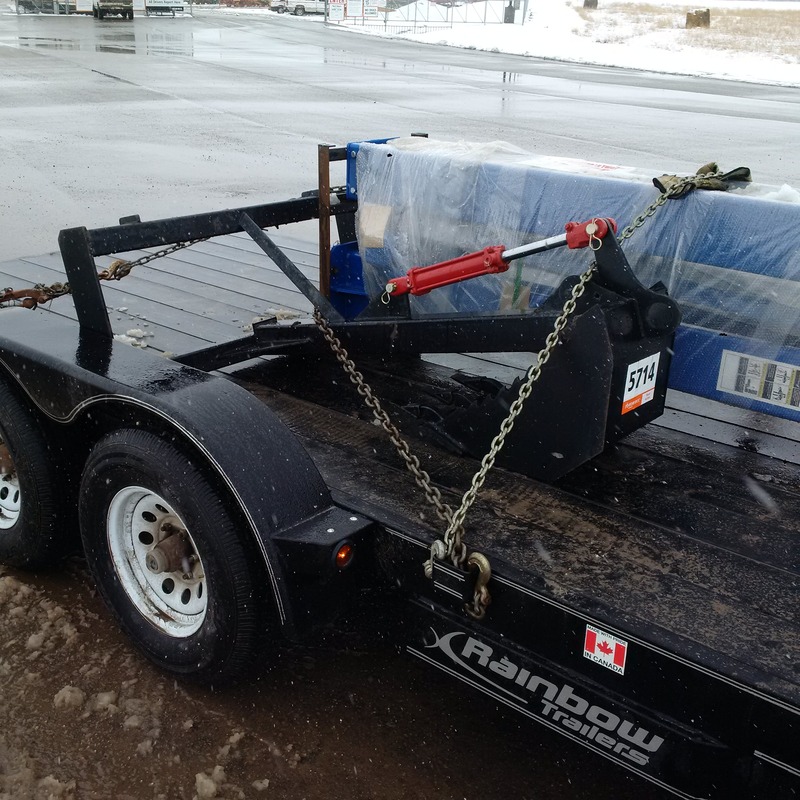
Then filled up on some cheap Alberta diesel and started heading for home.....snow was even worse through BC on the return trip....over 12" of wet slippery snow in some areas!
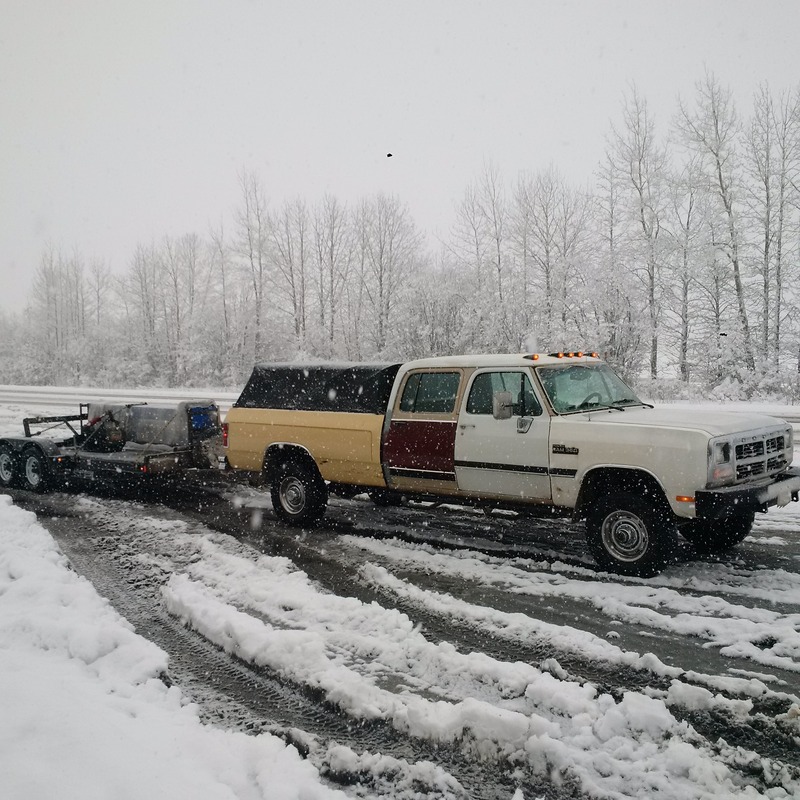
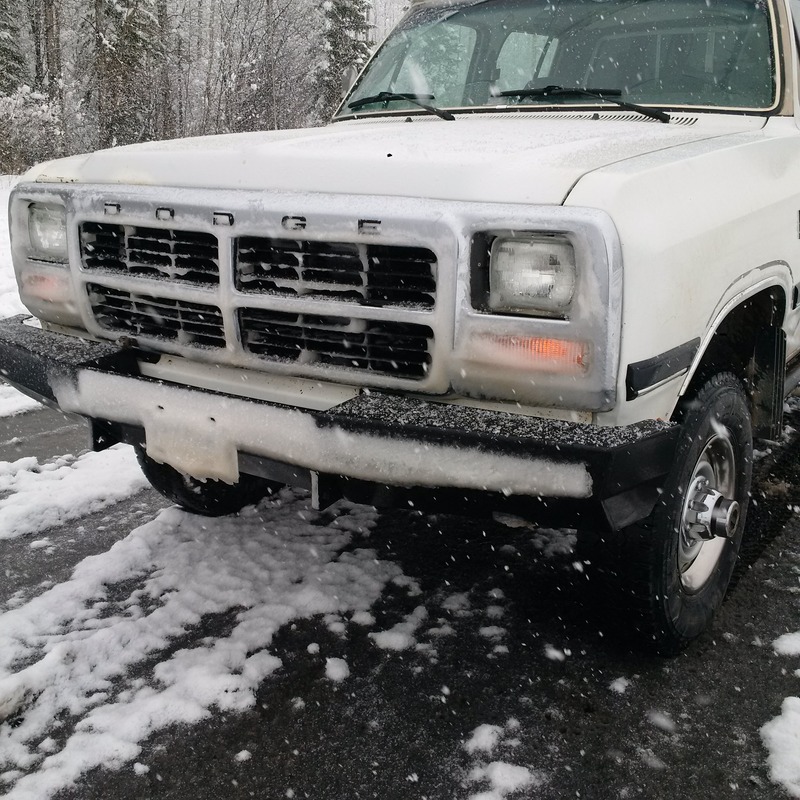

Ol Patches did great as usual, and got me home about 11pm last night.
Well yesterday I drove almost 1200km's, and 15.5hrs, round trip to Grande Prairie AB and back, to pick up a couple items I purchased at a Richie Bros Auction. Since I couldn't bid in person, I bid on-line....very handy system they have, and couldn't be happier with my purchases.
I purchased a simple backhoe attachment for my skid steer, and a 2 post hoist (9000lb rating) for the new shop when it gets built.
Same hoist I had been looking at locally, but got it for $1200 cheaper! Pretty certain it's off shore built, but will inspect it carefully, and if I have to modify and strengthen it I will.Due to the Easter weekend I was not sure if they were going to be open, so had to call early...Thankfully they were. I had got the truck and trailer ready to go the night before, so all I had to do was basically jump in and go. About an hour north of town the snow started.....and I had just put on my worn summer tires last week!
Snow got worse and worse as the trip went on, at least through BC, and evened out to a steady snow fall by the time I got into Alberta. Again thankful for the 4wd that's for sure.

Once I arrived at the RB Auction house they got me loaded up, chained everything down really well.


Then filled up on some cheap Alberta diesel and started heading for home.....snow was even worse through BC on the return trip....over 12" of wet slippery snow in some areas!


Ol Patches did great as usual, and got me home about 11pm last night.
The following 5 users liked this post by thrashingcows:
Blue Goose (04-16-2017),
Daytrepper (04-16-2017),
gyman98 (04-16-2017),
mknittle (04-16-2017),
NJTman (04-16-2017)
04-16-2017, 06:19 AM
#1245
Registered User
Join Date: Dec 2010
Location: Land of the Toxic Avenger
Posts: 6,770
Received 1,637 Likes
on
1,112 Posts
Bit of water got in past the front hub selector O-ring....but not too bad. .
I think my spindles are just worn out....think that is why I have the inner seals cooking out on me, and the rusty surfaces between the bearings and the spindle.
Cleaned up the caliper mounting points, scuffed the rotors and brake pads, and Also rotate my tires at this time as well. Should be good for our trip now.
The last time I did my hub servicing, I put a ton of grease where that large outer seal was, as well as inside the hub center. Now no more water gets in.
I also avoid direct pressure washing the hubs themselves....
Not saying you hubs can't be worn, but I would also check the clearances between the new seals and the hub prior to assembly. I know there can be problems with offshore bearings not fitting correctly as well.