my daily-driver Ramcharger build
 10-26-2013, 07:00 PM
#31
Registered User
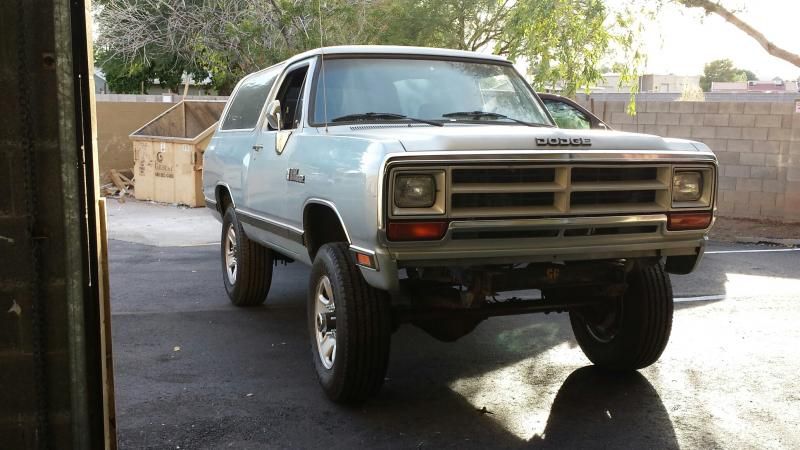
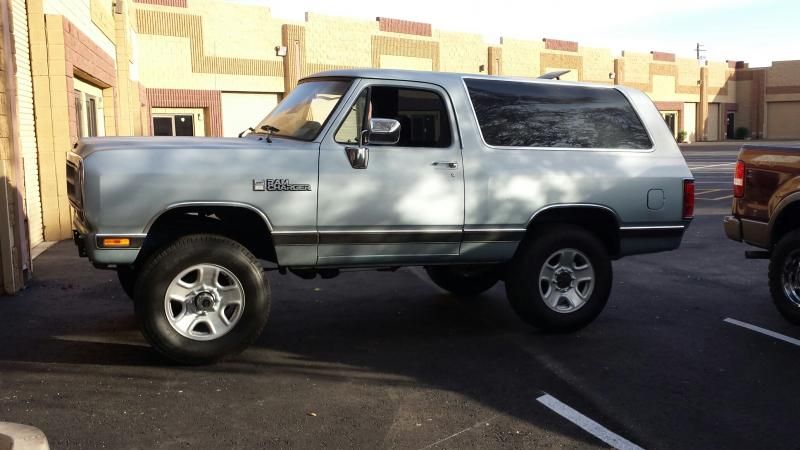
I like it! Perfect fit!
 10-26-2013, 08:07 PM
#32
Administrator

 . I'm kidding, but there is a guy around here that stuck the front end of a Toronado in the rear end of a VW, looked fast just sitting there..Mark
10-26-2013, 08:09 PM
. I'm kidding, but there is a guy around here that stuck the front end of a Toronado in the rear end of a VW, looked fast just sitting there..Mark
10-26-2013, 08:09 PM
#33
Registered User

Several reasons.
1. The ramcharger frame did not have all the holes in it for the 4x4 components. I did not want to go through the painstaking hassle of locating everything exacly as it should be.
2. It was far less work to splice the frames!! I would guess splicing was about 25% as much work as swapping parts. If even that honestly. (I have done 4x4 conversions before)
3. The diesel spec frame is .210" thick, where the Ramcharger is only .157" thick. That Cummins is heavy. It also tourques, and vibrates a lot. That extra .053" is a very welcome addition!
4. Did I mention it was quick and easy? LOL
Wow I didn't know that the Ramcharger frames were that thin! .053" a lot!
Thanks, now I have info in case I ever get around to building a ramcharger( probably will never get around to it) but if the opportunity presents itself.
10-26-2013, 08:14 PM
#34
Registered User
So, since the off-road joint down the street happened to have some wheel-spacers in stock! 
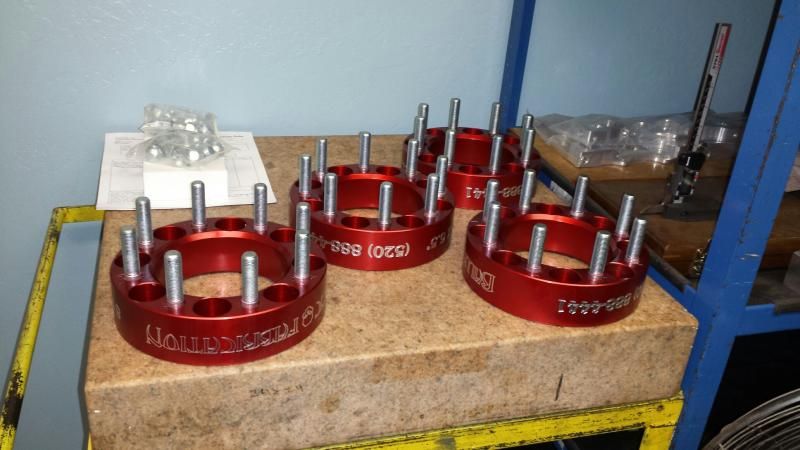
You know what that means! MOCK-UP TIME!!

NOT BAD! Not bad at'all.
The best part? I really like it and still have a bunch of this stuff > $$$$, in the bank, cause even after the spacers, it was CHEAP!

You know what that means! MOCK-UP TIME!!


NOT BAD! Not bad at'all.
The best part? I really like it and still have a bunch of this stuff > $$$$, in the bank, cause even after the spacers, it was CHEAP!
 10-27-2013, 07:33 AM
#36
Registered User
Very nice work there M-O-P-A-R!
That old 2wd RC body is straight.
I have a set of 17 inch 3rd gen rims I am thinking about using on my '80 RC when I swap it over to 8 lug and throw a 12V under the hood..
I think I will need to use some spacers to get it spaced out right as well.
That old 2wd RC body is straight.
I have a set of 17 inch 3rd gen rims I am thinking about using on my '80 RC when I swap it over to 8 lug and throw a 12V under the hood..
I think I will need to use some spacers to get it spaced out right as well.
 10-27-2013, 10:57 AM
#37
Registered User
Thread Starter
Chop/Splice is the way to go! IF! your welding skillz are up to it The horizontal weld in the "Z" is a pain in the rear. I am by no means a professional welder! So I struggle with anything that is not perfectly "in position". And you know the measurements, and are willing to spend quality time with a tape-measure. Don't forget to double check everything after you tack! Otherwise, yea, its the way to go. Another benefit that I didn't mention in my little list of why I went that way: you will never get the reliability from bolts holding everything together as the factory rivets! Those rivets are in there TIGHT! And they are practically maintenance free. I have seen a few come loose. Usually around the drivers-side front spring hanger. But that was only on trucks that were worked, or wheeled, very hard. I plowed snow back east in these trucks for 10 years. I have broken my fair share of stuff LOL. If one were to bolt all this stuff together they will find the need to keep an eye on everything. If one does need to bolt it all together, whatever you do, don't use split lock-washers!!! In a frame application where things are constantly twisting and moving, the split washers will break in half and fall out. All-metal crimp-lock nuts are your best bet.
10-27-2013, 11:01 AM
#38
Registered User
Thread Starter
Very nice work there M-O-P-A-R!
That old 2wd RC body is straight.
I have a set of 17 inch 3rd gen rims I am thinking about using on my '80 RC when I swap it over to 8 lug and throw a 12V under the hood..
I think I will need to use some spacers to get it spaced out right as well.
That old 2wd RC body is straight.
I have a set of 17 inch 3rd gen rims I am thinking about using on my '80 RC when I swap it over to 8 lug and throw a 12V under the hood..
I think I will need to use some spacers to get it spaced out right as well.

I have never had a problem with wheelspacers. You just can't compromise the install. That is why I am swapping for longer 9/16" studs, and bulge-style lug-nuts for the spacers.
10-28-2013, 08:03 AM
#40
Registered User
I started in thinking the suspension crossmembers unbolt... but now I can see they don't. The front suspension is mostly stripped from the D250 and RC. I'm going to try to mix'n'match parts and see how that goes.
10-28-2013, 08:41 AM
#41
Registered User

Few questions;
Who is the dude with the huge afro haha. Secondly, how did you hold the frame in place? Did you have to tac weld it first or did you use a pully of some sort to hold it. I would think there needs to be some serious pressure or no?
Who is the dude with the huge afro haha. Secondly, how did you hold the frame in place? Did you have to tac weld it first or did you use a pully of some sort to hold it. I would think there needs to be some serious pressure or no?
10-28-2013, 04:20 PM
#42
Registered User
Thread Starter
HA-HA! Dude with the huge afro is my buddy Tommy LOL. That's nothing! It gets worse, much worse. As tall as he is, he looks like a harlem-globetrotter with that afro! LOL. Then out of the blue, he will chop it all off. Its pretty funny actually, his hair grows like weeds. He is into these rigs too (my fault!) and works for me part time. We have been working together about 5 years now.
10-28-2013, 04:22 PM
#43
Registered User
Thread Starter
On holding the frame in place: If you look at the pic of it mocked-up, you will see two large pieces of channel clamped to the bottom of the front frame section. The rear section sat right on top of that channel. There was a floor jack at the very rear of the rear section. And the myriad of clamps in the pic did the rest. It was easy.
10-28-2013, 04:26 PM
#44
Registered User
Thread Starter
So, which lug-nuts would you use?
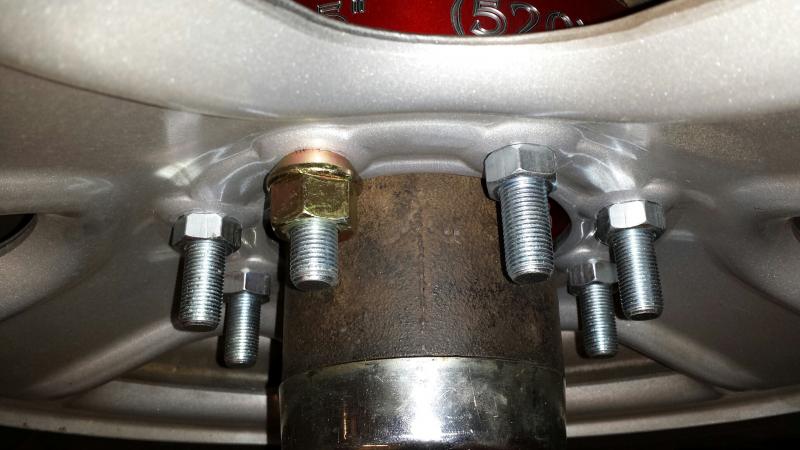
DUH! I know which ones I am using. So I picked up 32 of those at NAPA (ouch $$$). And I have 32 9/16" studs ordered to replace the factory 1/2" studs in the hubs. And I really don't like these cheapie lug-nuts that came with the wheel-spacers. So I will probably buy 32 more lug-nuts to hold the spacers to the hubs! LOL, Hey, if your gonna run wheel-spacers, you have to do it right!

DUH! I know which ones I am using. So I picked up 32 of those at NAPA (ouch $$$). And I have 32 9/16" studs ordered to replace the factory 1/2" studs in the hubs. And I really don't like these cheapie lug-nuts that came with the wheel-spacers. So I will probably buy 32 more lug-nuts to hold the spacers to the hubs! LOL, Hey, if your gonna run wheel-spacers, you have to do it right!