The motor Build thread.
 07-31-2014, 11:54 AM
#61
Registered User
^^^ like he says. An oil galley is plugged, or a seal or plug is missing, or oiling holes in camshaft, or maybe main bearings (don't have first hand knowledge of this engine) oiling holes not lined up or missing. (wrong bearing)
The loads you speak of are nothing compared to, for instance, the load on a wrist pin at ignition. Average oil film strengths are 20,000 psi (Semi-syn 10-40) or more, so the 1,000 lbs or so force put on them by the valve springs (3 springs per journal) should be well within the no-contact operating range..
Edit add --> The only time I've seen cam journals burned out is when the engine totally lost it's oil. All other bearing journal in those engines were also trashed.
I did patch one such 4.3 Chevy with a different cam, cam bushings, crank, and inserts, leaving the pistons and heads in place. It ran about 40,000 additional miles before giving up the ghost. I had bought a used engine and found that it had been grossly overheated (it was way too clean) and had no compression. The lower end was perfect. The engine with the rapping rods had good compression. Between the two I made a runner. Junk yard gave me back all except $100 of the original price.
 07-31-2014, 11:00 PM
#62
Registered User
Thread Starter
There are no plugs missing. One had apparently fallen out (which was documented and fixed) fallen out at some point before this build and I fixed it before this motor was ever fired and it's still in tact. And when I take it apart tomorrow morning, I will be taking a close look at each orifice to make sure nothing is plugged. To me, something has got to be wrong. It just doesn't make sense. If it was just one cam journal plugged it still wouldn't have wore out all of them like that so quickly in my mind. After the 550 or so miles it took to wipe the journals there is very little oil in the timing cover area (some places are completely free of oil, which I think is weird) and there is surprisingly little oil buildup inside the valve covers too. I don't know. I'm at a loss. I didn't forget anything, and oil pressure didn't give out on me either. hot idle was like 35 psi (45-55 cold and as much as 90 cold revving) which is actually kind of high for a hot idle on our motors. Unless the oil filter media came apart and plugged something. It just seems so strange. Only thing that changed between this latest motor build and the last one a couple years ago (which worked perfect for me) are the oversize valves, pushrods (which both add mass) and the 165# springs. So in all honesty, I have to assume that played a role in the wear unless otherwise proven because those items have a direct impact on the camshaft.
I just hope it doesn't grenade on me again... I mean, my build was pretty closely documented even online in this thread. So...
I just hope it doesn't grenade on me again... I mean, my build was pretty closely documented even online in this thread. So...
07-31-2014, 11:22 PM
#63
Registered User
Thread Starter
In any case, Zach Hamilton said on CF he would replace my 181/210 because of the surging I've had over the years running it and attempting every effort outside of replacing the cam to correct the issue. So a cam replacement is free for me.
2 1/2 years ago I built the motor (mostly stock) with a 181/210 cam right before they discontinued it. Ever since I put the cam in, as some of you know, I've been plagued with surging issues. I've literally tried everything under the sun to correct it. Multiple turbos, multiple sets of injectors, different pushrods, different valve springs, different pistons. stock and then P&P head. I've literally tried it all including all kinds of AFC tuning. Nothing helped. Finally Zach offered to replace the cam. So I will be sending the old cam back to them and likely replacing it with a 188/220 steel cam. The block will be bored for Hamiltons cam bushings which I ordered today. My 24v tappets will be resurfaced, and reused. It shouldn't be an issue they only have 20k miles on them anyways. Wish I had the extra cash for Hamiltons 1.3" tappets and go all fresh and new, but it's just not in the budget.
So that's the long of the short for my plans. Main and rod bearings will be replaced but the rings will not be this time around as the cylinder walls are perfect and they only have like 550 miles on them anyways. The bearings will be because the motor was ran with metal flakes in the oil (i didn't realize it right away) and I don't want to chance it. There is probably some wear on the bearings (or metal particles inbedded in the bearings) from the metal flakes being run through it. I actually haven't torn it down quite that far yet to see what the bearings look like but new ones are still on order anyways. I'm not chancing it.
Any other ideas on why in the heck this happened are good. I'm all ears. It makes little to no sense in my mind. Everyone always says well maybe you lost oil pressure at some point, which would make sense if it were true, but it's not.
08-01-2014, 10:46 AM
#64
Administrator

Rick, I have never specifically been into the guts of a B yet ( no reason to with only 184K ).
That being said, looking at the oil flow in the manual, when you take it apart, look specifically at the Main journal area, the oil indeed flows directly from the oil main to the main journal, where it is oiling the mains, the upper half, the piston squirters, and interestingly enough, a dedicated passage to just the cam journal bore. Now, given your absolute lack of indicators of problems elsewhere, I would have to say something is not allowing the oil to flow to the cam journal. Your comment about not having a large amount of oil upstairs also kind of concerns me.
We sure don't want you to grenade the next one either, please as you take the crank out, before you pull the upper half of the mains, verify that each of the 3 passages are centered over the correct passage to the galley it feeds. That seems like the only thing that would do what it did and not show other signs.
When you built it, what determined the orientation of the bearing say, 180 versus 360? Does it have a tang to assure you couldn't get the bearing rotated so the oiling holes wouldn't line up?
I wish I could be clearer, it is hard to describe, is it possible to put the top half of the main bearing in either way? ( put it in, then pick it up, rotate it 180 deg in horizontal plane, and put it back? )
08-01-2014, 11:30 AM
#65
Registered User

Typically there are two halfs to a main bearing with only the upper half having the oil holes so if that was the case it would have trashed the main and rod bearings as well.
Doesn't rule out the possibility that there is trash in some passages.
Doesn't rule out the possibility that there is trash in some passages.
08-01-2014, 12:38 PM
#66
Registered User

Pat, that's what I recollect on most engines I've worked on. The cam bearings and the main bearings are supported by the same structural web in the block. It's simple to cast a fat spot in the web and run a drill through it between the main and the cam bearings for oil flow. Usually on a V they share the same oil feed galley. On an inline, the main bearing will have a groove in it to feed the port to one side for the camshaft.
08-01-2014, 06:26 PM
#67
Administrator
You know, now that you say it, I haven't been into an inline engine since about 1983.....you do have a point.
And yea, I looked up pictures of the B main bearings, full insert ( tangs ) so they cant be installed backwards, and if swapped top to bottom, they would never have built any pressure at all. One other possibility exists ( other than wrong part # ) is that the inserts were poked backwards at the factory, I still think he needs to inspect it carefully in the block prior to pulling them to assure oiling hole alignment. I would just about lay my reputation that is where the problem is based upon the description and a glance at the B oiling system.
And yea, I looked up pictures of the B main bearings, full insert ( tangs ) so they cant be installed backwards, and if swapped top to bottom, they would never have built any pressure at all. One other possibility exists ( other than wrong part # ) is that the inserts were poked backwards at the factory, I still think he needs to inspect it carefully in the block prior to pulling them to assure oiling hole alignment. I would just about lay my reputation that is where the problem is based upon the description and a glance at the B oiling system.
08-18-2014, 10:29 AM
#68
Registered User
Thread Starter
One more update.
Zach replaced my camshaft at no cost to me and I got a steel 188/220. The reason he replaced the cam wasn't because of the cam journal wear as that had nothing to do with a manufacturing error. The reason he replaced it was because of surging I was having and I did everything I could to alleviate it, but nothing worked.
I also bought a new batch of zinc additive and cam bushings.
Turns out the cam wear was so severe in the block that it wasn't repairable with bushings. The block is junk.
As of right now I'm back to the drawing board and am in search of a replacement block.
As for why it happened. I don't know. The bearings were obviously the right ones and they were installed correctly. Everything was done right as far as that goes. No oil galleys were plugged and no plugs were missing.
It's a mystery why it happened. Maybe they were worn a bit prior and on startup with the new springs it was just enough to gall them a bit more and open up the clearance just too much and begin a process that wasn't going to be stopped.
08-18-2014, 04:06 PM
#72
Registered User
Thread Starter
Yeah it sucks.
I have a line on a storm block though. I'm not sure if it's a 53 block yet but if it isn't I may go that route. Or I might wait, get a running used motor and throw that in and sell the truck and replace it with a first gen. Tough call.
I have a line on a storm block though. I'm not sure if it's a 53 block yet but if it isn't I may go that route. Or I might wait, get a running used motor and throw that in and sell the truck and replace it with a first gen. Tough call.
09-10-2014, 10:59 AM
#73
Registered User
Thread Starter
Well back on track!
Got the block back yesterday!
Picked it up in the morning and dropped off the crank to be polished.
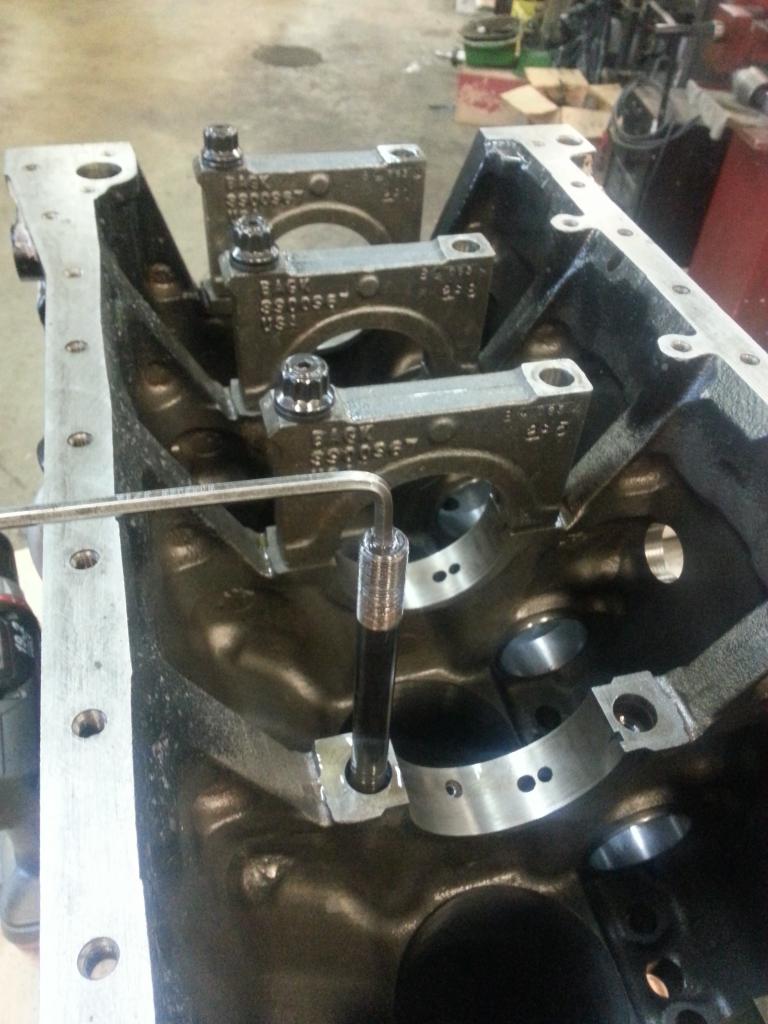
In any case, last friday I drilled and tapped the mains for 14mm studs. It went well. I only snapped one picture of that because I was rather dirty and my phone ended up dying anyways.
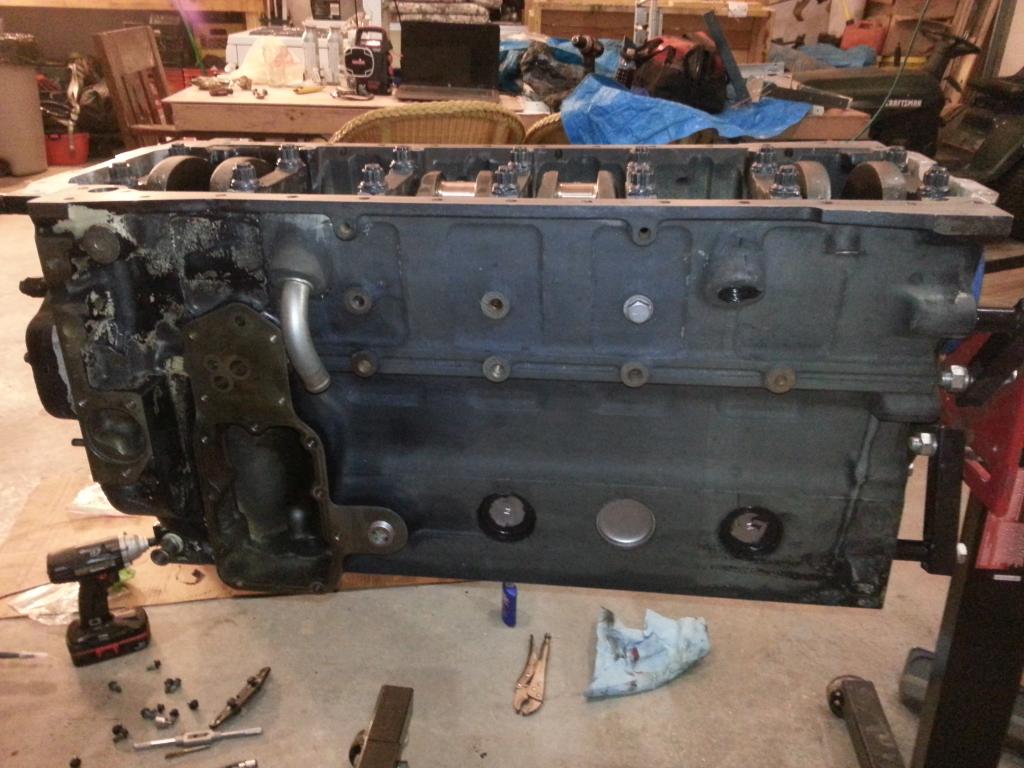
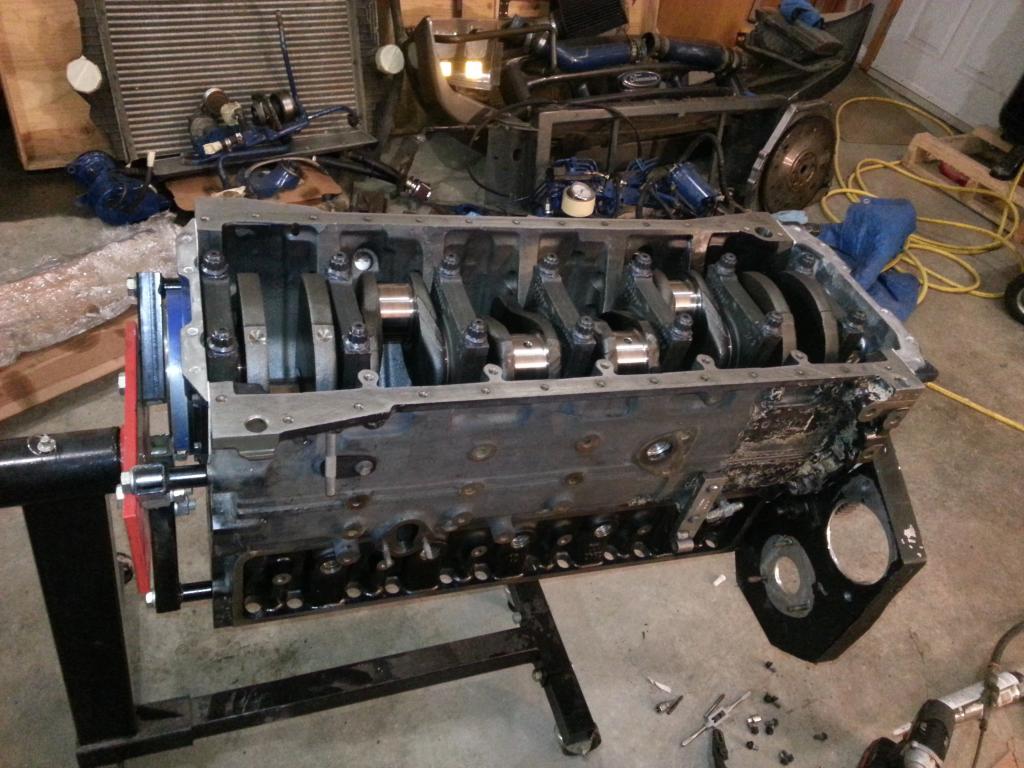
Then last night after getting the crank home I began putting it all back together. The block is a storm block, which is great.
What I had done to the block:
Cut for cam bushings (also had em pressed in)
bored 0.040" over
Decked 0.010"
drilled/tapped for 14mm mains (I did this)
align honed
crank polished
I had to replace a few freeze plugs today...
hot tanked
Anyway, this block is in super nice condition for having a life around these parts. All the paint is still on it and there is literally no rust at all. Pretty shocking actually.
Not many progress pictures for yesterday because it's much the same as last time.
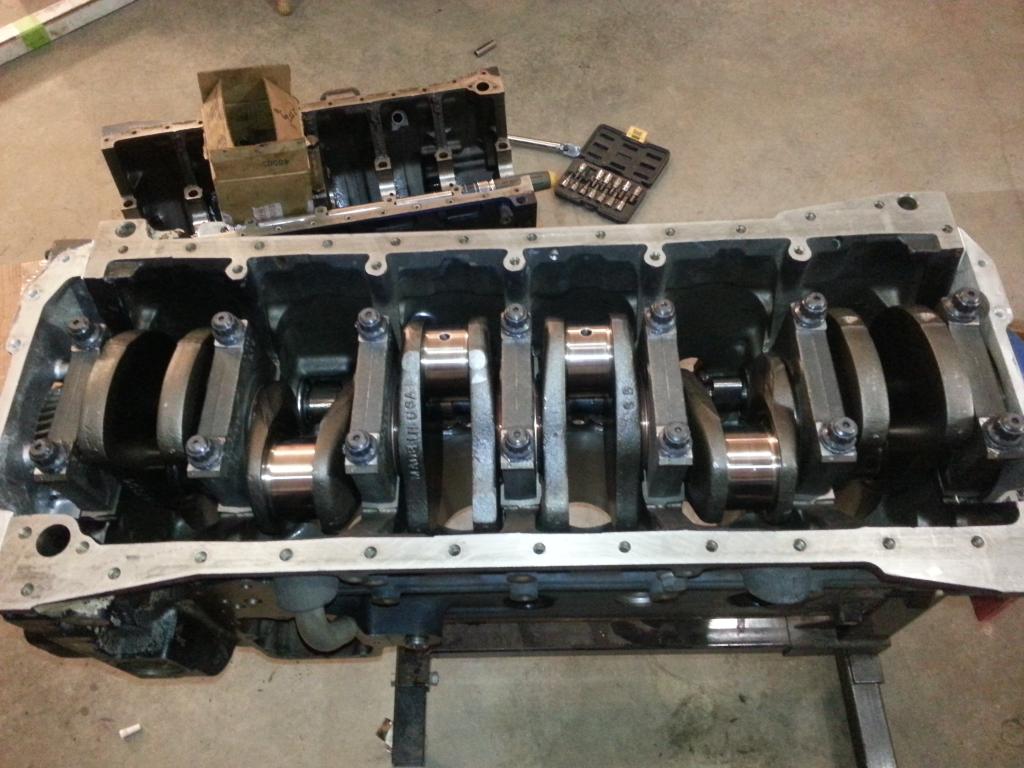
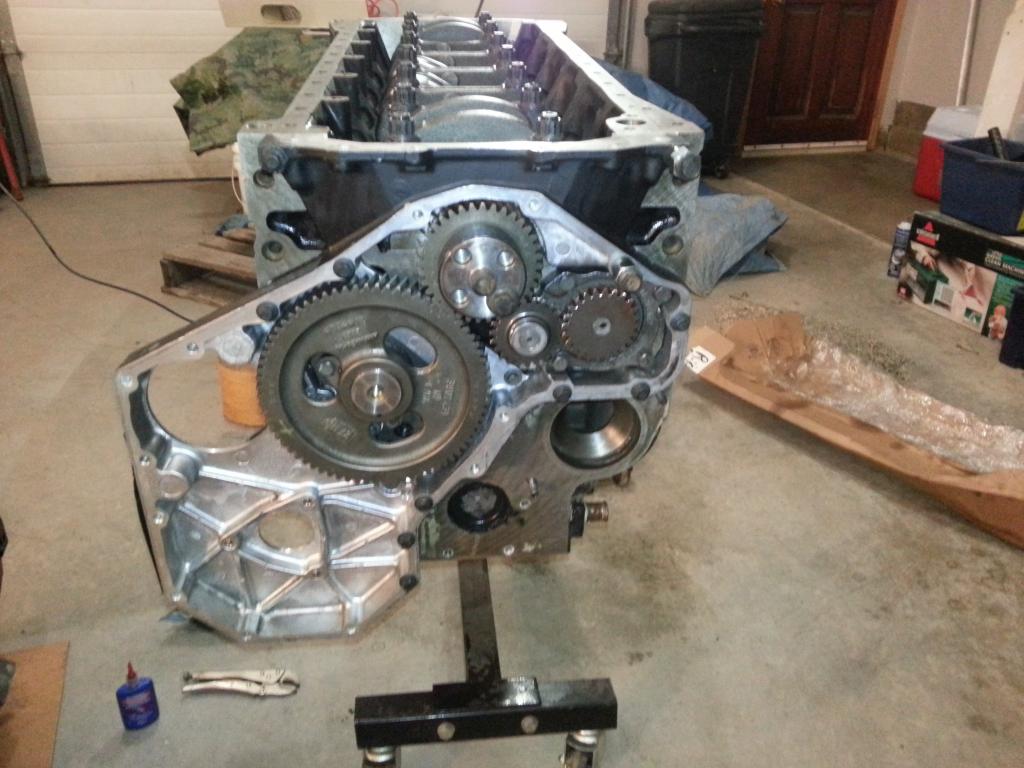
I installed the crank/main caps & torqued down to 175. Got the new 188/220 108 LSA steel Hamilton cam in. Got a few missing freeze plugs put in. Oil pump and timing case on... rear main as well. Got the studs for the lift pump and water pump in place in the block. Maybe something else I've forgotten about but that's the gist of it
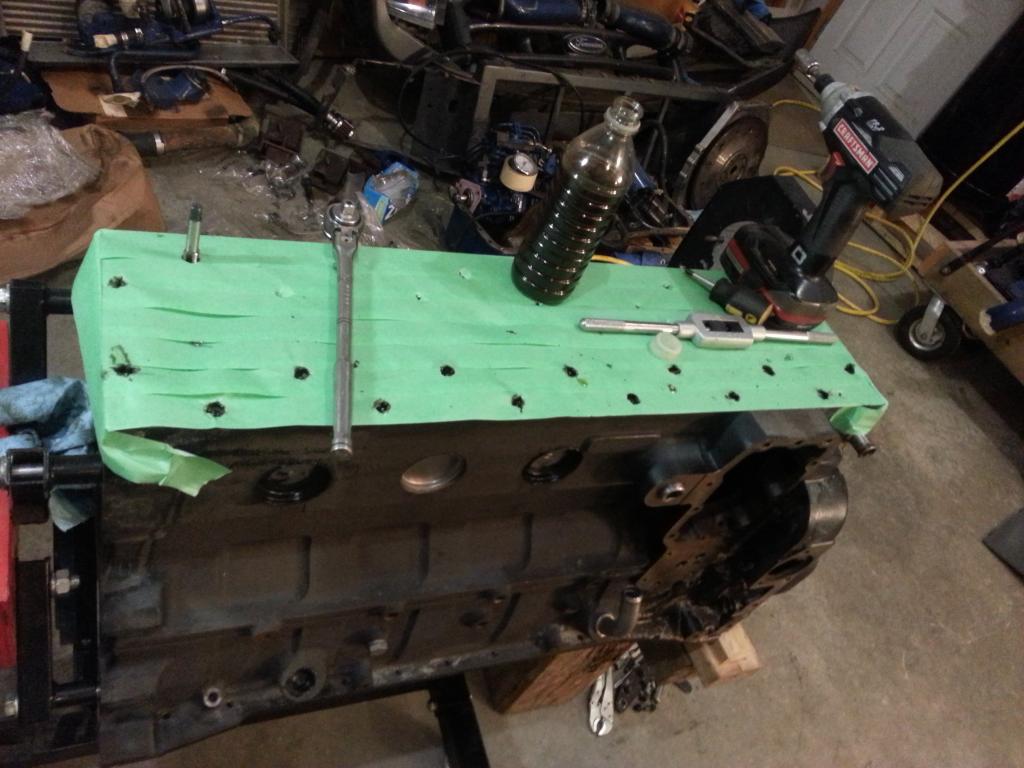
Last order of business after that was bottom tapping the head stud holes. I run A1 head studs. I use the oil as lube, the drill to spin it down and then the socket and 3/8 drive ratchet to actually do the bottom tapping. Normally I would use the tap handle like I did when I did the mains but these holes are already tapped and I'm just cleaning em up and taking a little material out at the bottom so it's not a big deal.
And that's more or less where it sits right now. Today I'll probably get the oil cooler, water pump, tappet cover and pistons in. If I have time I'll try to get farther than that, who knows.
Got the block back yesterday!
Picked it up in the morning and dropped off the crank to be polished.
In any case, last friday I drilled and tapped the mains for 14mm studs. It went well. I only snapped one picture of that because I was rather dirty and my phone ended up dying anyways.
Then last night after getting the crank home I began putting it all back together. The block is a storm block, which is great.
What I had done to the block:
Cut for cam bushings (also had em pressed in)
bored 0.040" over
Decked 0.010"
drilled/tapped for 14mm mains (I did this)
align honed
crank polished
I had to replace a few freeze plugs today...
hot tanked
Anyway, this block is in super nice condition for having a life around these parts. All the paint is still on it and there is literally no rust at all. Pretty shocking actually.
Not many progress pictures for yesterday because it's much the same as last time.
I installed the crank/main caps & torqued down to 175. Got the new 188/220 108 LSA steel Hamilton cam in. Got a few missing freeze plugs put in. Oil pump and timing case on... rear main as well. Got the studs for the lift pump and water pump in place in the block. Maybe something else I've forgotten about but that's the gist of it
Last order of business after that was bottom tapping the head stud holes. I run A1 head studs. I use the oil as lube, the drill to spin it down and then the socket and 3/8 drive ratchet to actually do the bottom tapping. Normally I would use the tap handle like I did when I did the mains but these holes are already tapped and I'm just cleaning em up and taking a little material out at the bottom so it's not a big deal.
And that's more or less where it sits right now. Today I'll probably get the oil cooler, water pump, tappet cover and pistons in. If I have time I'll try to get farther than that, who knows.
09-11-2014, 12:19 AM
#75
Registered User
Thread Starter
Man I'll tell you what, I sure hope so...
Did some more work on the motor tonight though
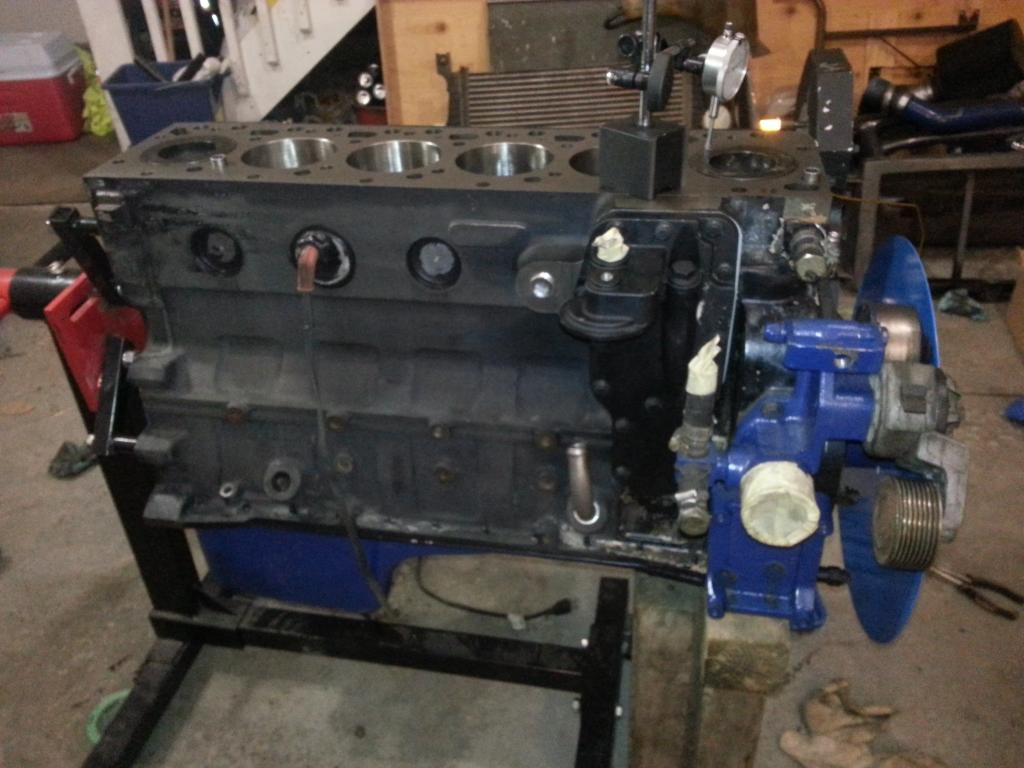
Got the oil cooler and coolant thingy done on the turbo side. Also knocked out the middle freeze plug, took the block heater off the old block and slapped that in on that side.
Got the tappet cover bolted down on the other side. Got the water pump on in the front and also got the pistons in and rods torqued. Got the pan on as well (which I hate because it's so tedious, 36 bolts that all need locktite)
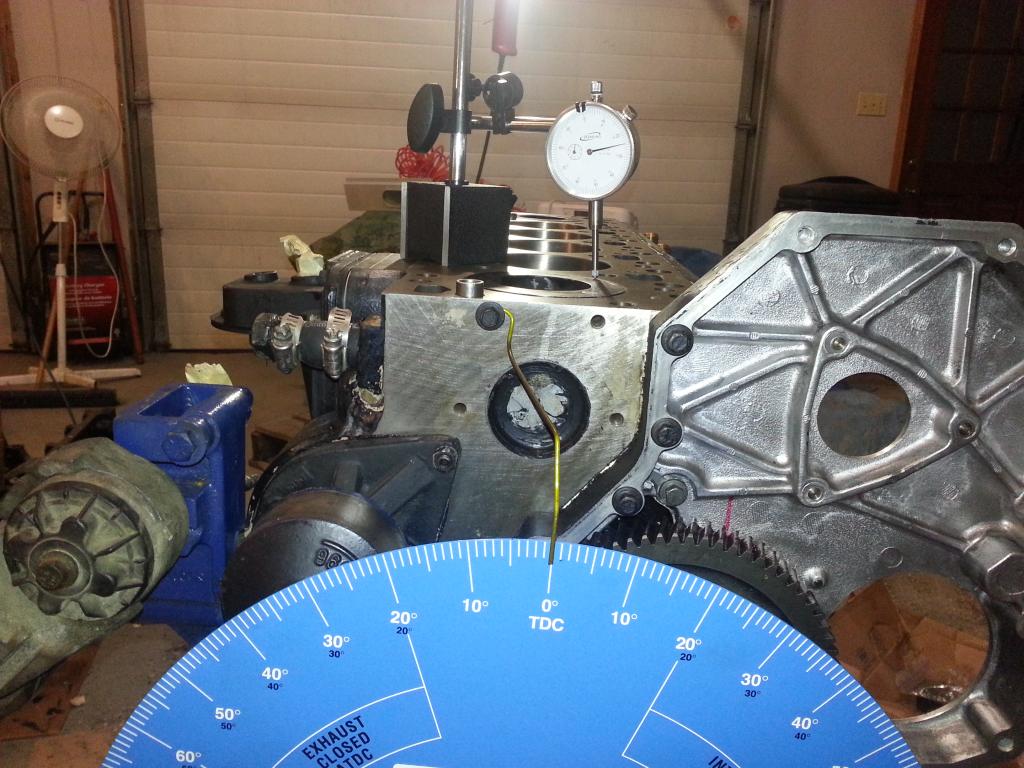
Last thing I did was find true TDC and piston protrusion. Piston protrusion falls between 0.024-6". That's ok because I plan to run the 0.010" over HG which will allow the cam the proper clearance.
Tomorrow will be the the head and finding camshaft centreline. I'll probably put a little paint on the motor as well. I'm not being overly meticulous with paint this time around. Seeing as how the truck as basically been off the road since last year I just want it to be driven and the one thing that inevitably takes the most time with assembly is cleaning and prep for paint so I'm forgoing that this time around.
Did some more work on the motor tonight though
Got the oil cooler and coolant thingy done on the turbo side. Also knocked out the middle freeze plug, took the block heater off the old block and slapped that in on that side.
Got the tappet cover bolted down on the other side. Got the water pump on in the front and also got the pistons in and rods torqued. Got the pan on as well (which I hate because it's so tedious, 36 bolts that all need locktite)
Last thing I did was find true TDC and piston protrusion. Piston protrusion falls between 0.024-6". That's ok because I plan to run the 0.010" over HG which will allow the cam the proper clearance.
Tomorrow will be the the head and finding camshaft centreline. I'll probably put a little paint on the motor as well. I'm not being overly meticulous with paint this time around. Seeing as how the truck as basically been off the road since last year I just want it to be driven and the one thing that inevitably takes the most time with assembly is cleaning and prep for paint so I'm forgoing that this time around.