1st Gen. Ram - All Topics Discussion for all Dodge Rams prior to 1994. This includes engine, drivetrain and non-drivetrain discussions. Anything prior to 1994 should go in here.

Crew Cab Project has Started

Thread Tools
 
Search this Thread
 
Old 04-12-2014, 11:06 PM
  #196  
Registered User
Thread Starter
 
brcron007's Avatar
 
Join Date: Nov 2010
Location: Bradenton, Fla
Posts: 268
Received 13 Likes on 10 Posts
Name:  102_zps0d38f0e1.jpg
Views: 182
Size:  55.5 KB


Name:  104_zpsb00fa91d.jpg
Views: 76
Size:  46.8 KB


Name:  103_zps9fa4379d.jpg
Views: 100
Size:  50.6 KB


Name:  099_zps25a0df13.jpg
Views: 101
Size:  78.0 KB
Old 04-12-2014, 11:30 PM
  #197  
Registered User
 
thrashingcows's Avatar
 
Join Date: Mar 2010
Location: Prince George, BC
Posts: 7,235
Received 1,331 Likes on 862 Posts
Are you going to vent the rear door some how? I like those ideas...never thought of of doing that.
Old 04-13-2014, 08:10 PM
  #198  
Registered User
Thread Starter
 
brcron007's Avatar
 
Join Date: Nov 2010
Location: Bradenton, Fla
Posts: 268
Received 13 Likes on 10 Posts
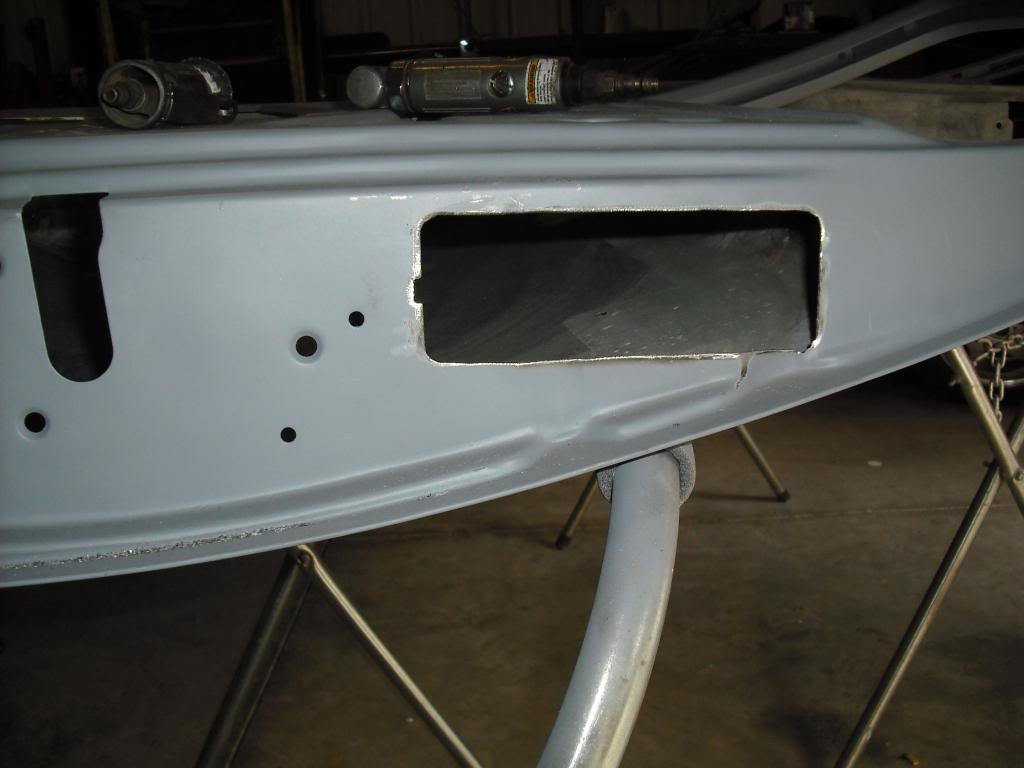
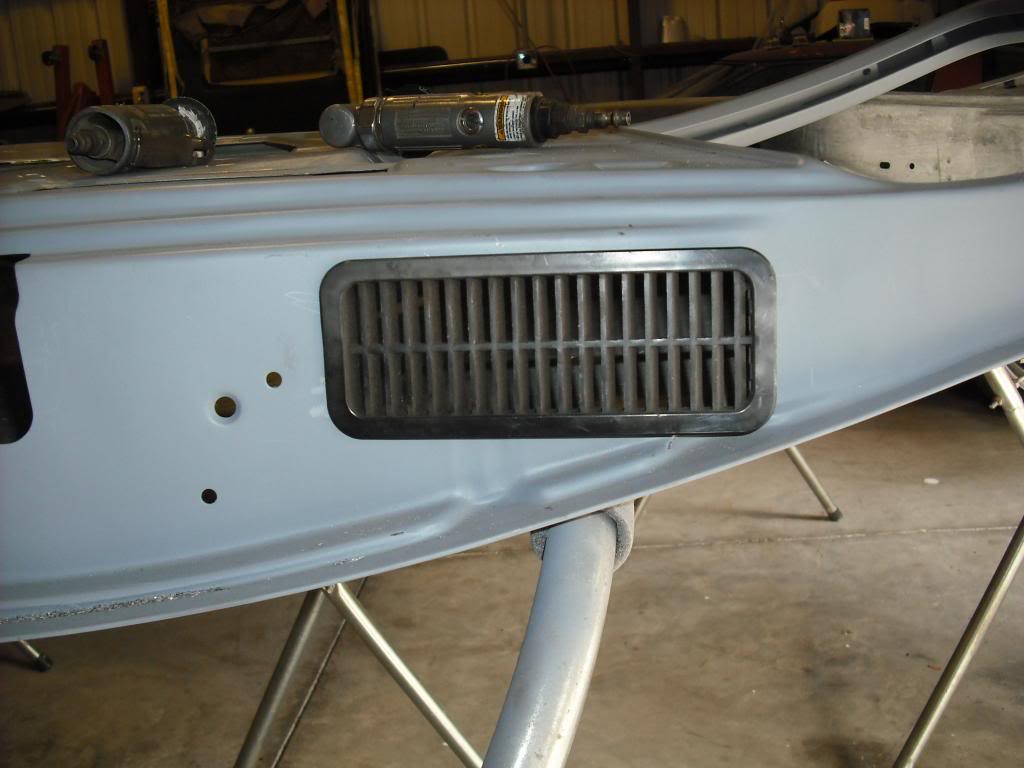
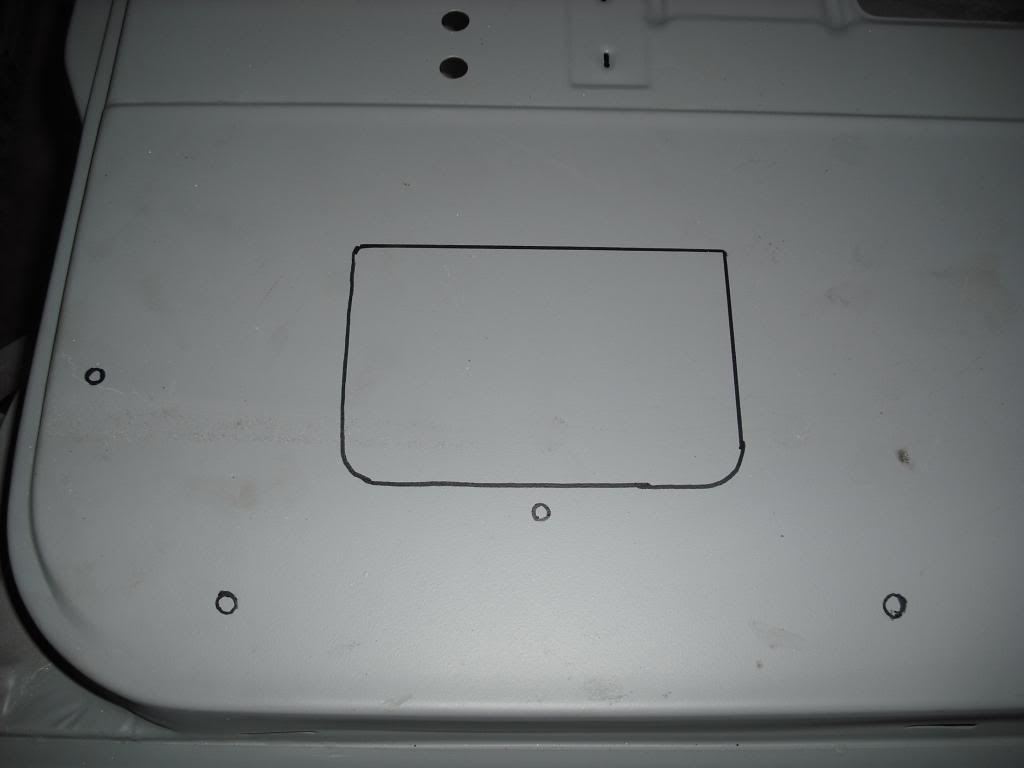
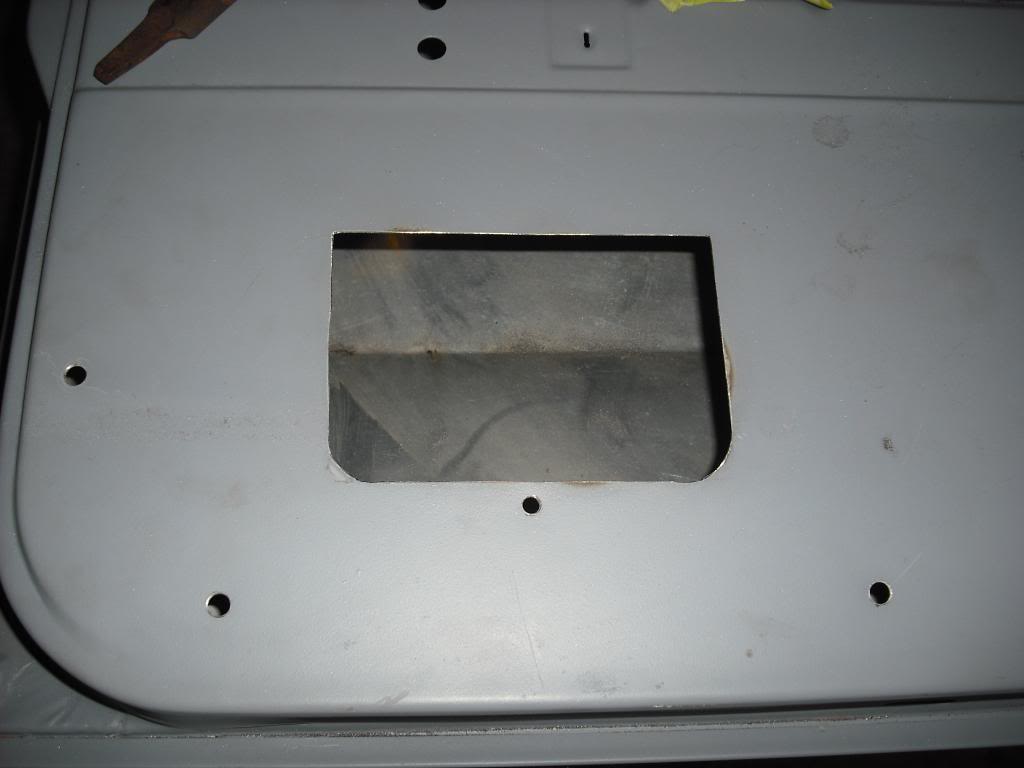
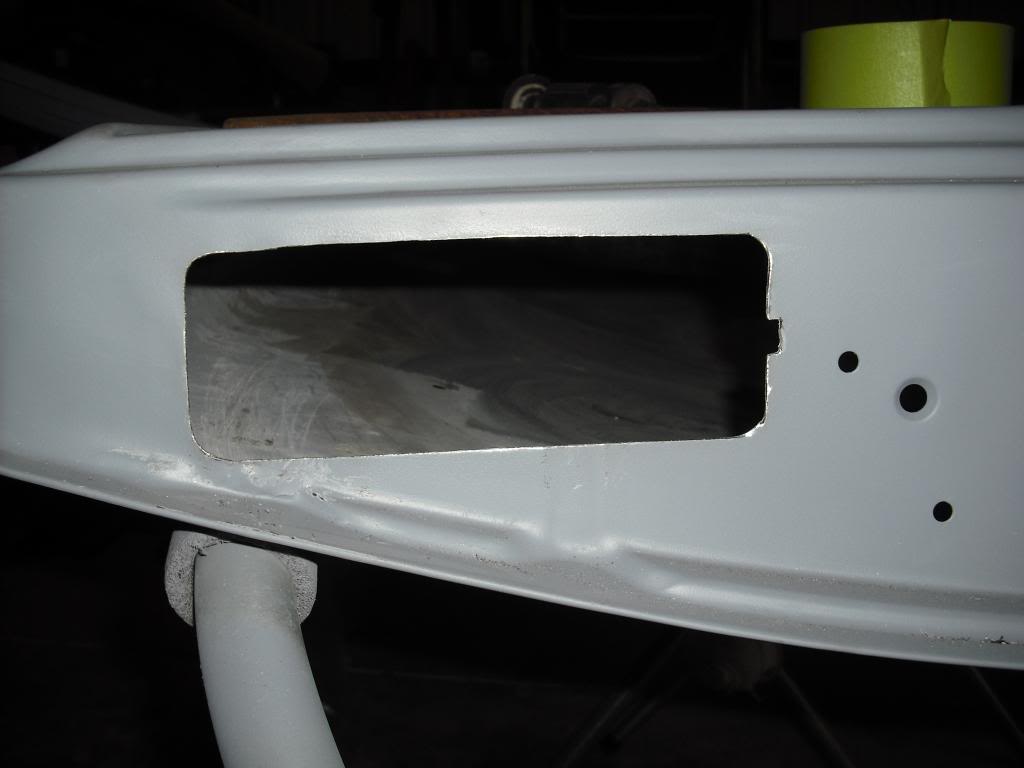
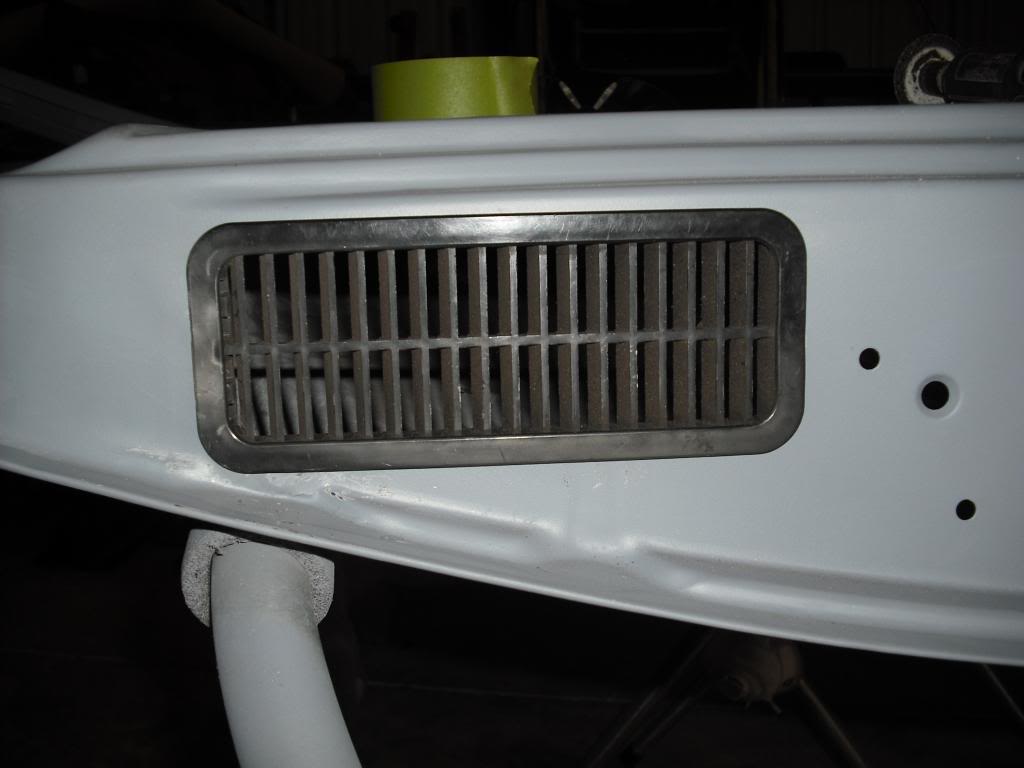
Hi ThrashingCows, As a matter of fact Yup. Just finished up one of the jamb pressure relief vents today. Matched it to the front doors. Still have a little bit up of clean up to do. But pretty much spot on to the front doors.


Name:  001_zps49030773.jpg
Views: 72
Size:  51.6 KB


Name:  002_zps7efba18b.jpg
Views: 111
Size:  68.2 KB
Old 04-23-2014, 08:14 PM
  #199  
Banned
 
getsome's Avatar
 
Join Date: Apr 2014
Posts: 2
Likes: 0
Received 0 Likes on 0 Posts
Where did you find rear door interior??
Old 04-23-2014, 11:21 PM
  #200  
Registered User
Thread Starter
 
brcron007's Avatar
 
Join Date: Nov 2010
Location: Bradenton, Fla
Posts: 268
Received 13 Likes on 10 Posts
He Getsome, The rear door upper door panel is the stock 1984 deluxe SE door panel the red lower kick panel is cut from a 1992 stock front LE door panel. I still have to finish cutting it down and fitting it to the small rear door. But I'll show how I did it in the next couple weekends
Old 04-23-2014, 11:37 PM
  #201  
Registered User
Thread Starter
 
brcron007's Avatar
 
Join Date: Nov 2010
Location: Bradenton, Fla
Posts: 268
Received 13 Likes on 10 Posts
I finished up cutting the speaker hole and the preshure vent holes on the drivers rear door this last weekend.


Name:  008_zps91b1e5b4.jpg
Views: 104
Size:  29.3 KB


Name:  009_zpsbe8ee329.jpg
Views: 69
Size:  39.3 KB


Name:  012_zps1553efa7.jpg
Views: 72
Size:  47.4 KB


Name:  013_zps64dcf796.jpg
Views: 115
Size:  37.5 KB
Old 04-23-2014, 11:42 PM
  #202  
Registered User
Thread Starter
 
brcron007's Avatar
 
Join Date: Nov 2010
Location: Bradenton, Fla
Posts: 268
Received 13 Likes on 10 Posts
More of the jamb pressure relief vent.


Name:  015_zpse8202601.jpg
Views: 96
Size:  43.7 KB


Name:  016_zpsc46422bd.jpg
Views: 119
Size:  61.5 KB


Name:  017_zps3bacada6.jpg
Views: 87
Size:  40.4 KB


Name:  026_zps9e33fb54.jpg
Views: 150
Size:  51.0 KB
Old 04-23-2014, 11:54 PM
  #203  
Registered User
Thread Starter
 
brcron007's Avatar
 
Join Date: Nov 2010
Location: Bradenton, Fla
Posts: 268
Received 13 Likes on 10 Posts
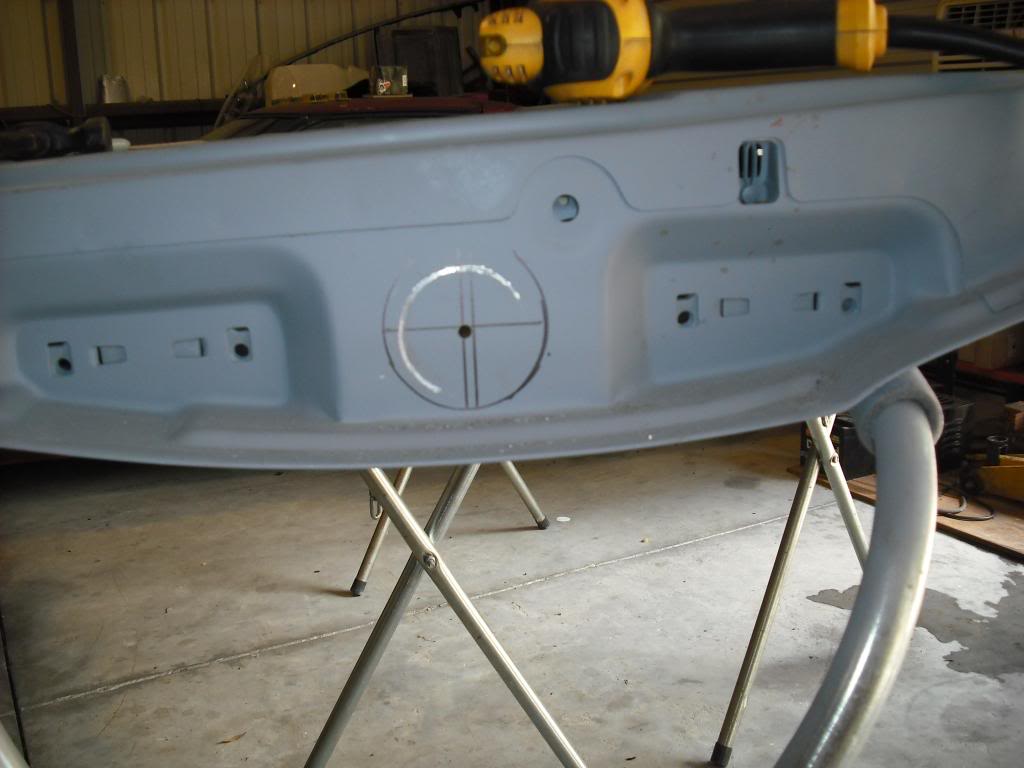
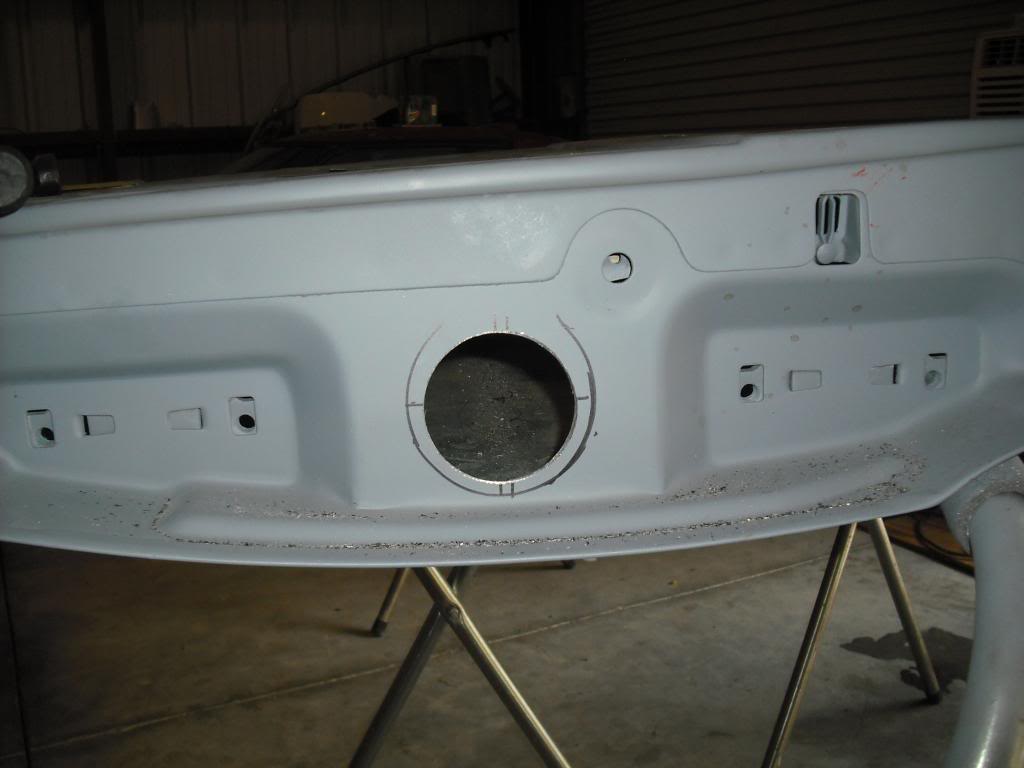
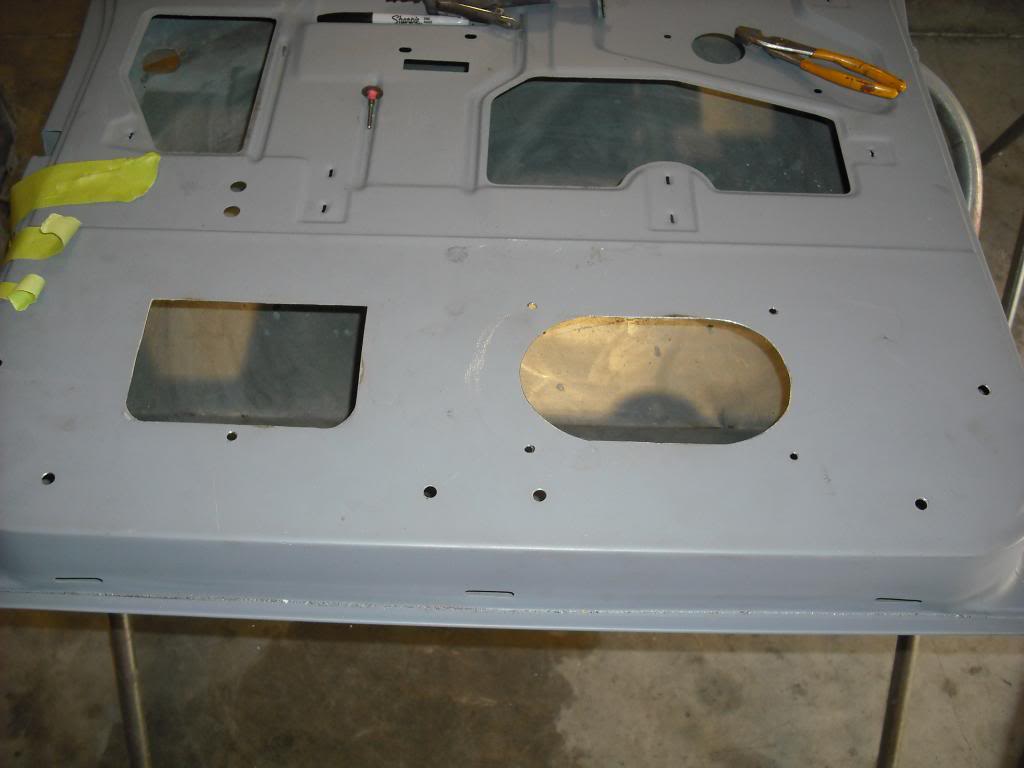
Here's some picks of the inside of the rear doors. I removed all the factory 84 tar that was sprayed on the bare steel by the factory. If you look around the perimeter you can see the shadow of where it was. After I pickle X 20 it I'll scuff it and prime it then each door will get 1 quart of bedliner material to seal the whole inside and deadn the sound. It'll be better than dynamatt.


Name:  003_zps95222b07.jpg
Views: 75
Size:  54.4 KB


Name:  002_zpsab25882f.jpg
Views: 93
Size:  43.9 KB


Name:  005_zps36efeb70.jpg
Views: 123
Size:  53.8 KB


Name:  004_zps1bd4b9ea.jpg
Views: 96
Size:  45.7 KB


Name:  001_zps3d2e820d.jpg
Views: 95
Size:  36.1 KB
Old 04-23-2014, 11:58 PM
  #204  
Registered User
Thread Starter
 
brcron007's Avatar
 
Join Date: Nov 2010
Location: Bradenton, Fla
Posts: 268
Received 13 Likes on 10 Posts
More of the inside rear doors.


Name:  018_zpsa117cd54.jpg
Views: 68
Size:  46.3 KB


Name:  021_zpsaab1e504.jpg
Views: 87
Size:  75.1 KB


Name:  022_zpsd7b0efda.jpg
Views: 97
Size:  71.2 KB
Old 
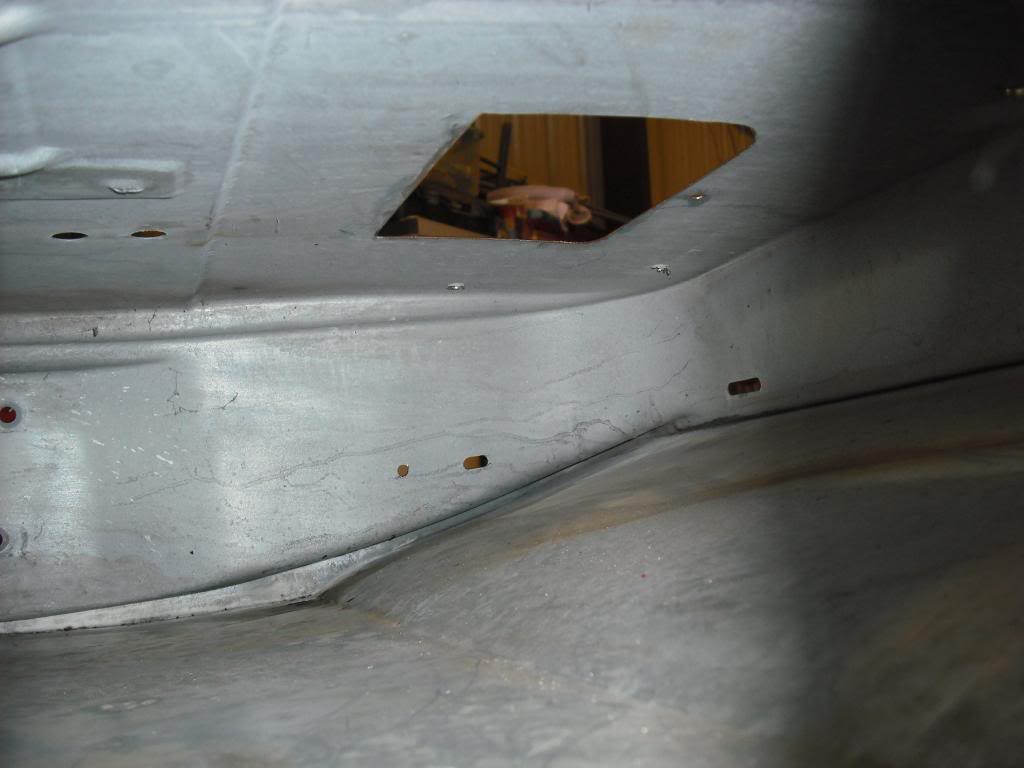
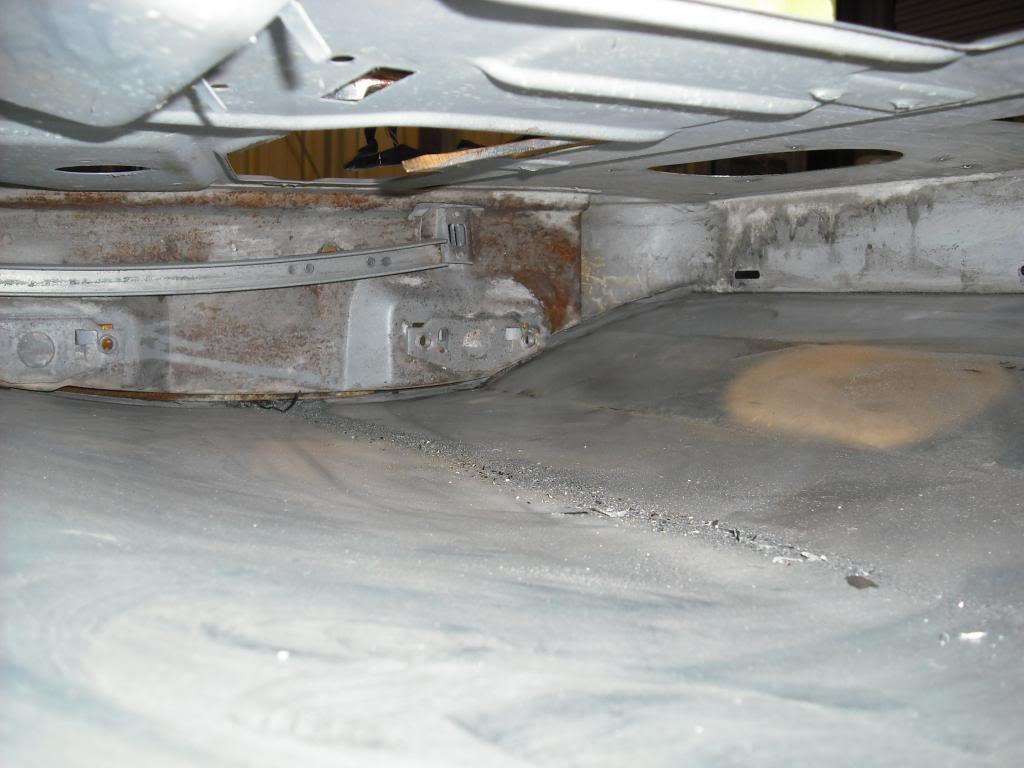
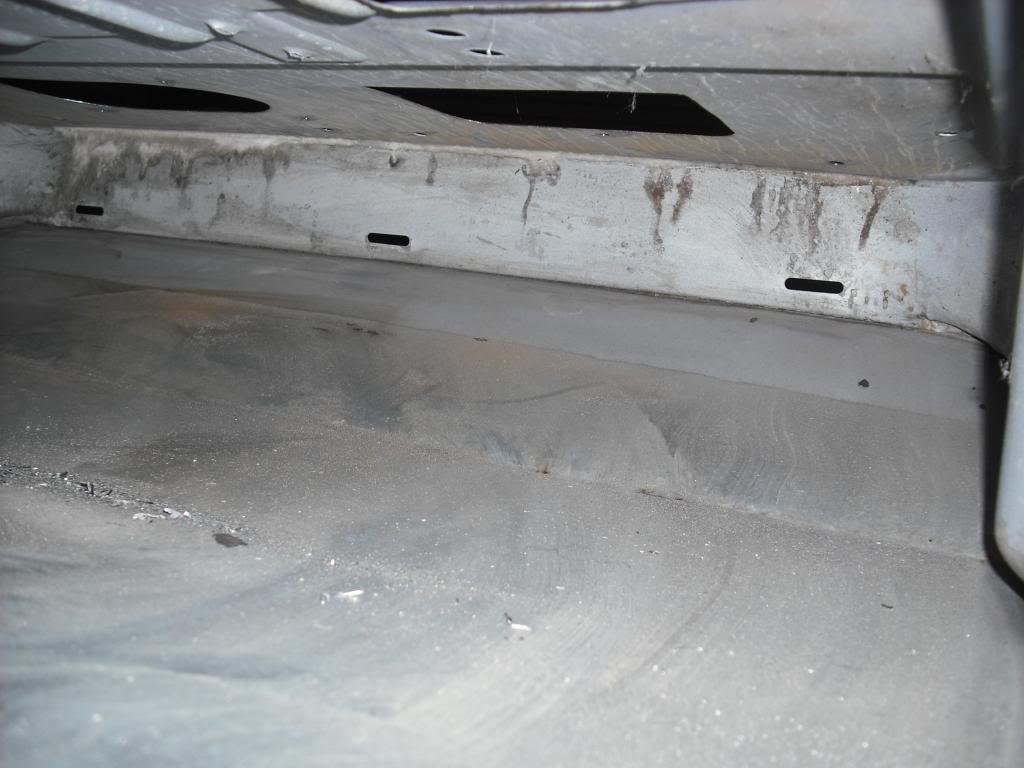
04-24-2014, 09:17 AM
  #205  
Banned
 
getsome's Avatar
 
Join Date: Apr 2014
Posts: 2
Likes: 0
Received 0 Likes on 0 Posts
Originally Posted by brcron007
He Getsome, The rear door upper door panel is the stock 1984 deluxe SE door panel the red lower kick panel is cut from a 1992 stock front LE door panel. I still have to finish cutting it down and fitting it to the small rear door. But I'll show how I did it in the next couple weekends
Im was thinking about doing a crew cab conversation, but there is no interior. Where would I find it for my doors?
Old 04-24-2014, 04:48 PM
  #206  
Registered User
 
flyboy129's Avatar
 
Join Date: Jan 2013
Posts: 138
Likes: 0
Received 10 Likes on 6 Posts
The big thing is actually having a good cab to start with, even if it is just a shell. Rear door parts are pretty much non existent. Made of stuff we like to call unobtanium. Still, it doesn't mean you can't make stuff work, or get creative and build it from scratch. If you have a solid cab with complete rear doors (doors, glass, and mechanisms), you are most of the way there.
Old 04-24-2014, 05:47 PM
  #207  
Registered User
 
CE_TX's Avatar
 
Join Date: Aug 2007
Location: Longview, Texas
Posts: 373
Received 2 Likes on 1 Post
Great job on the rear doors, I like the vents.
Old 04-24-2014, 09:49 PM
  #208  
Registered User
Thread Starter
 
brcron007's Avatar
 
Join Date: Nov 2010
Location: Bradenton, Fla
Posts: 268
Received 13 Likes on 10 Posts
Hi Getsome, I have to agree with Flyboy129's assertion of unobtainium on the interior for the crews. I looked for my crew cab truck for over a year and drove to Arizona to get her. The 2 most important things were 1 rust free and 2 and most important was a complete truck. Rare as a barn find 1969 Cougar Cobra Jet.

Thanks CETX, I just wanted to make sure ya don't have ta SLAM the doors. Which I'm sure is what contributes to those little cracks everyone has found by the quarter windows, including me.
Old 
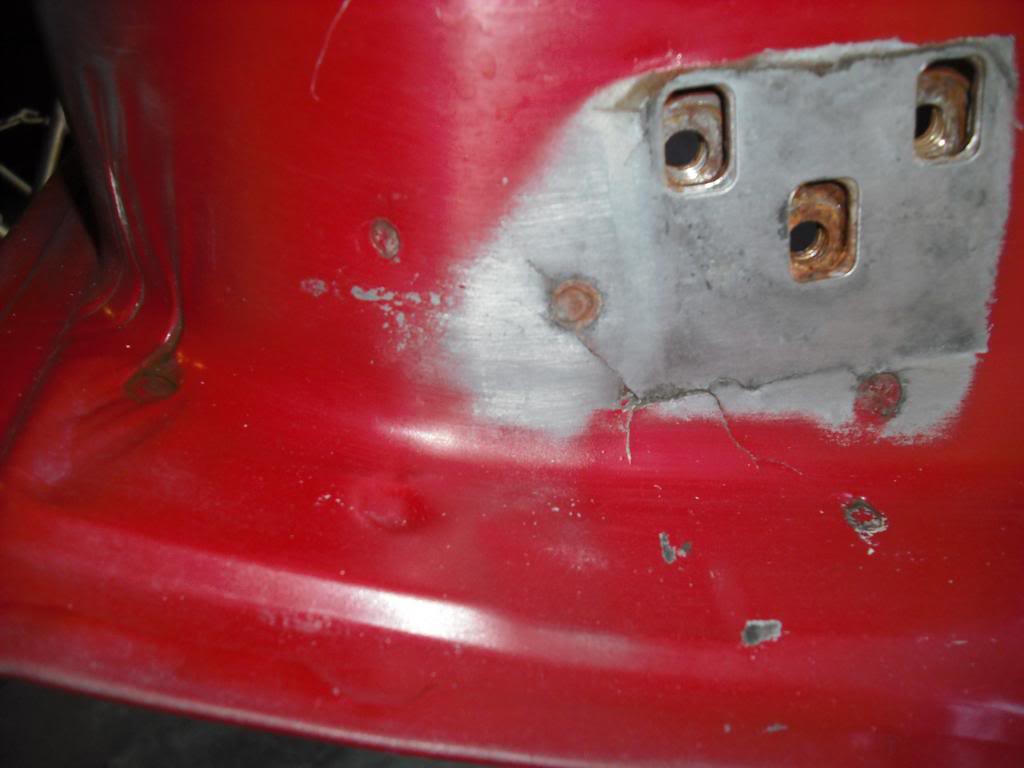
05-11-2014, 10:03 PM
  #209  
Registered User
Thread Starter
 
brcron007's Avatar
 
Join Date: Nov 2010
Location: Bradenton, Fla
Posts: 268
Received 13 Likes on 10 Posts
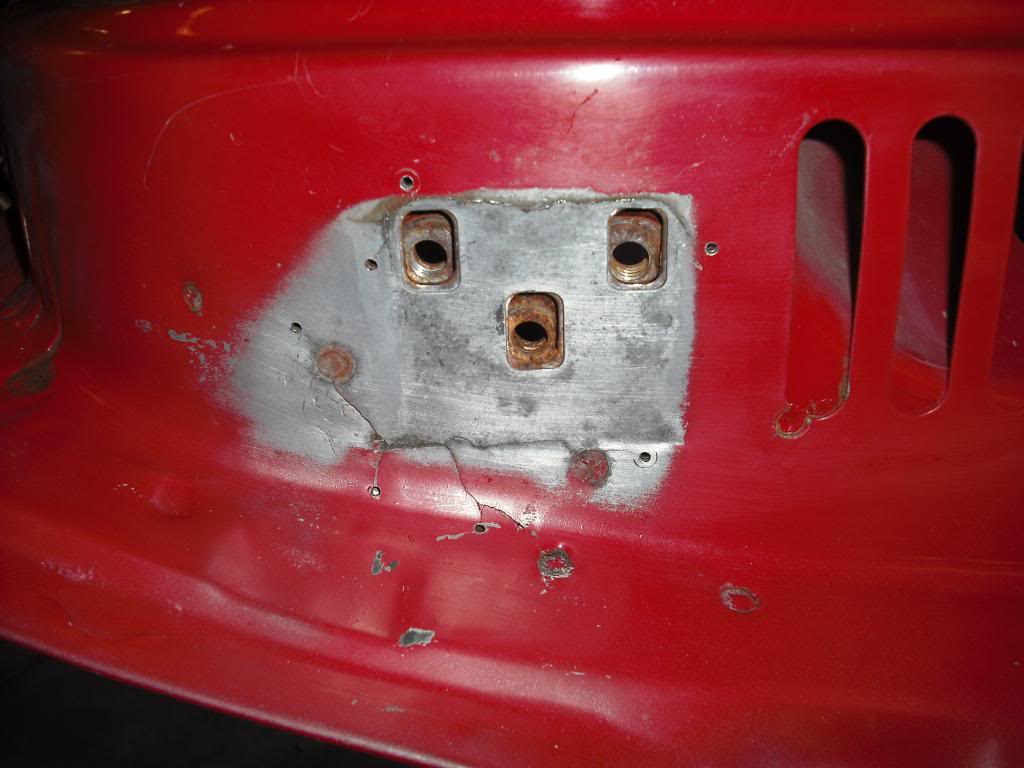
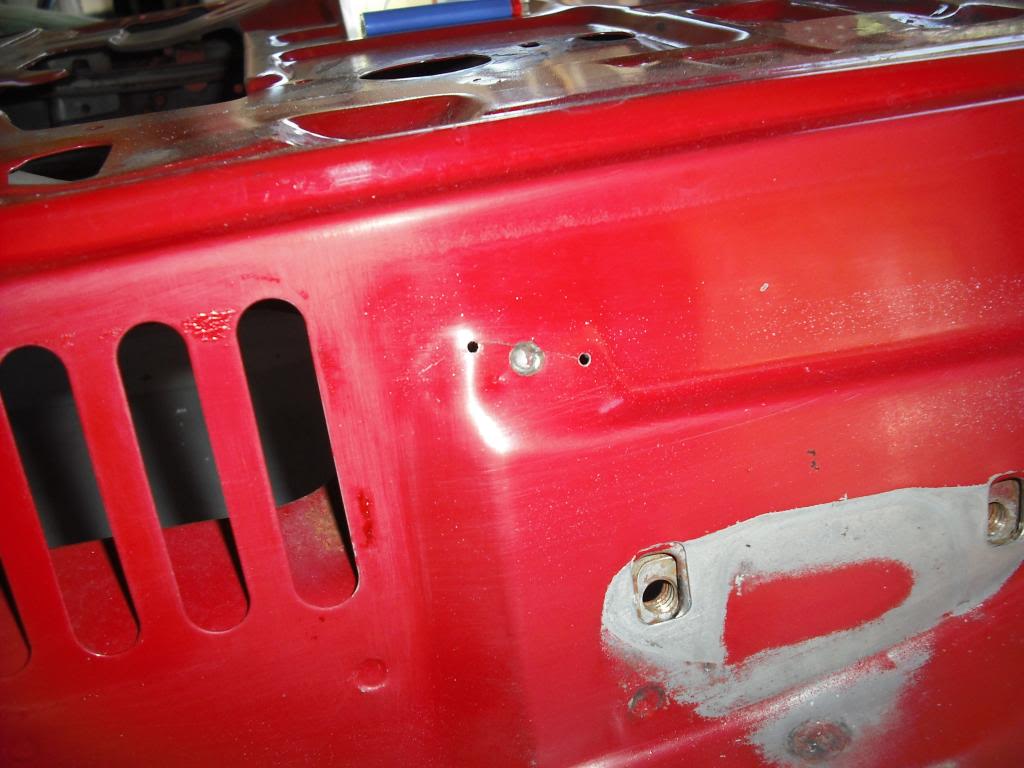
Here's some pics of the drivers door lower hinge typical cracks and the courtesy lite contact point.. Not near as bad as some I've seen. But Cracked none the less and in need of some welding tlc.


Name:  011_zps0b815016.jpg
Views: 92
Size:  53.9 KB


Name:  012_zps0dd2e862.jpg
Views: 104
Size:  88.0 KB


Name:  015_zpsf886f9e2.jpg
Views: 99
Size:  82.2 KB


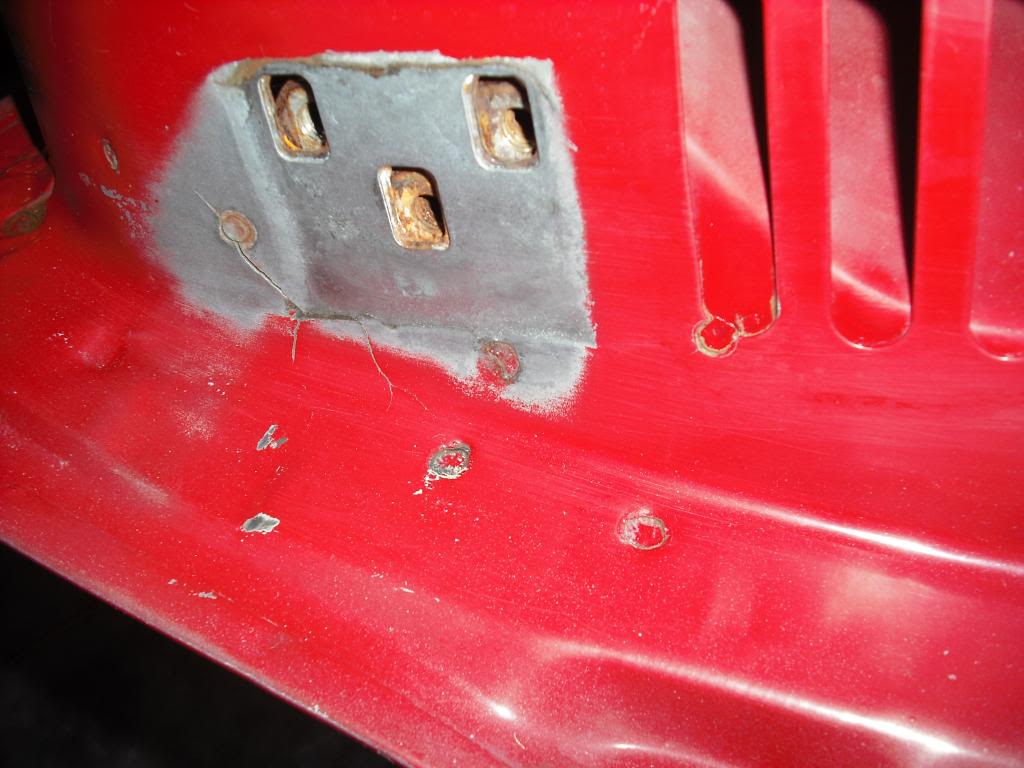
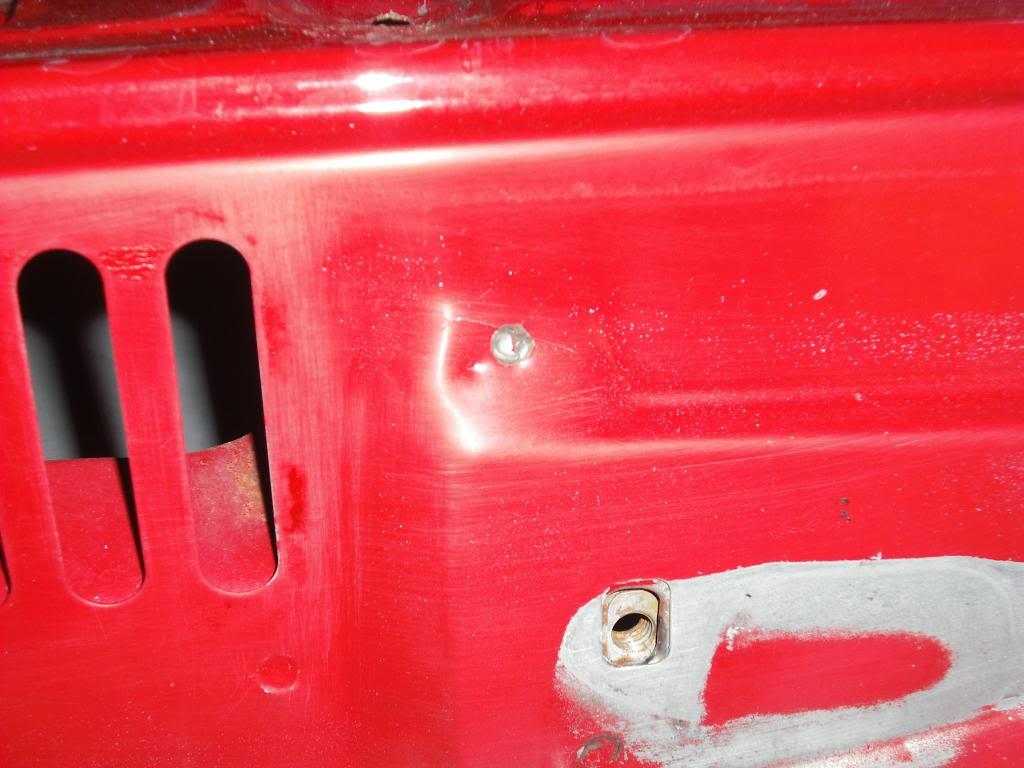
I drilled a stop hole at the end of each crack before I weld em up.


Name:  017_zpsd7077d20.jpg
Views: 118
Size:  67.7 KB


Name:  018_zpsf3be4cfe.jpg
Views: 72
Size:  82.1 KB
Old 05-11-2014, 10:42 PM
  #210  
Registered User
Thread Starter
 
brcron007's Avatar
 
Join Date: Nov 2010
Location: Bradenton, Fla
Posts: 268
Received 13 Likes on 10 Posts
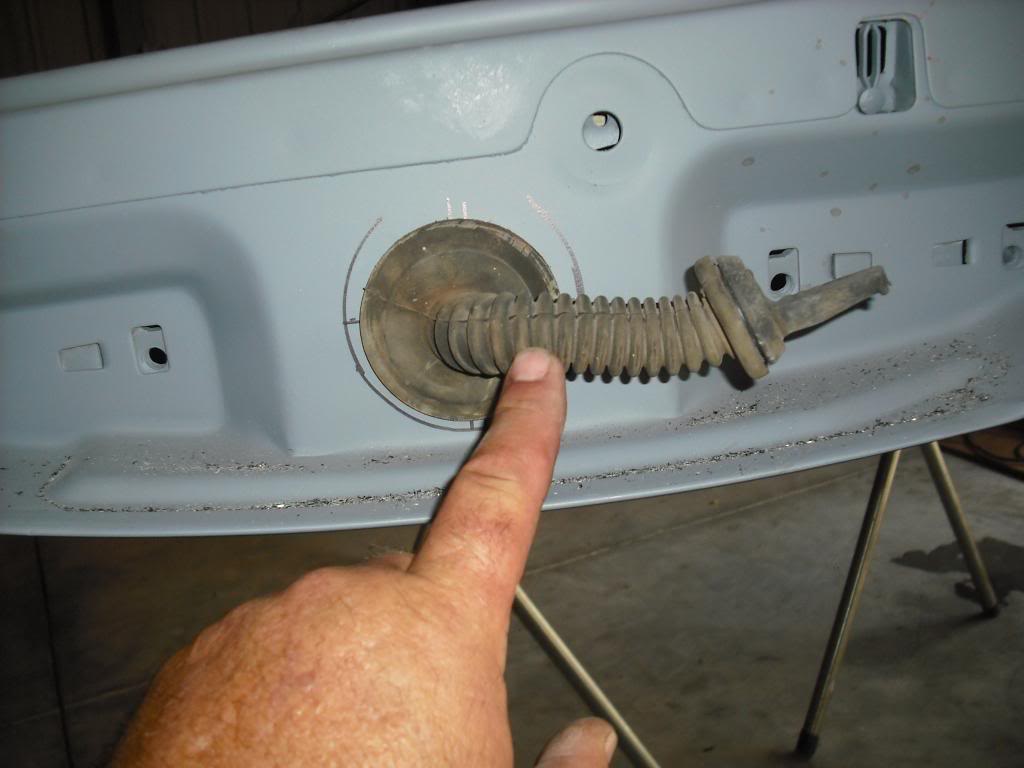
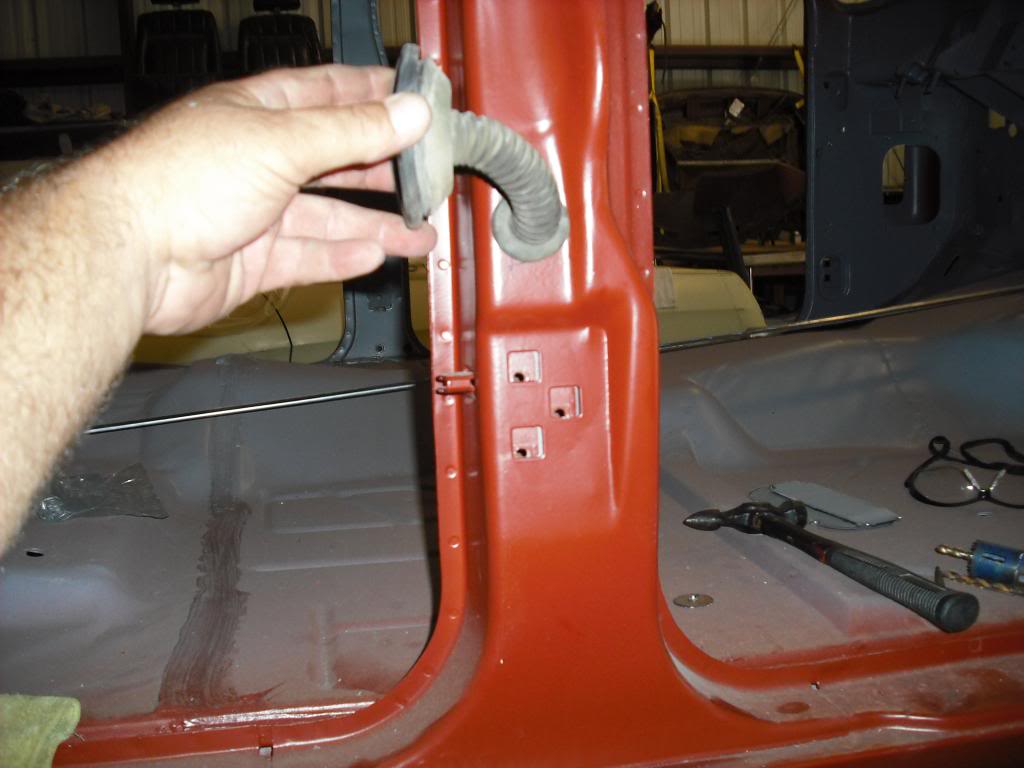
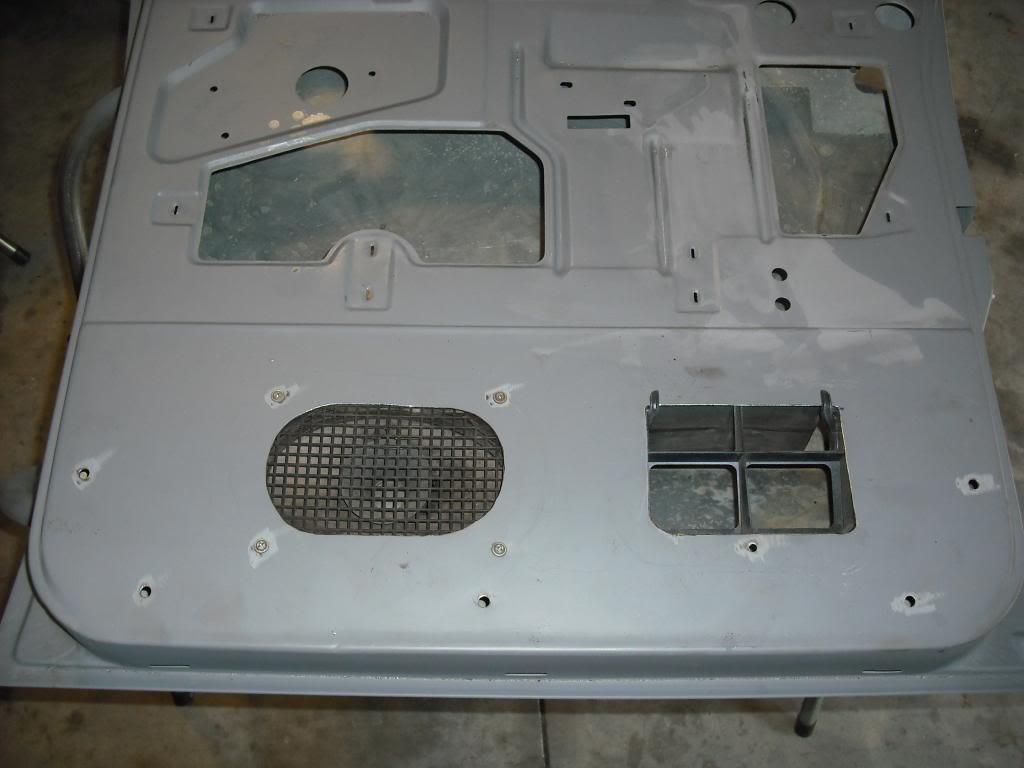
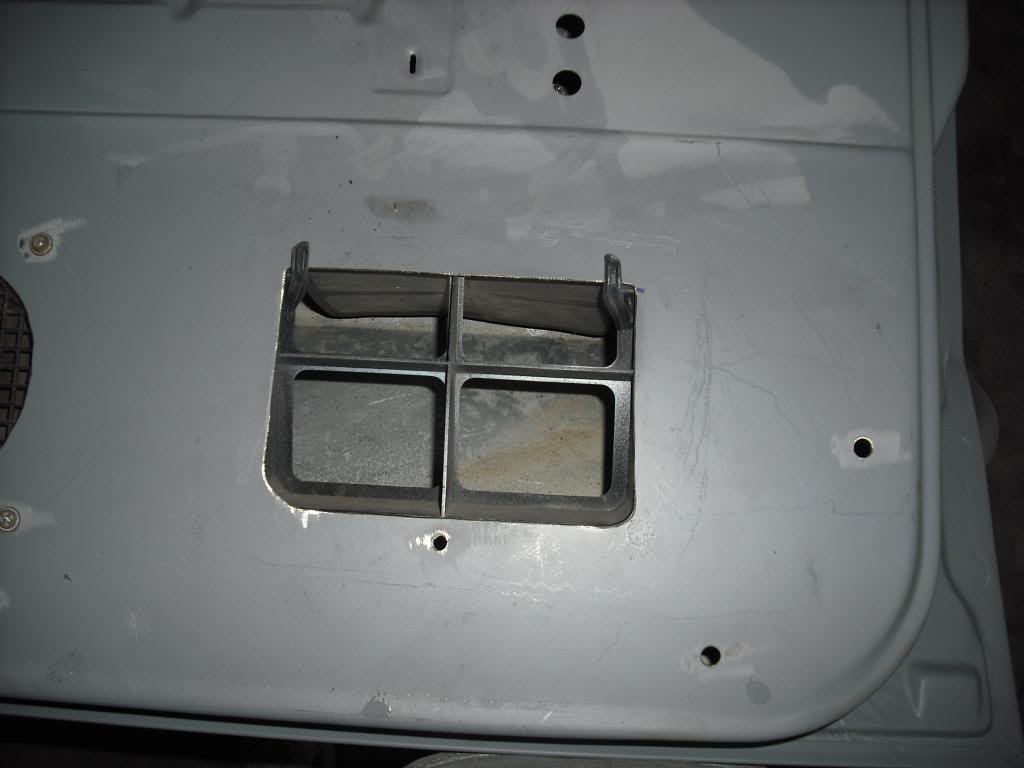
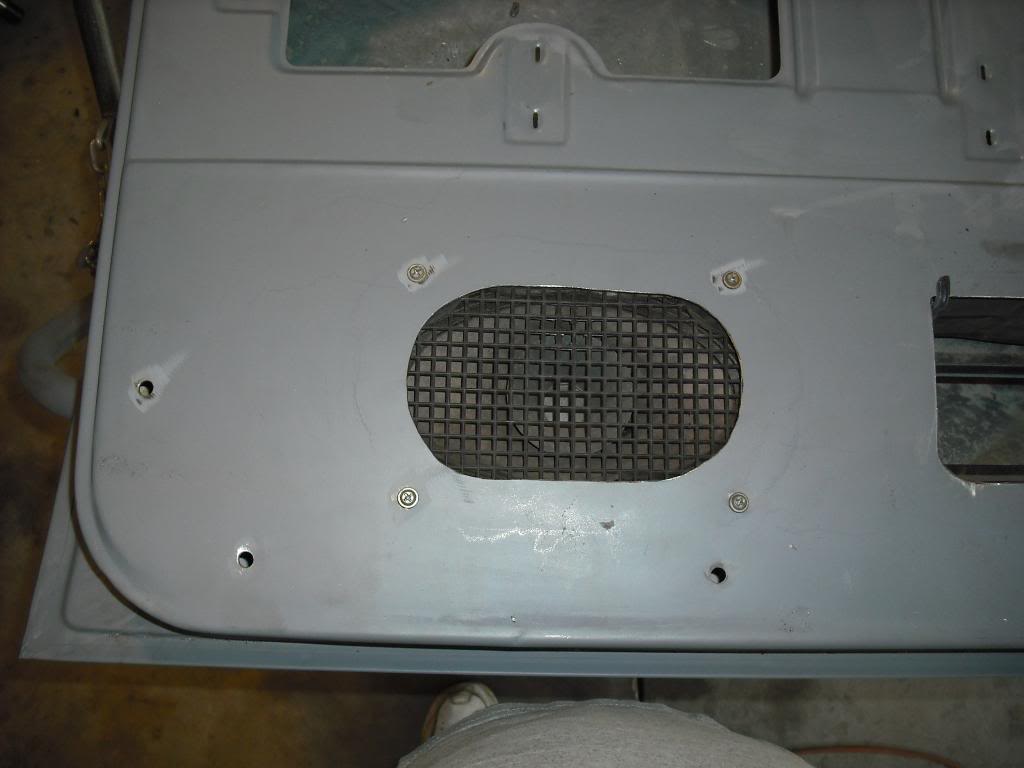
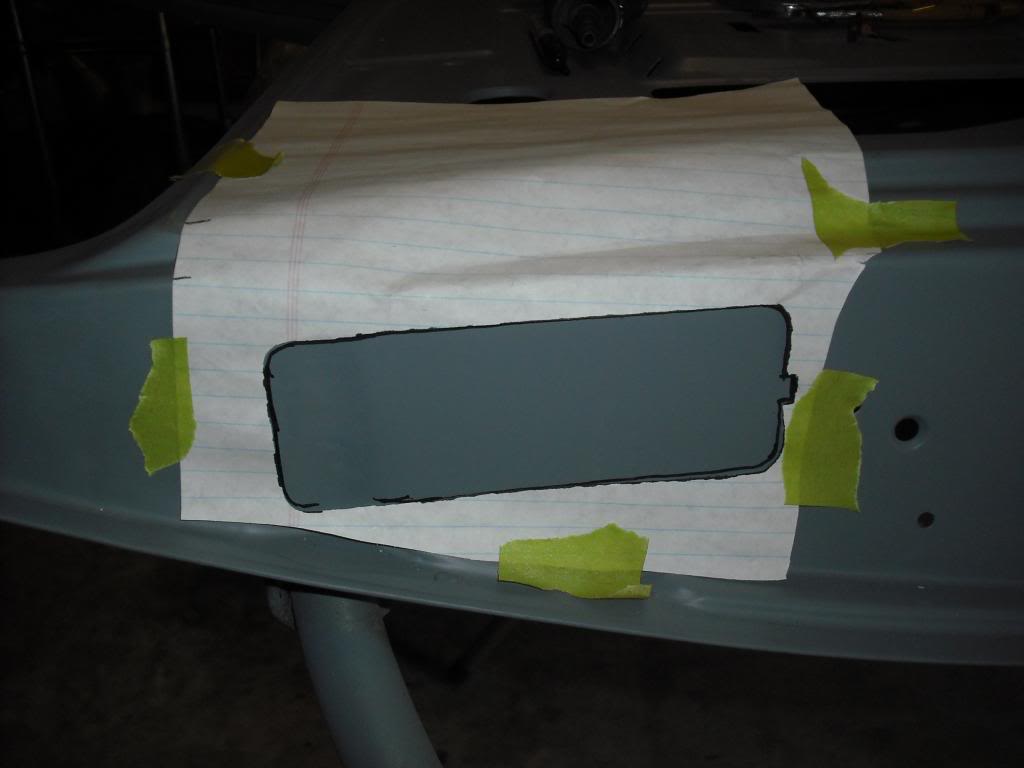
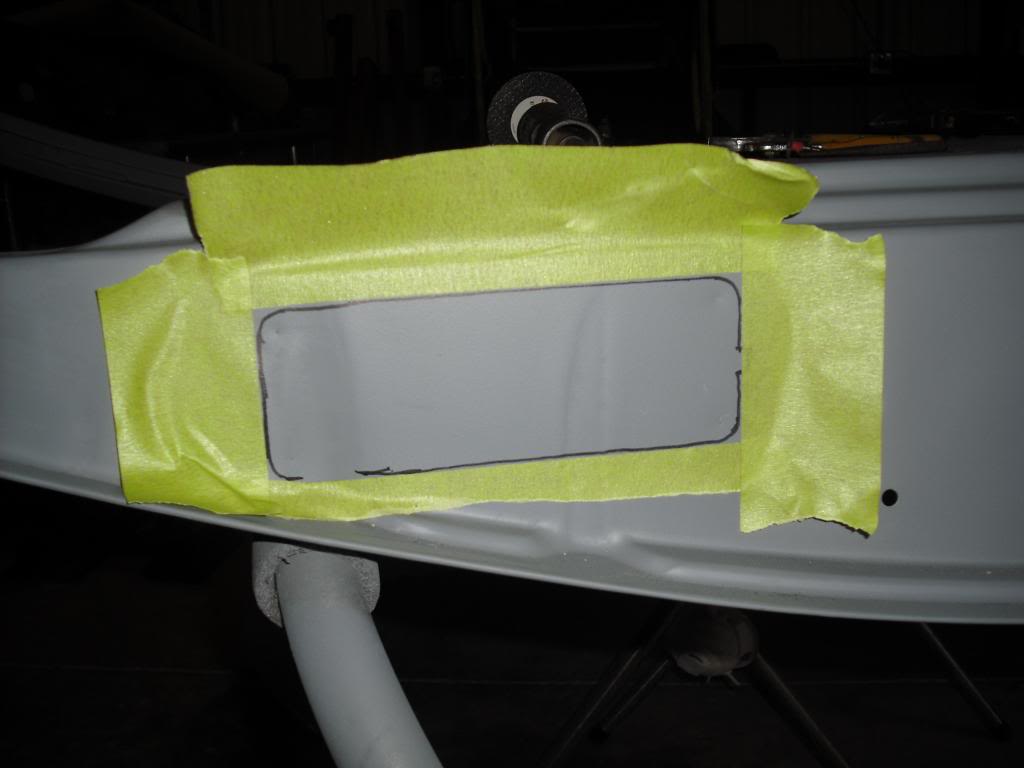
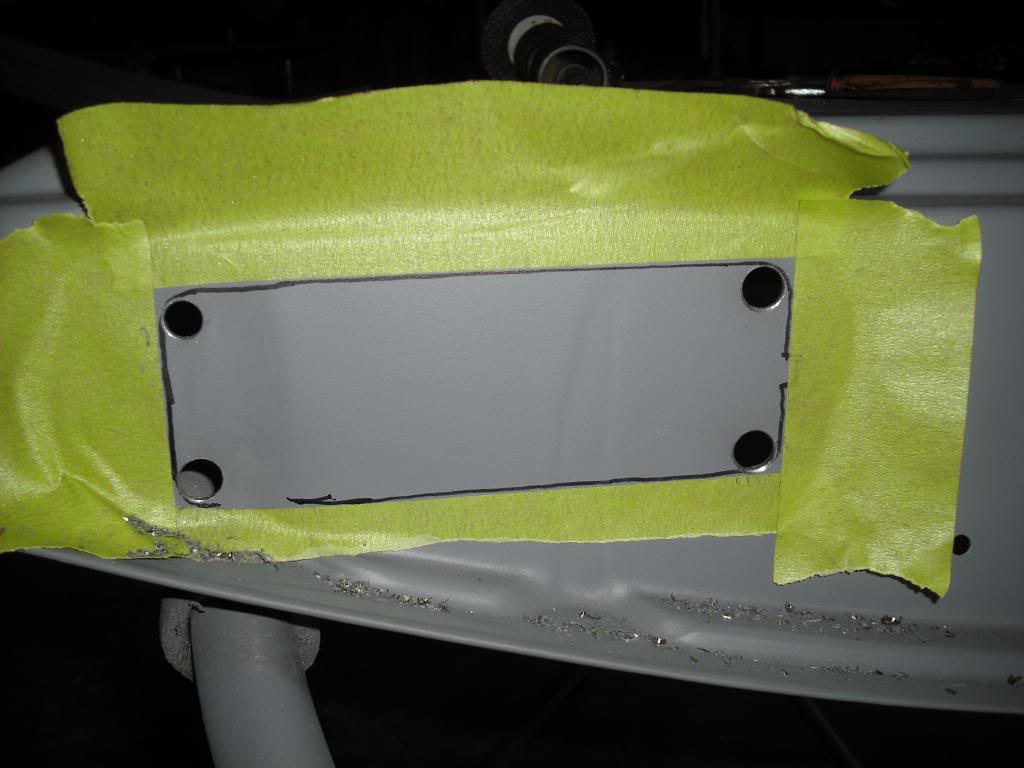
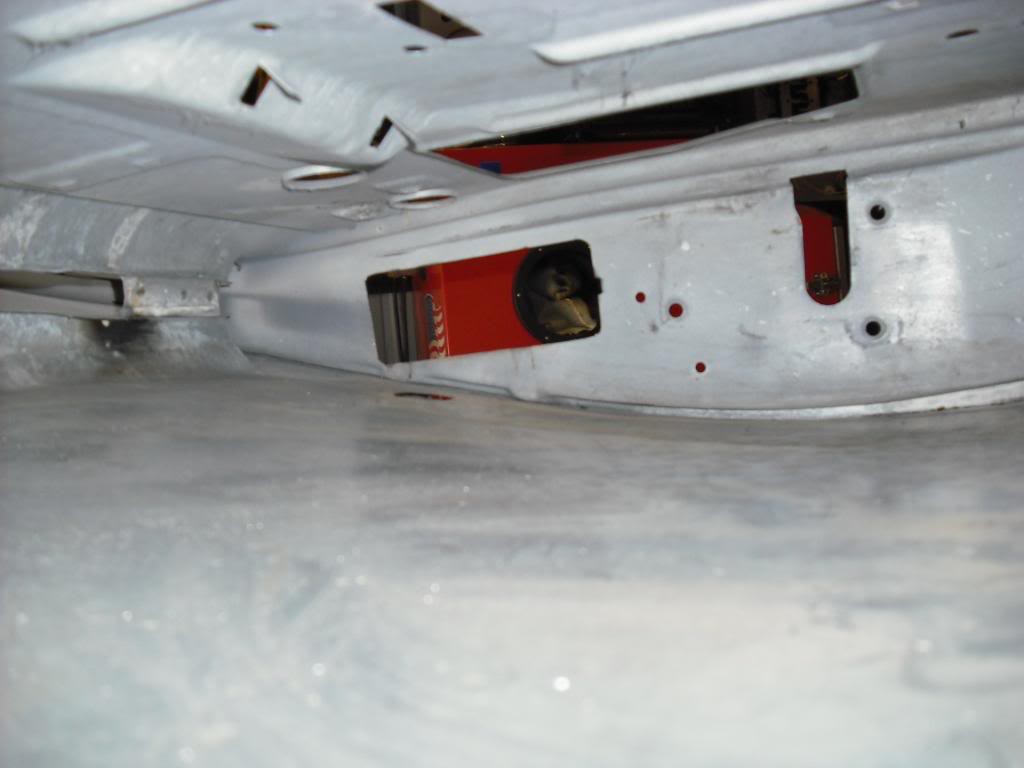
I set up the passenger rear door for the power window and power door lock and the speaker wiring rubber boot. The boot is from a 2002 Cavalier. It's the best fit for the limited space in the jamb.


Name:  008_zps9fc3d417.jpg
Views: 79
Size:  49.0 KB


Name:  009_zpsef2421c5.jpg
Views: 112
Size:  63.0 KB


  • Name:  010_zpsde9b4f28.jpg
Views: 74
Size:  48.2 KB
Name:  012_zpsdd9dd077.jpg
Views: 87
Size:  54.7 KB


Name:  019_zps1f470854.jpg
Views: 90
Size:  69.4 KB


Name:  020_zpsb33435af.jpg
Views: 113
Size:  66.5 KB


Quick Reply: Crew Cab Project has Started


All times are GMT -5. The time now is 04:00 AM.