Commence Operation Silence
 03-14-2011, 03:03 PM
#1
Administrator
Thread Starter

Commence Operation Silence
Part-1
This is another ongoing quest to create the perfect 1st Gen.
I have already added insulation to my cab in an effort to make it quieter inside but I still did not have it to the degree that I wanted so this weekend I made more improvements.
First I took out the entire interior down to the bare sheet metal, and then I wiped everything down using commercial grade Windex.
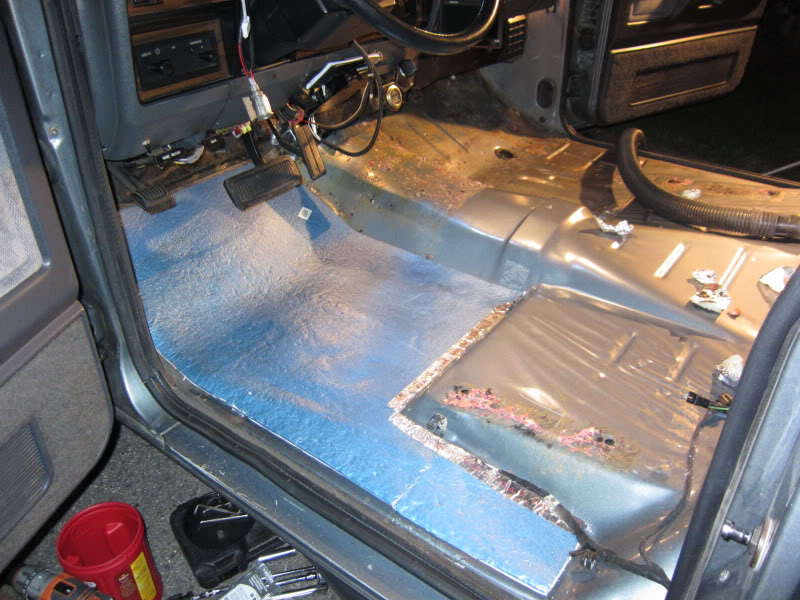
From the previous attempt you can see how I lined the floor pan using �� polystyrene insulation and securing them in place using HVAC aluminum tape.
Any holes in the floor pan were sealed using silicone and patch of foil tape to cover it.
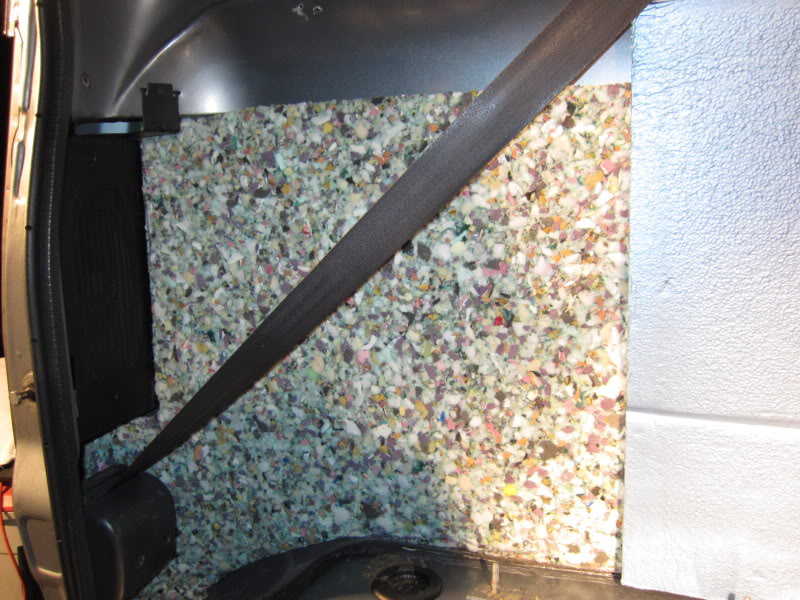
A lot of road noise enters your cab through the rear of the cab, think of the cab as the inside of a drum.
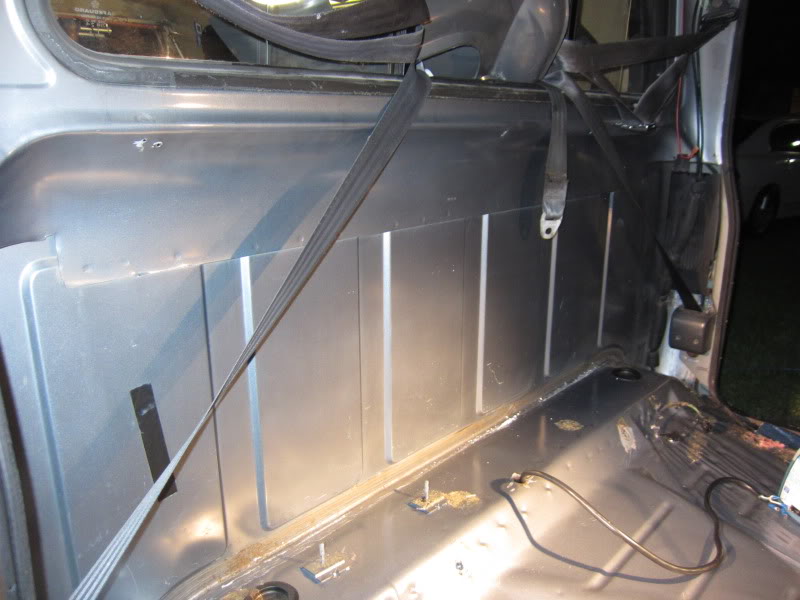
Next I cut out a section of 8 pound carpet padding 9/16� thick and fit it into the back of the cab extending as high as where the cab becomes double walled.
I secured the padding to the metal using double sided acrylic carpet tape across the top
and 5 vertical strips equally spaced.
Here another pair of hands are useful.
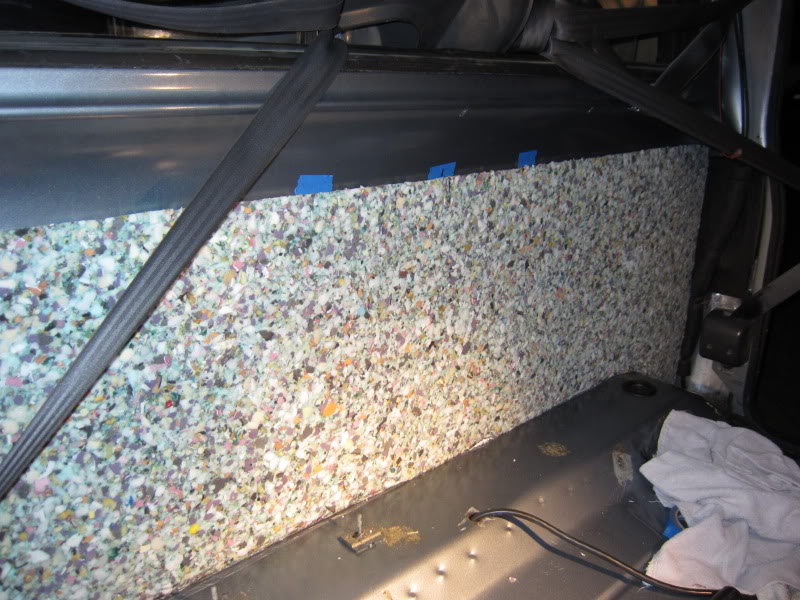
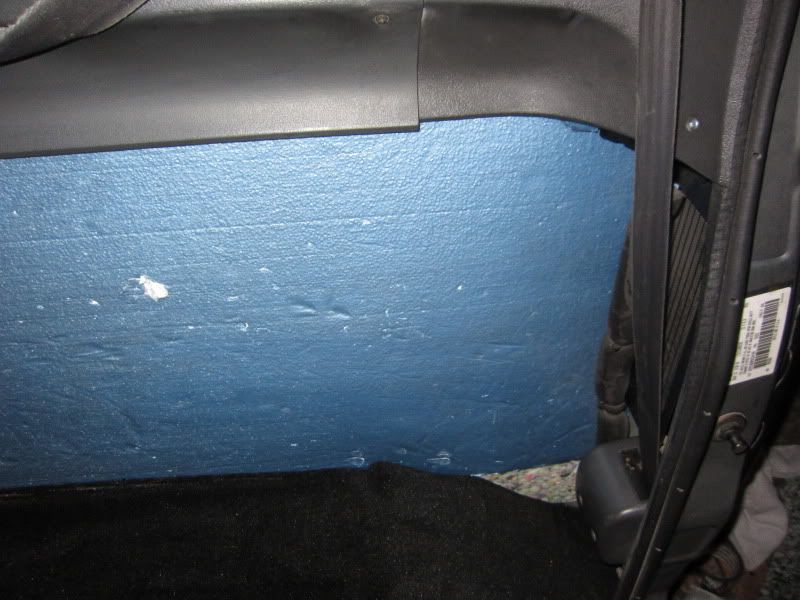
Then over the padding I installed some �� polystyrene insulating board to protect it and to hold it into place.
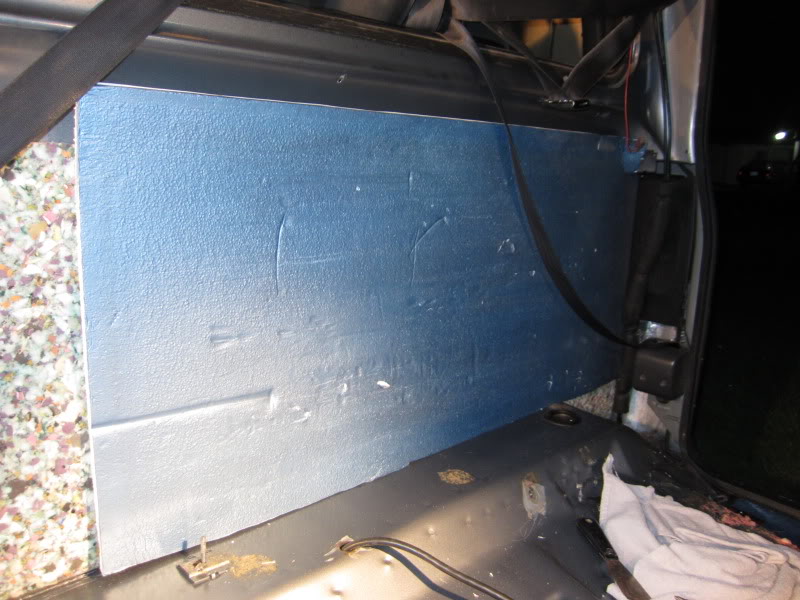
Here you can see how far it goes behind the speaker and down the floor.
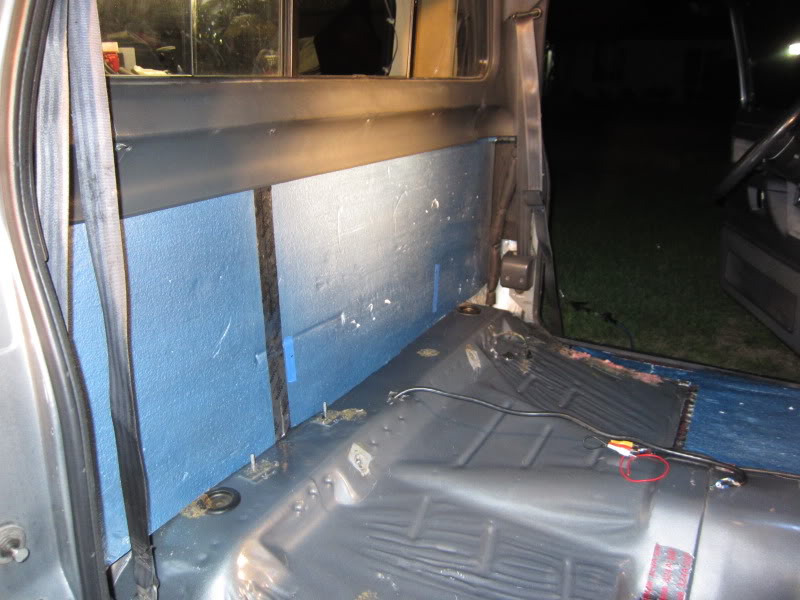
Here the remaining section is covered, the trim is reinstalled around the window and the joints are secured using Mylar tape.
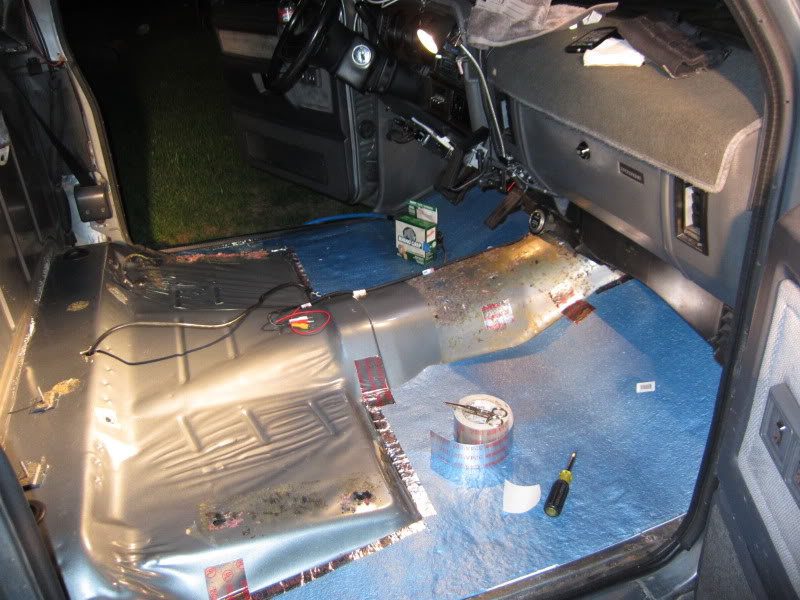
After the back of the cab was finished then it is time to pay attention to the floor board,
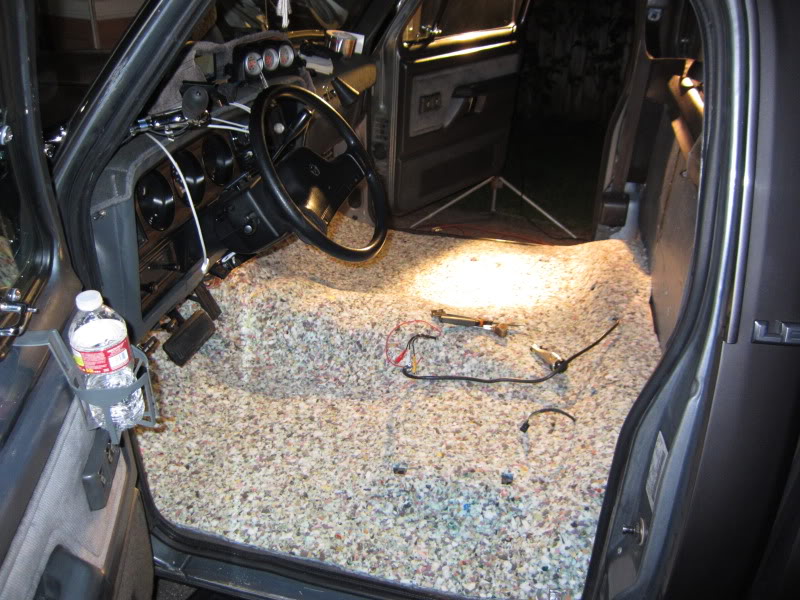
I next laid down a section of the 8 pound x 9/16� thick padding to the floor.
After working with it for awhile I had it all molded to the contour of the transmission tunnel and up around the pedals and working your way to the rear of the cab.
After you get the padding where you want it then you need to trim the back edge across the rear of the cab, you want to leave no piece of metal uncovered.
Then you need to trim the sides of the door sills about 1� into the channel using some scissors.
Part-1
This is another ongoing quest to create the perfect 1st Gen.
I have already added insulation to my cab in an effort to make it quieter inside but I still did not have it to the degree that I wanted so this weekend I made more improvements.
First I took out the entire interior down to the bare sheet metal, and then I wiped everything down using commercial grade Windex.
From the previous attempt you can see how I lined the floor pan using �� polystyrene insulation and securing them in place using HVAC aluminum tape.
Any holes in the floor pan were sealed using silicone and patch of foil tape to cover it.
A lot of road noise enters your cab through the rear of the cab, think of the cab as the inside of a drum.
Next I cut out a section of 8 pound carpet padding 9/16� thick and fit it into the back of the cab extending as high as where the cab becomes double walled.
I secured the padding to the metal using double sided acrylic carpet tape across the top
and 5 vertical strips equally spaced.
Here another pair of hands are useful.
Then over the padding I installed some �� polystyrene insulating board to protect it and to hold it into place.
Here you can see how far it goes behind the speaker and down the floor.
Here the remaining section is covered, the trim is reinstalled around the window and the joints are secured using Mylar tape.
After the back of the cab was finished then it is time to pay attention to the floor board,
I next laid down a section of the 8 pound x 9/16� thick padding to the floor.
After working with it for awhile I had it all molded to the contour of the transmission tunnel and up around the pedals and working your way to the rear of the cab.
After you get the padding where you want it then you need to trim the back edge across the rear of the cab, you want to leave no piece of metal uncovered.
Then you need to trim the sides of the door sills about 1� into the channel using some scissors.
 03-14-2011, 03:04 PM
#2
Administrator
Thread Starter
Part-2
Now it is time to reinstall your carper.
With a helper line up the roll of carpet working the front side first then start to roll it to the rear of the cab.
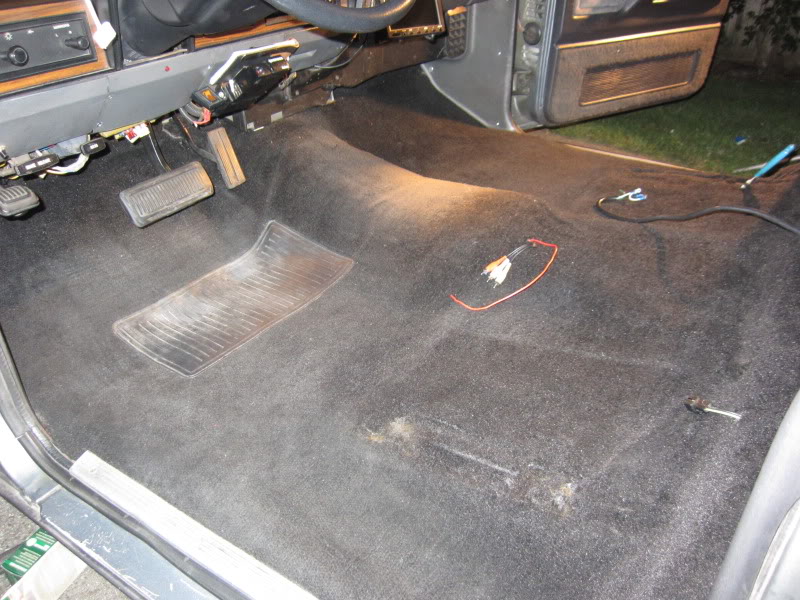
Here you see I have installed audio, video and power wires that will appear under the seat.
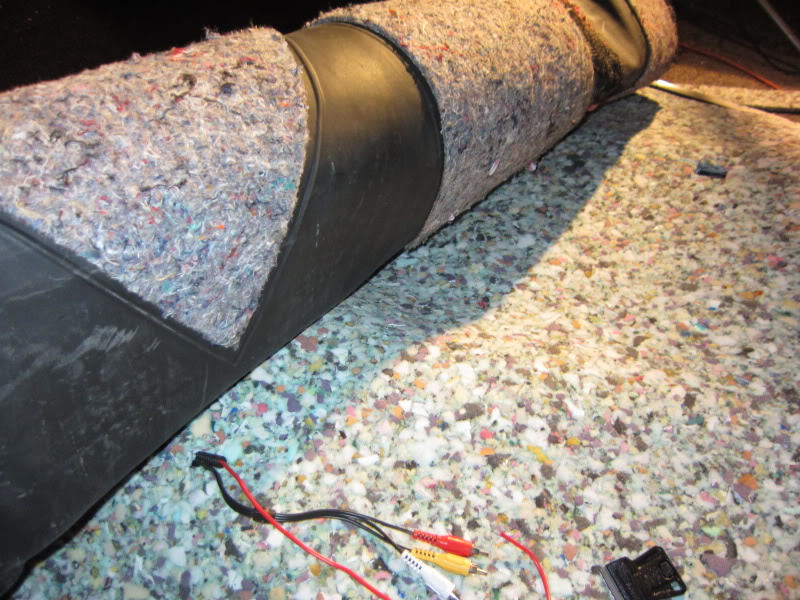
Here I made a cut in the carpet to pass the wires through.
At this time you should go ahead and cut openings for any wires, seat mounting and seat belt holes.
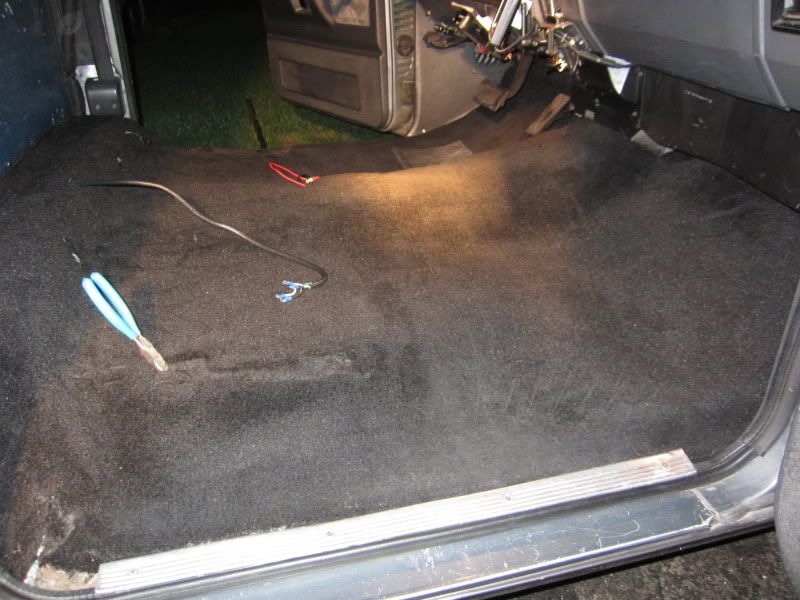
After the carpet is formed back into place then go ahead and reinstall any trim pieces you might have removed.
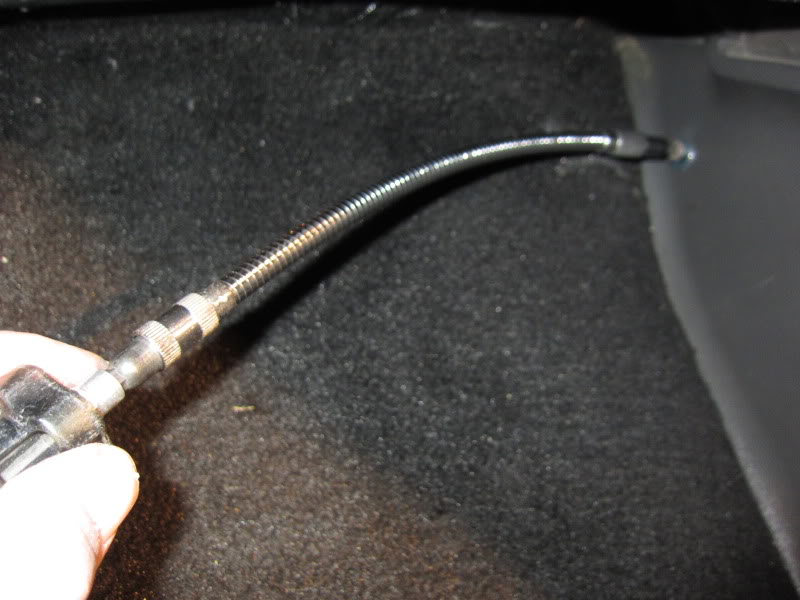
Here you see my flexible shaft screwdriver getting its workout.
You can also replace the sill plates
The newly installed carpet will be a bit of a bear to get back into its original position because it is now on top of the added insulation, but in time it will settle back down.
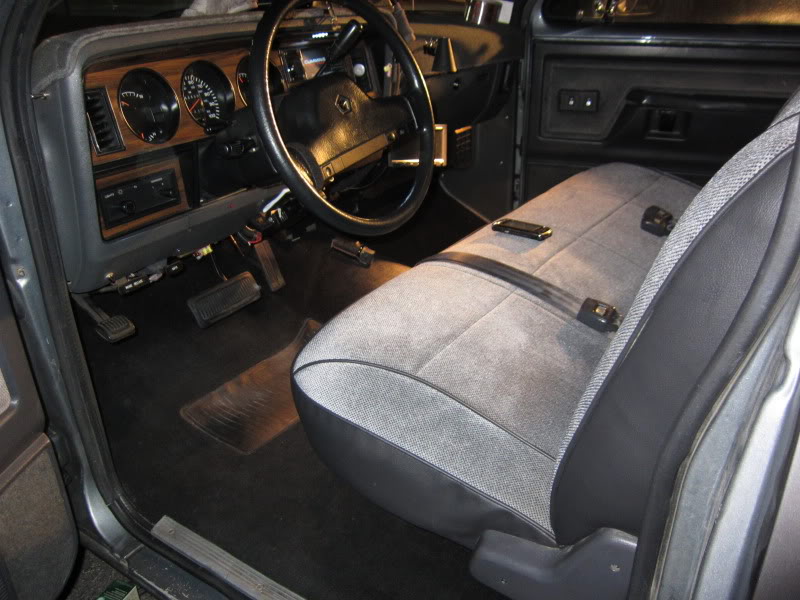
Here the carpet as back in place, notice how much higher it is around the tunnel.
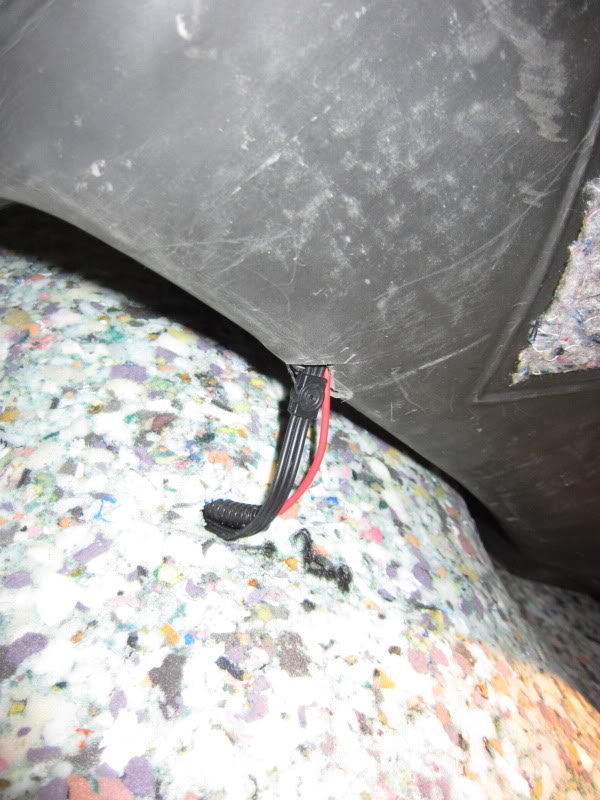
Be sure to check that the accelerator pedal can be depressed fully without hitting the carpet, I have already raised the entire pedal assembly about �� and tightened my cable to easily attain full travel.
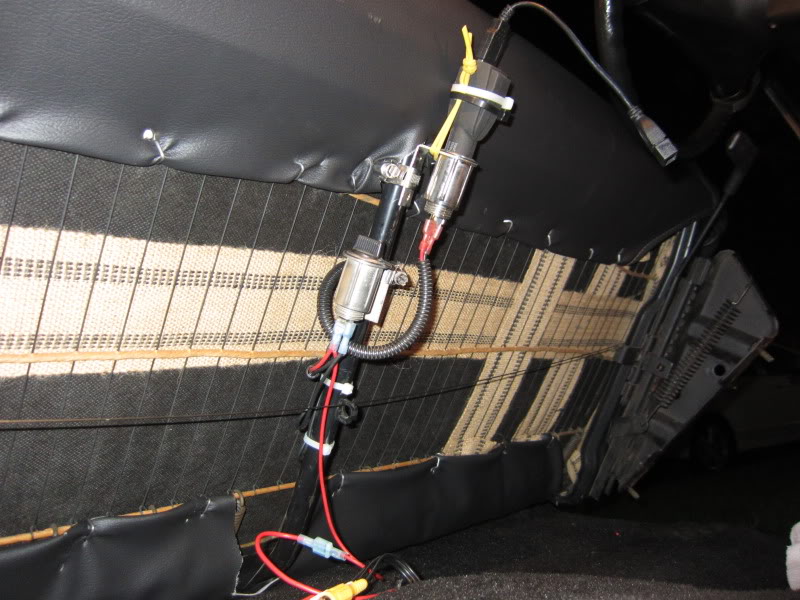
This shows the detail on how I covered the back of the cab, the padding goes all of the way to the bottom of the cab, and then the padding and carpet are tight against the back panel.
Here are the details for the DC power recieptle that I mounted under my seat, they are used for when I need to plug in a charger for a cell phone, DSi console or anything else that requires 12-volts DC, in the other recieptle is my USB adapter for charging my PDA, iPod. Also under my seat are all of the audio/ video connections to connect my 64gb iPod Touch to my receiver and monitor screen.
The cable will follow the path of the seat belt to be right next to me.
Also I am reinstalling my newly reupholstered seat for a cushy ride.
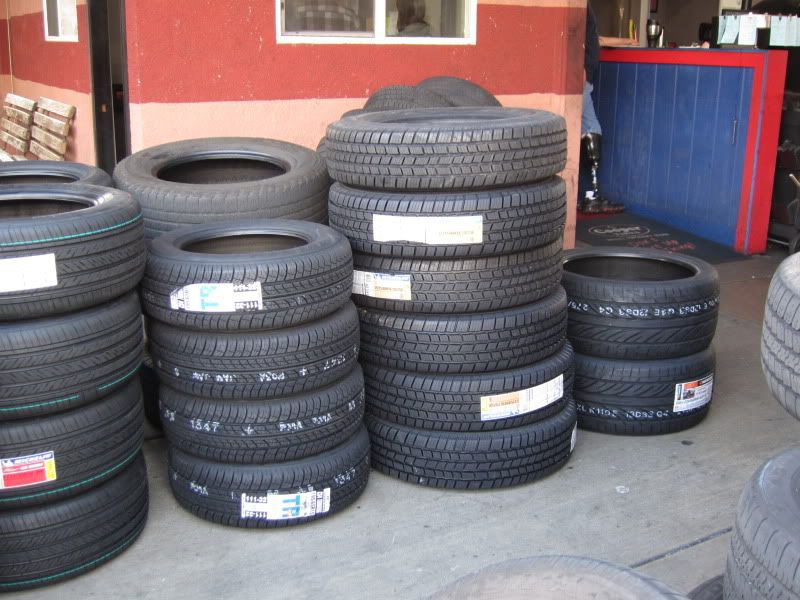
Also to give a better ride I also installed 6 new Michelin tires to the package.
Here is the final look at the interior of my truck.
Impressions:
Before adding all of the insulation, you could hit any section of the cab and it would sound like you were inside a big drum BONG when you smack it, now if you were to hit any part of the cab all you hear is a low muffled thud, when you get inside the truck and close the doors there are no echoes and all you hear is silence it sounds like you are inside a small padded room (no not that kind).
Without rolling down a window it is very difficult to close the doors on the first try and if you slam the doors you will feel it in your ears.
The audio sounds so much better and when you crank up the volume there are no rattles.
Once I went for a drive I realized my work was worth the time and effort, there is very little road noise and at freeway speeds you can now carry on a conversation with someone else besides yourself.
At a certain RPM I still hear a drone that I need to address but I am thinking it is the air being drawn in the turbo because I did not hear it as much when it was receiving air from under the bumper.
This was a relative easy weekend project; I started around noon on Sunday and finished up around midnight.
Something to be aware of:
It is difficult to hear sirens from inside the truck, I was sitting at an intersection and when I looked over into the opposite lane I saw a fire truck going past with its red lights and siren on, if I would have had the radio on very loud I would have never heard it. I am looking for a siren detector or circuits to build one.
Materials:
6�X 8� X 9/16� piece of 8 pound carpet padding. $38.00 Lowes
Double sided acrylic carpet tape.
12 hours of my time.
I will post a video from the inside when I get a chance.
I hope I was able to entertain you for a couple of minuets.
Coming Soon:
New rear Soft Ride leaf springs.
I am still planning on adding a layer of Dyna Mat or similar material to the door panels and floor pan to absorb all vibrations.
Jim
Now it is time to reinstall your carper.
With a helper line up the roll of carpet working the front side first then start to roll it to the rear of the cab.
Here you see I have installed audio, video and power wires that will appear under the seat.
Here I made a cut in the carpet to pass the wires through.
At this time you should go ahead and cut openings for any wires, seat mounting and seat belt holes.
After the carpet is formed back into place then go ahead and reinstall any trim pieces you might have removed.
Here you see my flexible shaft screwdriver getting its workout.
You can also replace the sill plates
The newly installed carpet will be a bit of a bear to get back into its original position because it is now on top of the added insulation, but in time it will settle back down.
Here the carpet as back in place, notice how much higher it is around the tunnel.
Be sure to check that the accelerator pedal can be depressed fully without hitting the carpet, I have already raised the entire pedal assembly about �� and tightened my cable to easily attain full travel.
This shows the detail on how I covered the back of the cab, the padding goes all of the way to the bottom of the cab, and then the padding and carpet are tight against the back panel.
Here are the details for the DC power recieptle that I mounted under my seat, they are used for when I need to plug in a charger for a cell phone, DSi console or anything else that requires 12-volts DC, in the other recieptle is my USB adapter for charging my PDA, iPod. Also under my seat are all of the audio/ video connections to connect my 64gb iPod Touch to my receiver and monitor screen.
The cable will follow the path of the seat belt to be right next to me.
Also I am reinstalling my newly reupholstered seat for a cushy ride.
Also to give a better ride I also installed 6 new Michelin tires to the package.
Here is the final look at the interior of my truck.
Impressions:
Before adding all of the insulation, you could hit any section of the cab and it would sound like you were inside a big drum BONG when you smack it, now if you were to hit any part of the cab all you hear is a low muffled thud, when you get inside the truck and close the doors there are no echoes and all you hear is silence it sounds like you are inside a small padded room (no not that kind).
Without rolling down a window it is very difficult to close the doors on the first try and if you slam the doors you will feel it in your ears.
The audio sounds so much better and when you crank up the volume there are no rattles.
Once I went for a drive I realized my work was worth the time and effort, there is very little road noise and at freeway speeds you can now carry on a conversation with someone else besides yourself.
At a certain RPM I still hear a drone that I need to address but I am thinking it is the air being drawn in the turbo because I did not hear it as much when it was receiving air from under the bumper.
This was a relative easy weekend project; I started around noon on Sunday and finished up around midnight.
Something to be aware of:
It is difficult to hear sirens from inside the truck, I was sitting at an intersection and when I looked over into the opposite lane I saw a fire truck going past with its red lights and siren on, if I would have had the radio on very loud I would have never heard it. I am looking for a siren detector or circuits to build one.
Materials:
6�X 8� X 9/16� piece of 8 pound carpet padding. $38.00 Lowes
Double sided acrylic carpet tape.
12 hours of my time.
I will post a video from the inside when I get a chance.
I hope I was able to entertain you for a couple of minuets.
Coming Soon:
New rear Soft Ride leaf springs.
I am still planning on adding a layer of Dyna Mat or similar material to the door panels and floor pan to absorb all vibrations.
Jim
03-14-2011, 05:51 PM
#4
Registered User
James:
That looks gorgeous. Thanks for the photographs. A couple of quick questions:
1. Are you still utilizing the OEM storage tray behind the seat? If so, did if fit in front of your new padding with no modification?
2. Have you replaced your OEM carpet? If so, could you recommend your supplier?
Thanks again,
JGB
03-14-2011, 06:34 PM
#5
Registered User
Join Date: Dec 2009
Location: Princeton, NJ
Posts: 902
Likes: 0
Received 0 Likes
on
0 Posts
It looks really good, but I'm a bit surprised. I figured YOU would use some liquid sound dampener, and follow it up with some dynamat-esque sound deadener.
That stuff is ridiculously expensive, though.
Nice work! Can't wait for the video.
That stuff is ridiculously expensive, though.
Nice work! Can't wait for the video.
03-14-2011, 08:16 PM
#7
Registered User
Looks great, Jim! I think I'll go through mine soon and do the same but I'd like to order a new carpet kit and possibly have my seat reupholstered. I'll bet deadening the rear sheet metal made the most noticeable difference. Do you think some sort of sound deadening material, such as dynamat, below the carpet padding would help in a moisture barrier kind of way?
Trending Topics
03-14-2011, 08:47 PM
#8
Registered User
Join Date: Aug 2008
Location: West Palm Beach, Florida
Posts: 1,450
Likes: 0
Received 0 Likes
on
0 Posts


 03-14-2011, 10:23 PM
#11
Administrator
Thread Starter
James:
That looks gorgeous. Thanks for the photographs. A couple of quick questions:
1. Are you still utilizing the OEM storage tray behind the seat? If so, did if fit in front of your new padding with no modification?
2. Have you replaced your OEM carpet? If so, could you recommend your supplier?
Thanks again,
JGB
That looks gorgeous. Thanks for the photographs. A couple of quick questions:
1. Are you still utilizing the OEM storage tray behind the seat? If so, did if fit in front of your new padding with no modification?
2. Have you replaced your OEM carpet? If so, could you recommend your supplier?
Thanks again,
JGB
Yes a few years ago I had the interior completely redone from the carpet to the headliner, cost about $500.00.
My truck never had the tray behind the seat.
03-14-2011, 10:27 PM
#12
Administrator
Thread Starter
03-14-2011, 10:35 PM
#13
Registered User
I just told my wife how much I want your extremely clean truck and how you have so many good write ups for me to learn from. Now you go and show me another great write up! Good job!!
03-14-2011, 10:37 PM
#14
Administrator
Thread Starter
Looks great, Jim! I think I'll go through mine soon and do the same but I'd like to order a new carpet kit and possibly have my seat reupholstered. I'll bet deadening the rear sheet metal made the most noticeable difference. Do you think some sort of sound deadening material, such as dynamat, below the carpet padding help out in a moisture barrier kind of way?
03-15-2011, 01:46 AM
#15
Registered User
Join Date: Sep 2009
Location: Collingwood Ontario, Canada
Posts: 479
Likes: 0
Received 0 Likes
on
0 Posts
where would one pick up a new carpet for our trucks? i was thinking just black outdoor carpeting with all the goodies you put under it to, but i think the original would look alot better if its not to pricey