Brake Light Switch Repair
 05-16-2011, 06:44 AM
#1
Administrator
Thread Starter

Brake Light Switch Repair
How to secure your Brake Light Switch.
Sometimes it is easier when you see a picture of what I am trying to describe.
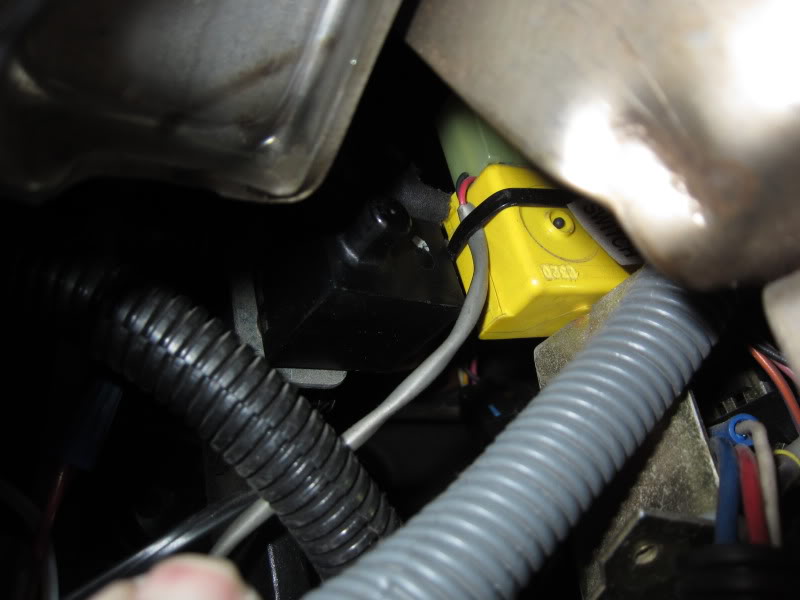
Here is what the Brake Light Switch looks like; this is viewed looking into the dash at the top of the brake pedal arm with the trim piece removed and the fuse panel swung out of the way.
The yellow device on the right side of the picture is the Multifunction Warning Buzzer
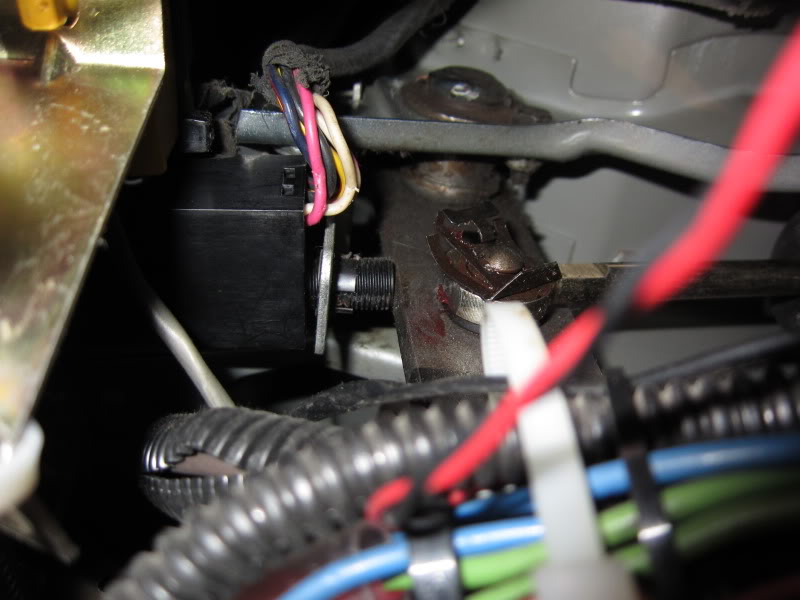
This is what the Brake Light Switch looks like when you are laying on your back looking up at the top of the brake pedal arm and how it is actuated by the brake pedal,
The Master Cylinder is supposed to limit the travel of the pedal but for some reason the remanufactured units do not, allowing the pedal to swing back too far and push the brake light switch assembly out of adjustment causing the brake lights to remain on when the brakes are released.
The adjustment of the brake light switch is only held in position by a spring clip that engages in what look like threads on the stem of the switch.
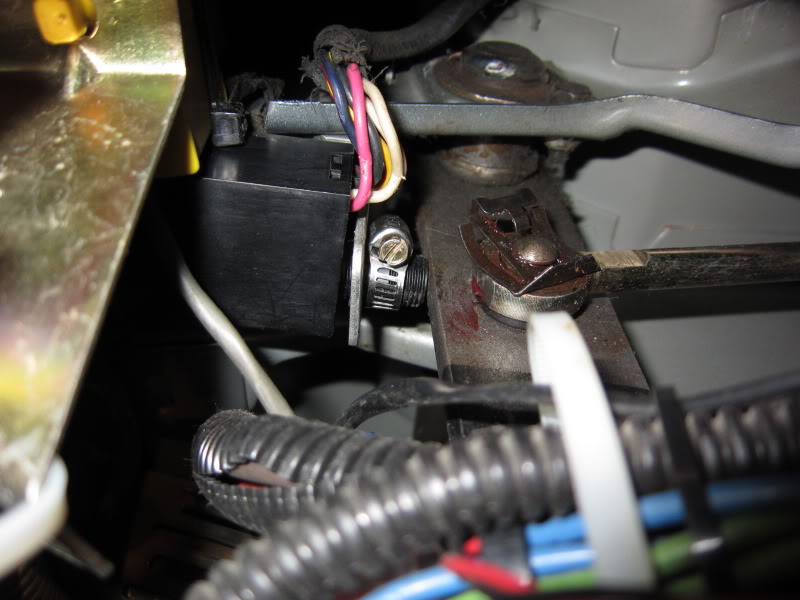
An easy way to secure the switch and keep the brake lights from coming on when they are not supposed to is to install a small worm drive hose clamp around the stem of the switch and then after carefully adjusting it to the pedal then carefully tighten up the hose clamp to lock the switch onto the bracket.
I am going to insert a section of rubber hose over the stem and under the hose clamp on the switch next time I am under the dash.
I hope you find this useful.
Jim
Sometimes it is easier when you see a picture of what I am trying to describe.
Here is what the Brake Light Switch looks like; this is viewed looking into the dash at the top of the brake pedal arm with the trim piece removed and the fuse panel swung out of the way.
The yellow device on the right side of the picture is the Multifunction Warning Buzzer
This is what the Brake Light Switch looks like when you are laying on your back looking up at the top of the brake pedal arm and how it is actuated by the brake pedal,
The Master Cylinder is supposed to limit the travel of the pedal but for some reason the remanufactured units do not, allowing the pedal to swing back too far and push the brake light switch assembly out of adjustment causing the brake lights to remain on when the brakes are released.
The adjustment of the brake light switch is only held in position by a spring clip that engages in what look like threads on the stem of the switch.
An easy way to secure the switch and keep the brake lights from coming on when they are not supposed to is to install a small worm drive hose clamp around the stem of the switch and then after carefully adjusting it to the pedal then carefully tighten up the hose clamp to lock the switch onto the bracket.
I am going to insert a section of rubber hose over the stem and under the hose clamp on the switch next time I am under the dash.
I hope you find this useful.
Jim

 10-16-2014, 12:34 PM
#4
Registered User
I know this is an old how to, but I suffered a brake switch spring clip failure yesterday which drained my battery completely. Gonna put this fix into place tonight, thanks for posting it.
10-16-2014, 09:17 PM
#5
Registered User

I just put a new master cylinder and brake booster on my '89, went outside that night and noticed the brake lights were on...switch had been pushed backwards while bleeding the brakes. It seems as though the brake pedal travel was only limited by the position of the switch i.e.once it was loose the pedal traveled much further up. I used a cable tie to secure the switch but removing it if necessary will be a pain. Your fix makes more sense.

Thread
Thread Starter
Forum
Replies
Last Post
Joey-D
3rd Gen Engine and Drivetrain -> 2003-2007
4
12-12-2011 12:52 PM
Gunz4all
3rd Generation Ram - Non Drivetrain - All Years
1
07-02-2008 05:51 AM