Attempting to save a dodge...
 09-19-2011, 08:32 PM
#1
Registered User
Thread Starter
Join Date: Dec 2010
Location: Land of the Toxic Avenger
Posts: 6,770
Received 1,637 Likes
on
1,112 Posts
Attempting to save a dodge...
Well, it's almost winter here in NJ  , and I've got a few more days ahead of me to get this relic of a survivor to be in it's best shape possible to resist the harsh environment it's been deposited into. Going from Oregon type weather to NJ corrosive air and salt winters is more than enough to turn it into another rust bucket, so I've doing everything that I can, just short of not driving it ever again, to halt the process of decay.
Since this truck has zero rot either in the cab, or frame, it's time for me to be proactive. I'll share what I've done so far, and post pix along the way. Hopefully you guys will get the itch, and roll around on your back eating dust, dirt and fumes for a couple of weeks, so we can call each other brothers.... Sorry, I don't know what peeps are, other than those marshmallow chicks and bunnies you get at easter..
Here she goes.
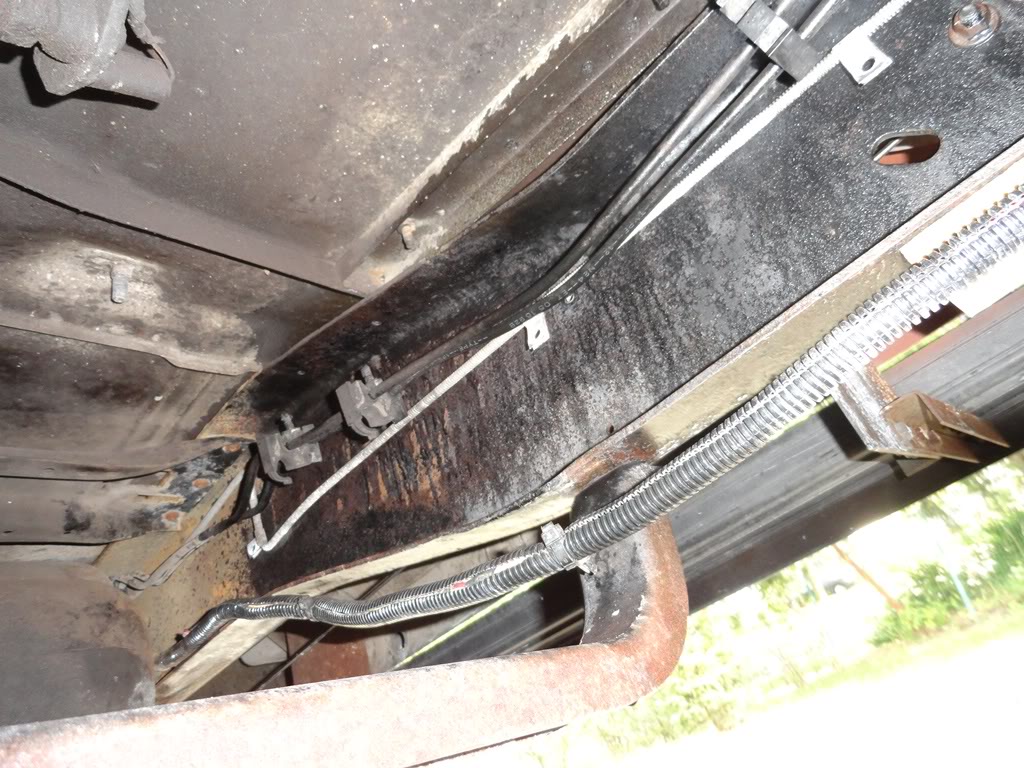
First thing was done was the truck underbody was sprayed a couple weeks ago with a degreaser, then powerwashed. The plugs in the body were removed, and the sediment was flushed out. I let a couple weeks go by to ensure it was dry under there, and then began my quest for a protected (somewhat) vehicle I can drive around in the winter...after all that what it was originally designed for, right ?
I first scraped, sanded, and wire brushed the truck from the front bumper (removed) to the fuel tank. After blowing all the dust off....I applied a rust converter to the frame using a pump sprayer. I'm using a phosphoric acid (PA) to restore the metal and stop the rust. I decided to use this because it's able to be flushed into areas (such as body cavities) where you can't scrape or brush. I pumped the stuff into the crevices between the frame connections, and just about everywhere else rust could possibly form. You let the stuff sit for a day, go back and see what you've found. If the metal has turned completely black where there was rust, you're done. If it's still rosy or red, then a second application is necessary. It's not necessary to remove the converter once it's done drying, but a wipe down is still recommended. You'll be amazed at the difference between the old rust and the new. If it gets wet, a white haze will appear, but if you re-apply the PA and wipe it down. Once it's dry, you're ready to prime. this section required a second application
Once it was dry, an oil based rust preventing primer was applied. Although the rust converter claimed to be "self priming", I felt better adding this additional step.
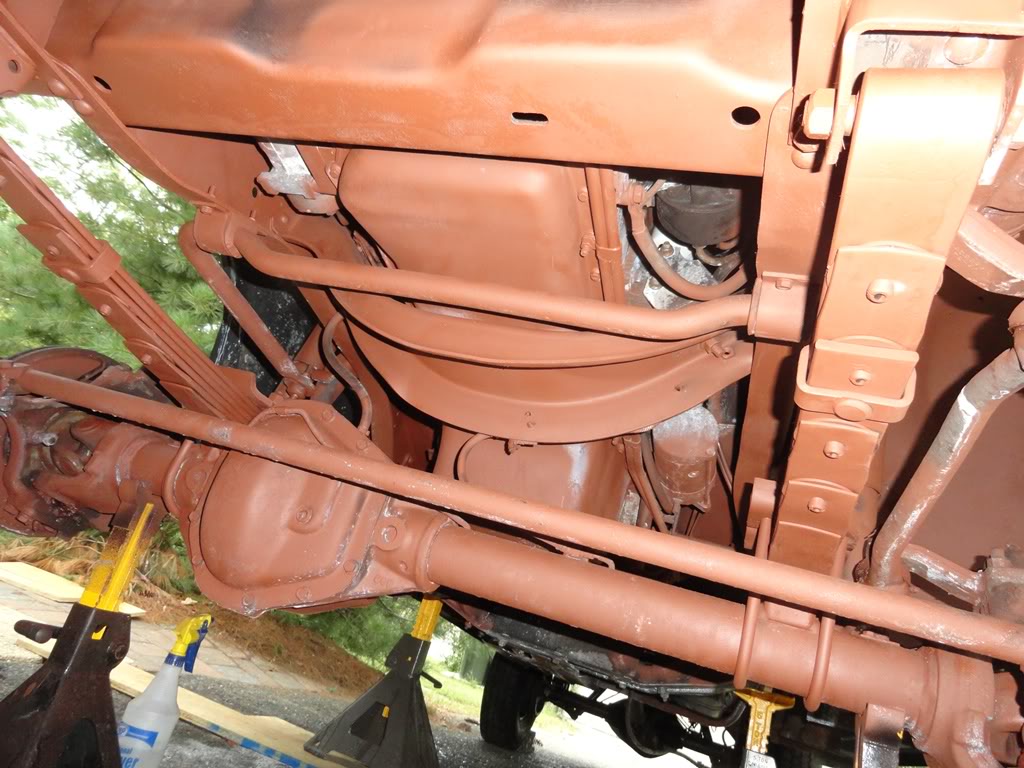
24 hours later.... it was painted with a gloss black paint to protect the new surfaces
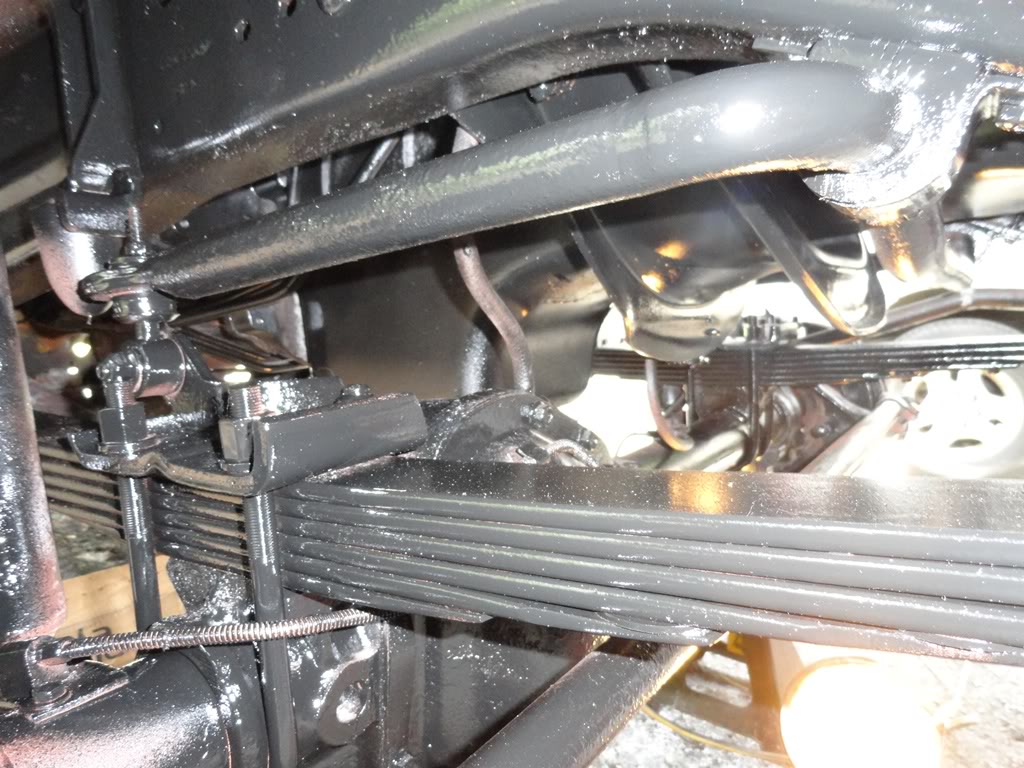
You tend to miss a few spots in the front because of suspension parts being in the way, but after a few tries, you can get paint onto just about every surface.... including the new front springs I just installed.
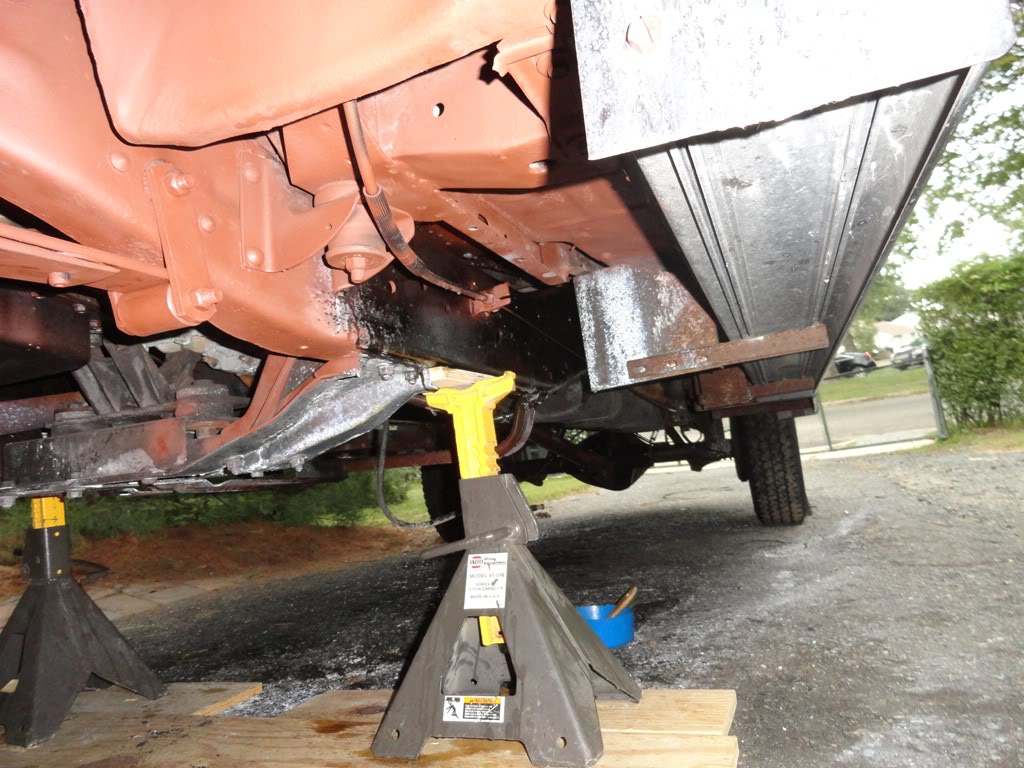
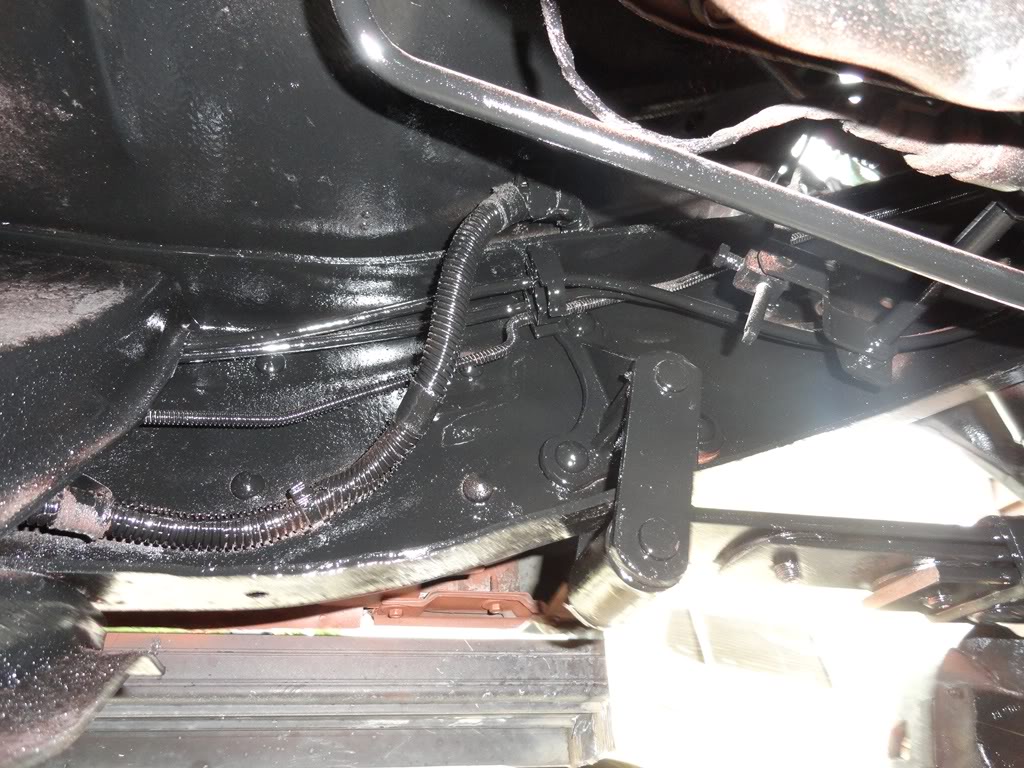
From the cab mounts back, it gets a whole lot easier, as there isn't as many parts to work around... Dropping the fuel tank will require the most amount of work from this point on....and it's really not that difficult....
BTW.... removal of the exhaust will be required to get into the frame on the passenger side. Since I had to remove it anyway, the timing couldn't have been better
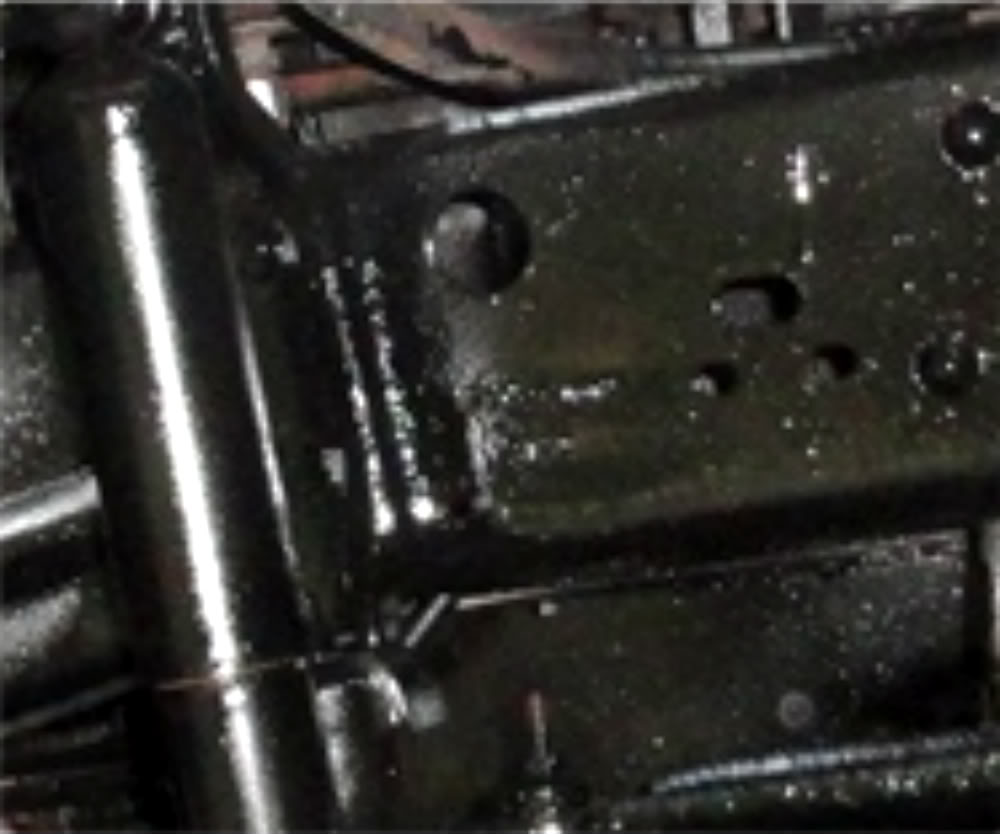
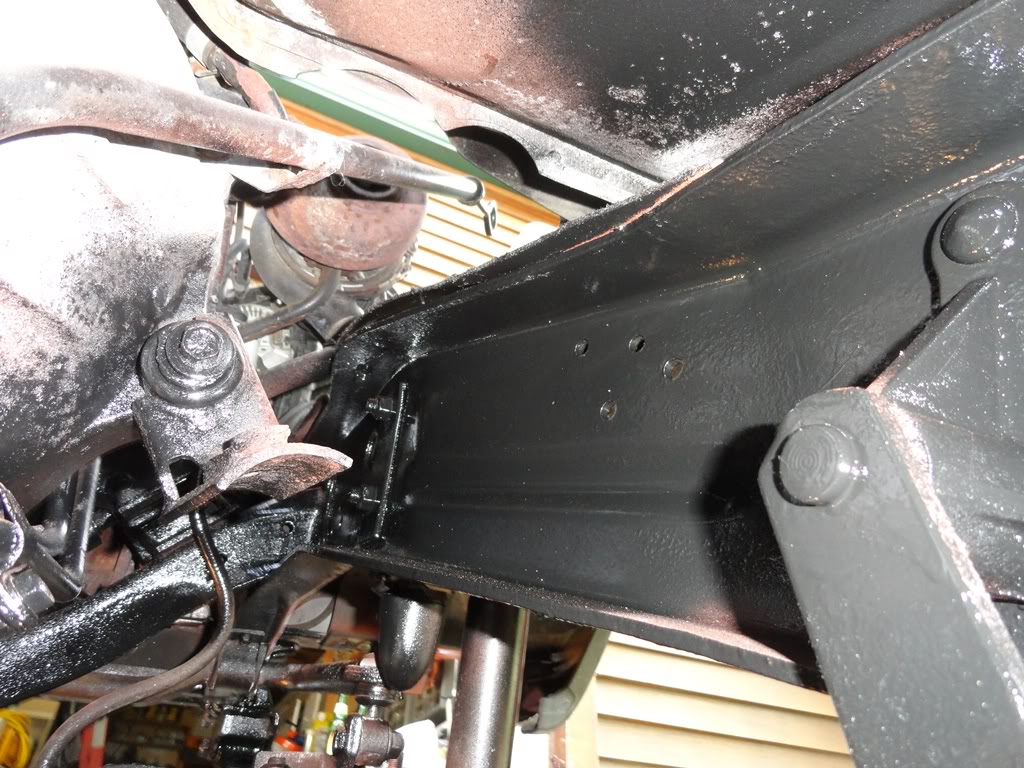
And make sure you check the tops and upper side of the c-channel, as it's easy to miss spots.... I went back over these after looking at these pix It's essential to not use a primer that's the same color as the chassis, so you can see where you missed.
, and I've got a few more days ahead of me to get this relic of a survivor to be in it's best shape possible to resist the harsh environment it's been deposited into. Going from Oregon type weather to NJ corrosive air and salt winters is more than enough to turn it into another rust bucket, so I've doing everything that I can, just short of not driving it ever again, to halt the process of decay.Since this truck has zero rot either in the cab, or frame, it's time for me to be proactive. I'll share what I've done so far, and post pix along the way. Hopefully you guys will get the itch, and roll around on your back eating dust, dirt and fumes for a couple of weeks, so we can call each other brothers.... Sorry, I don't know what peeps are, other than those marshmallow chicks and bunnies you get at easter..
Here she goes.
First thing was done was the truck underbody was sprayed a couple weeks ago with a degreaser, then powerwashed. The plugs in the body were removed, and the sediment was flushed out. I let a couple weeks go by to ensure it was dry under there, and then began my quest for a protected (somewhat) vehicle I can drive around in the winter...after all that what it was originally designed for, right ?
I first scraped, sanded, and wire brushed the truck from the front bumper (removed) to the fuel tank. After blowing all the dust off....I applied a rust converter to the frame using a pump sprayer. I'm using a phosphoric acid (PA) to restore the metal and stop the rust. I decided to use this because it's able to be flushed into areas (such as body cavities) where you can't scrape or brush. I pumped the stuff into the crevices between the frame connections, and just about everywhere else rust could possibly form. You let the stuff sit for a day, go back and see what you've found. If the metal has turned completely black where there was rust, you're done. If it's still rosy or red, then a second application is necessary. It's not necessary to remove the converter once it's done drying, but a wipe down is still recommended. You'll be amazed at the difference between the old rust and the new. If it gets wet, a white haze will appear, but if you re-apply the PA and wipe it down. Once it's dry, you're ready to prime. this section required a second application
Once it was dry, an oil based rust preventing primer was applied. Although the rust converter claimed to be "self priming", I felt better adding this additional step.
24 hours later.... it was painted with a gloss black paint to protect the new surfaces
You tend to miss a few spots in the front because of suspension parts being in the way, but after a few tries, you can get paint onto just about every surface.... including the new front springs I just installed.
From the cab mounts back, it gets a whole lot easier, as there isn't as many parts to work around... Dropping the fuel tank will require the most amount of work from this point on....and it's really not that difficult....
BTW.... removal of the exhaust will be required to get into the frame on the passenger side. Since I had to remove it anyway, the timing couldn't have been better
And make sure you check the tops and upper side of the c-channel, as it's easy to miss spots.... I went back over these after looking at these pix It's essential to not use a primer that's the same color as the chassis, so you can see where you missed.


 09-19-2011, 08:40 PM
#3
Registered User
Thread Starter
Join Date: Dec 2010
Location: Land of the Toxic Avenger
Posts: 6,770
Received 1,637 Likes
on
1,112 Posts
09-19-2011, 09:45 PM
#5
Registered User

 NJTman,
All I can say is I bet you were one grimey dude when you finally got it all wire-brushed.
I like to see such enthusiasm in a project.
It will have to be better even than when new, as the factory intends them to rust and you don't.
At any point, did you consider sand-blasting ??
Good job.
 09-19-2011, 09:59 PM
#7
Old Mopar Aficionado Extraordinaire

Join Date: Oct 2008
Location: North West Jorsey
Posts: 730
Likes: 0
Received 0 Likes
on
0 Posts
That looks like the Rustoleum primer. Stuff sticks to everything. But you can't use anything else over the top of it but Rustoleum.
I use the rust converter from Eastwood. Expensive, but does a better jog over all. I used to use phosphoric acid, but this is a 1 step and you paint right over it too. I restore Mopars. Fortunately I have a newer truck, but I have already sprayed the bottom. Holds up bare too.
Where you at there Jersey Boy? I'm up near Dover. Just being nosey
Good Job
Whay does NJT mean? NJIT? I'm NCE Alumni
Trending Topics
09-19-2011, 10:46 PM
#8
Registered User

Join Date: Aug 2010
Posts: 153
Likes: 0
Received 0 Likes
on
0 Posts
Commendable, looks great. I want to do the same to my truck. Wash the corrosives off the undercarriage and out of the crannies as frequently as you can this winter, and she'll look the same come spring.

 09-20-2011, 05:52 AM
#11
Registered User
NJTman,All I can say is I bet you were one grimey dude when you finally got it all wire-brushed.
I like to see such enthusiasm in a project.
It will have to be better even than when new, as the factory intends them to rust and you don't.
At any point, did you consider sand-blasting ??
Good job.
09-20-2011, 06:19 AM
#12
Registered User
Thread Starter
Join Date: Dec 2010
Location: Land of the Toxic Avenger
Posts: 6,770
Received 1,637 Likes
on
1,112 Posts
I use Jasco Prep and primer: The stuff is amazing I put it on my plow and it completely neutralized the rust and has since prevented any further rusting. It's outside in the rain all year long and no rust.... even after not applying anything but the jasco product on it.
Here's the MSDS as you need to be really careful with this stuff. It BURNS and can cause health issues, immediate blindness or death if you're not careful how you expose yourself to it. I was lying on a section of cardboard that had one drop on it. It went through my shirt and burned a hole in my skin. The acid isn't the real problem, as it just burns... it's the ethlyene glycol monobutyl ether that causes the health risks. Hopefully my minimal exposure to the stuff won't cause me any issues.
http://www.google.com/url?sa=t&sourc...8enJgA&cad=rja
09-20-2011, 06:24 AM
#13
Registered User
Thread Starter
Join Date: Dec 2010
Location: Land of the Toxic Avenger
Posts: 6,770
Received 1,637 Likes
on
1,112 Posts
Yes... But it's gets too messy, and I don't have a power respirator ...yet
Good catch. it is rustoleum. I used it on my toyota last year, and it wears like iron if prepped properly.
I'm in Central NJ on the coast.
NJT ? I'm from NJ, and my nickname is " T. " I'm actually a Rutgers Alumni...
When is there going to be a NJ MEET ? Say @ the water gap ? or at Hot Dog Jonnies on rt 46 ? Hopefully I'll be done by then ...
Invest in a power washer. Minimum PSI of 3K. You won't be disappointed as I've found more uses than I can ever imagine I ever would have.
Got the washing my truck time down to around 15 minutes !
I'm in Central NJ on the coast.
NJT ? I'm from NJ, and my nickname is " T. " I'm actually a Rutgers Alumni...
When is there going to be a NJ MEET ? Say @ the water gap ? or at Hot Dog Jonnies on rt 46 ? Hopefully I'll be done by then ...
Got the washing my truck time down to around 15 minutes !
09-20-2011, 07:58 AM
#14
Registered User
Really looking good. All your efforts will pay off and I know that was a WHOLE lot of work and effort to get what you got done.
I took out a body plug on mine to peek inside and now can't get the hardened rubber thing back on! Tried boiling it and freezing it to no avail. Guess I need a new one before winter. Did yours pop back in OK?
I pulled the bed off my M880 last winter to replace broken leaves, add overloads and a new sending unit in the gas tank with new lines before I installed a flat bed. I sand blasted from the frame back and then applied Eastwoods Rust Encapsulator. I like it better than POR-15 so far.
Let us know how it holds up.
09-20-2011, 09:41 AM
#15
Registered User

Join Date: Aug 2011
Location: Canada
Posts: 103
Likes: 0
Received 0 Likes
on
0 Posts
Do you have rust proofing companies down there? They drill holes in strategic spots and spray a rust proofing oil type liquid. They spray the under carriage too. I get my vehicles done every year around the end of the summer. Got a 1998 Sierra with no rust a 2000 Jimmy with no rust. Both vehicles get driven all the time on salted roads. I bought my dodge to late to save though