Tips on installing airdog 150
 01-03-2010, 09:00 PM
#1
Registered User
Thread Starter

Join Date: Dec 2009
Location: Beaufort South Carolina
Posts: 39
Likes: 0
Received 0 Likes
on
0 Posts
Tips on installing airdog 150
Ok guys im ordering my airdog 150 tomorrow. Mad Hat is helping me put it on and i wanted to know if anyone can give us any tips. One main question i have is how do i bypass the stock filter housing and when it is bypassed can i remove it from the engine bay? Any tips for installing this thing will be greatly appreciated!
 01-03-2010, 10:02 PM
#2
Registered User
Join Date: Oct 2007
Location: Okotoks, AB
Posts: 1,716
Likes: 0
Received 0 Likes
on
0 Posts
you can bypass the stock housing by not touching it at all. remove it and the supply line to the vp44. replace the vp44 supply line banjo with a pushlock fitting and then run the hose to it from the airdog.
lot's of guys have removed both the stock filter housing and the LP and never looked back.
lot's of guys have removed both the stock filter housing and the LP and never looked back.
01-04-2010, 02:42 AM
#3
Registered User

Join Date: Jul 2008
Location: San Diego, California
Posts: 78
Likes: 0
Received 0 Likes
on
0 Posts
Yes just remove the whole fuel filter set up from the block. Disconnect the incoming fuel line and the line that goes to the VP and remove everything and run straight from the Airdog to the VP. If you have a fuel pressure gauge, now the time to install it. The 90 that comes with the Airdog can be replaced with a 90 that has the threaded hole to accept the fitting for you fuel pressure gauge.
The bracket that holds the old fuel pump (assuming it is on the block and not in the tank) cannot be removed. You can remove the pump but not the bracket itself.
I heated the ends of the fuel line and then put a liberal amount of oil on it as I pushed the hose onto the fittings (a real pain for me) but not hard. Some people use and hair dryer to soften the ends up before putting them on the fittings.
Instructions are an easy read (3 or 4 time prior starting work) just go section by section. After you inventory your fitting and such, I laid out the fittings as as was going to use them. Helps to keep track of everything if you keep the supply chain laid out by phase.
When you drop your tank, place 2X4's in the general area that the straps are located so the center section will not be on the ground and give you a false reading when you record your measurements. You can either cut a slant cut at the end of your straw or what I did was cut a deep star at the bottom of the straw with a hack saw blade.
Not real hard stuff to do, just take your time and read 4 times prior installing and measure 4 times prior cutting your draw straw length.
I used a self tapping #6 or 8 self tapping screw and placed the fuse in the driver side fire wall are. Of course your batteries are disconnected while all this is going on. Good Luck, take your time you will do just fine.
01-04-2010, 07:43 AM
#4
Banned
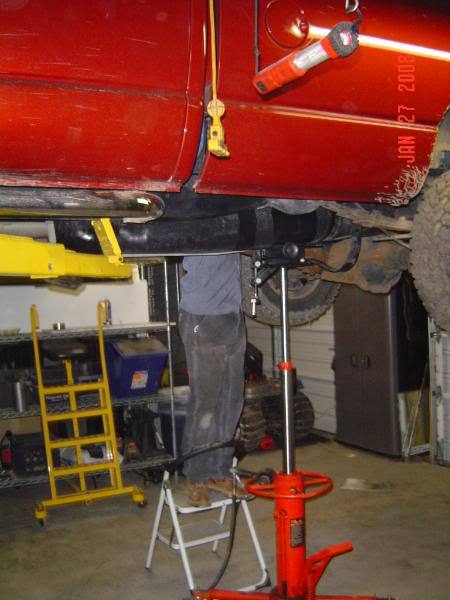
I just installed a Airdog 150 yesterday. The instructions are simple to follow if you read as you go. I hooked the pump up & had it mounted to the frame. Then I used the Airdog to drain the fuel from the fuel tank. When removing the tank, remove the gas cap from the filler neck, then remove the 3 screws that hold the filler neck in place. Place a jack under the tank & remove the 2 bolts holding the tank straps with a 15mm socket on a long extension. The tank will drop down to the floor if you pop the fuel lines out of the holders.
01-04-2010, 07:59 AM
#5
Administrator/Jarhead
We're going to pull the bed, I've had the best luck with that...
The only thing I'm wondering about is bypassing the stock FF canister. I am not too terribly familiar with the way the VP 44 fuel goes to and from the stock canister, there are a lot of lines going to it...
When I hooked mine up, I had to leave the stock canister there because I'm too cheap to buy a delete for it.
He already has the FP gauge plumbed into the VP44 with the plug edge sent him. Hopefully, we will be able to use that, but in thinking about it, I have a feeling that it is going to come off if we run the fuel straight to the VP.
I'll post some pics later if I get a chance.
01-04-2010, 11:04 AM
#6
Banned
We're going to pull the bed, I've had the best luck with that...
The only thing I'm wondering about is bypassing the stock FF canister. I am not too terribly familiar with the way the VP 44 fuel goes to and from the stock canister, there are a lot of lines going to it...
When I hooked mine up, I had to leave the stock canister there because I'm too cheap to buy a delete for it.
He already has the FP gauge plumbed into the VP44 with the plug edge sent him. Hopefully, we will be able to use that, but in thinking about it, I have a feeling that it is going to come off if we run the fuel straight to the VP.
I'll post some pics later if I get a chance.
The only thing I'm wondering about is bypassing the stock FF canister. I am not too terribly familiar with the way the VP 44 fuel goes to and from the stock canister, there are a lot of lines going to it...
When I hooked mine up, I had to leave the stock canister there because I'm too cheap to buy a delete for it.
He already has the FP gauge plumbed into the VP44 with the plug edge sent him. Hopefully, we will be able to use that, but in thinking about it, I have a feeling that it is going to come off if we run the fuel straight to the VP.
I'll post some pics later if I get a chance.
The stock FF cannister on the engine is very simple, just unplug the harnesses & tape the plug ends up. Then remove the lines & discard. Cap off the line going to the stock lp & just leave it mounted.
Trending Topics
01-04-2010, 12:54 PM
#8
Banned
Yes. Thats how mine has been for a long time now. I just removed my brothers yesterday. Just be sure to block the lines off & tape up the harness with rubber tape.
01-04-2010, 08:33 PM
#10
Banned
 01-04-2010, 09:54 PM
#12
Banned
01-07-2010, 09:15 AM
#13
Registered User
Join Date: Jan 2005
Location: Montana
Posts: 409
Likes: 0
Received 0 Likes
on
0 Posts
DONT pull the bed.. lots of extra back pain.. drop the tank much easier!!.. as for using the edge fitting you will probably need to pick up a banjo fitting with the 1/8 pipe fittin in it...what i did with mine is splice into the fuel line going to the VP, only because my FP line was right there where my FF can used to be(99's go right into the top of the FF) and i used stainless hose, so i just bought a couple of AN fittings and spliced the fuel line. Easy install, me and my bro did it in like 2 hrs i think..wasnt to bad!! I dont know what fuel pressure gauge you have, but mine only goes to 15psi..well as soon as i turned the key on it pegged it over to the 0 side!! So i'm guessing 20+ psi!! You'll like it!!
Capn
Capn
 06-03-2010, 07:37 AM
#15

Anyone got a brand name/part# or description for this fitting? I don't even know what to ask for a the parts store. I'm just putting a 150 in and I want to keep my gauge. The line is attached to the end of the banjo bolt at the VP right now.

