1982 GMC K3500 3+3 Dually Conversion
 10-14-2009, 09:45 PM
#1
Registered User
Thread Starter
Join Date: Jun 2008
Location: Stony Plain, AB
Posts: 129
Likes: 0
Received 0 Likes
on
0 Posts
1982 GMC K3500 3+3 Dually Conversion
Trucks are in my sig, conversion's going to be starting here pretty quick. Will probably try to make the GM alternator work, haven't looked at the p/s yet. Because my truck's a one ton, it has hydroboost brakes which I plan to keep, but might make the p/s interesting.
Stay tuned.
Stay tuned.
 01-23-2010, 02:15 PM
#3
Registered User
Thread Starter
Join Date: Jun 2008
Location: Stony Plain, AB
Posts: 129
Likes: 0
Received 0 Likes
on
0 Posts
Well, I've finally begun. Parted the '91, sold the axles and most of the body, engine-tranny-transfercase in my garage.
Truck--Clean up the engine bay, straighten out/redo all the wiring.
Engine--366 spring, HE351CW turbo with 4" mandrel bent DP/exhaust, new crank seals and oil pan gasket, KDP. Intercooled with a 2nd gen intercooler and custom pipes right to intake manifold. Still thinking about a piston pump while it's easy to access.
Transmission--NV4500 getting rebuild with a fully splined mainshaft, 1.375 input shaft, SouthBend 3250 dual disc clutch.
Transfer case--Twin stick. It's already been rebuilt recently by The Gear Centre.
New home for the whole thing.

I've been fiddling with the PCM to see if I can adapt it all to work the grids like it did in the old '91 but I'm not sure it's worth the trouble. Oil and water temp for the gauges is super easy, but not sure the PCM will happen. I had the glows on the old 6.2 on a manual switch, probably end up doing just that with the grids.
I'll also be adding a battery isolator and switching to some type of heavier alternator. I've read Jim's writeup on the "triple nickel", either go that way or maybe a Delco 22SI, which is basically identical to the CS144 I had on the old engine but with more Dodge friendly mounts.
Truck--Clean up the engine bay, straighten out/redo all the wiring.
Engine--366 spring, HE351CW turbo with 4" mandrel bent DP/exhaust, new crank seals and oil pan gasket, KDP. Intercooled with a 2nd gen intercooler and custom pipes right to intake manifold. Still thinking about a piston pump while it's easy to access.
Transmission--NV4500 getting rebuild with a fully splined mainshaft, 1.375 input shaft, SouthBend 3250 dual disc clutch.
Transfer case--Twin stick. It's already been rebuilt recently by The Gear Centre.
New home for the whole thing.
I've been fiddling with the PCM to see if I can adapt it all to work the grids like it did in the old '91 but I'm not sure it's worth the trouble. Oil and water temp for the gauges is super easy, but not sure the PCM will happen. I had the glows on the old 6.2 on a manual switch, probably end up doing just that with the grids.
I'll also be adding a battery isolator and switching to some type of heavier alternator. I've read Jim's writeup on the "triple nickel", either go that way or maybe a Delco 22SI, which is basically identical to the CS144 I had on the old engine but with more Dodge friendly mounts.
01-23-2010, 07:08 PM
#5
Registered User
Thread Starter
Join Date: Jun 2008
Location: Stony Plain, AB
Posts: 129
Likes: 0
Received 0 Likes
on
0 Posts
Yeah, I had a moment of weakness there where i was like, "maybe I should make it easy for other people to drive" then I came back to my senses . . . .
01-24-2010, 09:34 AM
#7
Registered User
Join Date: Jan 2009
Location: Beallsville, Ohio
Posts: 389
Likes: 0
Received 0 Likes
on
0 Posts
take a look at my powersteering pump....its actually a gm pump that had two return lines and gm fittings.....i swapped this pump in instead of the stock dodge style pump....its off of a 4bt....it bolted right on and my chevy lines screwed right in....couldnt have been easier
Trending Topics
02-03-2010, 08:40 PM
#8
Registered User
Thread Starter
Join Date: Jun 2008
Location: Stony Plain, AB
Posts: 129
Likes: 0
Received 0 Likes
on
0 Posts
Would anyone be able to confirm for me that a second gen (NV4500) bell fits the 1st gen manual engine plate and starter?
My new Southbend dual disk clutch and throwout arm don't fit inside the A/A bell my truck had on it
My new Southbend dual disk clutch and throwout arm don't fit inside the A/A bell my truck had on it
02-13-2010, 12:58 PM
#9
Registered User
Thread Starter
Join Date: Jun 2008
Location: Stony Plain, AB
Posts: 129
Likes: 0
Received 0 Likes
on
0 Posts
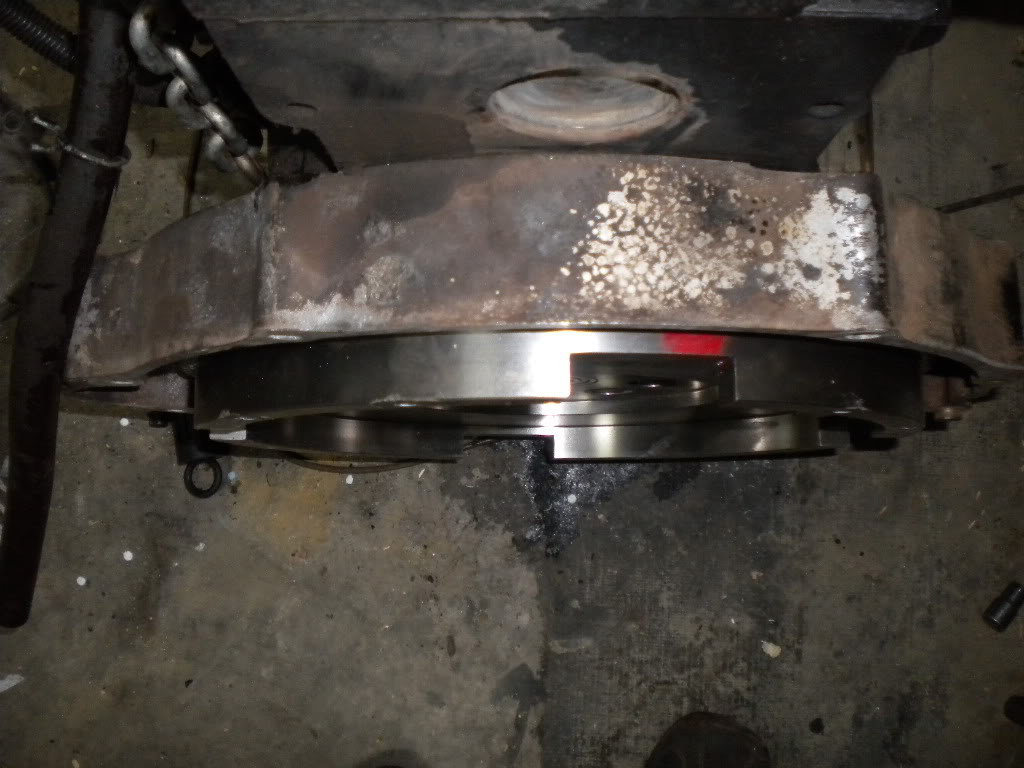
Well . . . . .
Bought a stock '98 engine plate, bellhousing, starter, and hydraulics from a local guy for $600, that way all the new stuff that came with my clutch just bolts up the way it's supposed to. Bolt pattern is the same between the 1st and 2nd gen plates, but the 2nd gen plate has an inch deep recess from the mounting surface to where the flywheel sits, so without the 2nd gen plate there isn't enough depth for even the stock 13" flywheel.
Pictures coming . . . .
02-13-2010, 10:26 PM
#10
Registered User
Thread Starter
Join Date: Jun 2008
Location: Stony Plain, AB
Posts: 129
Likes: 0
Received 0 Likes
on
0 Posts
Making some progress here, just have to remember to keep the pictures coming.
Drilling out my HE351 exhaust housing to bolt to the first gen manifold
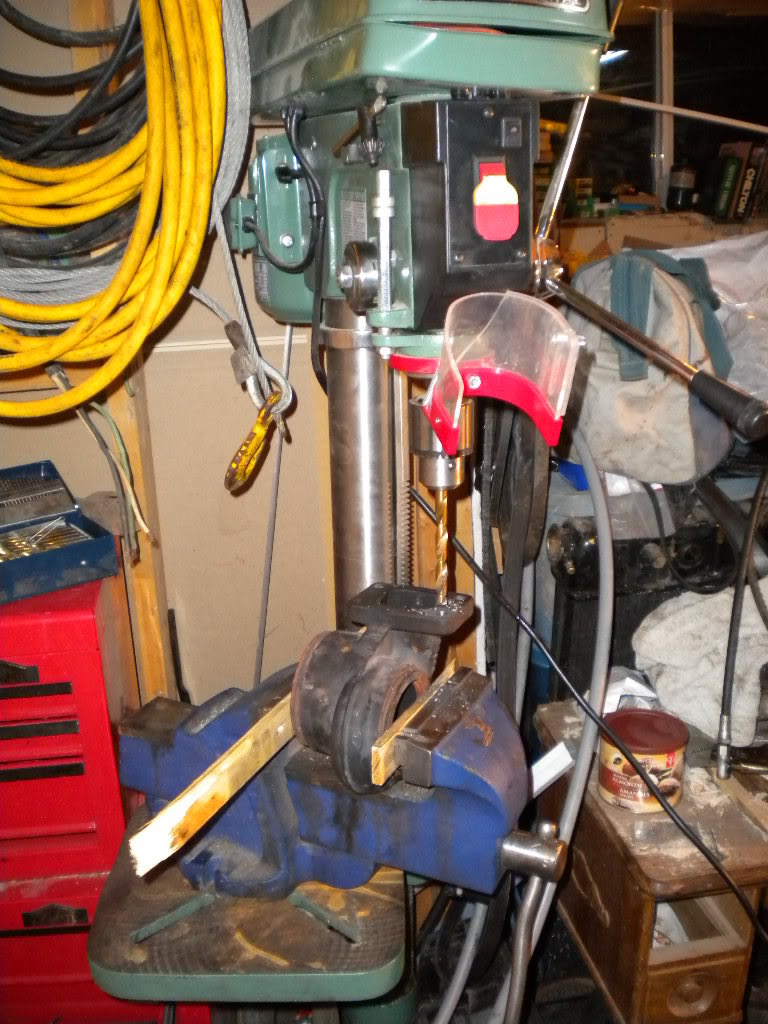
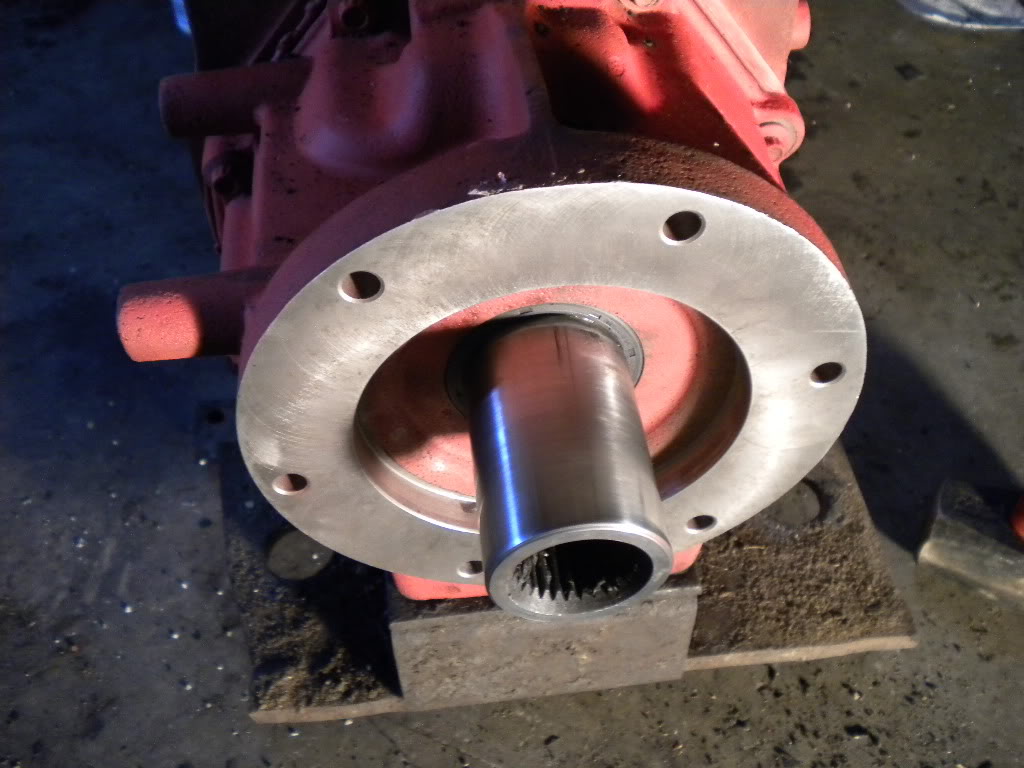
Had my transmission rebuilt and along the way it got a Torque King fully splined mainshaft, 1.375" input shaft, and a cast iron tailhousing. The new tail comes with an oil seal provision, but it was slightly too small for the adapter, so . . . .
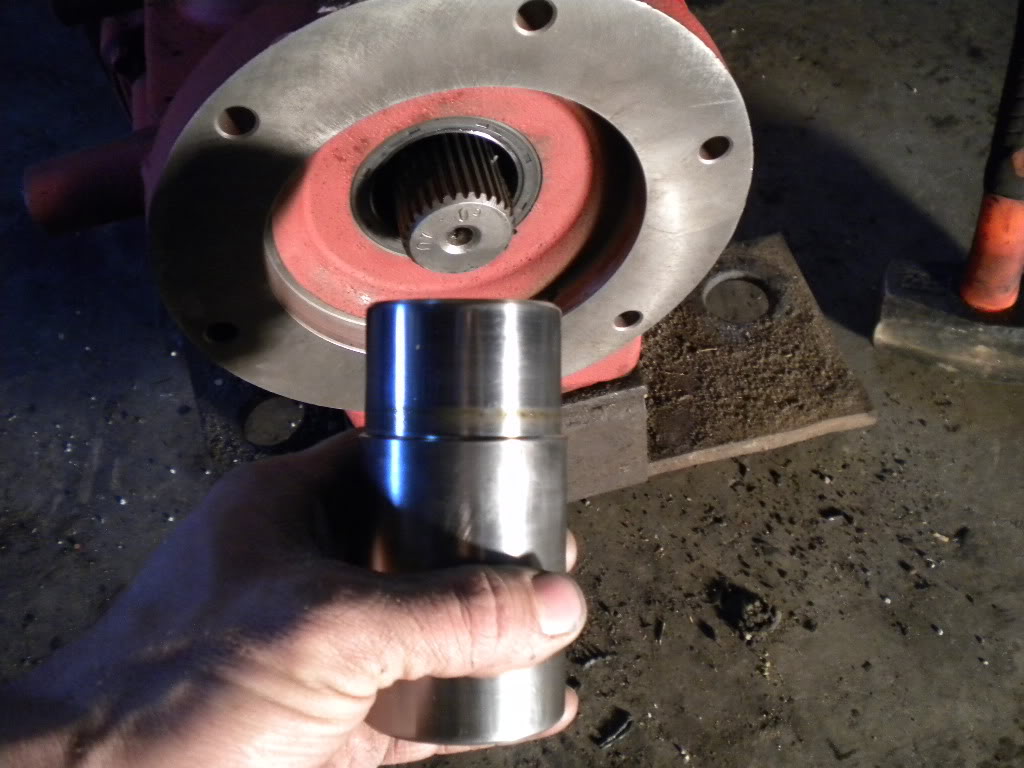
It got turned down to 51MM from the original 54MM just far enough back to pass the seal. There is still an inch or better of transmission splines inside the full diameter section, so I'm not worried about strength.
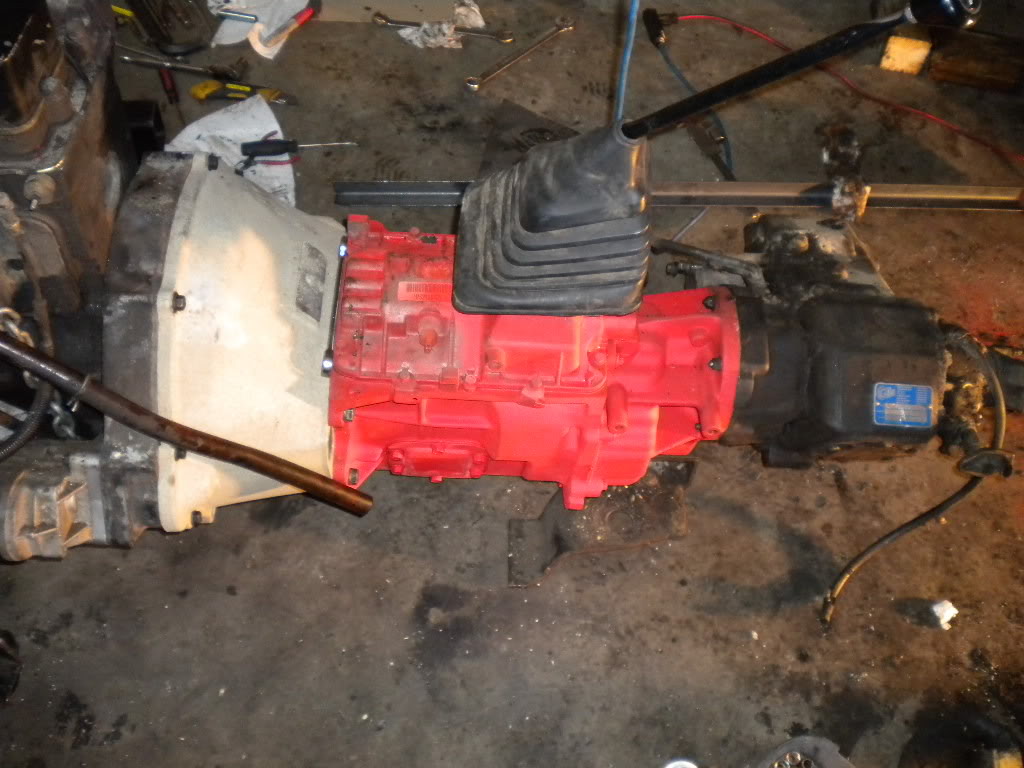
here's everything bolted together--I think somebody stole some of my pictures because I can't find the ones I took of the new input shaft and the DD clutch inside the '98 engine plate.
Chevy OPS tucks in nicely behind the throttle bracket with a bit of tube and a 90 elbow--I love how all the wiring is on the same side of the engine on these trucks, well away from the hot stuff.
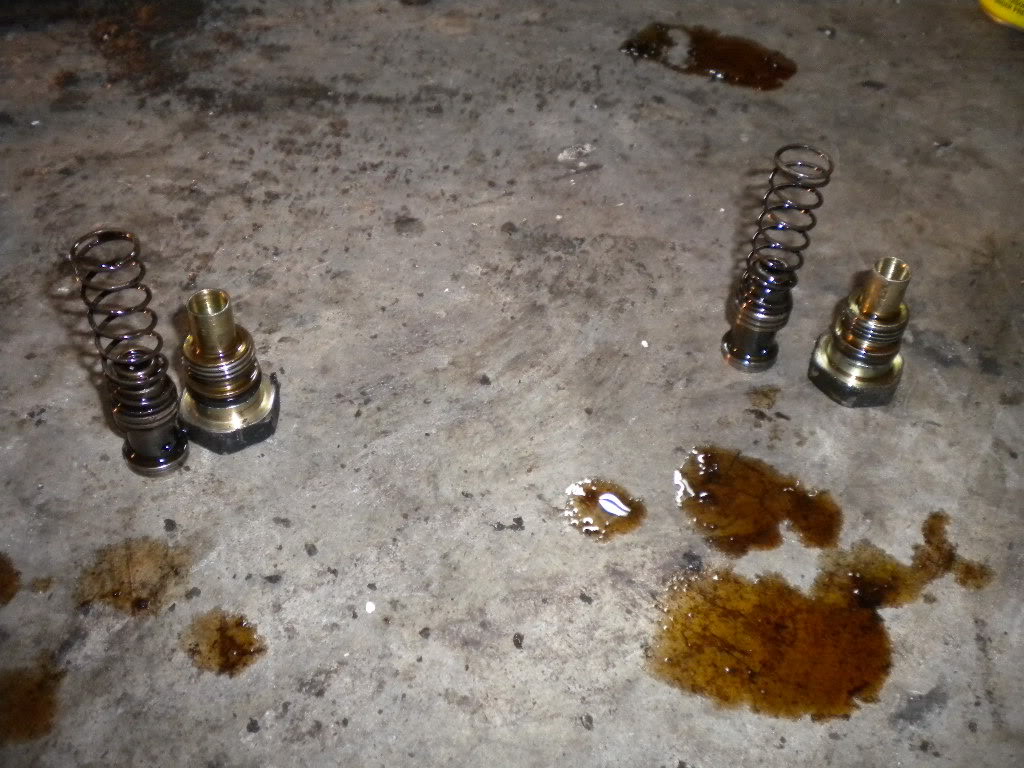
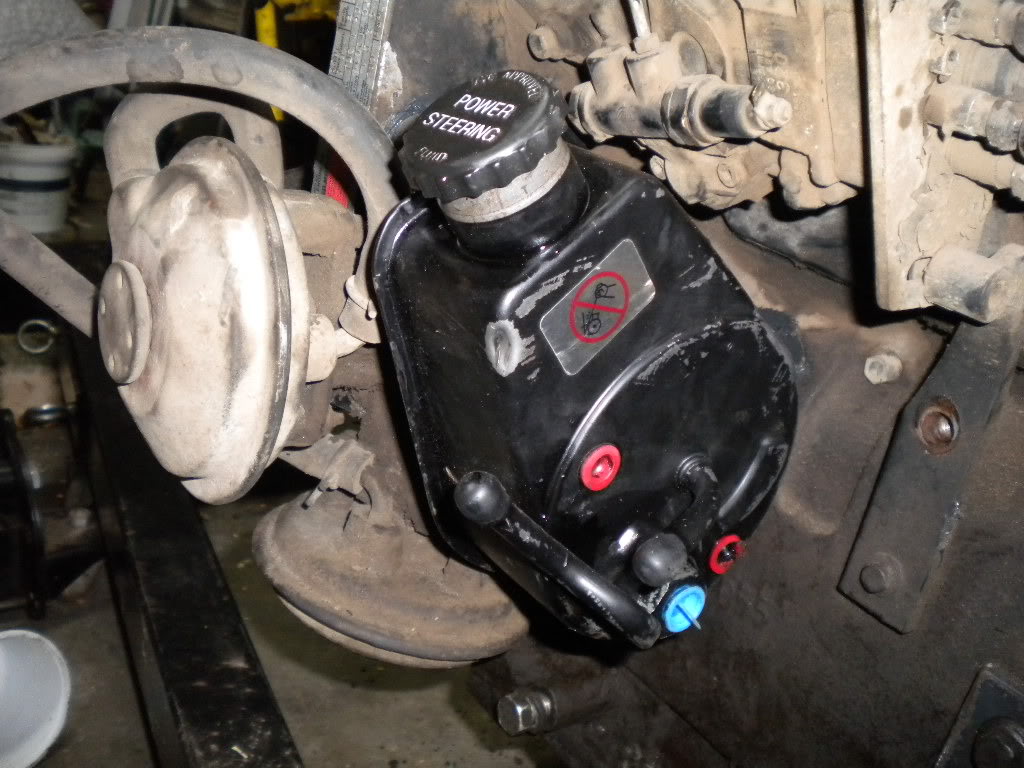
Because GM and Dodge used the same P/S pump manufacturer, they have interchangeable pressure line adapters in the back of the pump. I just swapped my spring and adapter from the GM pump into the '97 Dodge pump and the GM lines fit right in.
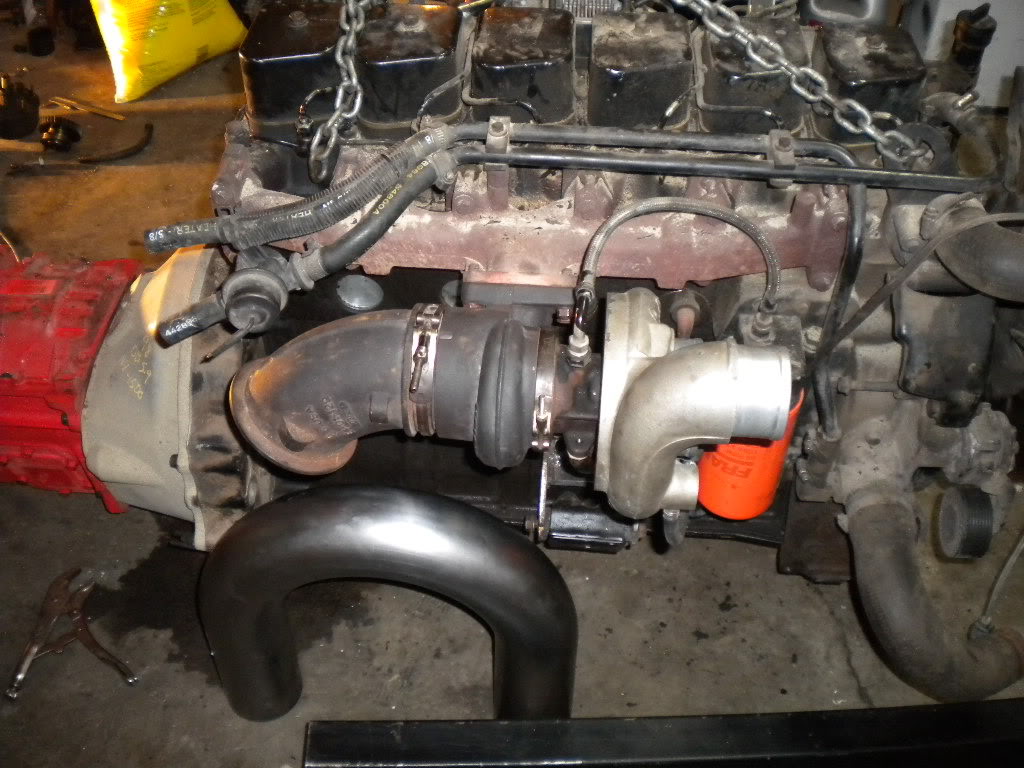
Lots of space for exhaust with a straight six configuration, here's my HE351 turbo mounted up and a 4" mandrel bent exhaust tube sitting beside it. Gonna be 4" straight past the t-case, then 5" exiting somewhere--haven't decided yet.
Drilling out my HE351 exhaust housing to bolt to the first gen manifold
Had my transmission rebuilt and along the way it got a Torque King fully splined mainshaft, 1.375" input shaft, and a cast iron tailhousing. The new tail comes with an oil seal provision, but it was slightly too small for the adapter, so . . . .
It got turned down to 51MM from the original 54MM just far enough back to pass the seal. There is still an inch or better of transmission splines inside the full diameter section, so I'm not worried about strength.
here's everything bolted together--I think somebody stole some of my pictures because I can't find the ones I took of the new input shaft and the DD clutch inside the '98 engine plate.
Chevy OPS tucks in nicely behind the throttle bracket with a bit of tube and a 90 elbow--I love how all the wiring is on the same side of the engine on these trucks, well away from the hot stuff.
Because GM and Dodge used the same P/S pump manufacturer, they have interchangeable pressure line adapters in the back of the pump. I just swapped my spring and adapter from the GM pump into the '97 Dodge pump and the GM lines fit right in.
Lots of space for exhaust with a straight six configuration, here's my HE351 turbo mounted up and a 4" mandrel bent exhaust tube sitting beside it. Gonna be 4" straight past the t-case, then 5" exiting somewhere--haven't decided yet.
02-13-2010, 10:31 PM
#11
Registered User
Thread Starter
Join Date: Jun 2008
Location: Stony Plain, AB
Posts: 129
Likes: 0
Received 0 Likes
on
0 Posts
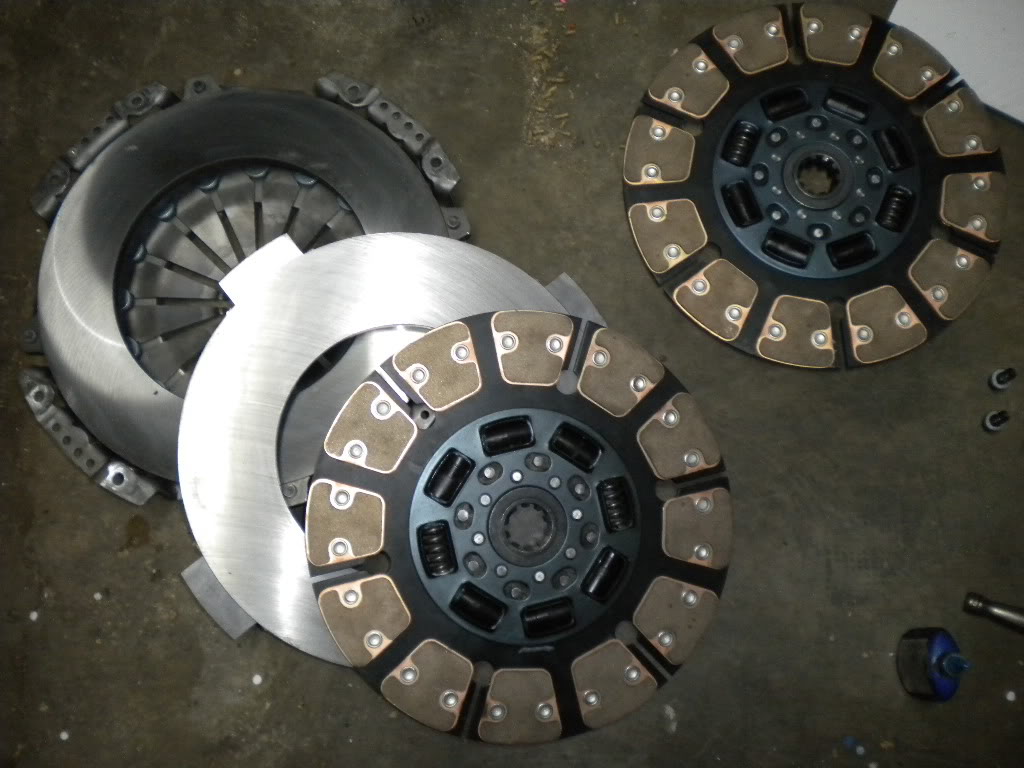
Found my other pictures--here's the DD clutch on the 1st gen adapter
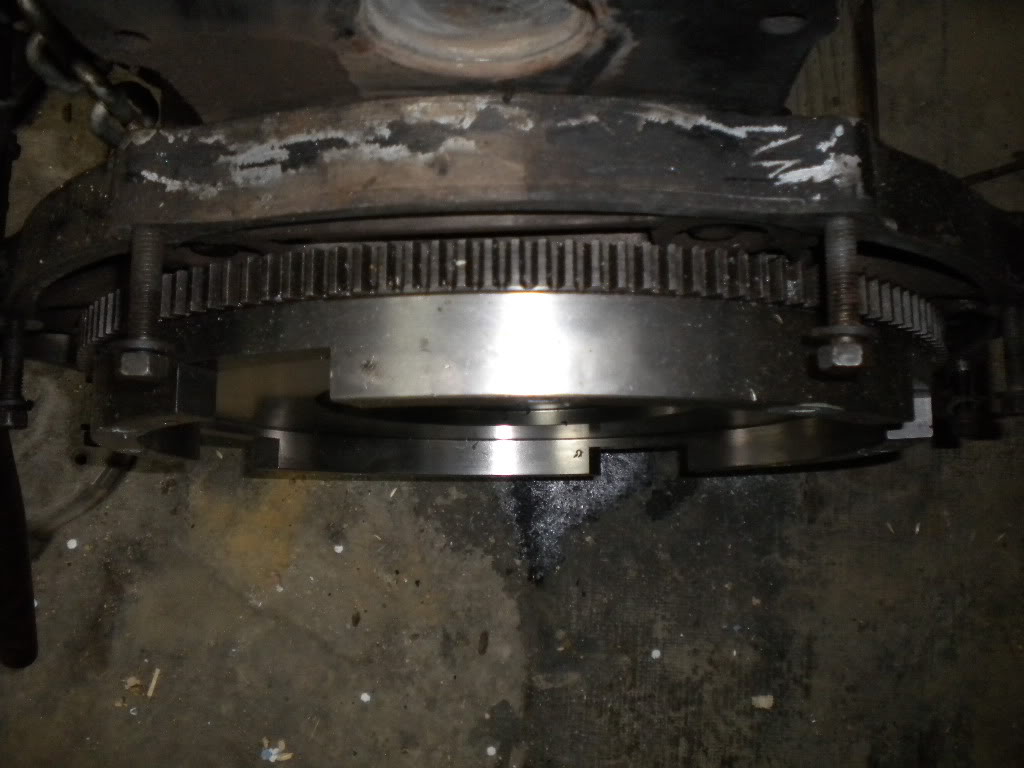
Here's the same clutch in the 2nd gen plate.
ANd the whole thing spread out on the floor. I realise I'll likely not make enough power to really NEED the DD clutch, but I tow upwards of 12K regularly and I hate doing clutches.
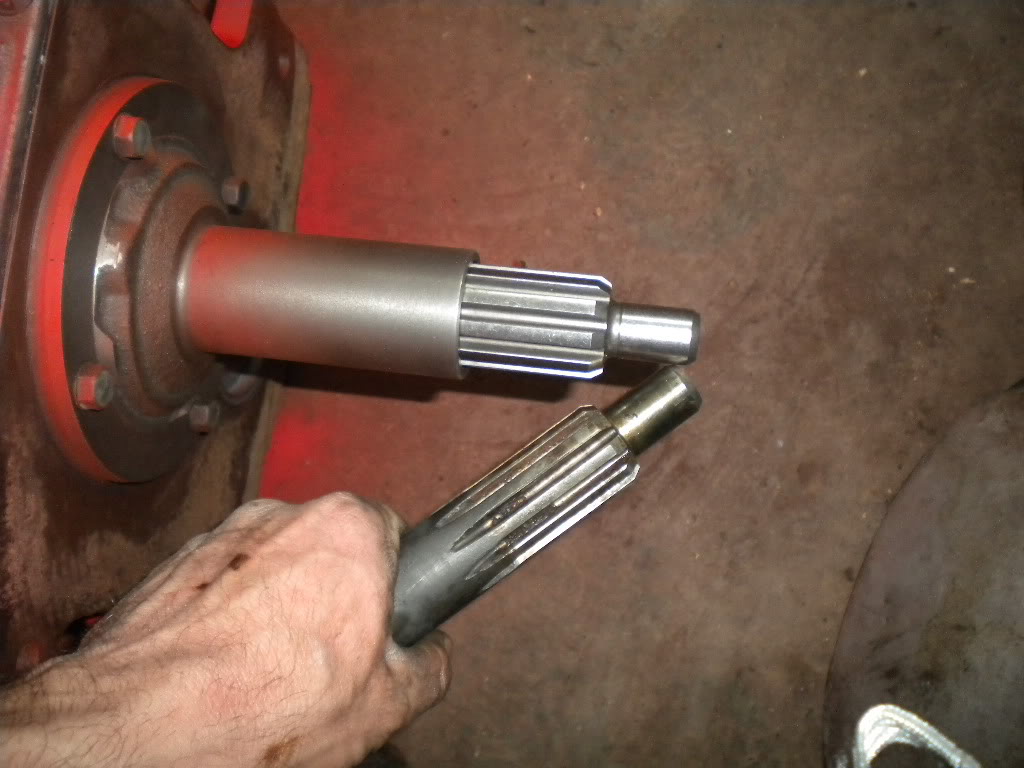
And the big input beside the little input shaft.
That's all for now, hope these help anyone else in the same process. Lots to do yet before it's all done--like my 2/0 welding cable battery cables , intercooler tubing, piston lift pump, etc.
Here's the same clutch in the 2nd gen plate.
ANd the whole thing spread out on the floor. I realise I'll likely not make enough power to really NEED the DD clutch, but I tow upwards of 12K regularly and I hate doing clutches.
And the big input beside the little input shaft.
That's all for now, hope these help anyone else in the same process. Lots to do yet before it's all done--like my 2/0 welding cable battery cables
, intercooler tubing, piston lift pump, etc.
02-20-2010, 09:34 PM
#12
Registered User
Thread Starter
Join Date: Jun 2008
Location: Stony Plain, AB
Posts: 129
Likes: 0
Received 0 Likes
on
0 Posts
Made a little more progress this week. Everything is pretty much going as expected, no major hiccups yet. Only thing I'm concerned about is the way the hydraulic clutch stuff works, I've only ever used mechanical linkage before and always set them up so there was just a touch of slack. That way the clutch doesn't burn and the throwout bearing only has to work when your foot is on the pedal.
With the DD clutch, the end of the throwout arm is less than an inch inside the hole, and the push rod sticks out 3.5" more or less. It pushes into the cylinder easily enough, but always has that 10 or so pounds of pressure on the arm. Seems like it's asking for a really short life for the release bearing, any input?
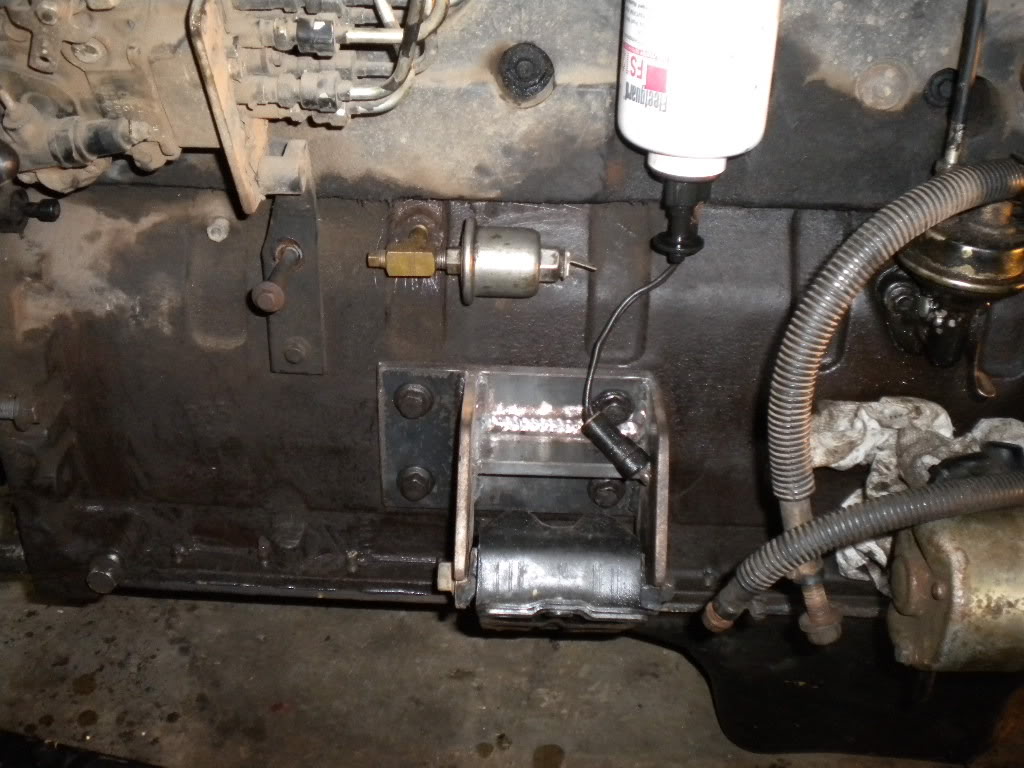
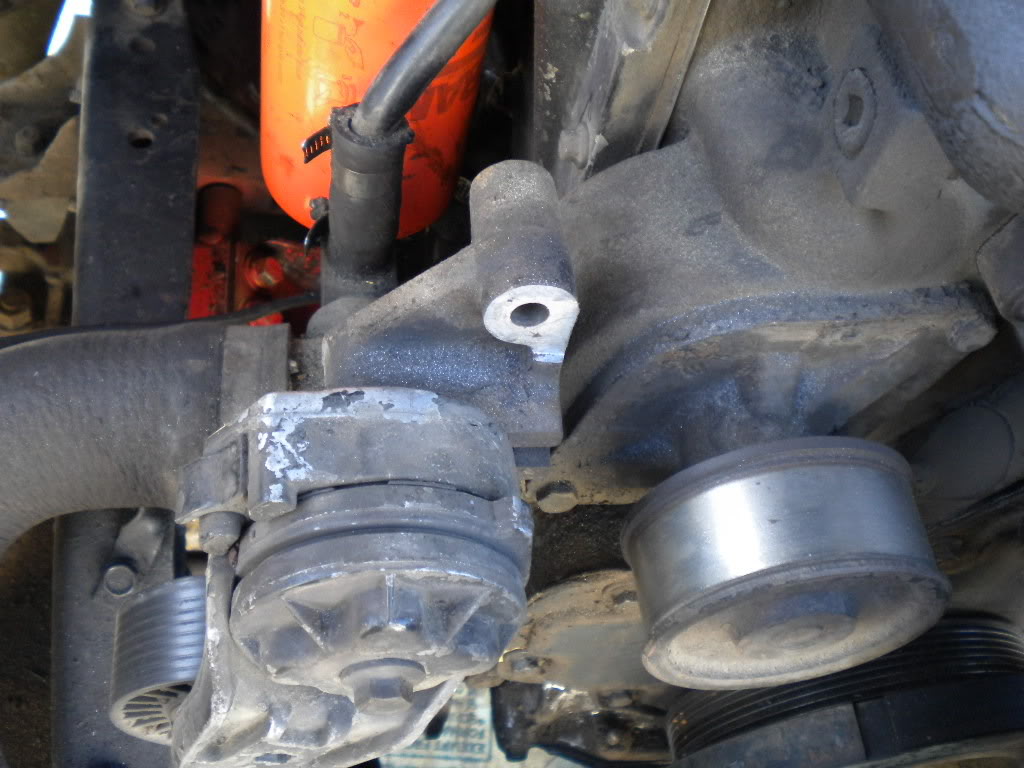
Mounted my new lift pump, total conversion cost $384 from the Cummins dealer
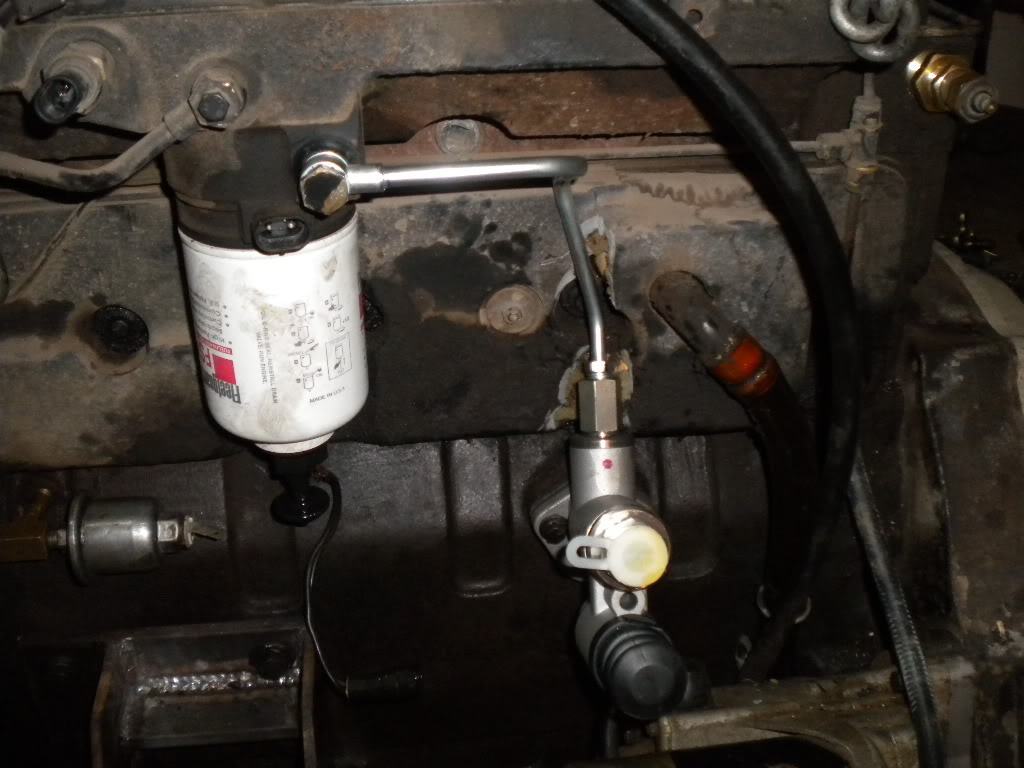
Next step was power steering. I bought a pump for a '97 Cummins dually, and the '93 GM power steering lines that I was running bolted right on. The Saginaw pumps all have a removeable adapter for the pressure line, so I could have swapped that in if necessary because they are all the same on the pump side. Direct fit though, did have to press off the vacuum pump drive that came on the '97 pump's shaft. Once that was off it pressed right into place on the 1st gen vacuum pump.
Next up was my intake, going from non-IC to IC setup and didn't like the stock intake, so . . ..
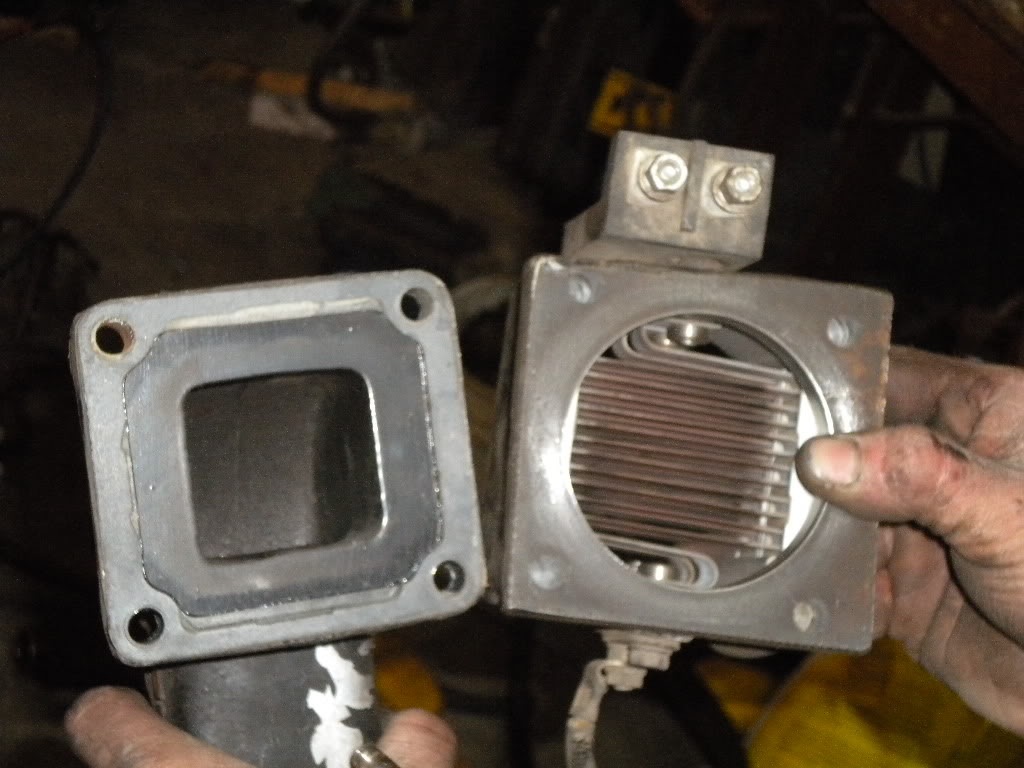
Should be a vast improvement, 3" mandrel bend intake. Will require a custom cowl hood though
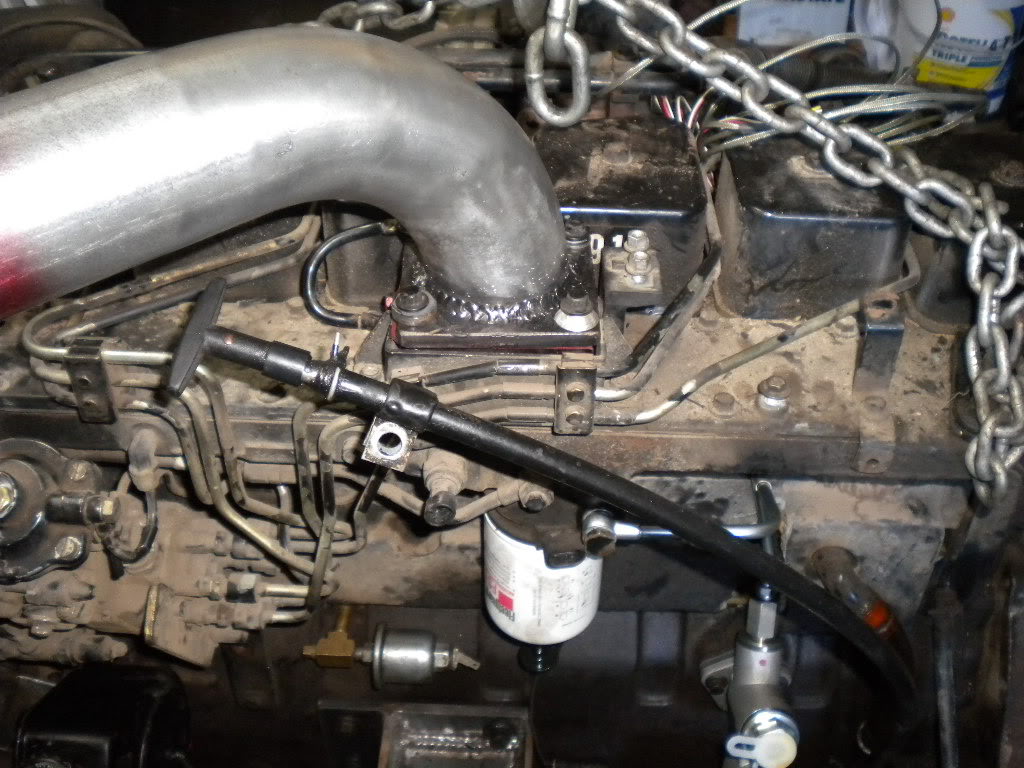
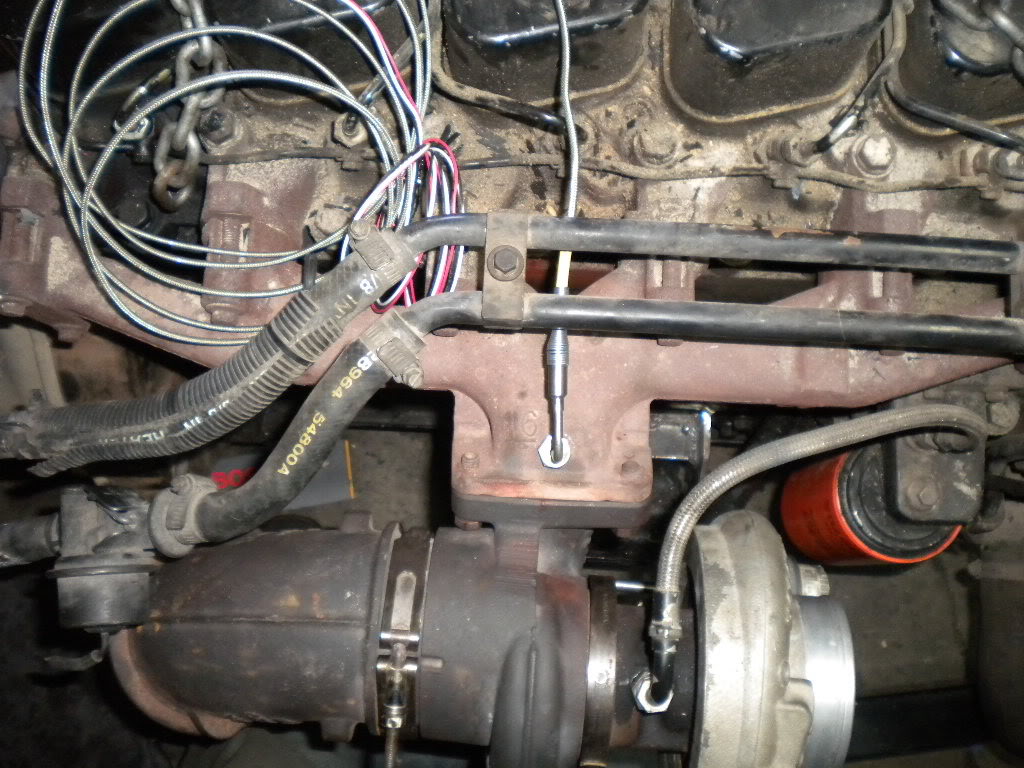
Also got my pyro probe installed, any feedback on the location?
Friday I rebuilt the wiring harness to fit the Cummins and installed it this morning, battery cables are in as well. Fuel lines will happen Monday evening hopefully as well as a start on the downpipe. Planning to run a CS144 alternator in the stock location, good for around 90 amps at idle and 140 or so amps at running speed.
With the DD clutch, the end of the throwout arm is less than an inch inside the hole, and the push rod sticks out 3.5" more or less. It pushes into the cylinder easily enough, but always has that 10 or so pounds of pressure on the arm. Seems like it's asking for a really short life for the release bearing, any input?
Mounted my new lift pump, total conversion cost $384 from the Cummins dealer
Next step was power steering. I bought a pump for a '97 Cummins dually, and the '93 GM power steering lines that I was running bolted right on. The Saginaw pumps all have a removeable adapter for the pressure line, so I could have swapped that in if necessary because they are all the same on the pump side. Direct fit though, did have to press off the vacuum pump drive that came on the '97 pump's shaft. Once that was off it pressed right into place on the 1st gen vacuum pump.
Next up was my intake, going from non-IC to IC setup and didn't like the stock intake, so . . ..
Should be a vast improvement, 3" mandrel bend intake. Will require a custom cowl hood though
Also got my pyro probe installed, any feedback on the location?
Friday I rebuilt the wiring harness to fit the Cummins and installed it this morning, battery cables are in as well. Fuel lines will happen Monday evening hopefully as well as a start on the downpipe. Planning to run a CS144 alternator in the stock location, good for around 90 amps at idle and 140 or so amps at running speed.
03-01-2010, 09:54 AM
#13
Registered User
Thread Starter
Join Date: Jun 2008
Location: Stony Plain, AB
Posts: 129
Likes: 0
Received 0 Likes
on
0 Posts
Did my alternator conversion this week, it's not a Leece-Neville but it'll do the job . The CS144 is readily available in junkyards EVERYWHERE, parts are easy to find, and they put out 140 amps at cruise. I went to the wreckers and picked up two of them for $40, and can get rebuild kits to run up to 250 amps.
The other advantage is that it fits in the same location, and the Dodge pulley bolts right on, so no modification to the alternator itself is needed. As long as I can swap pulleys (impact) I can run any off the shelf alternator. I will be looking for another pulley so I can keep a spare alternator in my toolbox though.
First task was to compare mounts. The GM alt mounts on the other side of the engine, but if you flip it upside down it's roughly comparable to the Dodge mounts. Roughly
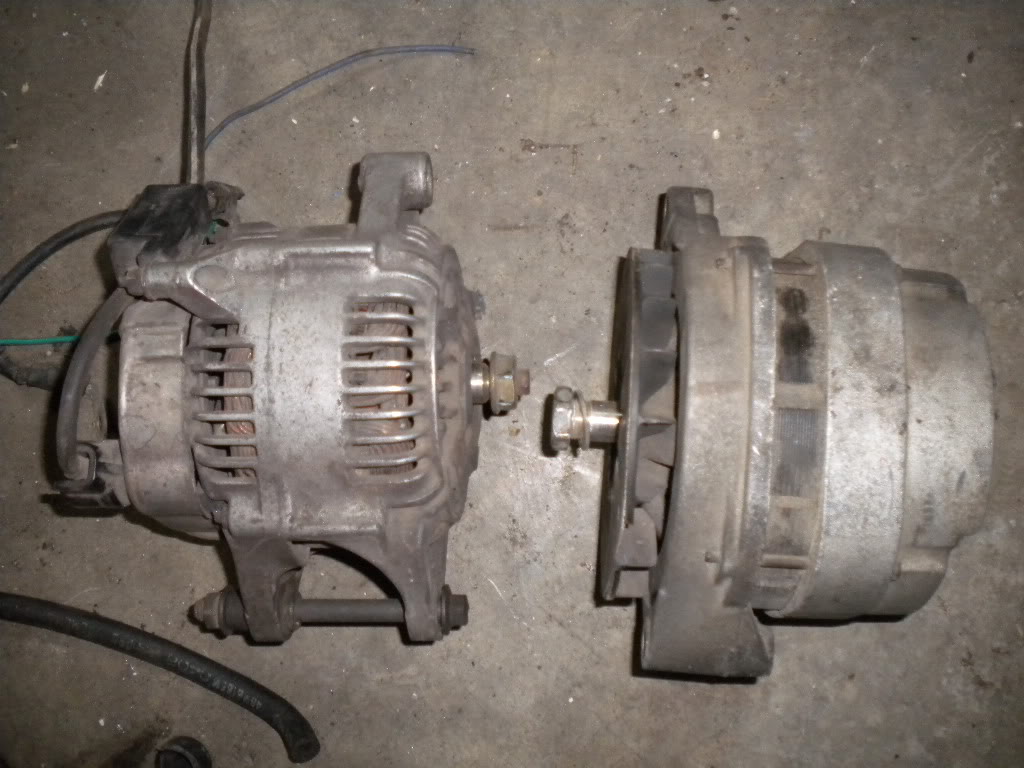
Flipped.
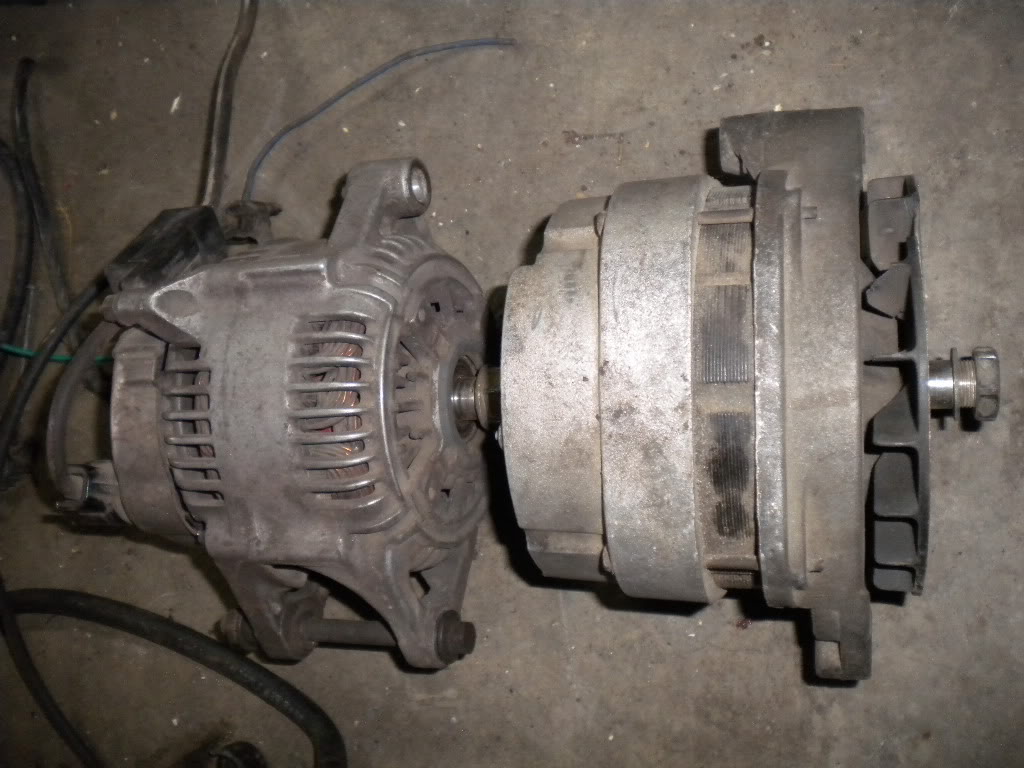
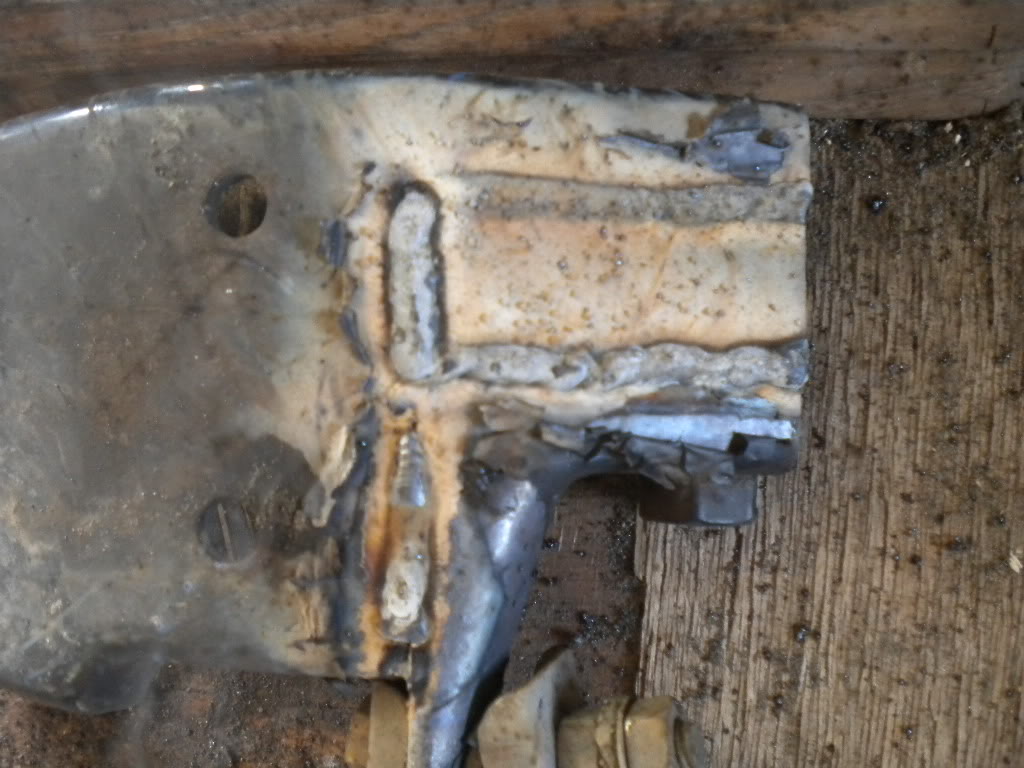
The small tab on the GM alt is a little thicker than the lower front tab on the NipponDenso, so I had to cut the stock mount to make it line up. Again, the goal is to alter mounts, not the alternator, so that I can use any off the shelf unit without modifying it. If you do the mounts right, you're good for the life of the truck.
Next step was the upper bracket. Length was fine, but the two tabs needed to be spread apart to fit what used to be the CS alternator's lower mount.
First step was cut, measure, and tack.
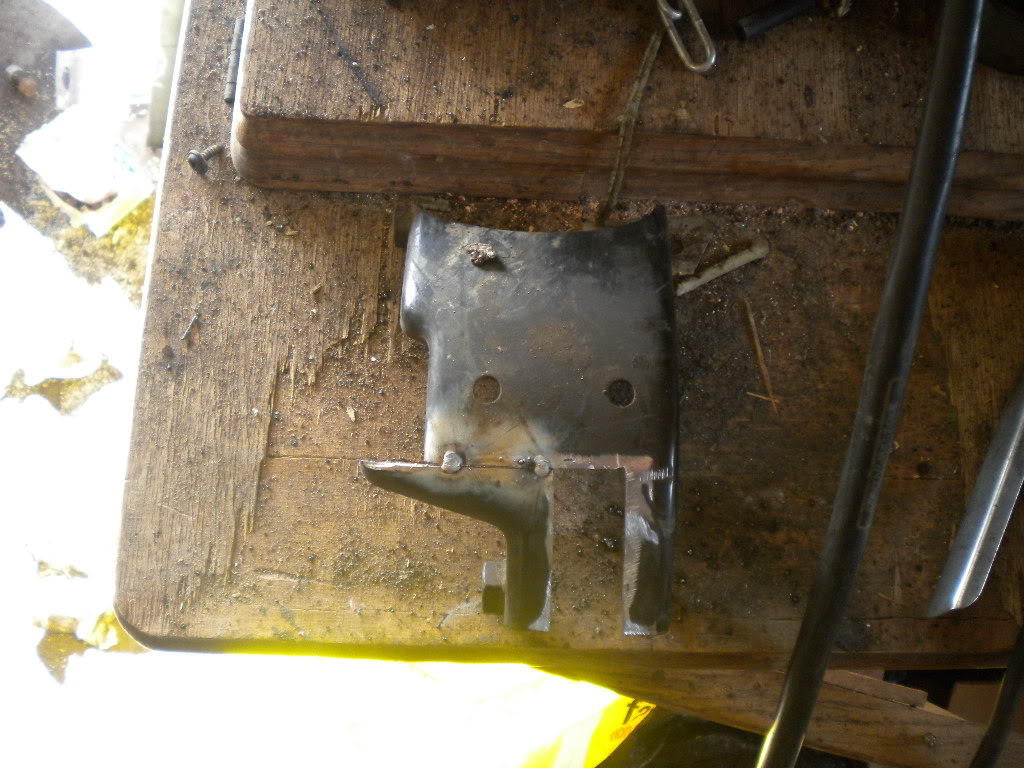
Then put in a filler piece and weld.
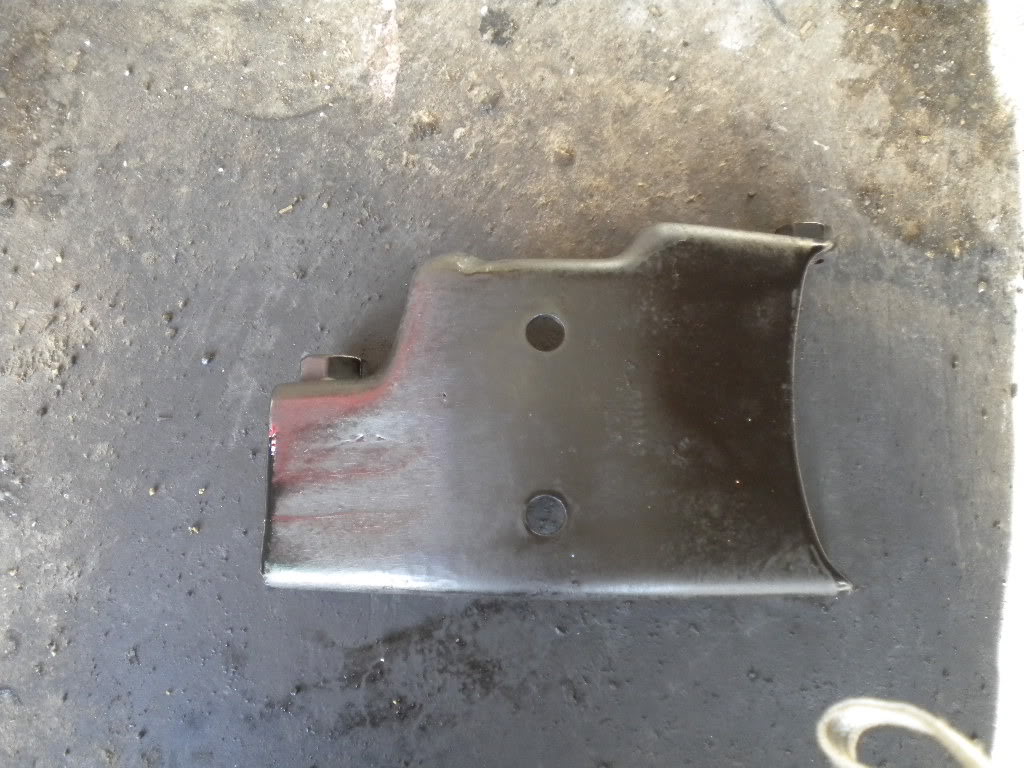
Then a little grinding and a little paint!
Last step was mounting, I added a ground cable to the block even though the alternator is a case ground because all the mounts are on brackets with gaskets behind them.
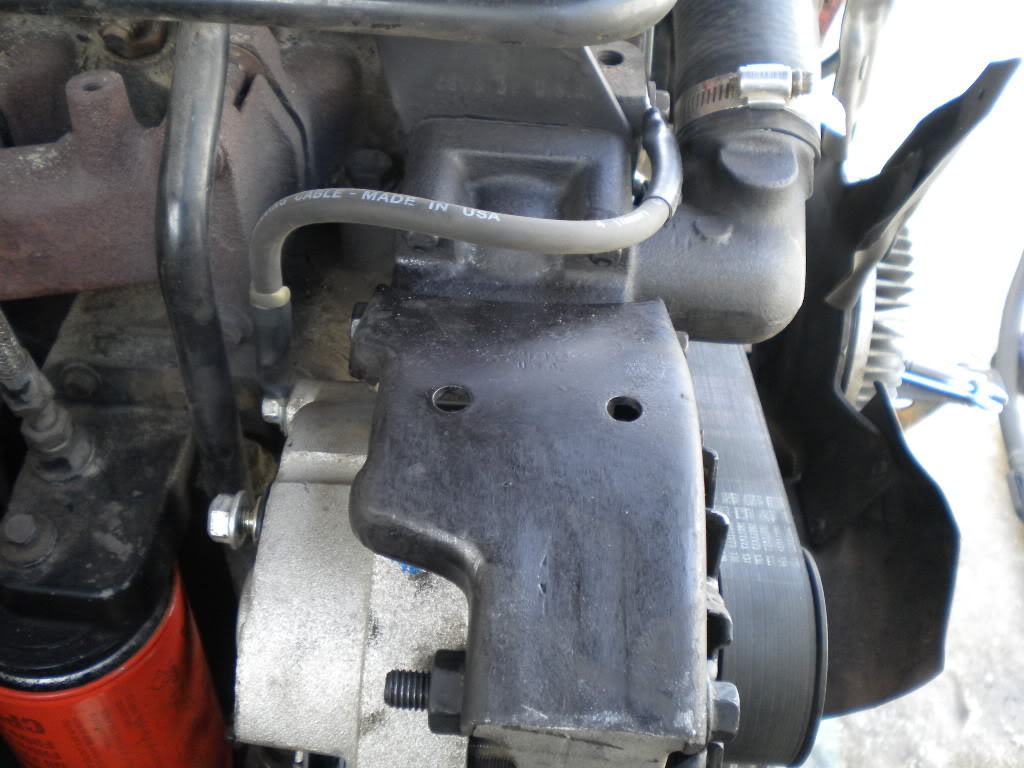
Just have to finish that end of the wiring harness now, stay tuned. You can also see my new I/C water neck with the second gen radiator hose, planning to run the GM diesel radiator.
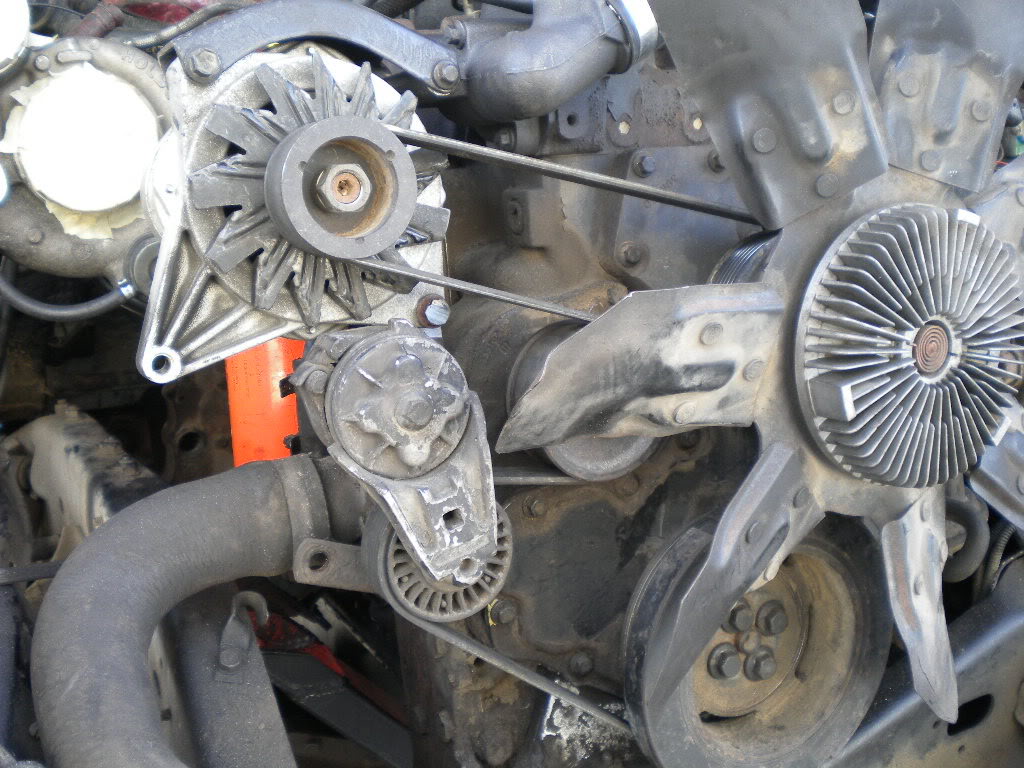
Here's the finished setup, the alternator I'm running has a funky extra bracket on the front half of the case that sticks out but doesn't get in the way of anything. Most CS144's don't have that on the case. They also come with either a steel or a plastic fan, the steel ones are much harder to find but I lucked out on this one.
. The CS144 is readily available in junkyards EVERYWHERE, parts are easy to find, and they put out 140 amps at cruise. I went to the wreckers and picked up two of them for $40, and can get rebuild kits to run up to 250 amps.The other advantage is that it fits in the same location, and the Dodge pulley bolts right on, so no modification to the alternator itself is needed. As long as I can swap pulleys (impact) I can run any off the shelf alternator. I will be looking for another pulley so I can keep a spare alternator in my toolbox though.
First task was to compare mounts. The GM alt mounts on the other side of the engine, but if you flip it upside down it's roughly comparable to the Dodge mounts. Roughly
Flipped.
The small tab on the GM alt is a little thicker than the lower front tab on the NipponDenso, so I had to cut the stock mount to make it line up. Again, the goal is to alter mounts, not the alternator, so that I can use any off the shelf unit without modifying it. If you do the mounts right, you're good for the life of the truck.
Next step was the upper bracket. Length was fine, but the two tabs needed to be spread apart to fit what used to be the CS alternator's lower mount.
First step was cut, measure, and tack.
Then put in a filler piece and weld.
Then a little grinding and a little paint!
Last step was mounting, I added a ground cable to the block even though the alternator is a case ground because all the mounts are on brackets with gaskets behind them.
Just have to finish that end of the wiring harness now, stay tuned. You can also see my new I/C water neck with the second gen radiator hose, planning to run the GM diesel radiator.
Here's the finished setup, the alternator I'm running has a funky extra bracket on the front half of the case that sticks out but doesn't get in the way of anything. Most CS144's don't have that on the case. They also come with either a steel or a plastic fan, the steel ones are much harder to find but I lucked out on this one.
03-02-2010, 09:19 AM
#14
Registered User
Join Date: Jan 2009
Location: Beallsville, Ohio
Posts: 389
Likes: 0
Received 0 Likes
on
0 Posts
good job on the alternator....i took the easy way out and converted my nippo to internaly regulated....but like you said if mine goes out i have to find a new one and prob. a new regulater then tear them apart and put them together....i bought new so i should be good for a while.....also what intercooler do you plan on running? i ran the first gen dodge intercooler and had to run the first gen radiator because of the intercooler being so narrow...i'd love to be able to run the big gm diesel radiator...
03-02-2010, 09:59 AM
#15
Registered User
Thread Starter
Join Date: Jun 2008
Location: Stony Plain, AB
Posts: 129
Likes: 0
Received 0 Likes
on
0 Posts
I was running a second gen (97) intercooler already with my 6.5TD, the GM rad JUST fits between the arms of that cooler.
It's a pretty tight fit in the core tho . . .
It's a pretty tight fit in the core tho . . .

